 by
by 
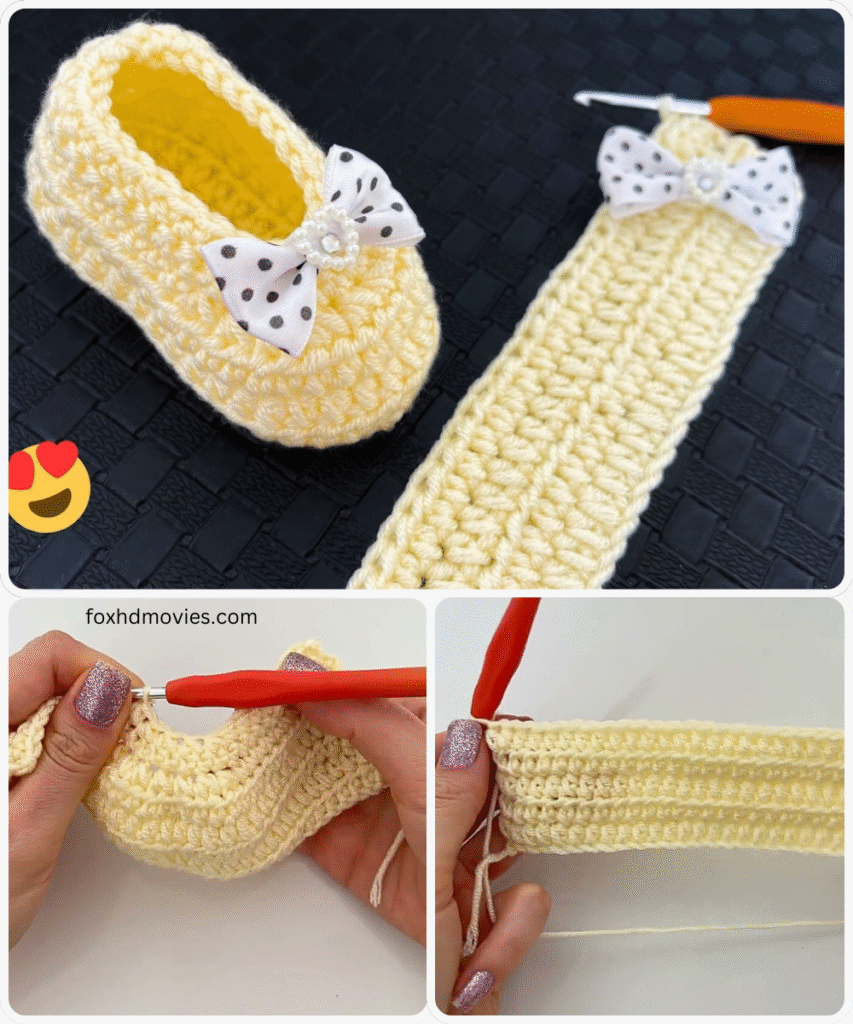
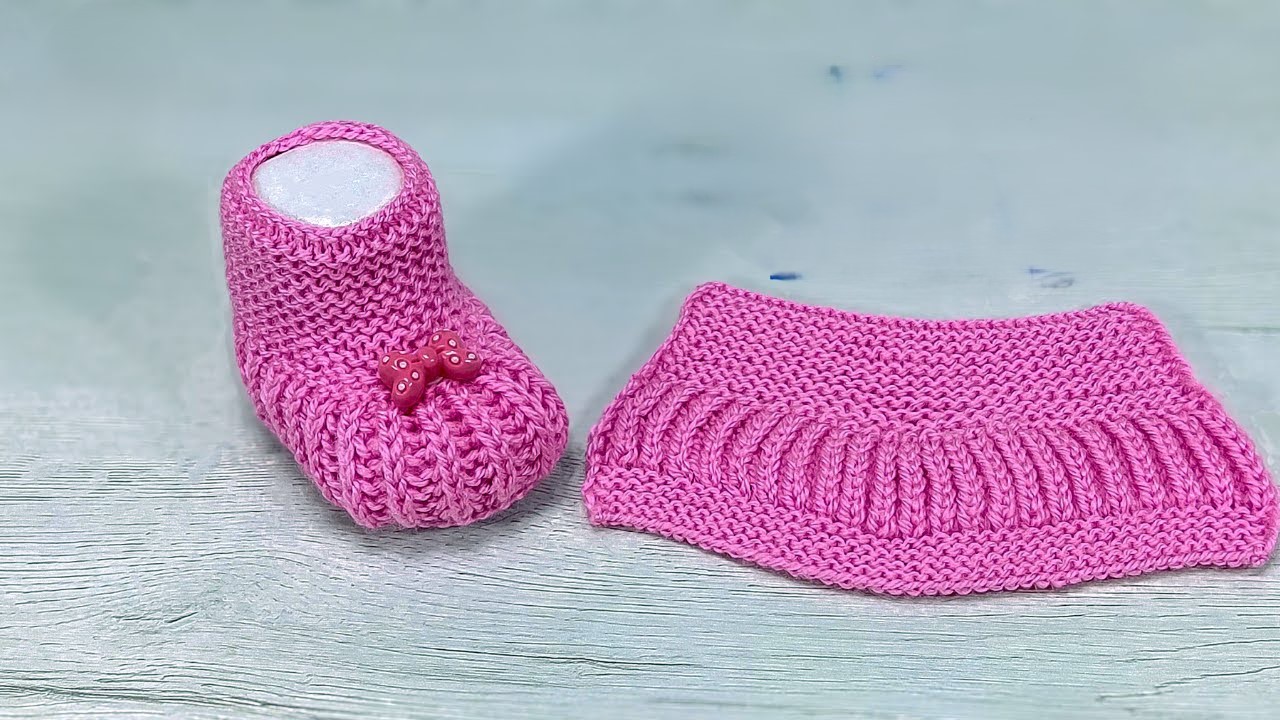
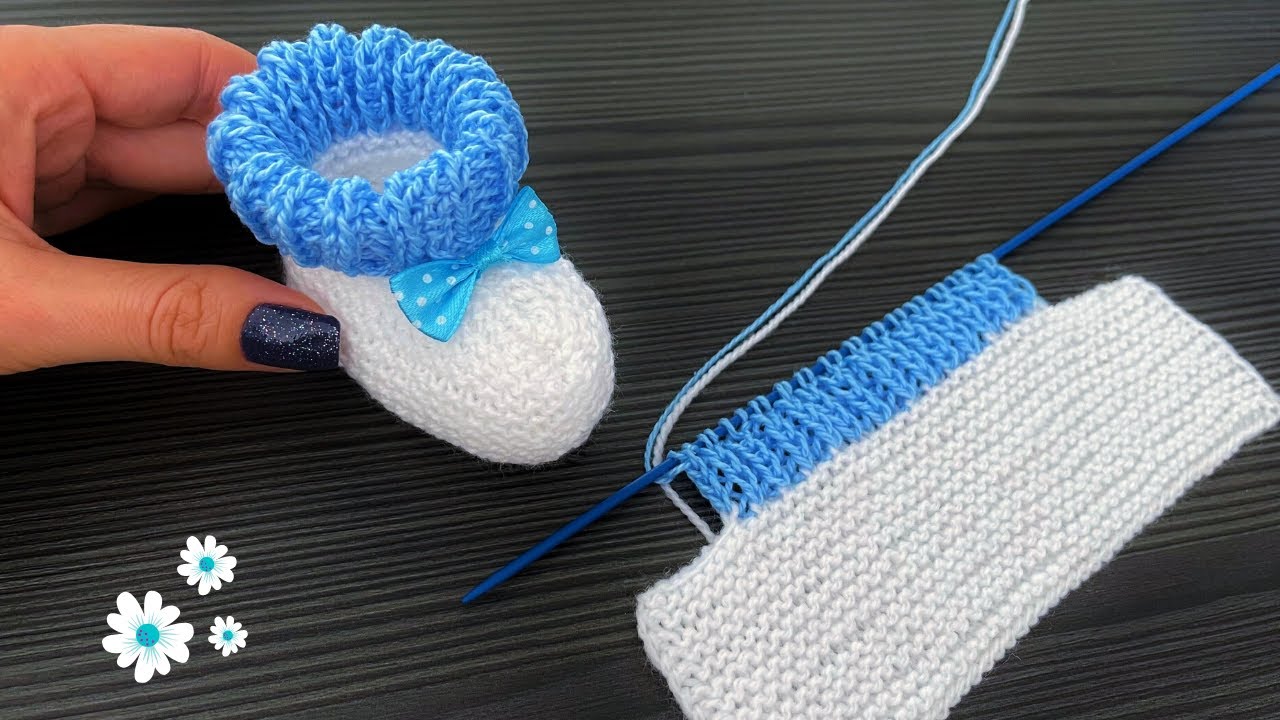
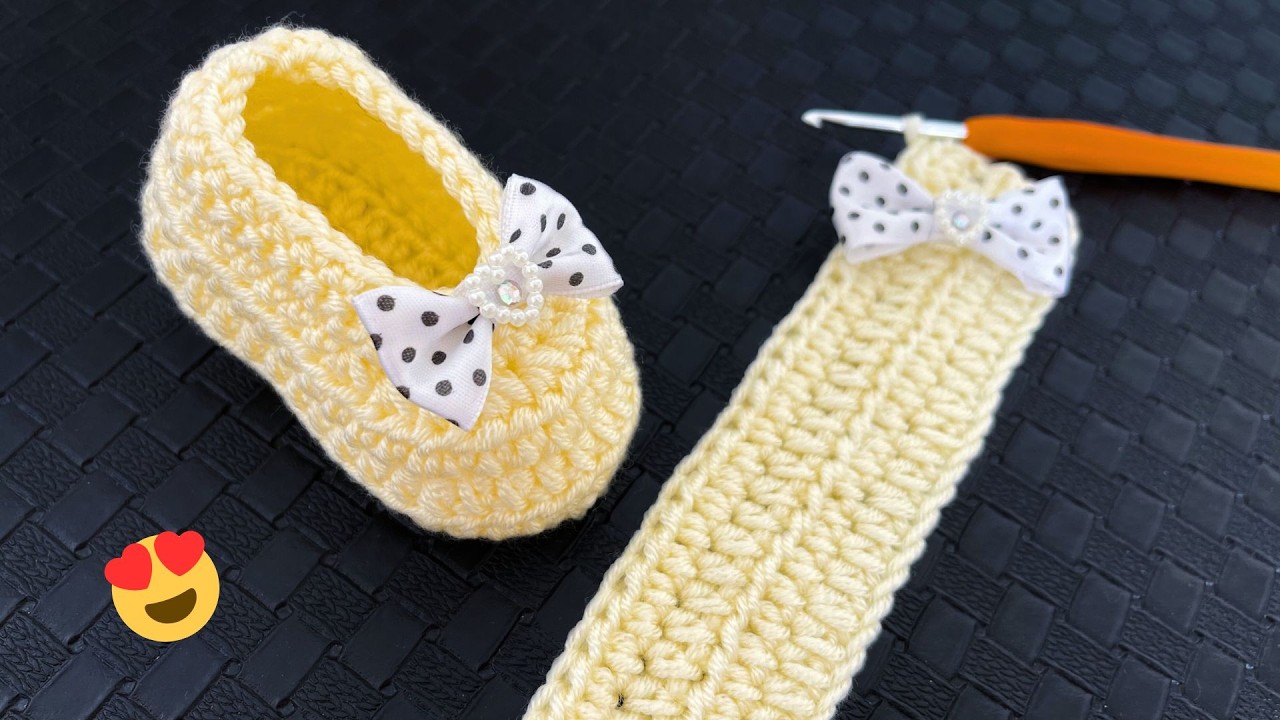
I can certainly help you with a detailed pattern for a very easy crochet bootie! This pattern is designed for beginners and uses basic crochet stitches.
Skill Level: Beginner
Materials:
- Worsted weight yarn (approximately 50 yards)
- Crochet hook size H/8 (5.0 mm)
- Yarn needle
- Scissors
Gauge: Not crucial for this project, but approximately 4 single crochets (sc) = 1 inch.
Finished Size: This pattern will create a bootie approximately 3.5 inches long, suitable for a newborn (0-3 months). You can adjust the size by using a thicker or thinner yarn and/or a larger or smaller hook.
Abbreviations:
- ch = chain
- sl st = slip stitch
- sc = single crochet
- hdc = half double crochet
- dc = double crochet
- inc = increase (work 2 stitches in the same stitch)
- dec = decrease 1 (work 2 stitches together)
- rep = repeat
- rnd = round
Pattern:
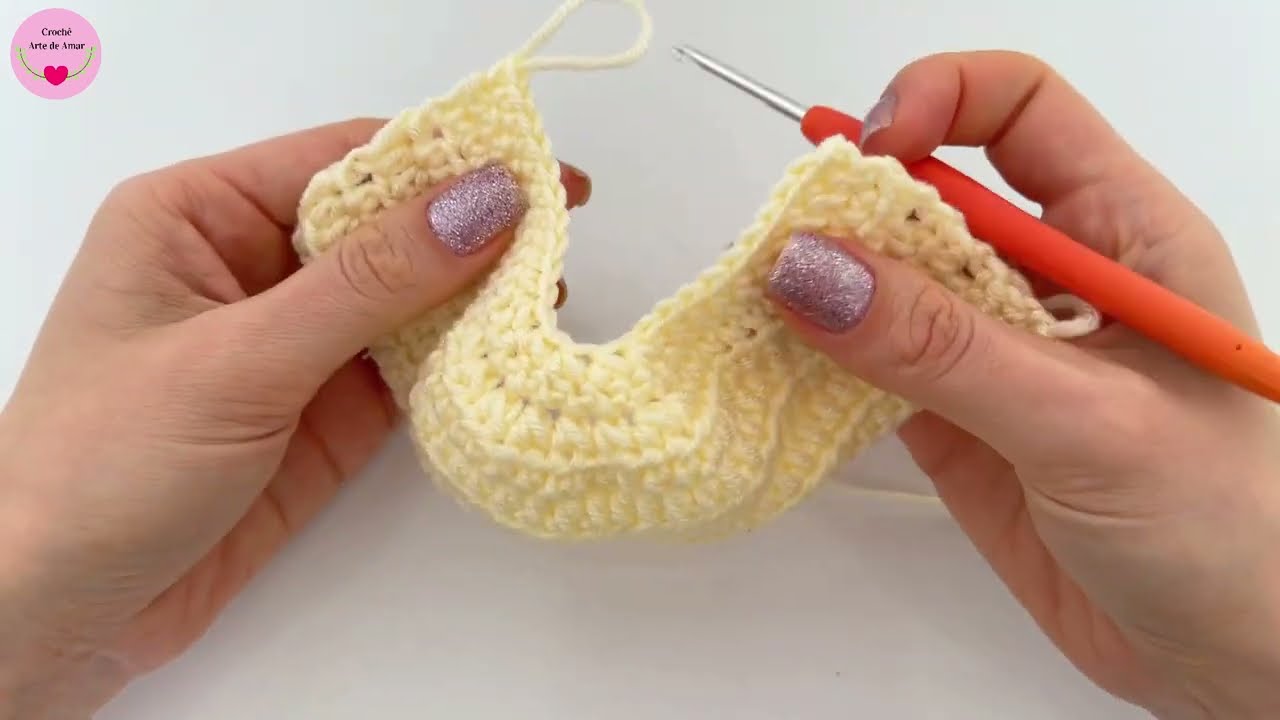
Sole (Make 2):
- Rnd 1: Ch 9. Sc in the 2nd ch from the hook and in the next 6 chs. 3 sc in the last ch. Working on the other side of the chain, sc in the next 6 chs. 2 sc in the last ch. Sl st to the first sc to join. (18 sts)
- Rnd 2: Ch 1 (does not count as a stitch). 2 sc in the first sc, sc in the next 6 sc, 2 sc in each of the next 3 sc, sc in the next 6 sc, 2 sc in each of the last 2 sc. Sl st to the first sc to join. (24 sts)
- Rnd 3: Ch 1. 2 sc in the first sc, sc in the next 8 sc, (2 sc in the next sc, sc in the next sc) rep 3 times, sc in the next 8 sc, (2 sc in the next sc, sc in the next sc) rep 2 times. Sl st to the first sc to join. (30 sts)
- Rnd 4: Ch 1. 2 sc in the first sc, sc in the next 10 sc, (2 sc in the next sc, sc in the next 2 sc) rep 3 times, sc in the next 10 sc, (2 sc in the next sc, sc in the next sc) rep 2 times. Sl st to the first sc to join. (36 sts)
Fasten off and weave in the ends for both soles.
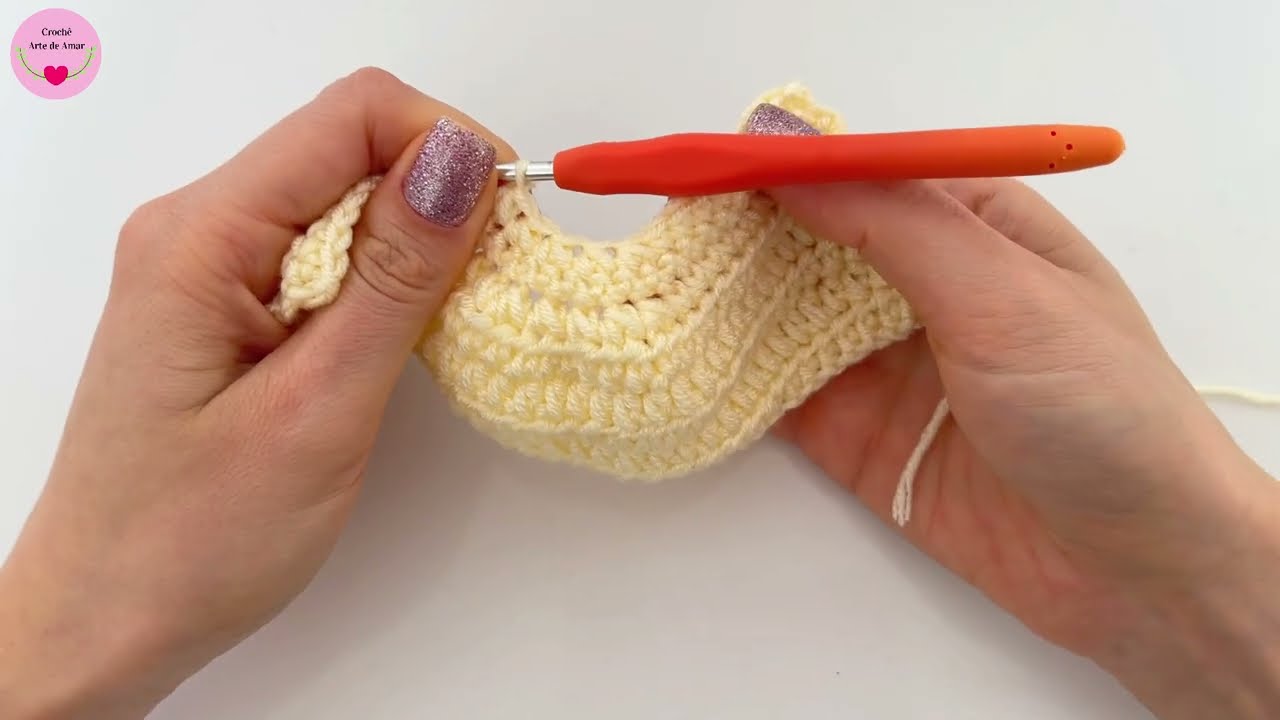
Upper:
- With the right side of one sole facing you, join yarn with a sl st in any stitch.
- Rnd 1: Ch 1. Sc in each stitch around. Sl st to the first sc to join. (36 sts)
- Rnd 2: Ch 1. Sc in each stitch around. Sl st to the first sc to join. (36 sts)
- Rnd 3: Ch 1. Sc in the next 10 sts. Hdc in the next 16 sts. Sc in the last 10 sts. Sl st to the first sc to join. (36 sts)
- Rnd 4: Ch 1. Sc in the next 10 sts. Hdc in the next 16 sts. Sc in the last 10 sts. Sl st to the first sc to join. (36 sts)
- Rnd 5: Ch 1. Sc in the next 10 sts. Hdc in the next 16 sts. Sc in the last 10 sts. Sl st to the first sc to join. (36 sts)
- Rnd 6: Ch 1. Sc in the next 8 sts. Dec over the next 2 sts. Hdc in the next 12 sts. Dec over the next 2 sts. Sc in the last 8 sts. Sl st to the first sc to join. (34 sts)
- Rnd 7: Ch 1. Sc in the next 8 sts. Dec over the next 2 sts. Hdc in the next 10 sts. Dec over the next 2 sts. Sc in the last 8 sts. Sl st to the first sc to join. (32 sts)
- Rnd 8: Ch 1. Sc in the next 8 sts. Dec over the next 2 sts. Hdc in the next 8 sts. Dec over the next 2 sts. Sc in the last 8 sts. Sl st to the first sc to join. (30 sts)
- Rnd 9: Ch 1. Sc in the next 8 sts. Dec over the next 2 sts. Hdc in the next 6 sts. Dec over the next 2 sts. Sc in the last 8 sts. Sl st to the first sc to join. (28 sts)
Fasten off and weave in the end.
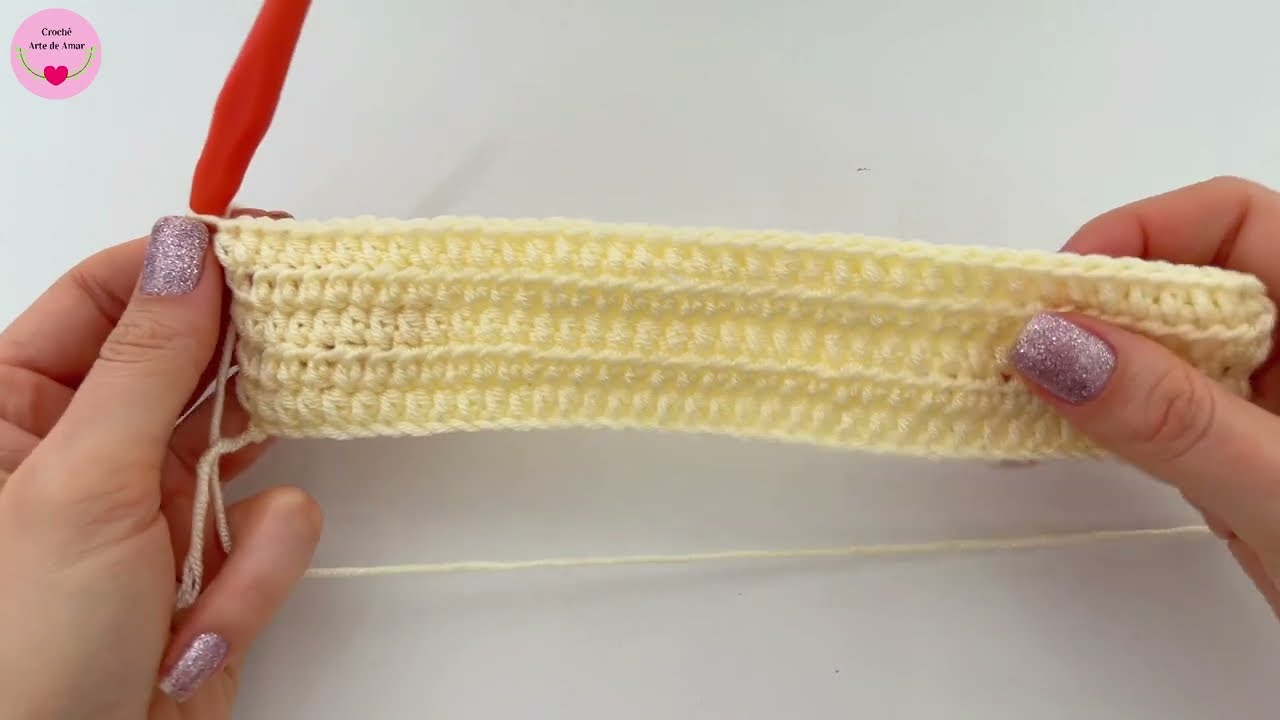
Ankle Cuff (Make 2):
- With the right side of the bootie facing you, join yarn with a sl st at the back center of the bootie (opposite the toe).
- Rnd 1: Ch 1. Sc in each stitch around. Sl st to the first sc to join. (28 sts)
- Rnd 2: Ch 3 (counts as a dc). Dc in each stitch around. Sl st to the top of the beginning ch-3 to join. (28 sts)
- Rnd 3: Ch 1. Sc in each stitch around. Sl st to the first sc to join. (28 sts)
Fasten off and weave in the ends.
Video tutorial
Finishing:
- Sew the two booties together using the yarn needle and yarn. Align the edges of the soles and whipstitch them together securely.
- Turn the booties right side out.
Congratulations! You have now made a pair of very easy crochet booties. Feel free to add embellishments like buttons, ribbons, or small appliques to personalize them. Happy crocheting!