by
by 
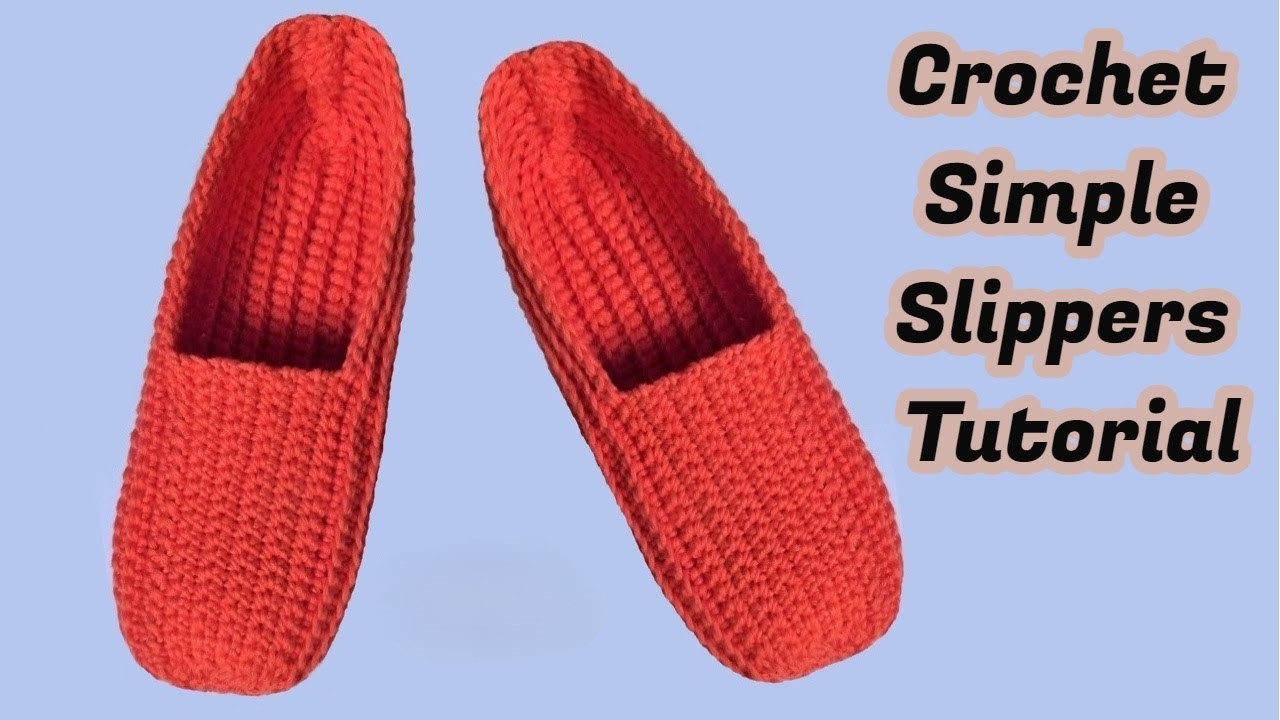
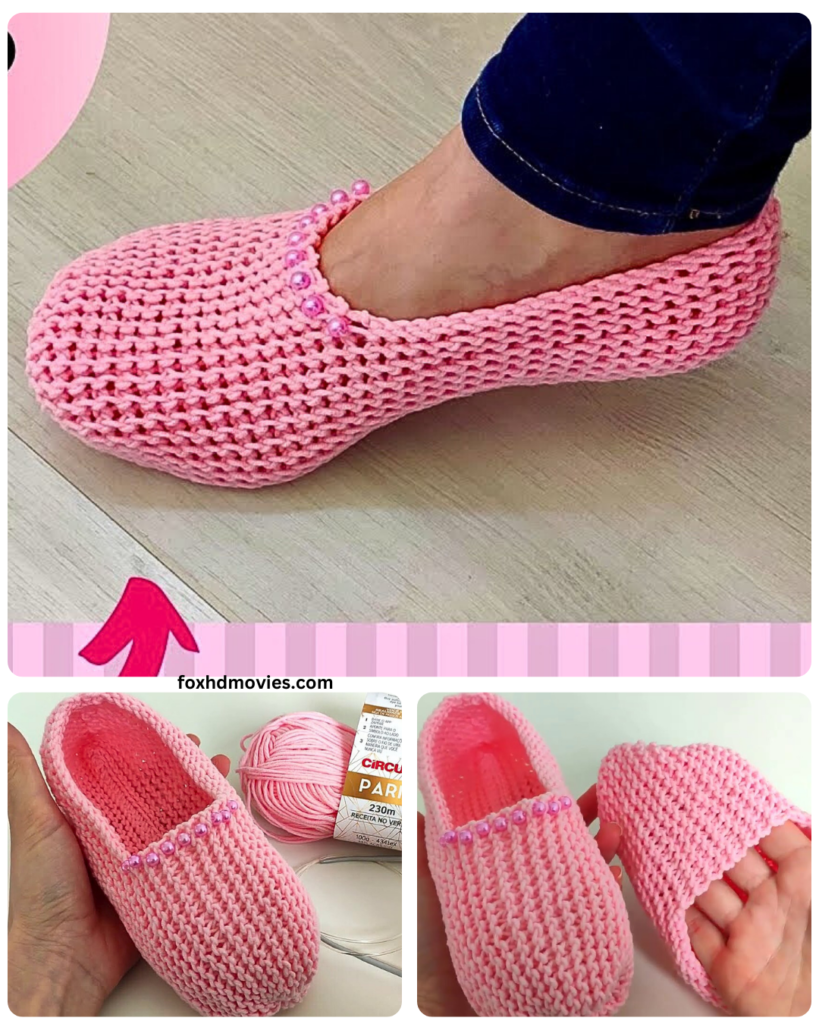
here is a detailed step-by-step pattern for knitting a basic garter stitch slipper. This pattern is suitable for beginners and creates a cozy, comfortable slipper.
Skill Level: Beginner
Materials:
- Yarn: Approximately 100-150 yards of worsted weight yarn. You can choose any color you like.
- Knitting Needles: One pair of straight knitting needles in size US 8 (5 mm) or the size needed to obtain the gauge.
- Scissors: For cutting yarn.
- Tapestry Needle (Yarn Needle): For weaving in ends and seaming.
- Optional: Stitch markers (helpful for keeping track of rows, but not strictly necessary for this simple pattern).
Gauge:
While gauge isn’t critical for slippers, aiming for approximately 16 stitches and 32 rows in garter stitch (knit every row) to measure 4 inches (10 cm) will give you a good-sized slipper for an average adult.
Abbreviations:
- K: Knit
- sts: Stitches
- RS: Right Side
- WS: Wrong Side
- Rep: Repeat
- BO: Bind Off

Instructions:
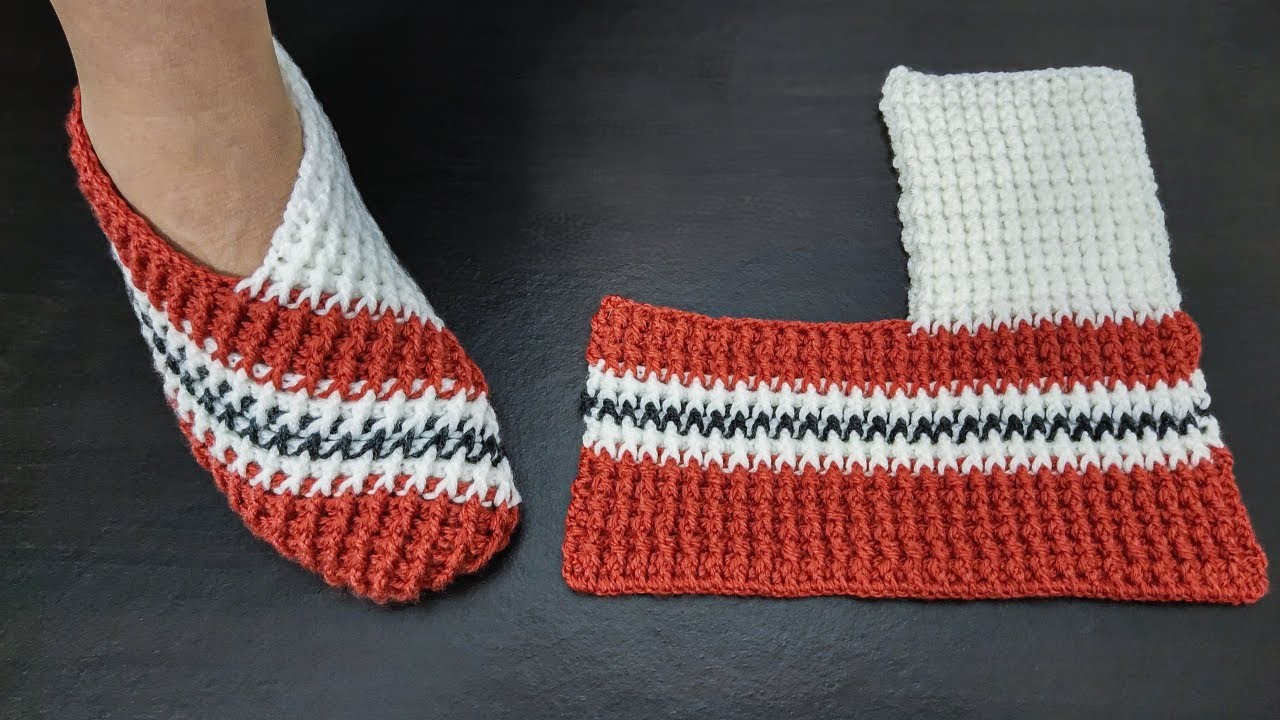
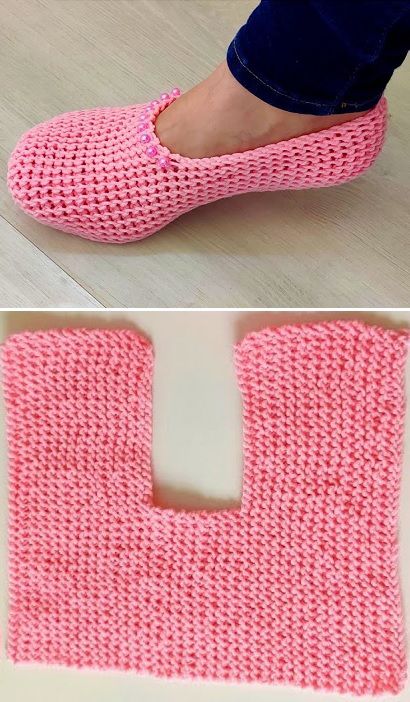
This pattern is worked in two pieces: the sole and the upper.
Part 1: Knitting the Sole
- Cast On: Cast on 12 stitches.
- Garter Stitch: Knit every row. This creates a textured, reversible fabric that is good for the sole.
- Increase Section:
- Row 1 (RS): K1, yarn over (yo), knit to the last stitch, yo, K1. (14 sts)
- Row 2 (WS): Knit all stitches.
- Row 3: K1, yo, knit to the last stitch, yo, K1. (16 sts)
- Row 4: Knit all stitches.
- Row 5: K1, yo, knit to the last stitch, yo, K1. (18 sts)
- Row 6: Knit all stitches.
- Row 7: K1, yo, knit to the last stitch, yo, K1. (20 sts)
- Row 8: Knit all stitches.
- Row 9: K1, yo, knit to the last stitch, yo, K1. (22 sts)
- Row 10: Knit all stitches.
- Row 11: K1, yo, knit to the last stitch, yo, K1. (24 sts)
- Row 12: Knit all stitches.
- Row 13: K1, yo, knit to the last stitch, yo, K1. (26 sts)
- Row 14: Knit all stitches.
- Note: You can adjust the number of increase rows to make the sole wider or narrower. For a larger foot, you might do a couple more increase rows.
- Straight Section: Continue knitting every row (garter stitch) until the sole measures approximately 8-9 inches (20-23 cm) in length for an average adult woman’s size. For a larger or smaller foot, adjust this length accordingly. You can measure against your own foot or a shoe for reference.
- Decrease Section:
- Row 1: K1, knit two together (k2tog), knit to the last 3 stitches, k2tog, K1. (24 sts)
- Row 2: Knit all stitches.
- Row 3: K1, k2tog, knit to the last 3 stitches, k2tog, K1. (22 sts)
- Row 4: Knit all stitches.
- Row 5: K1, k2tog, knit to the last 3 stitches, k2tog, K1. (20 sts)
- Row 6: Knit all stitches.
- Row 7: K1, k2tog, knit to the last 3 stitches, k2tog, K1. (18 sts)
- Row 8: Knit all stitches.
- Row 9: K1, k2tog, knit to the last 3 stitches, k2tog, K1. (16 sts)
- Row 10: Knit all stitches.
- Row 11: K1, k2tog, knit to the last 3 stitches, k2tog, K1. (14 sts)
- Row 12: Knit all stitches.
- Row 13: K1, k2tog, knit to the last 3 stitches, k2tog, K1. (12 sts)
- Row 14: Knit all stitches.
- Bind Off: Bind off all 12 stitches. Cut the yarn, leaving a long tail for seaming.

Part 2: Knitting the Upper
- Cast On: Cast on 40 stitches.
- Garter Stitch: Knit every row.
- Work Straight: Continue knitting every row until the upper measures approximately 6-7 inches (15-18 cm) in length. This will form the top part of the slipper that covers your foot. You can adjust this length if you prefer a higher or lower slipper.
- Shape the Toe (Optional, but recommended for a better fit):
- Row 1: K1, k2tog, knit to the last 3 stitches, k2tog, K1. (38 sts)
- Row 2: Knit all stitches.
- Repeat these two rows 4 more times. (30 sts)
- Note: This creates a slight curve at the front of the upper to better fit the toes. If you prefer a more rectangular upper, you can skip this shaping.
- Bind Off: Bind off all remaining stitches. Cut the yarn, leaving a long tail for seaming.

Part 3: Assembling the Slipper
- Seam the Upper: Take the upper piece. Fold it in half lengthwise, with the wrong side facing out. Using the long tail left from binding off, seam the two short edges together to form a tube. This seam will be at the back of the slipper. You can use a mattress stitch or any other seam you prefer for a neat finish.
- Attach the Upper to the Sole:
- Positioning: Place the sole piece with the right side facing up. Position the seamed edge of the upper at the heel end of the sole. The open edge of the upper will go around the top of your foot.
- Seaming: Using the long tail left from the sole, begin to sew the upper to the sole. Start at the heel and work your way around the edges.
- Toe Shaping: As you reach the toe area, you’ll need to gather the open edge of the upper to fit the curved shape of the sole. Take your time and make small, even stitches to create a smooth join. You can gently pleat or gather the fabric of the upper as needed to fit the curve of the sole.
- Weave in Ends: Once you have completely seamed the upper to the sole, weave in all loose yarn ends using the tapestry needle to ensure a neat and secure finish.
Making the Second Slipper:
Repeat all the steps above to make the second slipper.
Video tutorial
Tips and Variations:
- Sizing: To adjust the size, you can change the number of stitches you cast on for the sole and the length of the straight section of both the sole and the upper. You might also need to adjust the number of increase and decrease rows for the sole.
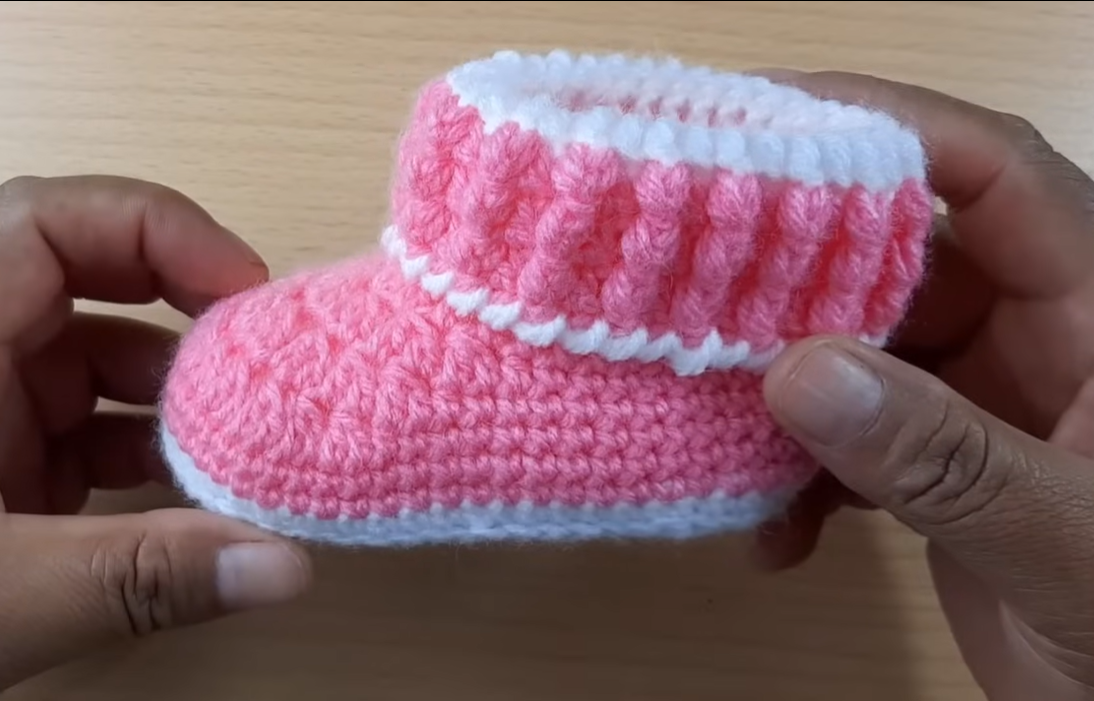
- Colorwork: You can introduce different colors of yarn to create stripes or other patterns.
- Texture: Experiment with different stitch patterns for the upper, such as ribbing or seed stitch. However, for the sole, garter stitch is recommended for its durability and non-slip texture.
- Embellishments: You can add buttons, pom-poms, or other embellishments to personalize your slippers.
- Thicker Sole: For a thicker sole, you can knit two sole pieces and sew them together.