by
by 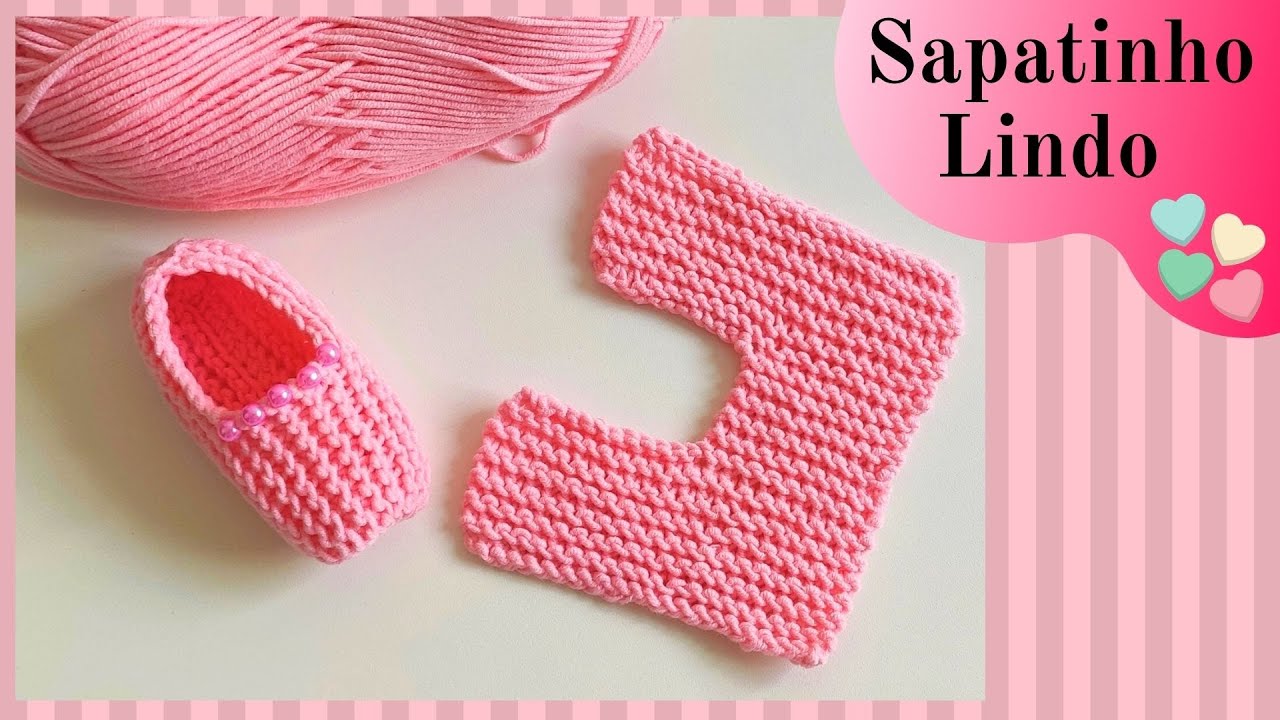
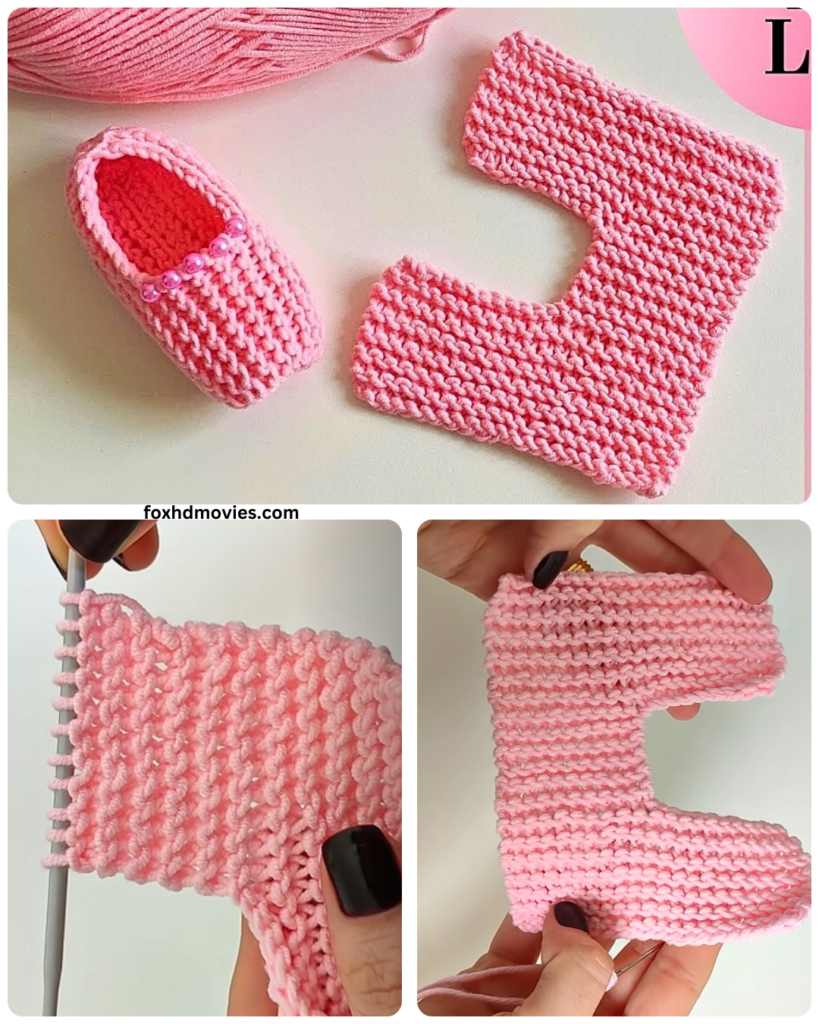
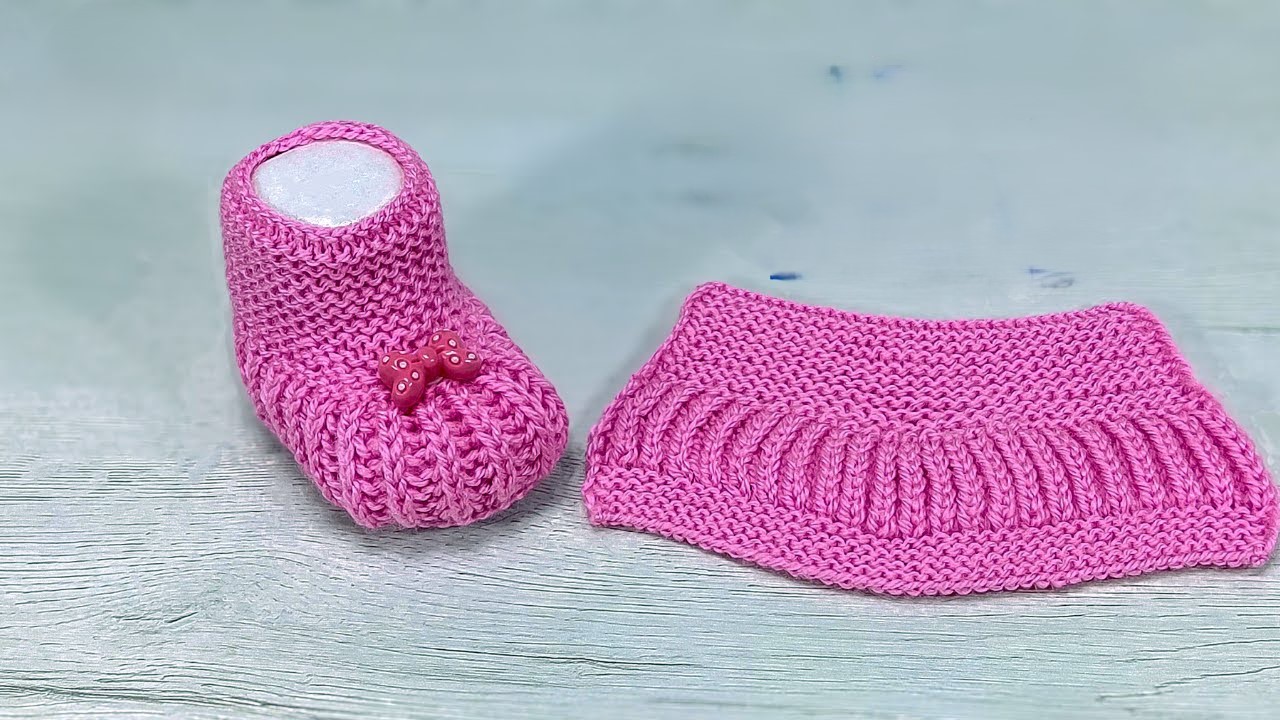
here is a detailed step-by-step pattern for an easy garter stitch baby shoe, perfect for beginners! This pattern uses only the knit stitch, making it very simple.
Materials You Will Need:
- Yarn: Approximately 50-75 yards of soft baby yarn (worsted weight or DK weight works well). Choose a yarn that is machine washable for practicality.
- Knitting Needles: One pair of straight knitting needles in a size appropriate for your chosen yarn (usually US size 6-8 or 4-5 mm). Check your yarn label for recommendations.
- Scissors: For cutting the yarn.
- Tapestry Needle (or Yarn Needle): For weaving in the ends and seaming the shoe.
Gauge (Optional but Recommended for Size Accuracy):
- While this pattern is forgiving, knowing your gauge can help ensure the shoe fits the intended age.
- Knit a small square (about 4 inches by 4 inches) in garter stitch (knit every row).
- Count the number of stitches and rows in 1 inch.
- A common gauge for worsted weight yarn is around 16-20 stitches and 30-40 rows in 4 inches (in garter stitch).
- If your gauge is significantly different, you might need to adjust your needle size.
Abbreviations:
- K: Knit
- CO: Cast On
- BO: Bind Off (Cast Off)
- sts: Stitches
- rep: Repeat
Pattern Instructions:
This pattern makes a small baby shoe, approximately 0-3 months size (sole length around 3.5 inches). You can adjust the length of the sole section (Steps 1-14) to make it slightly larger or smaller.
Part 1: The Sole
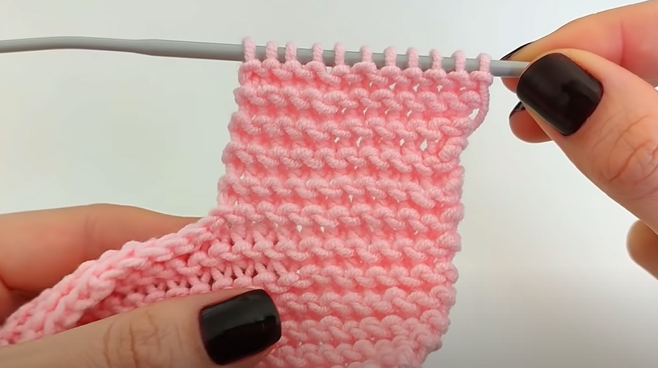
- CO 25 sts. (Cast on 25 stitches onto your knitting needle).
- Row 1: K all sts. (Knit every stitch across the row).
- Row 2: K all sts.
- Rows 3-14: Rep Row 2 (Knit every row) until you have completed a total of 14 rows. This will form the rectangular sole of the shoe.
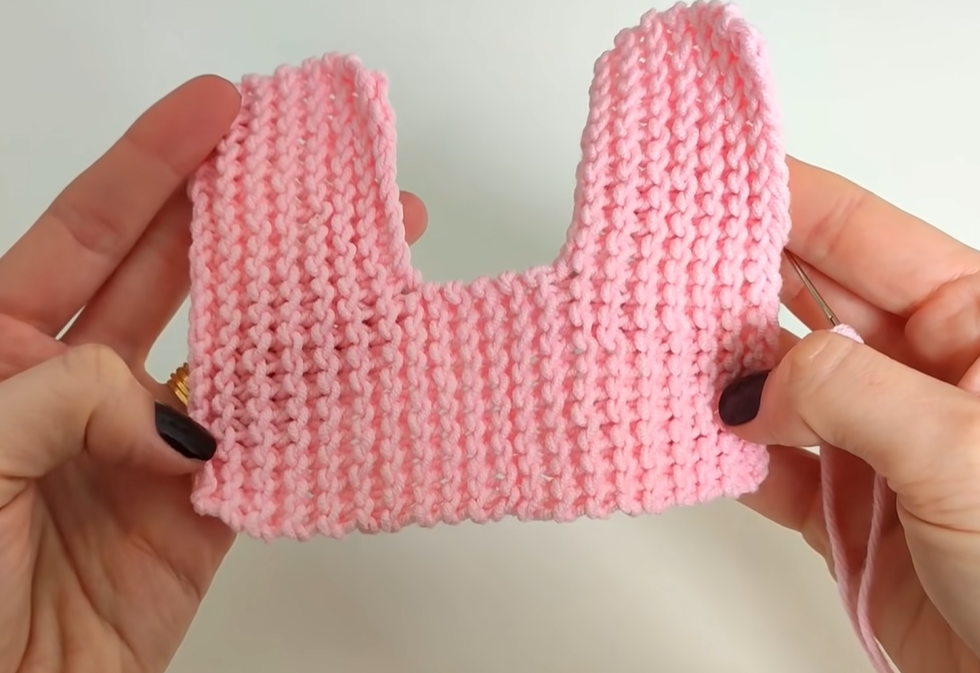
Part 2: Shaping the Sides
Now we will start increasing stitches to create the sides of the shoe.
- Row 15: K 1, yarn over (YO), K to the last st, YO, K 1. (You have increased 2 stitches). To make a yarn over: Bring the yarn forward between your needles, then bring it over the right needle to the back. Knit the next stitch as usual.
- Row 16: K all sts (including the yarn overs).
- Row 17: K 1, YO, K to the last st, YO, K 1. (You have increased 2 stitches).
- Row 18: K all sts.
- Row 19: K 1, YO, K to the last st, YO, K 1. (You have increased 2 stitches).
- Row 20: K all sts. You should now have 31 stitches on your needle.
Part 3: Creating the Upper Part of the Shoe
This section will form the top and sides of the foot.
- Row 21: K 10, BO the next 11 sts, K the remaining 10 sts. (Knit 10 stitches, then bind off the next 11 stitches. This creates the opening for the foot. You will have 10 stitches on your right needle, then you will pick up the yarn again to knit the last 10 stitches onto a separate needle or you can slide the stitches back onto the left needle).
- Row 22: K all 10 sts on the first needle. Then, rejoin your yarn (if you cut it) and K all 10 sts on the second needle. You will now work each side separately for a few rows.
- Row 23 (Right Side): K all 10 sts.
- Row 24 (Right Side): K all 10 sts.
- Row 25 (Left Side): K all 10 sts.
- Row 26 (Left Side): K all 10 sts.
Part 4: Shaping the Toe
Now we will decrease stitches to shape the toe of the shoe.
- Row 27 (Right Side): K 1, knit two together (K2tog) 6 times, K 1. (You have decreased 6 stitches, leaving 4 stitches). To knit two together: Insert your right needle into the next two stitches on the left needle as if to knit, and then knit them together as one stitch.
- Row 28 (Right Side): K all 4 sts.
- Row 29 (Left Side): K 1, K2tog 6 times, K 1. (You have decreased 6 stitches, leaving 4 stitches).
- Row 30 (Left Side): K all 4 sts.
Part 5: Finishing and Seaming
- BO all 4 sts on the right needle. Cut your yarn, leaving a tail of about 12 inches.
- BO all 4 sts on the left needle. Cut your yarn, leaving a tail of about 12 inches.
- Seaming the Sole: Thread one of the yarn tails onto your tapestry needle. Fold the knitted piece in half along the center of the sole section (the first 14 rows). Use the tapestry needle to sew the cast-on edge to the bound-off edge of the sole using a mattress stitch or any seam you are comfortable with. This will close the bottom of the shoe.
- Seaming the Back: Thread the other yarn tail onto your tapestry needle. With the wrong side of the knitting facing you, seam the back of the shoe together, starting from the bound-off edge of the upper part down to where the sole begins to curve.
- Weaving in Ends: Weave in all loose yarn ends securely into the fabric of the shoe so they don’t come undone.
Making the Second Shoe:
Repeat all the steps above to make the second baby shoe.
Video tutorial
Tips for Beginners:
- Practice the Knit Stitch: Make sure you are comfortable with the basic knit stitch before starting this project.
- Don’t Be Afraid to Count: Count your stitches at the end of each row, especially in the shaping sections, to ensure you are on track.
- Take Your Time: Knitting should be a relaxing activity. Don’t rush, and enjoy the process!
- Watch Videos: If any of the techniques (like casting on, binding off, yarn over, or knit two together) are unfamiliar, there are many helpful video tutorials available online.
- Embrace Imperfection: As a beginner, your first few projects might not be perfect, and that’s okay! Each project is a learning experience.