 by
by 
Absolutely! Let’s create a detailed step-by-step pattern for a basic, yet customizable, crochet headband.
Materials:
- Yarn: Choose a yarn that suits your preference. Worsted weight (medium 4) is a good starting point. You can also use cotton, wool, or acrylic.
- Crochet Hook: Use a hook size that corresponds to your yarn. A size H-8 (5.0mm) is common for worsted weight.
- Scissors
- Yarn Needle (for weaving in ends)
- Measuring Tape (optional, but helpful)
- Buttons, Flowers, or Other Embellishments (optional)
Abbreviations:
- ch: chain
- sc: single crochet
- dc: double crochet
- sl st: slip stitch
- st(s): stitch(es)

Pattern:
1. Determine Headband Size:
- Measure the circumference of the head where the headband will sit. Subtract 1-2 inches (2.5-5 cm) for a snug fit, as crochet stretches.
- Decide on the desired width of your headband.
2. Foundation Chain:
- Chain a length that will give you the desired width of your headband.
- For a thinner headband, you might chain 10-15.
- For a wider headband, you might chain 20-30 or more.
- Example: lets start with a chain of 15.
- Important: It is best to create a small swatch of your chosen chain length, and then crochet a few rows in your chosen stitch, to ensure you are happy with the width.
3. Row 1 (Single Crochet):
- Insert your hook into the second chain from the hook.
- Single crochet (sc) in each chain across.
- Chain 1 and turn.
4. Row 2 and Subsequent Rows (Repeat):
- Option 1: Single Crochet Ribbing:
- Sc in the back loop only (BLO) of each stitch across. This creates a ribbed effect.
- Chain 1 and turn.
- Option 2: Double Crochet Ribbing:
- Double crochet (dc) in the back loop only (BLO) of each stitch across.
- Chain 2 and turn.
- Option 3: Simple Single Crochet:
- Sc in each stitch across.
- Chain 1 and turn.
- Option 4: Simple Double Crochet:
- Dc in each stitch across.
- Chain 2 and turn.
- Repeat the chosen row until your headband reaches the desired length (the circumference you measured earlier, minus 1-2 inches).
5. Finishing:
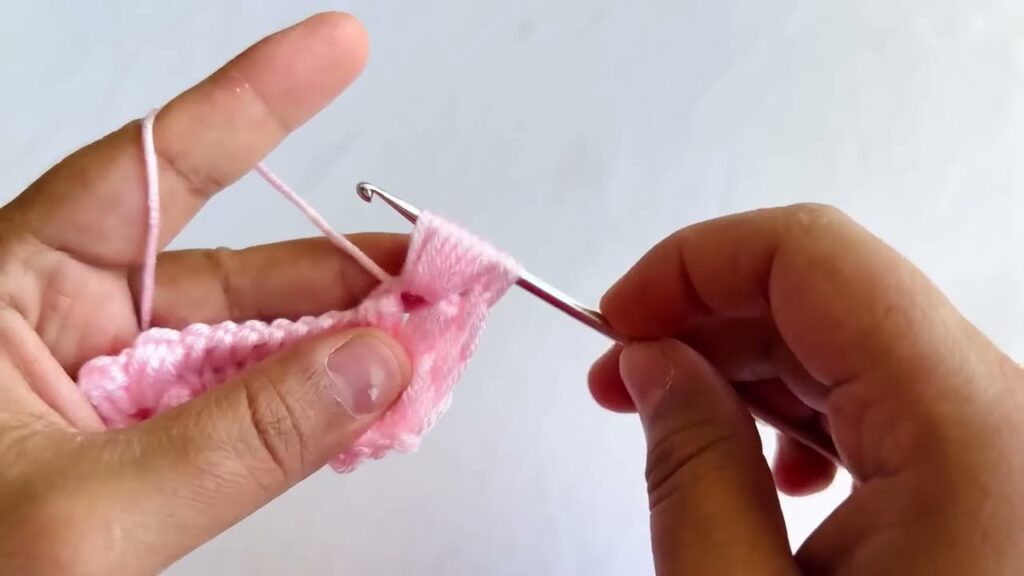
- Once you reach the desired length, fasten off your yarn, leaving a tail of about 6 inches (15 cm).
- Use your yarn needle to weave in the ends securely.
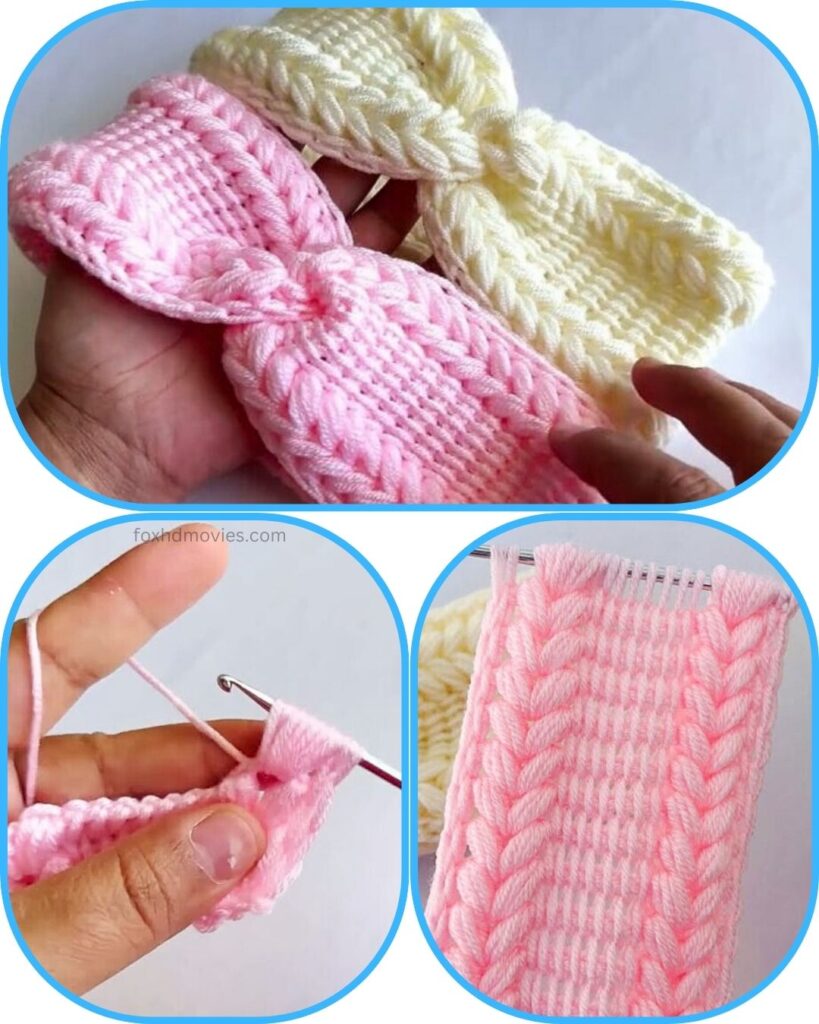
6. Joining the Ends:
- Option 1: Sewing:
- Lay the two short ends of the headband together, overlapping slightly.
- Use your yarn needle and the yarn tail to sew the ends together securely, creating a seamless join.
- Option 2: Slip Stitch Join:
- Hold the two ends together.
- Insert your hook into the first stitch of both ends.
- Slip stitch (sl st) through both loops.
- Continue slip stitching across the ends, joining them together.
- Fasten off and weave in the end.
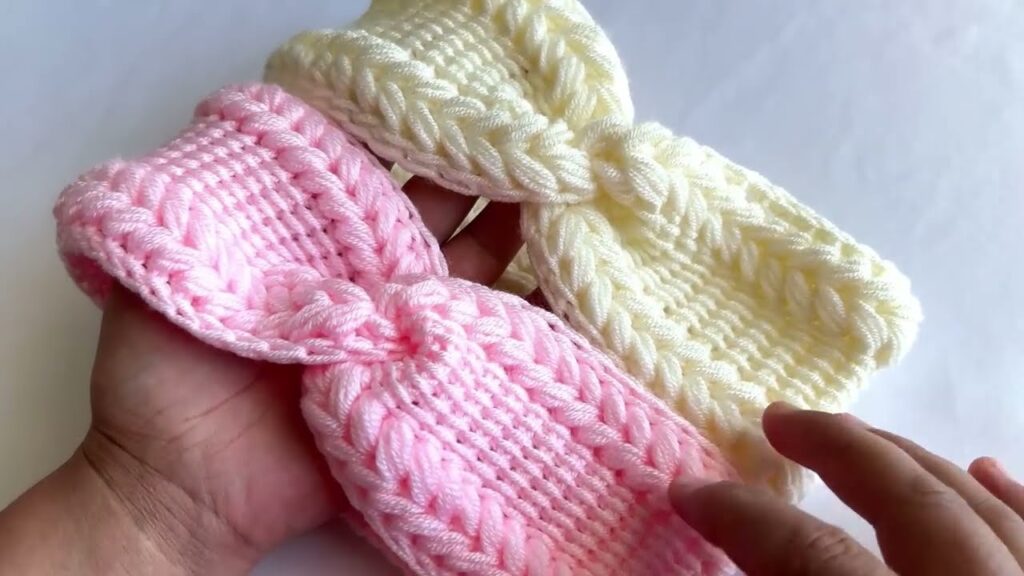
7. Embellishments (Optional):
- You can add buttons, flowers, bows, or other embellishments to your headband.
- Sew or glue them securely to the headband.
Variations:
- Textured Headband: Use different stitch combinations, such as alternating rows of single crochet and double crochet, or using a textured stitch like the moss stitch.
- Cable Headband: There are many crochet cable stiches that add a wonderful raised texture to a headband.
- Color Changes: Change yarn colors every few rows for a striped or multicolored effect.
- Lace Headband: Use a thinner yarn and a larger hook to create a lacy design.
- Ear Warmer: make the headband wider, to cover the ears.
Video Tutorial
Tips:
- Keep your tension consistent for an even fabric.
- Don’t be afraid to experiment with different stitches and yarn types.
- If you’re unsure about the size, make a small swatch and measure it before starting the full headband.
- Blocking your finished headband will help to even out the stitches, and give it a professional finish.