 by
by 
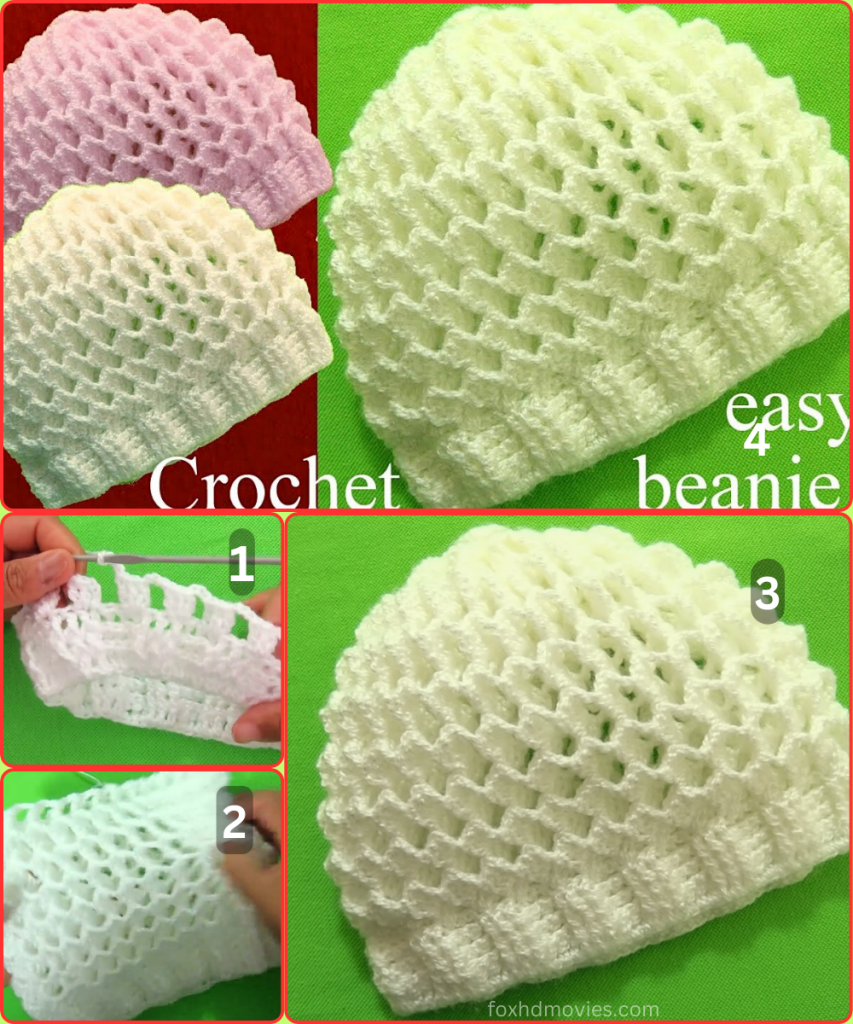
Welcome! This is a gorgeous crochet project that results in a stunning, geometric doily. The design is a series of interconnected square motifs, each with a central floral element, which come together to form a larger, intricate pattern. The result is a piece that’s both modern and classic, perfect for decorating a table or as a gift. This pattern is designed for an intermediate crocheter who is comfortable with basic stitches and joining motifs as you go.
Materials
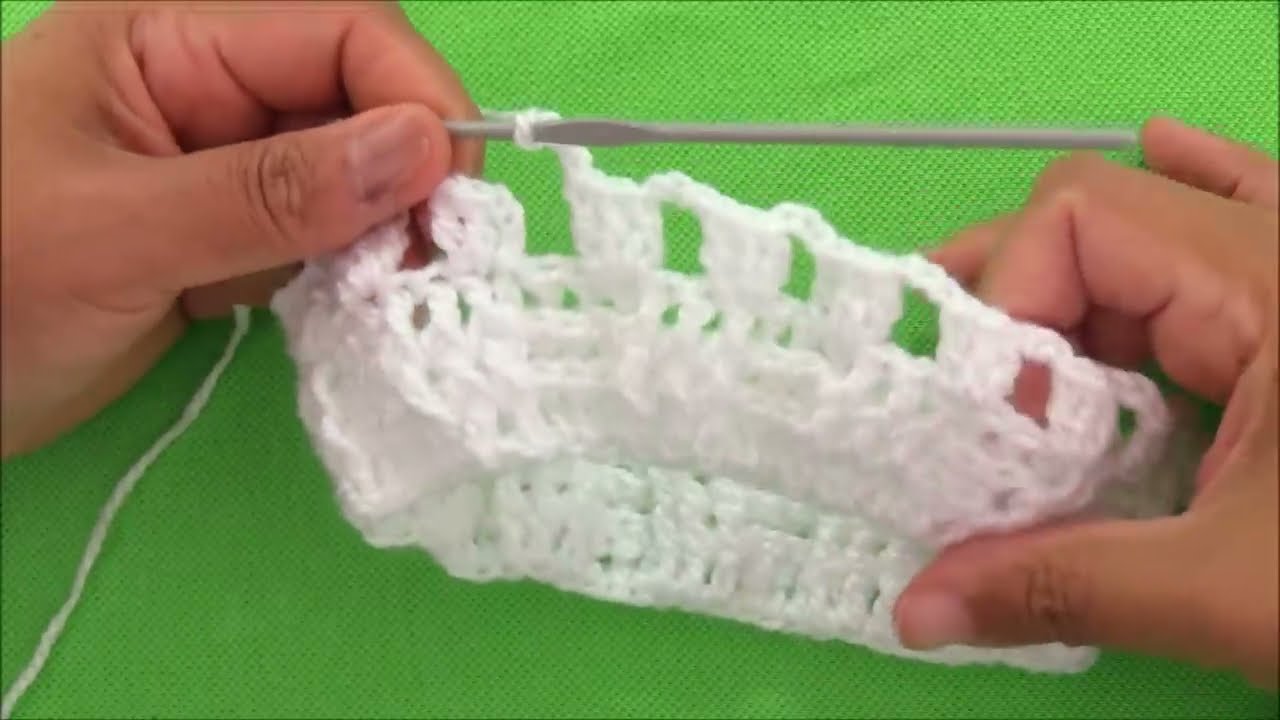
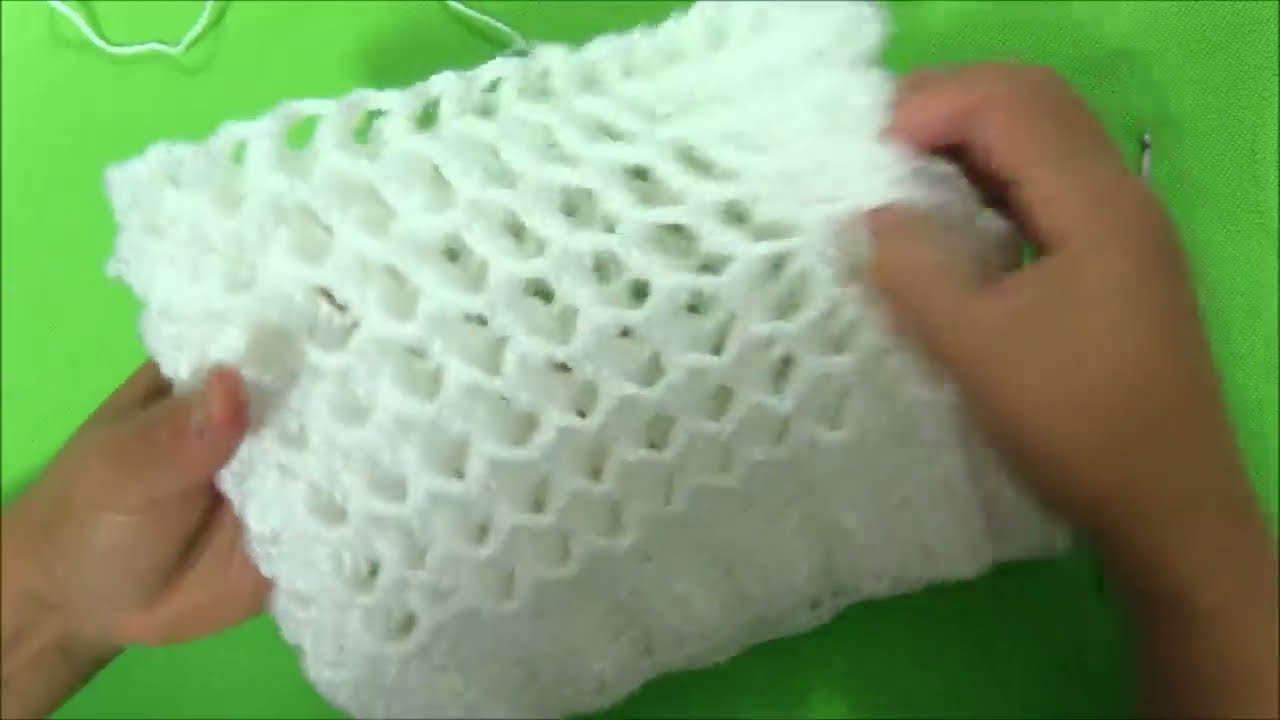
- Yarn: Size 10 crochet thread in your chosen color. The image shows a beautiful mint green.
- Hook: A steel crochet hook, size 1.75 mm or a size appropriate for your chosen thread.
- Basic crochet supplies: Scissors and a tapestry needle for weaving in ends.
Abbreviations
- ch: chain
- sl st: slip stitch
- sc: single crochet
- dc: double crochet
- tr: treble crochet
- sp: space
- rep: repeat
Pattern Instructions
This pattern is for one square motif. You will need to make and join four of these to create the full doily.
Motif Pattern
Round 1: The Center
- Ch 4, sl st to the first ch to form a ring.
- Ch 3 (counts as first dc), work 11 dc into the ring. Join with sl st to the top of the beginning ch-3. (12 dc)
Round 2: The Petals
- Ch 1, sc in the same st.
- *Ch 4, skip the next dc, sc in the next dc.* Rep from * to * 5 more times. Ch 4, sl st to the beginning sc. (6 ch-4 sps)
Round 3: Building the Petals
- Sl st into the first ch-4 sp.
- *Work (sc, hdc, 3 dc, hdc, sc) into the ch-4 sp.* Rep from * to * 5 more times. Join with sl st to the beginning sc. (6 petals)
Round 4: Creating the Square Corners
- Sl st to the top of the first petal (the center dc).
- Ch 1, sc in the same st.
- *Ch 3, dc in the next sc between the petals. Ch 3, sc in the top of the next petal (the center dc).
- Ch 5, sc in the top of the next petal. This is your corner.
- Ch 3, dc in the next sc between the petals. Ch 3, sc in the top of the next petal.* Rep from * to * 3 more times. Ch 5, sl st to the beginning sc to join.
Round 5: Final Touches
- Sl st into the first ch-3 sp.
- Ch 3 (counts as first dc), work 2 dc into the same ch-3 sp.
- *3 dc in the next ch-3 sp. In the ch-5 corner sp, work (2 dc, ch 3, 2 dc).
- 3 dc in the next ch-3 sp. 3 dc in the next ch-3 sp.* Rep from * to * 3 more times. Join with sl st to the top of the beginning ch-3. Fasten off.
Joining the Motifs
You will join the motifs on the final round. When you reach a corner where you want to join, instead of a ch-3, you will work a ch 1, sl st into the corresponding ch-3 sp of the previous motif, ch 1. When you are joining along an edge, instead of a ch-3, you will work a ch 1, sl st into the corresponding ch-3 sp of the previous motif, ch 1.
Joining 2 Motifs:
- Make your first motif completely. Make a second motif and stop at the last round.
- Work the last round until you reach a corner where you will join. Work (2 dc, ch 1, sl st to the ch-3 sp of the first motif, ch 1, 2 dc) in the corner.
- Continue along the side, where you will join each ch-3 sp with a ch-1, sl st, ch-1 to the previous motif.

Joining 3 or 4 Motifs:
- Continue the process, joining each new motif to the previous one along the edges. The corners where 4 motifs meet will require you to work a ch-1, sl st to the previous motif, ch-1, sl st to the next motif, ch-1.
Video tutorial
Finishing Touches
Once all your motifs are joined, weave in all loose ends with a tapestry needle. Block your doily by wetting it, pinning it to a flat surface, and shaping it to ensure the corners and edges are crisp and straight. Let it dry completely.
Your geometric floral square doily is now complete!