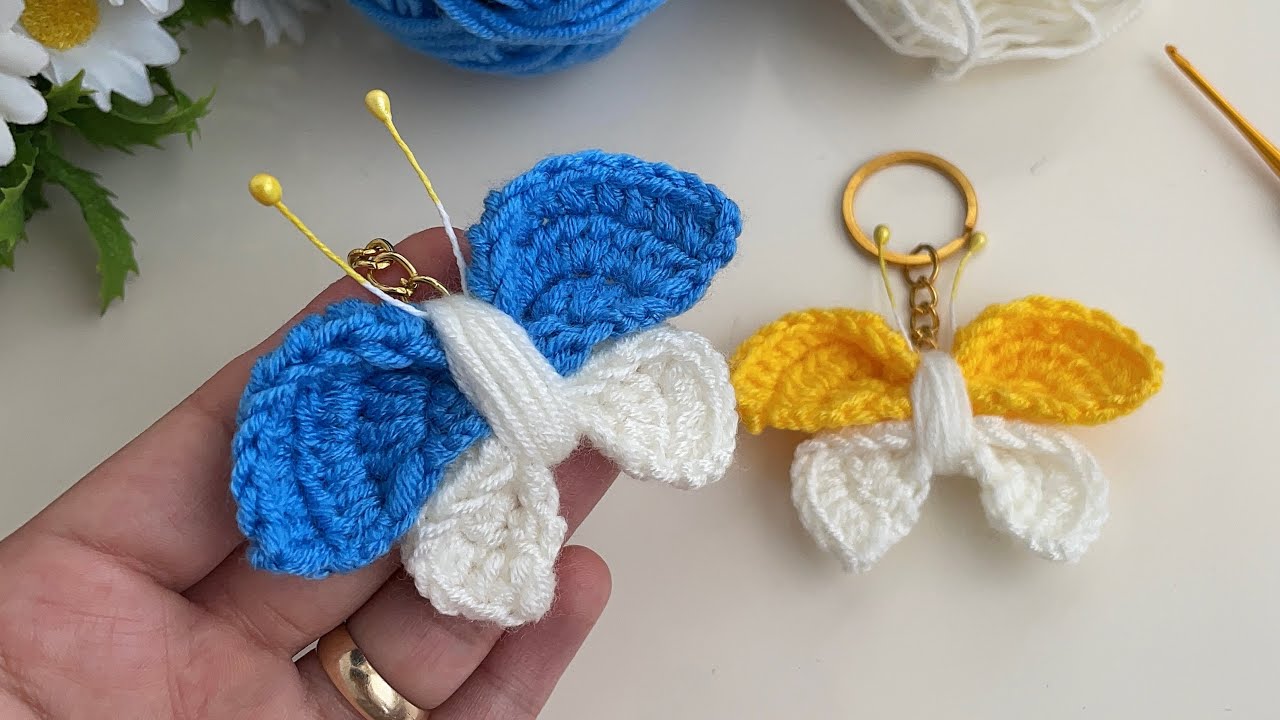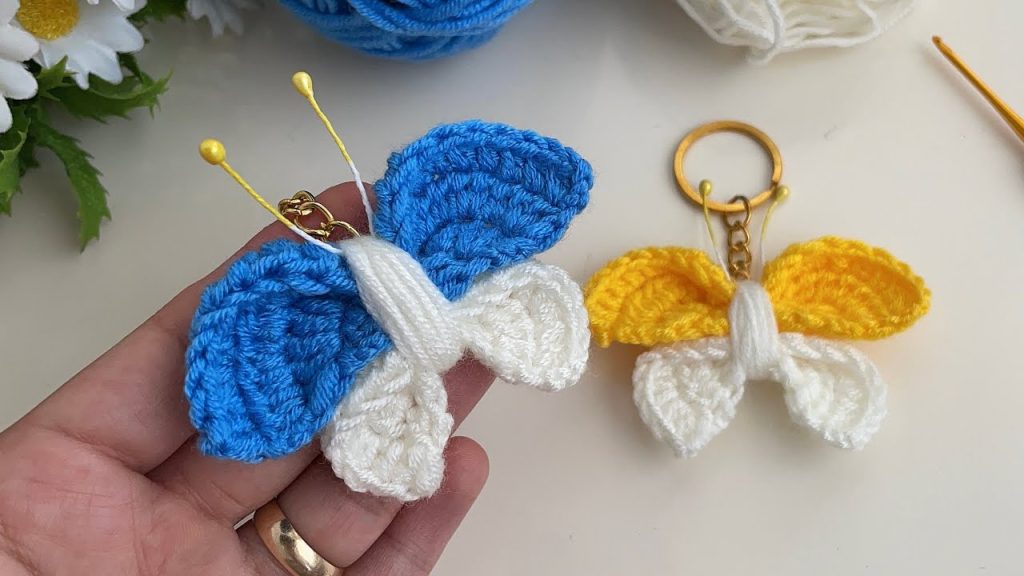
Create these enchanting “Flutterby Charms” with this long and incredibly detailed crochet pattern. Perfect for adding a touch of whimsy to your keys, bags, or any craft project, these butterflies are a joy to make and customize with your favorite color combinations. This pattern provides instructions for creating one butterfly, and you can easily repeat the process to make as many as you desire.
Skill Level: Beginner to Intermediate – This pattern utilizes basic crochet stitches and simple shaping. The wire antennae are optional and require minimal crafting skills.
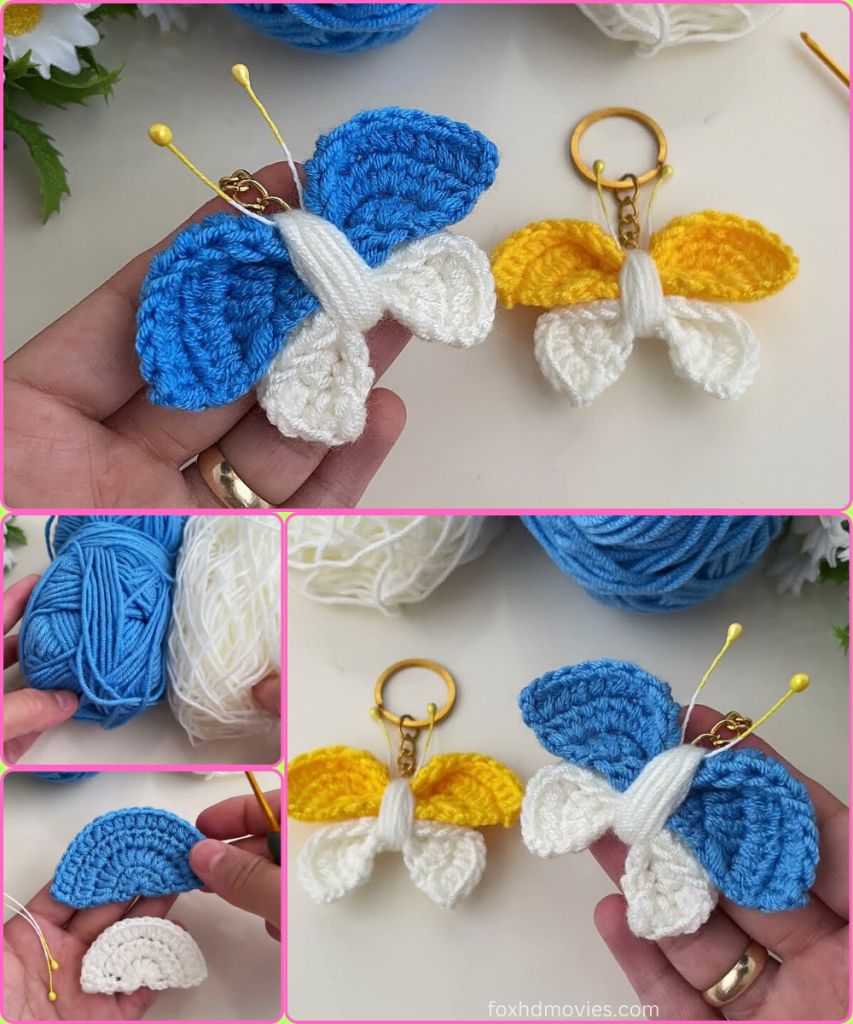
Materials You’ll Need:
- Yarn: Small amounts of sport (size 2) or DK (size 3) weight yarn in your chosen colors. For each butterfly, you’ll need:
- Color A: For the top two wings (approximately 15-20 yards).
- Color B: For the bottom two wings (approximately 15-20 yards).
- Color C: For the body (a small amount, approximately 5 yards).
- Optional: A small amount of white or a contrasting color for small details (like the stripe on the body).
- Crochet Hook: A size G/6 (4.0mm) crochet hook is recommended for sport or DK weight yarn.
- Scissors
- Yarn Needle for weaving in all ends and assembling the butterfly.
- Craft Wire (20-24 gauge): Approximately 4-6 inches for the antennae (optional).
- Jewelry Pliers: For bending and shaping the craft wire (if using antennae).
- Keyring or Split Ring: For attaching the butterfly as a keychain (optional).
- Small Jump Ring: To connect the butterfly to the keyring (optional).
- Sewing Pins: For holding pieces together while assembling.
Gauge: Gauge is not critical for this project, as the size of the butterfly can be easily adjusted by using different yarn weights and hook sizes.
Finished Size: Approximately 2.5 – 3 inches wide and 2 – 2.5 inches tall, depending on your yarn and hook.
Extremely Detailed Pattern Instructions (Make One Butterfly)
We will crochet the four wings separately, then the body, and finally assemble all the pieces.
Part 1: Crafting the Top Wings (Make 2 in Color A)
The top wings have a slightly rounded shape.

- Starting Chain: With Color A, chain 10.
- Row 1: In the second chain from your hook, work 1 single crochet (sc). Work 1 sc in each of the next 8 chains. (Total: 9 stitches)
- Row 2: Chain 1 (turn). Work 1 sc in the first stitch. Work 1 half double crochet (hdc) in the next stitch. Work 1 double crochet (dc) in each of the next 5 stitches. Work 1 hdc in the next stitch. Work 1 sc in the last stitch. (Total: 9 stitches)
- Row 3: Chain 1 (turn). Work 1 sc in the first stitch. Work 1 hdc in the next stitch. Work 1 dc in each of the next 5 stitches. Work 1 hdc in the next stitch. Work 1 sc in the last stitch. (Total: 9 stitches)
- Row 4: Chain 1 (turn). Work 1 sc in the first stitch. Work 1 hdc in the next stitch. Work 1 treble crochet (tr) in each of the next 3 stitches. Work 1 hdc in the next stitch. Work 1 sc in the last stitch. (Total: 9 stitches)
- Row 5: Chain 1 (turn). Work 1 sc in the first stitch. Work 1 hdc in the next stitch. Work 1 dc in each of the next 3 stitches. Work 1 hdc in the next stitch. Work 1 sc in the last stitch. (Total: 9 stitches)
- Row 6: Chain 1 (turn). Work 1 sc in the first stitch. Work 1 hdc in the next stitch. Work 1 sc in each of the next 3 stitches. Work 1 hdc in the next stitch. Work 1 sc in the last stitch. (Total: 9 stitches)
- Row 7: Chain 1 (turn). Work 1 sc in the first stitch. Work 1 sc in each of the next 5 stitches. Work 1 sc in the last stitch. (Total: 7 stitches)
- Row 8: Chain 1 (turn). Work 1 sc in the first stitch. Work 1 sc in each of the next 3 stitches. Work 1 sc in the last stitch. (Total: 5 stitches)
- Row 9: Chain 1 (turn). Work 1 sc in the first stitch. Work 1 sc in the next stitch. Work 1 sc in the last stitch. (Total: 3 stitches)
- Row 10: Chain 1 (turn). Work 1 sc in the center stitch. (Total: 1 stitch)Fasten off Color A, leaving a tail long enough for sewing the wings to the body. Make a second top wing following the same instructions.
Part 2: Crafting the Bottom Wings (Make 2 in Color B)
The bottom wings have a slightly more rounded and smaller shape than the top wings.

- Starting Chain: With Color B, chain 8.
- Row 1: In the second chain from your hook, work 1 single crochet (sc). Work 1 sc in each of the next 6 chains. (Total: 7 stitches)
- Row 2: Chain 1 (turn). Work 1 sc in the first stitch. Work 1 half double crochet (hdc) in the next stitch. Work 1 double crochet (dc) in each of the next 3 stitches. Work 1 hdc in the next stitch. Work 1 sc in the last stitch. (Total: 7 stitches)
- Row 3: Chain 1 (turn). Work 1 sc in the first stitch. Work 1 hdc in the next stitch. Work 1 dc in each of the next 3 stitches. Work 1 hdc in the next stitch. Work 1 sc in the last stitch. (Total: 7 stitches)
- Row 4: Chain 1 (turn). Work 1 sc in the first stitch. Work 1 hdc in the next stitch. Work 1 sc in each of the next 3 stitches. Work 1 hdc in the next stitch. Work 1 sc in the last stitch. (Total: 7 stitches)
- Row 5: Chain 1 (turn). Work 1 sc in the first stitch. Work 1 sc in each of the next 3 stitches. Work 1 sc in the last stitch. (Total: 5 stitches)
- Row 6: Chain 1 (turn). Work 1 sc in the first stitch. Work 1 sc in the next stitch. Work 1 sc in the last stitch. (Total: 3 stitches)
- Row 7: Chain 1 (turn). Work 1 sc in the center stitch. (Total: 1 stitch)Fasten off Color B, leaving a tail long enough for sewing the wings to the body. Make a second bottom wing following the same instructions.
Part 3: Crafting the Body (Color C)
The body is a simple tube shape.
- Starting Chain: With Color C, chain 12.
- Row 1: In the second chain from your hook, work 1 single crochet (sc). Work 1 sc in each of the next 10 chains. (Total: 11 stitches)
- Row 2-4: Chain 1 (turn). Work 1 sc in each stitch across. (Total: 11 stitches for each row)Fasten off Color C, leaving a long tail for sewing the body together and attaching it to the wings.
Optional: Adding a Stripe to the Body: You can add a small stripe of white or a contrasting color in the center of the body by working one row in that color during Rows 2-4.
Part 4: Assembling the Butterfly
Now we’ll bring all the pieces together to form the butterfly.
- Sewing the Body: Fold the crocheted body piece in half lengthwise. Using the long tail, whipstitch the long edges together to create a small, slightly flattened tube. Fasten off the tail inside the body.
- Attaching the Top Wings: Position one top wing on one side of the body, aligning the bottom edge of the wing with the side of the body. Use sewing pins to hold it in place. Using the yarn tail left on the wing, sew the wing securely to the body. Repeat this process for the second top wing on the opposite side of the body. Ensure the wings are symmetrical.
- Attaching the Bottom Wings: Position one bottom wing underneath one of the top wings, slightly overlapping. Use sewing pins to hold it in place. Using the yarn tail left on the wing, sew the bottom wing securely to the body. Repeat this process for the second bottom wing underneath the other top wing. Ensure the bottom wings are also symmetrical.

Part 5: Creating and Attaching the Optional Wire Antennae
These add a lovely finishing touch.
- Cutting the Wire: Cut two pieces of craft wire, each approximately 2-3 inches long.
- Shaping the Antennae Tips: Using your jewelry pliers, create a small loop or bend at one end of each wire to form the characteristic butterfly antenna tip.
- Attaching the Antennae: Insert the straight end of one wire into the top of the butterfly’s body, pushing it through a few stitches to secure it. Repeat this for the second antenna, positioning them symmetrically. You can bend the antennae slightly for a more realistic look.
Part 6: Adding the Keychain Hardware (Optional)
- Attaching the Jump Ring: Open a small jump ring using your pliers. Attach it to the top center of the butterfly’s body, making sure it goes through a few secure stitches.
- Attaching the Keyring: Slide the keyring or split ring onto the open jump ring. Use your pliers to close the jump ring securely.
Part 7: Final Touches
- Weaving in All Ends: Double-check that all yarn ends are securely woven in on all parts of the butterfly.
- Adjusting the Wings: Gently shape the wings with your fingers to give them a natural, slightly curved appearance.
Video tutorial
Congratulations! You have now crocheted a beautiful “Flutterby Charm”! These delightful butterflies are perfect for adding a handmade touch to your belongings or for gifting to friends and family. Experiment with different color combinations to create a whole flutter of these charming creatures!
