by
by 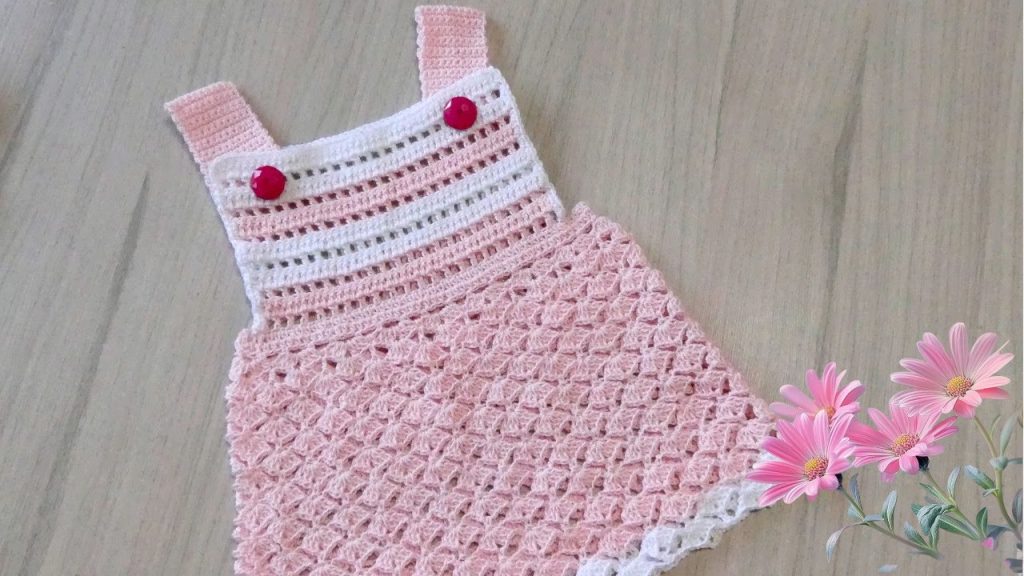
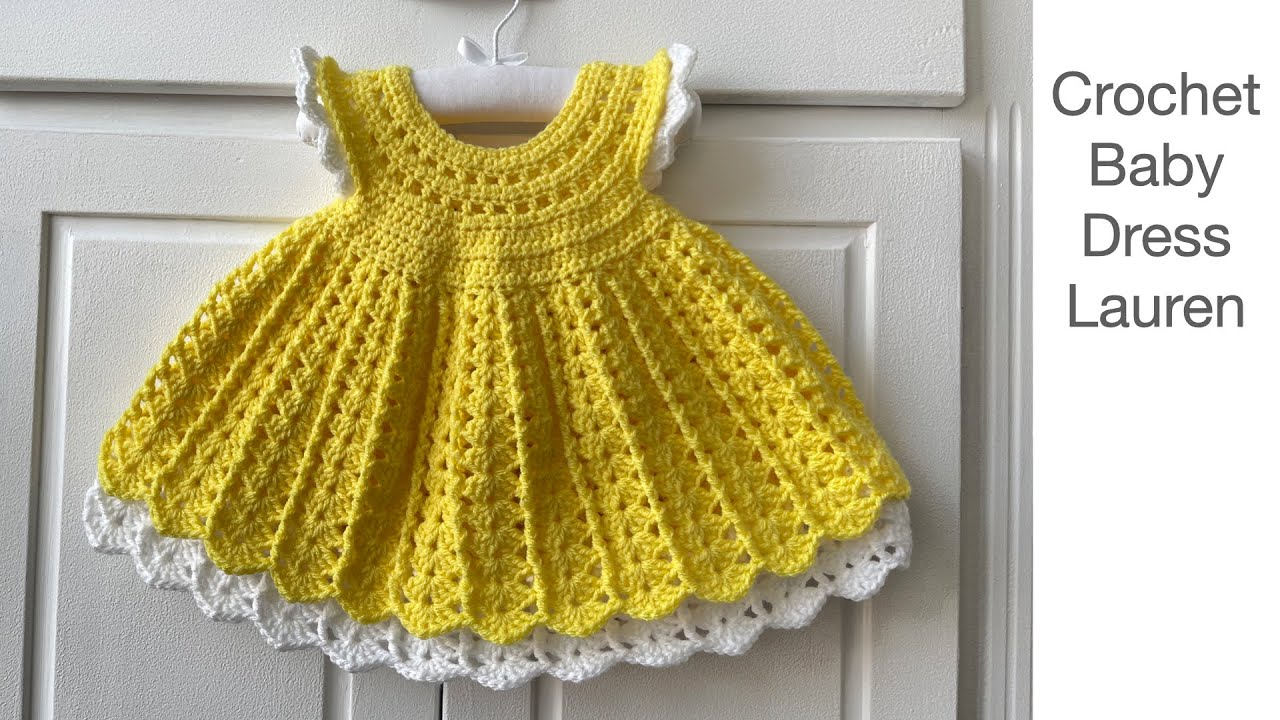
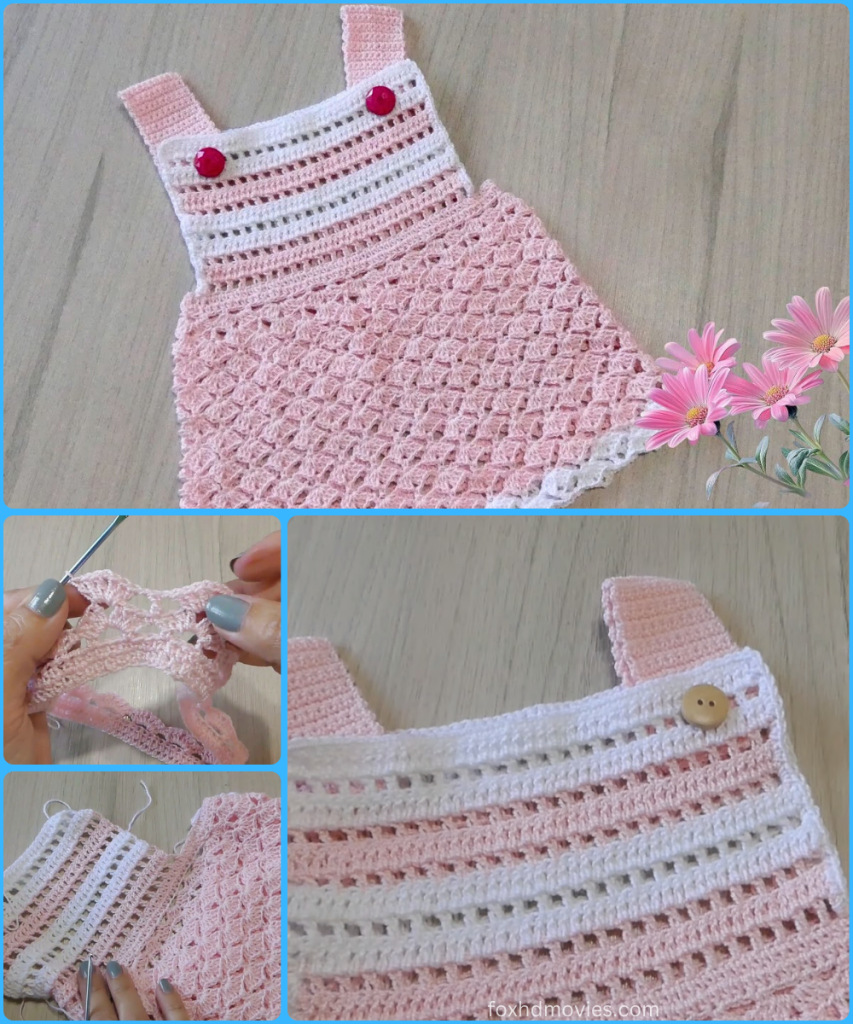
Welcome, fellow crafters! There’s nothing sweeter than a handmade outfit for a little one, and this adorable crochet sundress is the perfect project. With its fresh pink and white stripes, a beautifully textured skirt, and simple button-up straps, this dress evokes the timeless charm of a strawberry milkshake on a sunny day. This pattern is designed for the confident beginner or intermediate crocheter and includes all the steps you need to create a cherished, unique garment.
Skill Level: Intermediate
This pattern uses basic stitches but requires attention to detail for the color changes and the shell stitch skirt.
Materials You’ll Need
- Yarn:
- Color A (Pink): Approximately 150g of a DK weight (#3) cotton blend or baby-friendly acrylic yarn.
- Color B (White): Approximately 50g of a DK weight (#3) cotton blend or baby-friendly acrylic yarn.
- Crochet Hook: 4.0 mm (G/6 US) or size needed to obtain gauge.
- Buttons: Two large, decorative buttons (approximately 1 inch / 2.5 cm in diameter).
- Tapestry Needle: For weaving in ends.
- Scissors
- Stitch Markers: To mark the armholes.
Gauge
- 18 half-double crochet stitches = 4 inches (10 cm)
- 12 rows of half-double crochet = 4 inches (10 cm)
Meeting the correct gauge is crucial to ensure the dress fits the intended size. This pattern is for a 6-12 month size.
Abbreviations (US Terms)
- ch: chain
- sl st: slip stitch
- sc: single crochet
- hdc: half-double crochet
- dc: double crochet
- sk: skip
- sp: space
- st(s): stitch(es)
- Shell: 5 dc in the same st or sp
Part 1: The Bodice
The bodice is worked in flat rows, creating a rectangle that will be seamed to form the front and back panels.

With Color A (Pink):
- Foundation: Ch 50.
- Row 1: Hdc in the 3rd ch from the hook and in each ch across. (48 hdc)
- Rows 2-3: Ch 2 (counts as hdc here and throughout), turn. Hdc in each st across. (48 hdc)
- Color Change: At the end of Row 3, switch to Color B (White).
With Color B (White):
- Rows 4-5: Ch 2, turn. Hdc in each st across. (48 hdc)
- Color Change: At the end of Row 5, switch back to Color A (Pink).
With Color A (Pink):
- Rows 6-7: Ch 2, turn. Hdc in each st across. (48 hdc)
- Color Change: At the end of Row 7, switch back to Color B (White).
With Color B (White):
- Rows 8-9: Ch 2, turn. Hdc in each st across. (48 hdc)
- Color Change: At the end of Row 9, switch back to Color A (Pink).
With Color A (Pink):
- Rows 10-12: Ch 2, turn. Hdc in each st across. (48 hdc)
Split for Armholes: Now, you will split the work to create the front and back panels, working in separate sections.
First Back Panel (Shoulder): 12. Row 13: Ch 2, turn. Hdc in the first 10 sts. (10 hdc) 13. Rows 14-16: Ch 2, turn. Hdc in each st across. Fasten off at the end of Row 16.
Front Panel: 14. Row 13: Rejoin yarn to the 11th st of Row 12. Ch 2, hdc in the next 28 sts. (28 hdc) 15. Rows 14-16: Ch 2, turn. Hdc in each st across. Fasten off at the end of Row 16.
Second Back Panel (Shoulder): 16. Row 13: Rejoin yarn to the 39th st of Row 12. Ch 2, hdc in the next 10 sts. (10 hdc) 17. Rows 14-16: Ch 2, turn. Hdc in each st across. Fasten off at the end of Row 16.
Seam the Bodice: Fold the top piece in half, matching the front and back panels. Sew the shoulder seams and the side seams with a tapestry needle, leaving the armholes open.
Part 2: The Skirt
The skirt is worked in joined rounds from the bottom of the bodice.

With Color A (Pink):
- Row 1 (Increase): Join yarn to the back of the bodice where you finished the last row. Ch 2, turn. Hdc in each st around, working 2 hdc in every 4th st to create a subtle flare. Sl st to join. (60 hdc)
- Row 2 (Shell Stitch): Ch 3 (counts as dc), dc in the same st. Sk 2 sts, [sc in the next st, sk 2 sts, Shell in the next st]. Repeat from [ ] around. End with sc in the last st, sl st to join. (10 shells)
- Row 3: Ch 3, 2 dc in the same st. [Sc in the center of the next shell, Shell in the next sc]. Repeat from [ ] around. End with sc in the center of the last shell, sl st to join. (10 shells)
- Rows 4-15: Repeat Row 3 until the skirt reaches the desired length.
With Color B (White):
- Final Scallop Edge: Join white yarn to any st. Ch 1, sc in the same st. Sk 1 st, Shell in the next st. [Sk 1 st, sc in the next st, sk 1 st, Shell in the next st]. Repeat from [ ] around. Sl st to join. Fasten off.
Part 3: The Straps
The straps are worked in a simple row to create a sturdy, flat piece.
With Color A (Pink):
- Strap 1: Ch 20. Hdc in the 3rd ch from the hook and in each ch across. (18 hdc)
- Rows 2-3: Ch 2, turn. Hdc in each st across. (18 hdc)
- Buttonhole Row: Ch 2, turn. Hdc in the first 5 sts. Ch 2, sk 2 sts (this forms the buttonhole). Hdc in the last 11 sts. Fasten off.
Repeat this process for the second strap.
Part 4: Assembly and Finishing
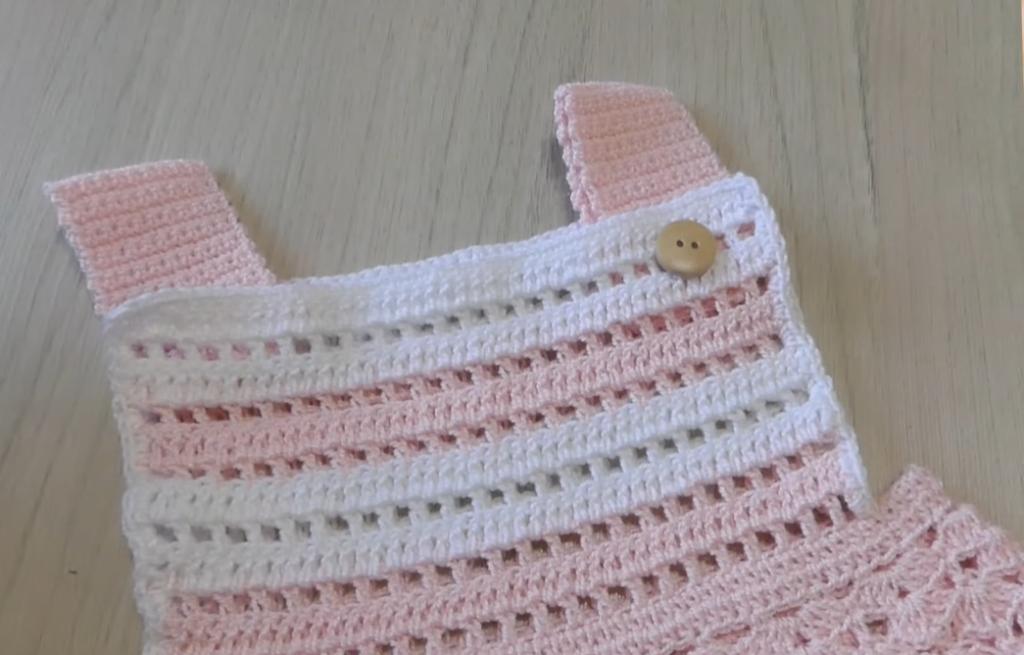
- Attach Straps: Position the straps evenly on the back panel of the bodice. Using your tapestry needle, sew the straps securely in place.
- Sew on Buttons: Sew the two large decorative buttons to the front of the bodice, aligning them with the buttonholes on the straps.
- Weave in Ends: Use your tapestry needle to carefully weave in all the loose ends of your yarn for a clean and professional finish.
- Blocking (Optional): Gently wet the dress and pin it to a flat surface to the correct measurements. Allow it to air dry completely. This will help the stitches lie flat and give the dress a polished look.
Your beautiful Strawberry Milkshake Sundress is now complete! Enjoy the satisfaction of having created a custom, charming, and stylish garment for a special little one.