 by
by 
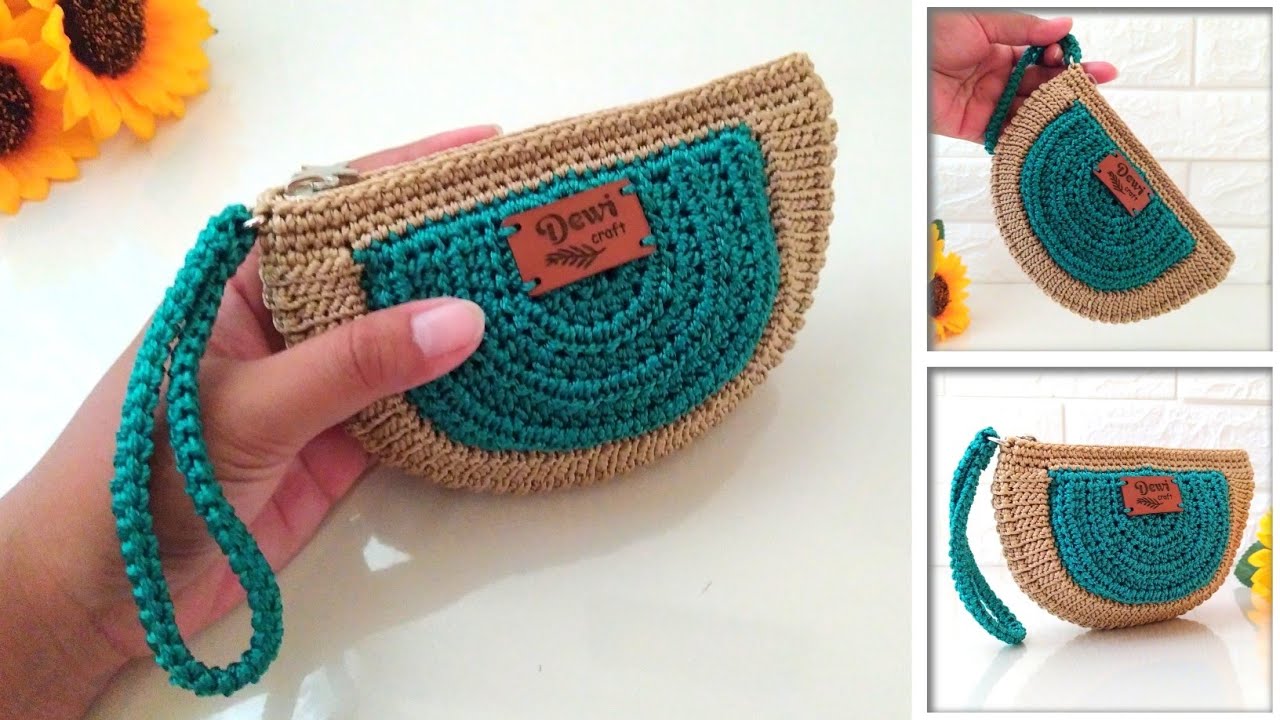
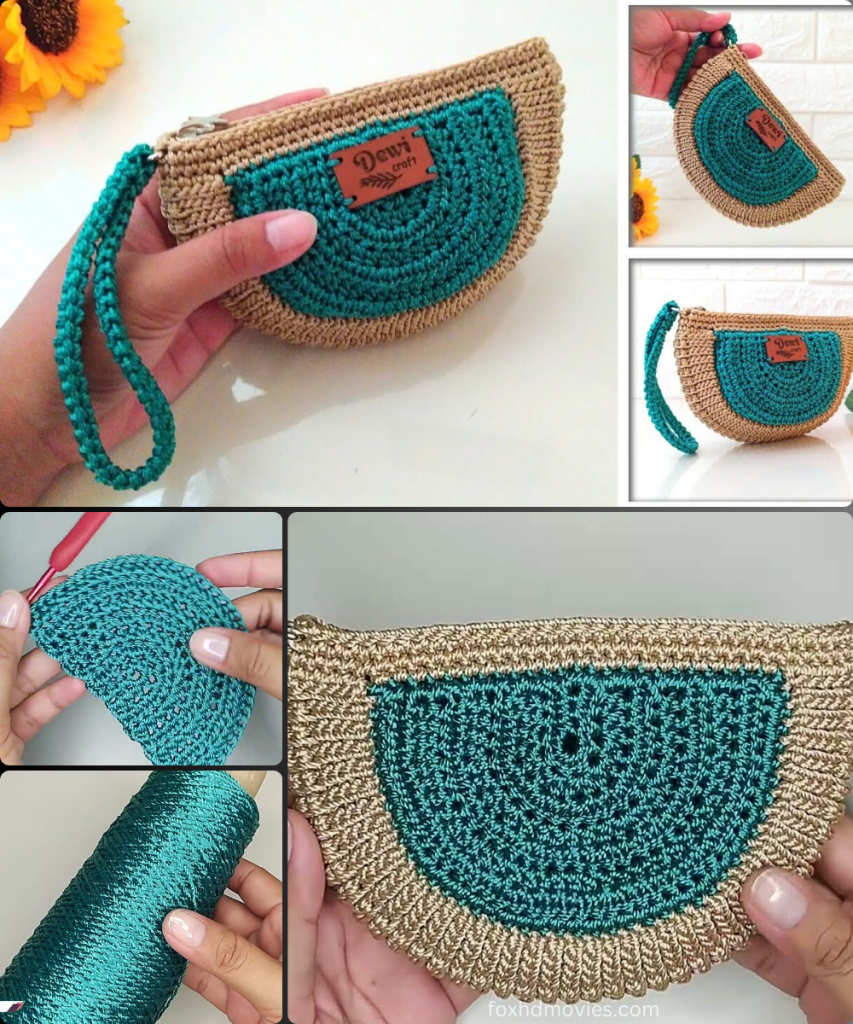
Create your own chic and practical mini wallet with this fantastic crochet pattern! Inspired by a detailed tutorial, this design guides you through crafting a compact yet spacious accessory, perfect for keeping your cards, cash, and small essentials organized. The pattern uses an oval base for a unique shape and a textured side panel for added durability.
Skill Level: Intermediate
Finished Size (Approximate):
- Approximately 6 inches (15 cm) long x 4.3 inches (11 cm) high
- Size can vary based on yarn, hook, and tension.
Materials You’ll Need:
- Yarn: Approximately 65 grams of yarn. The video uses nylon yarn, but you can also use other durable yarns like:
- Cotton/Polyester Blend: For a sturdy, structured finish.
- Fingering/Sock Weight Yarn: Use two strands held together for added durability.
- A smooth, firm yarn is best for a wallet to prevent stretching.
- Crochet Hook: 4.0 mm (G/6) crochet hook.
- Choose a hook size that creates a very firm, dense fabric with no gaps. This is crucial for a durable wallet.
- Tapestry Needle: For weaving in ends and seaming.
- Scissors
- D-Ring: One D-ring for a strap.
- Stitch Markers (Optional): To mark the beginning of rounds.
- Zipper & Fabric (Optional): For a separate lining and zipper closure, as mentioned in the video.
Gauge (Crucial for Wallet Structure!):
Achieving a very firm, dense fabric is crucial for this wallet to hold its shape and be durable. Work a swatch to ensure your stitches are tight with no visible gaps. If your fabric is too loose, go down a hook size.
Abbreviations (US Crochet Terms):
- ch: chain
- sl st: slip stitch
- sc: single crochet
- hdc: half double crochet
- inc: increase (2 hdc in the same stitch)
- st(s): stitch(es)
- FO: Fasten off
- BLO: Back Loop Only
Let’s Crochet Your Stylish Oval Mini Wallet!
This wallet is constructed by creating two identical oval panels and then joining them with a separate strap for the sides.
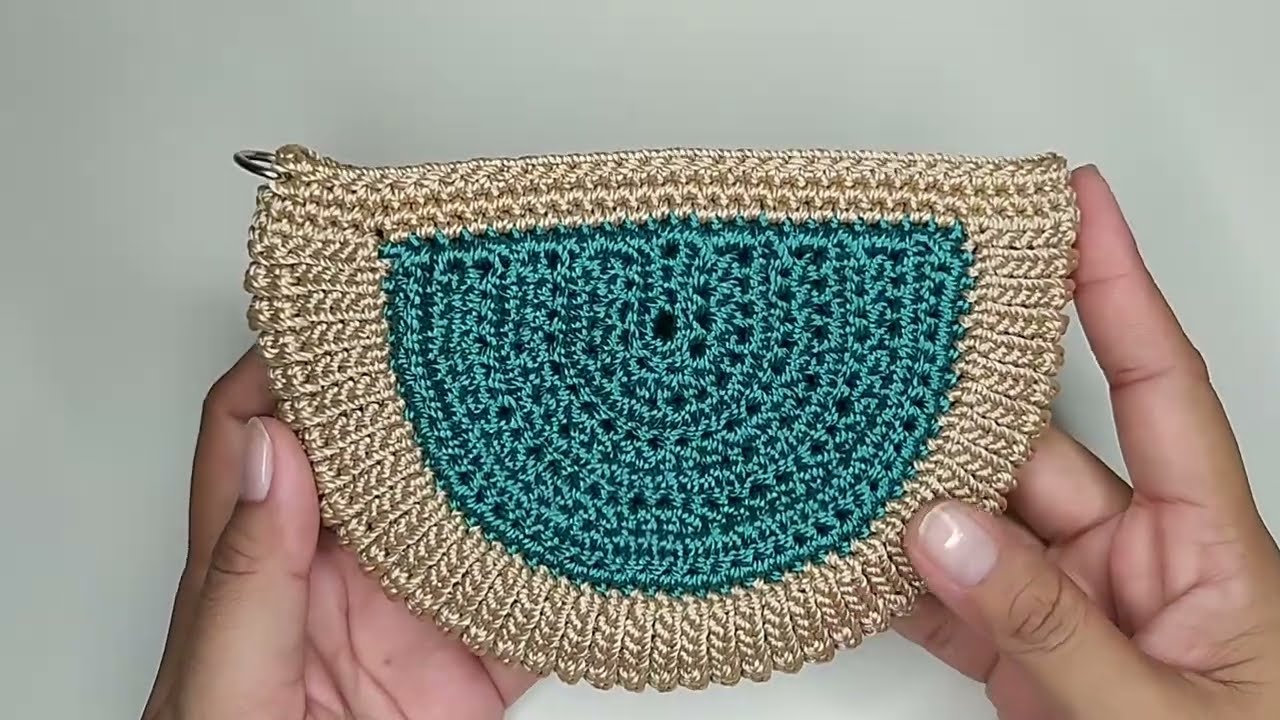
Part 1: The Wallet Panels (Make 2 – Main Yarn Color)
These two panels form the front and back of your wallet.

- Ch 16. (Adjust this chain length for a longer or shorter wallet. The final length is 15 cm).
- Round 1: Hdc in 2nd ch from hook. Hdc in next 13 ch. 5 hdc in last ch.
- Now working on the opposite side of the chain: Hdc in next 13 ch. 4 hdc in last ch. Join with a sl st to the first hdc. (36 hdc)
- Round 2: Ch 1 (does not count as a st). Inc in first st. Hdc in next 13 sts. Inc in next 5 sts. Hdc in next 13 sts. Inc in last 4 sts. Join with a sl st to the first hdc. (46 hdc)
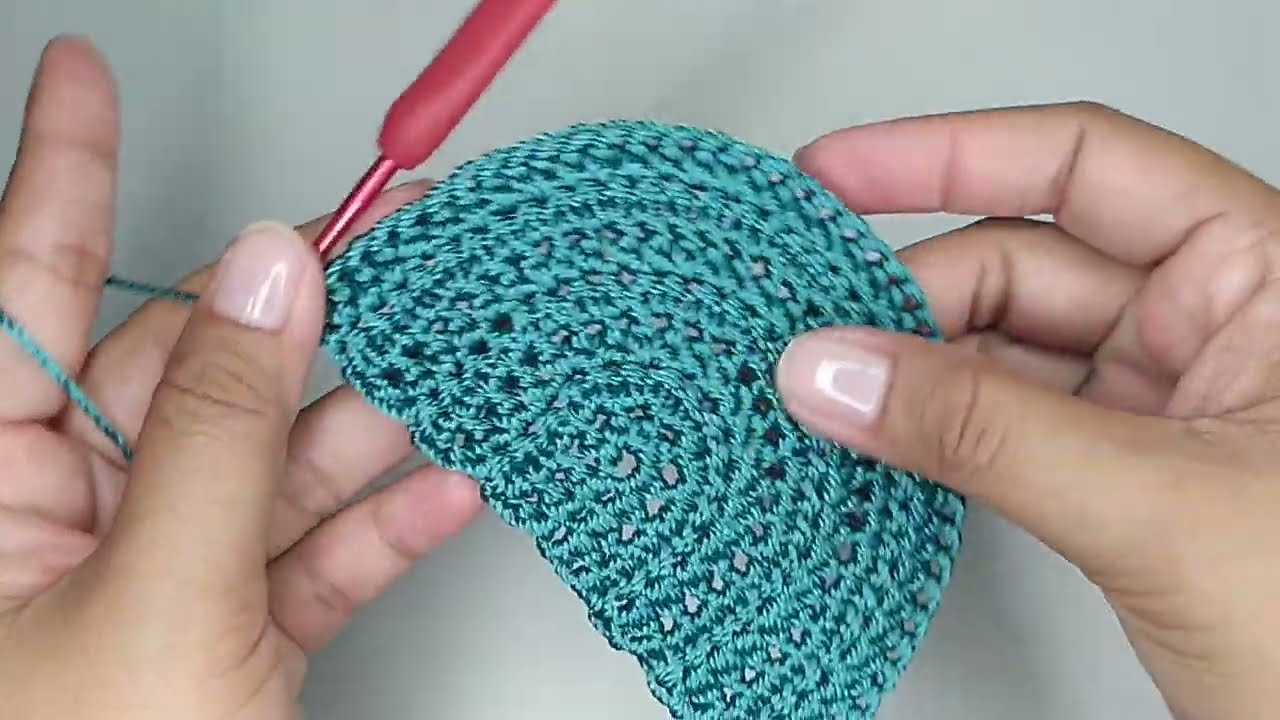
- This creates the oval shape. The video continues with increases in each round to gradually widen the base. Continue increasing until your piece reaches the desired size.
- Final Round (Edging): Ch 1 (does not count as a st). Sc in each hdc around. Join with a sl st to the first sc.
- This final round of sc creates a neat, firm edge for joining.
FO, leaving a very long tail on one of the panels for seaming.
Part 2: Joining the Panels & Creating the Sides
The video uses a different colored yarn and a pattern of slip stitches and single crochets to create the sides of the wallet.
- Take your two finished oval panels. Place them with wrong sides facing each other.
- Attach a new yarn color to one corner of the wallet with a sl st.
- Joining Row: Ch 1. Work a repeating pattern of sl st and sc to join the two panels together, working through the sc stitches of both panels.
- The video shows a textured side created by this alternating pattern. A simple single crochet seam would also work well if you prefer a less textured look.
- Seam the Sides: Continue this joining row around the two panels, leaving a portion of the top edge open for the wallet opening.
Part 3: The Strap
The video demonstrates how to crochet a strap for the wallet.
- Ch 60-70. (This will create a strap approximately 26 cm long).
- Row 1: Sc in 2nd ch from hook and in each ch across. Ch 1, turn.
- Row 2 – 3 (or desired width): Sc in each sc across. Ch 1, turn.
- FO, leaving a long tail for seaming.
Part 4: Adding Accessories & Finishing Touches
- Attach D-Ring:
- Using a new piece of yarn and your tapestry needle, securely sew the D-ring to one side of the wallet, near the top opening.
- Attach Strap:
- Use the long tail from the strap to sew it securely to the D-ring.
- Lining & Zipper (Optional):
- The video mentions a separate tutorial for this. If you wish to add a lining, you can cut fabric to the dimensions of the wallet panels and side, sew them together, and then hand-sew the lining into the finished crochet wallet, along with a zipper.
- Weave in all ends: Use your tapestry needle to neatly weave in any remaining loose yarn tails.
- Shape: Gently shape your wallet, ensuring all seams are neat and the structure is firm.
Video tutorial
Versatile Uses for Your Crocheted Mini Wallet:
- Everyday Wallet: Perfect for carrying your essential cards, cash, and ID.
- Coin Purse: Ideal for loose change.
- Small Pouch: Use for earbuds, lip balm, or other small items.
- Gift: A thoughtful and impressive handmade gift for friends or family.
Customization & Tips:
- Yarn Choice: Experiment with different colors or striped patterns for the wallet.
- Size Adjustment:
- Larger Wallet: Increase the initial chain count for the main panels and the number of increase rounds.
- Smaller Wallet: Decrease the initial chain count for the main panels and the number of increase rounds.
- Closure: If you don’t want a zipper, you can add a snap or button and loop closure to the top opening.
- Strap Style: You can make a longer strap for a crossbody wallet, or a different style of strap (e.g., a simple crocheted chain) if you prefer.
Enjoy crocheting your own beautiful, practical, and unique mini wallet! It’s a fantastic way to create a personalized accessory that’s sure to become a favorite.