 by
by Hello, quick-crafting friends!

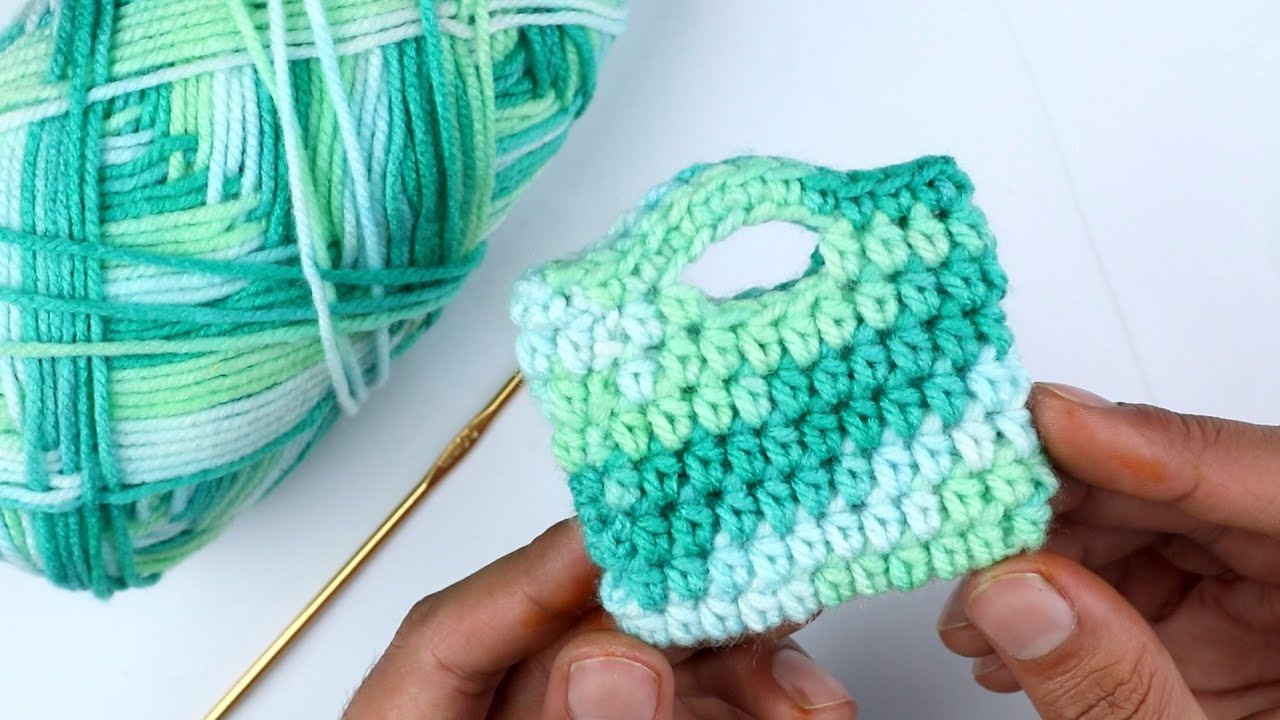
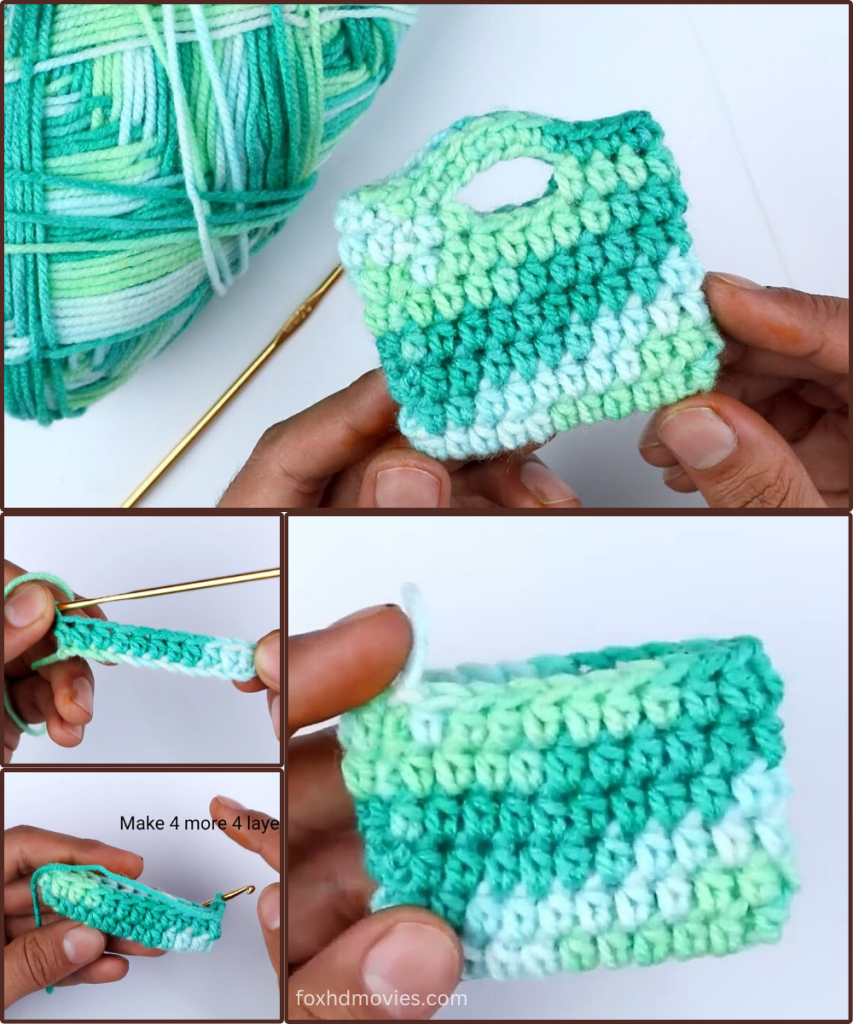
Ever need a tiny, adorable bag for a special little gift, or perhaps a miniature project bag for your yarn scraps? Today, we’re making the delightful “Little Swirl” Mini Tote! This charming bag, as seen in the image, is made with simple stitches and features a beautiful variegated yarn that creates its own mesmerizing color swirls. It’s incredibly fast to whip up and perfect for beginners!
This pattern is a fantastic way to use up those smaller skeins of yarn or explore the beauty of self-striping and variegated yarns. The integrated handles are neat and sturdy, making this mini tote both functional and incredibly sweet.
Ready to create a little bag that packs a lot of charm? Let’s grab our yarn and hooks!
What you’ll need:
- Yarn: A Worsted weight (Aran/10-ply) or DK (light worsted) variegated yarn. The sample in the image uses a beautiful mix of greens and blues, which works perfectly. You’ll need about 20-30 yards for one bag.
- Crochet Hook: A hook size appropriate for your chosen yarn. For worsted weight yarn, a 4.0mm (G/6) or 4.5mm (7) hook would be suitable. For DK, a 3.5mm (E/4) or 4.0mm (G/6) hook. (The hook in the image looks like it could be a 4.0mm or 4.5mm).
- Scissors
- Tapestry Needle (for weaving in ends)
- Stitch Marker (optional, but helpful for working in rounds)
Abbreviations (US Terms):
- ch: chain
- st(s): stitch(es)
- sl st: slip stitch
- sc: single crochet
- hdc: half double crochet
- inc: increase (work 2 sts in the same st)
- sk: skip
- rep: repeat
The “Little Swirl” Mini Tote Pattern (Make 1)
We’ll start by creating the base, then work up the sides, and finally form the integrated handles. This pattern is worked in continuous rounds unless specified.
Part 1: The Base (Worked in continuous spiral rounds)
Use a stitch marker to mark the first stitch of each round if you’re working in a spiral.
- Ch 11.
- Round 1: Sc in the 2nd ch from hook. Sc in the next 8 ch. 3 sc in the last ch. (Now working along the opposite side of the chain) Sc in the next 8 ch. 2 sc in the last ch (the very first chain you worked into). (22 sc total).
- You’ve formed an oval base. Do not join with a sl st; continue to the next round.
- Round 2: Inc in the first st. Sc in the next 8 sts. Inc in the next 3 sts. Sc in the next 8 sts. Inc in the last 2 sts. (28 sc total).
- Move your stitch marker to the new first stitch of each round.
- Round 3: Sc in the first st. Inc in the next st. Sc in the next 9 sts. Inc in the next 2 sts. Sc in the next 9 sts. Inc in the next st. (32 sc total).
- Your base is now complete. For a very neat bottom edge, you can work the first round of the bag body into the back loops of this round.
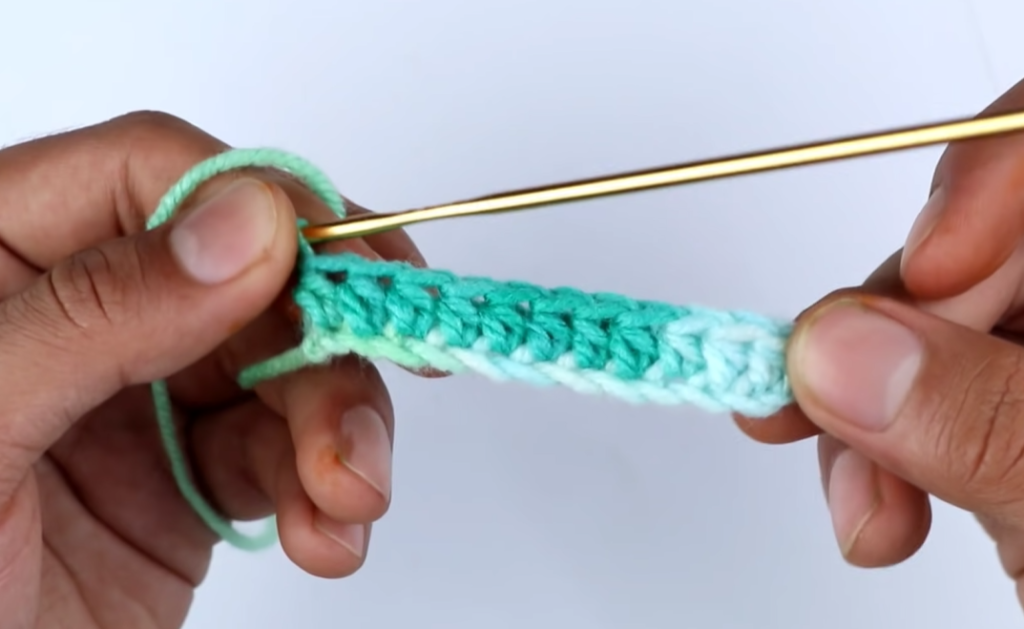
Part 2: The Bag Body (Worked in continuous spiral rounds)
- Round 4 (Creating the Side Wall): Sc in the BLO (back loop only) of each sc around. (32 sc).
- Working in the back loop here helps create a defined corner for the bottom of the bag.
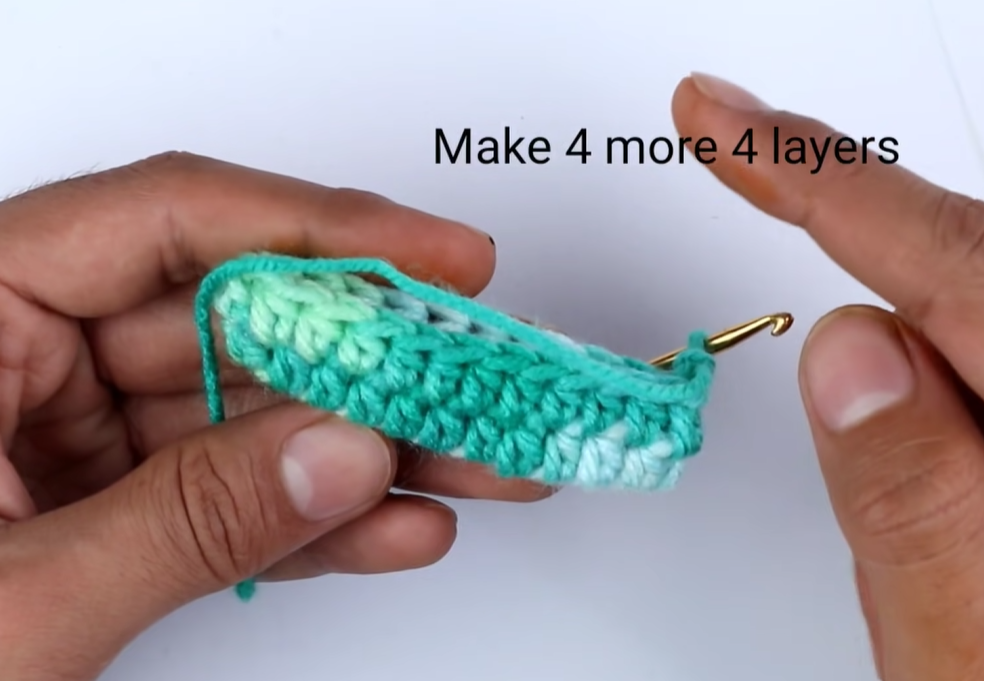
- Rounds 5-10: Sc in each sc around. (32 sc).
- Continue working rounds of single crochet until your bag reaches the desired height before the handles. The image shows about 6 rounds of straight single crochet after the base.
Part 3: The Handles
We’ll now create the openings for the handles. This part is worked in two separate sections for each handle, then joined.
- Round 11 (Handle Openings):
- Sc in the next 6 sts.
- Ch 4 (this creates the first part of your handle opening). Sk next 4 sts.
- Sc in the next 12 sts.
- Ch 4 (this creates the second part of your handle opening). Sk next 4 sts.
- Sc in the remaining 6 sts. (24 sc, 2 ch-4 spaces).
- This round should end roughly where your stitch marker was, creating two gaps for the handles.
- Round 12 (Forming the Handles):
- Sl st to the first sc of the round. Ch 1.
- Sc in the next 6 sc.
- Sc 5 times around the ch-4 space (working into the chain itself, not into individual chains).
- Sc in the next 12 sc.
- Sc 5 times around the next ch-4 space.
- Sc in the remaining 6 sc. Sl st to the first sc to join. (34 sc).
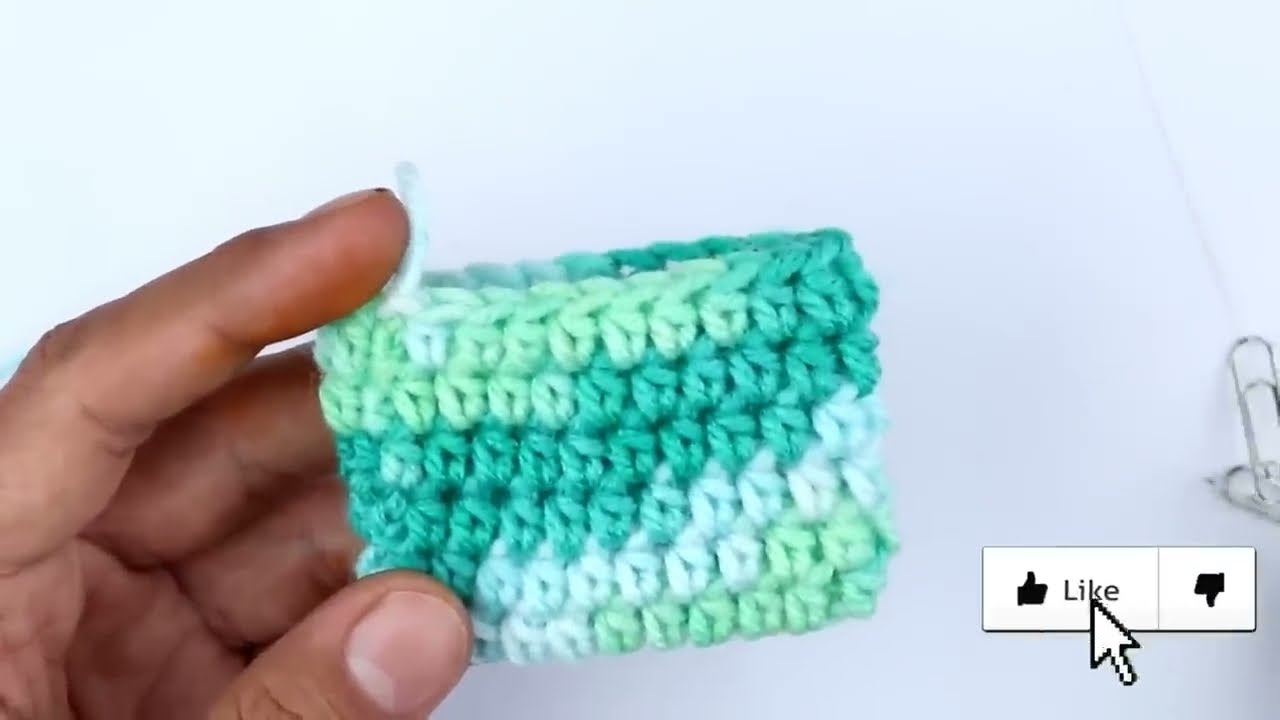
- You’ve now created the top edge of the bag with two formed handle loops.
- Round 13 (Handle Firming): Ch 1. Sc in each sc around. Sl st to the first sc to join. (34 sc).
- This final round helps to firm up the handles and give a neat finish to the top edge.
Finishing:
- Fasten off, leaving a tail of about 6 inches.
- Weave in all loose ends securely using your tapestry needle.
Video tutorial
Tips for Your “Little Swirl” Mini Tote:
- Yarn Magic: Variegated yarns are your best friend for this project! Let the yarn do the colorwork for you. Solid colors would also look lovely, but the “swirl” comes from the yarn itself.
- Stitch Consistency: Try to keep your single crochet stitches consistent in tension for an even fabric. This is especially important for the handles.
- Handle Adjustments: Want bigger handles? Increase the number of chains in Round 11 (e.g., ch 5 or 6). Remember to then crochet the corresponding number of sc stitches around those chains in Round 12.
- Uses for Your Mini Tote:
- A cute little gift bag for jewelry, candy, or small toys.
- A handy coin purse.
- A holder for earbuds or charging cables.
- An adorable prop for doll play.
- A tiny project bag for your crochet notions (stitch markers, tiny scissors!).
This “Little Swirl” Mini Tote is a testament to how simple stitches and beautiful yarn can create something truly charming. Enjoy making these quick and adorable bags!
Happy Crocheting!