by
by 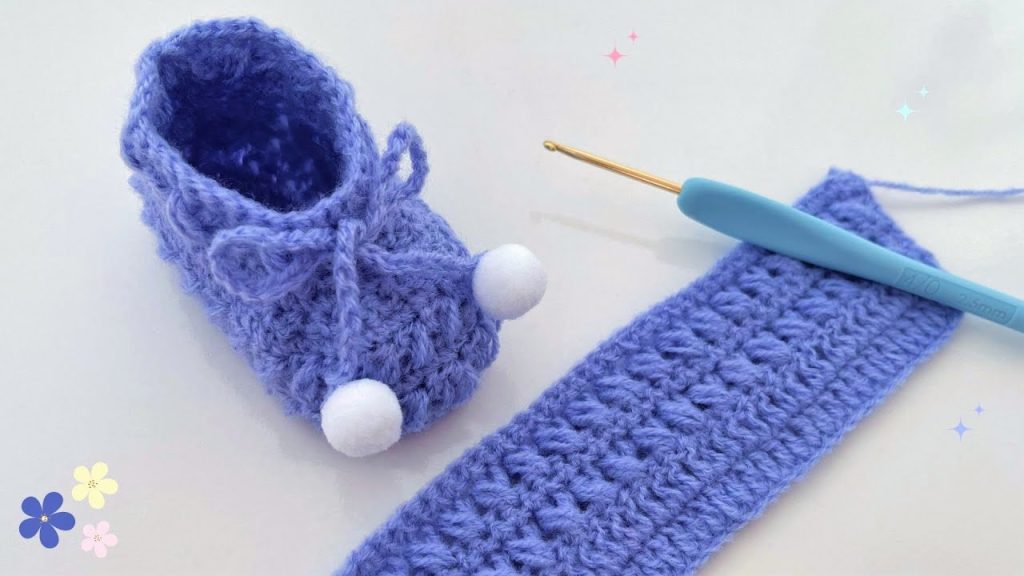
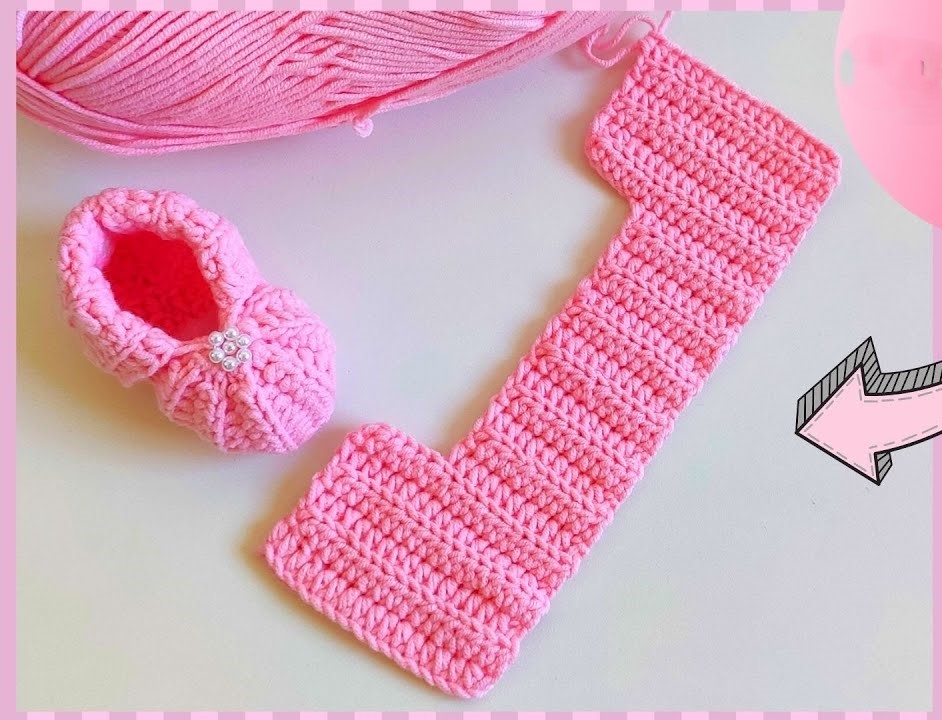
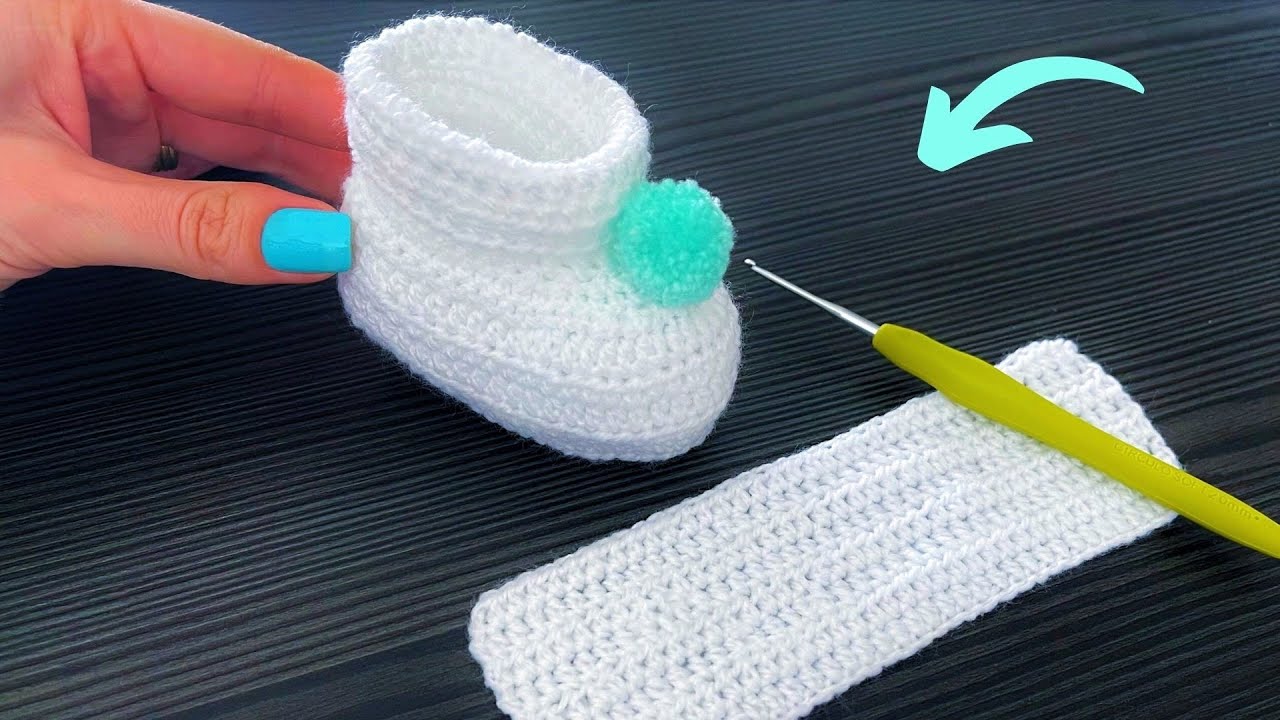
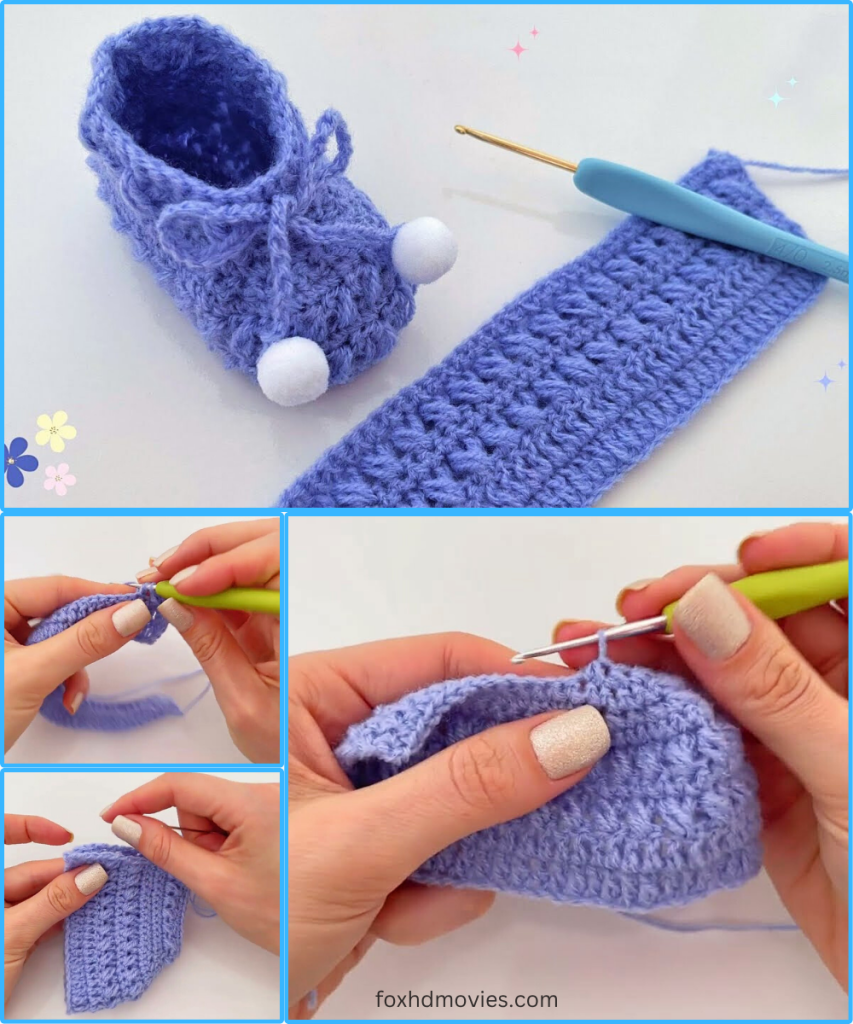
Hello, wonderful makers! Get ready to crochet the cutest little booties that are sure to bring smiles. This time, we’re making a sweet pair of baby booties in a lovely shade of lavender, complete with charming ties and delightful bobble accents on the toes! These are perfect for keeping tiny feet warm and make an incredibly thoughtful handmade gift.
The main body of the bootie features a beautiful, textured stitch that gives it a cozy, squishy feel. The accompanying swatch clearly demonstrates this stitch, which appears to be a variation of the double crochet or half double crochet worked in a way that creates a raised, almost basket-weave like texture. We’ll aim to capture that unique look!
Materials You’ll Need:
- Yarn: DK weight (Light Worsted / 8 ply) yarn in your desired color (lavender shown). (Approx. 50-70g per pair, depending on size).
- Crochet Hook: 3.5mm (E/4) or 4.0mm (G/6) – choose the hook size that gives you a nice, even fabric with your chosen yarn. The hook in the picture appears to be a 2.5mm, but for DK yarn, a 3.5mm or 4.0mm is generally more suitable to achieve a soft fabric. If you use a 2.5mm, your booties will be very small.
- Small Pompoms: Two small white pompoms (store-bought or handmade) for the toes.
- Yarn Needle: For weaving in ends and attaching pompoms (if handmade).
- Scissors
- Stitch Markers (optional, but helpful for working in rounds)
Abbreviations Used:
- ch: chain
- sl st: slip stitch
- sc: single crochet
- hdc: half double crochet
- dc: double crochet
- inc: increase (2 stitches in the same stitch)
- dc2tog: double crochet 2 together (decrease)
- FPdc: front post double crochet
- BPdc: back post double crochet
- st(s): stitch(es)
- FO: fasten off
Gauge (Approximate):
While not strictly necessary for this project, achieving a similar gauge will help ensure your booties are roughly the same size as the pattern. 16 dc x 10 rows = 4 inches (10 cm)
Pattern: Adorable Bobble-Toe Baby Booties
These booties are worked from the sole up. The pattern is for approximately 0-3 months, with notes on how to adjust for slightly larger sizes.
Finished Sole Length (approx): 3.5 – 4 inches (9-10 cm)
Part 1: The Sole (Make 2)
We’ll start by creating an oval sole.
Row 1: Ch 12. Row 2: 2 hdc in 2nd ch from hook, hdc in next 9 ch, 6 hdc in last ch. Working along the other side of the starting chain: hdc in next 9 ch, 2 hdc in last ch. Join with a sl st to the top of the first hdc. (28 hdc) Row 3: Ch 1. Inc in first 2 hdc, hdc in next 9 hdc, inc in next 6 hdc, hdc in next 9 hdc, inc in last 2 hdc. Join with a sl st to the top of the first hdc. (40 hdc) Row 4: Ch 1. Sc in first 2 hdc, inc in next 2 hdc, sc in next 9 hdc, (inc, sc) repeat 6 times, sc in next 9 hdc, inc in last 2 hdc. Join with a sl st to the top of the first sc. (52 sc)
- For a slightly larger sole (3-6 months): You can add an additional increase round (e.g., using hdc) after Row 4, ensuring increases are evenly distributed to maintain the oval shape.
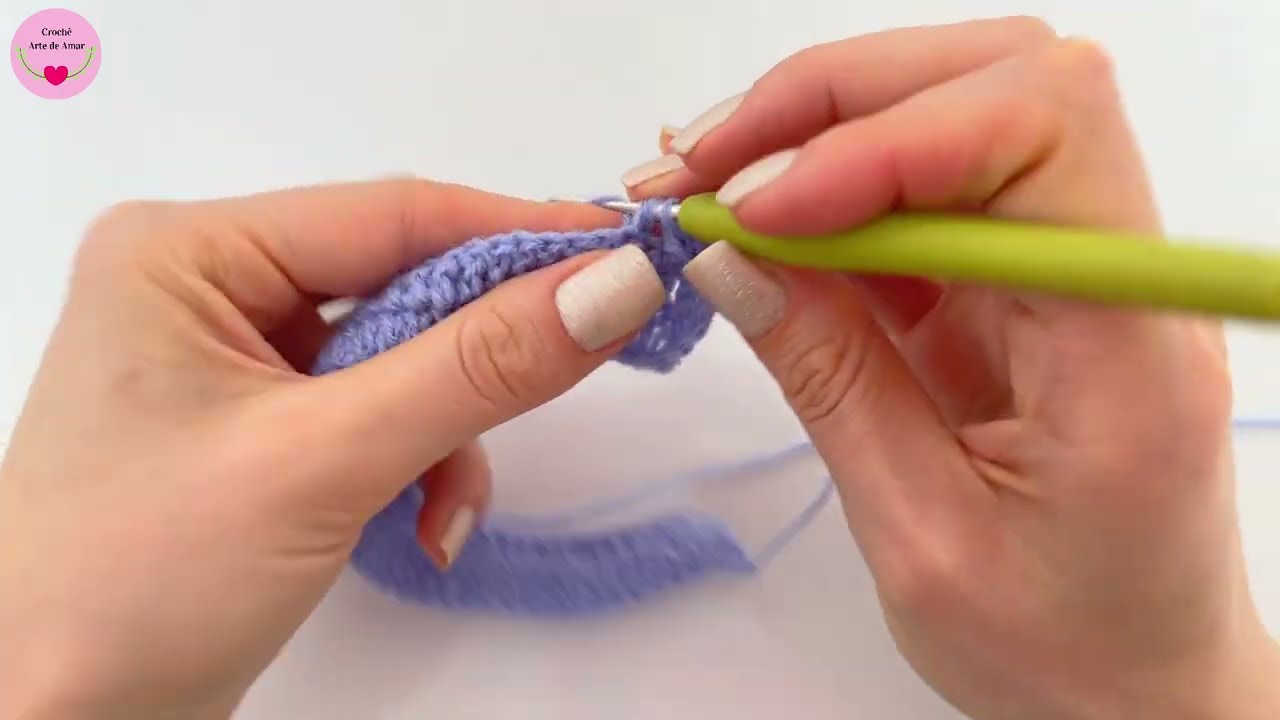
Part 2: Building the Sides with Texture
The main body of the bootie and the swatch show a beautiful textured stitch. This often involves alternating front post and back post stitches, or working into specific loops. Let’s try to achieve a similar look with a textured double crochet approach.
Round 5 (Base for Sides): Ch 1. Hdc in BLO around. Join with a sl st to the top of the first hdc. (52 hdc)
- Working in the BLO for this round creates a defined edge for the sole.
Round 6 (Textured Round 1): Ch 2 (counts as first dc). Dc in next st. FPdc around next st. Repeat from * to * around. End with a Dc in the last st. Join with a sl st to the top of the beginning ch 2. (52 sts – mix of dc and FPdc)
- Alternatively, you could try working alternating hdc in BLO and FLO as in the previous pattern if this doesn’t give the desired look.
Round 7 (Textured Round 2): Ch 2 (counts as first dc). BPdc around the next FPdc from the previous round. Dc in the next dc. Repeat from * to * around. Adjust last stitches to maintain pattern. Join with a sl st to the top of the beginning ch 2. (52 sts – mix of dc and BPdc)
Round 8: Repeat Round 6.
- You should have 3 rounds of textured stitches above the sole’s initial edge.
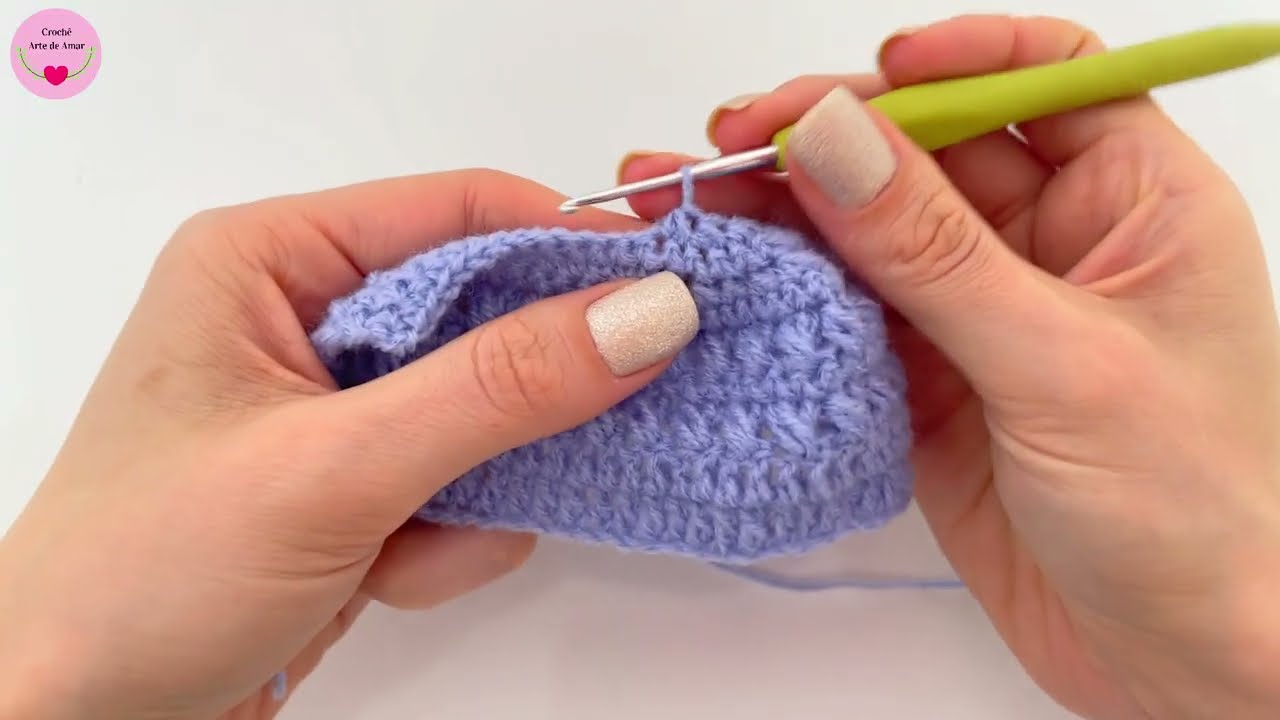
Part 3: Shaping the Toe & Ankle Tie Openings
Now we’ll decrease to form the toe and create gaps for the ankle tie.
Round 9: Ch 1. Hdc in next 16 hdc. (Hdc2tog) 10 times. Hdc in next 16 hdc. Join with a sl st to the top of the first hdc. (42 hdc)
Round 10: Ch 1. Hdc in next 12 hdc. (Hdc2tog) 9 times. Hdc in next 12 hdc. Join with a sl st to the top of the first hdc. (33 hdc)
Round 11: Ch 1. Sc in next 9 sc. (Sc2tog) 7 times. Sc in next 10 sc. Join with a sl st to the top of the first sc. (26 sc)
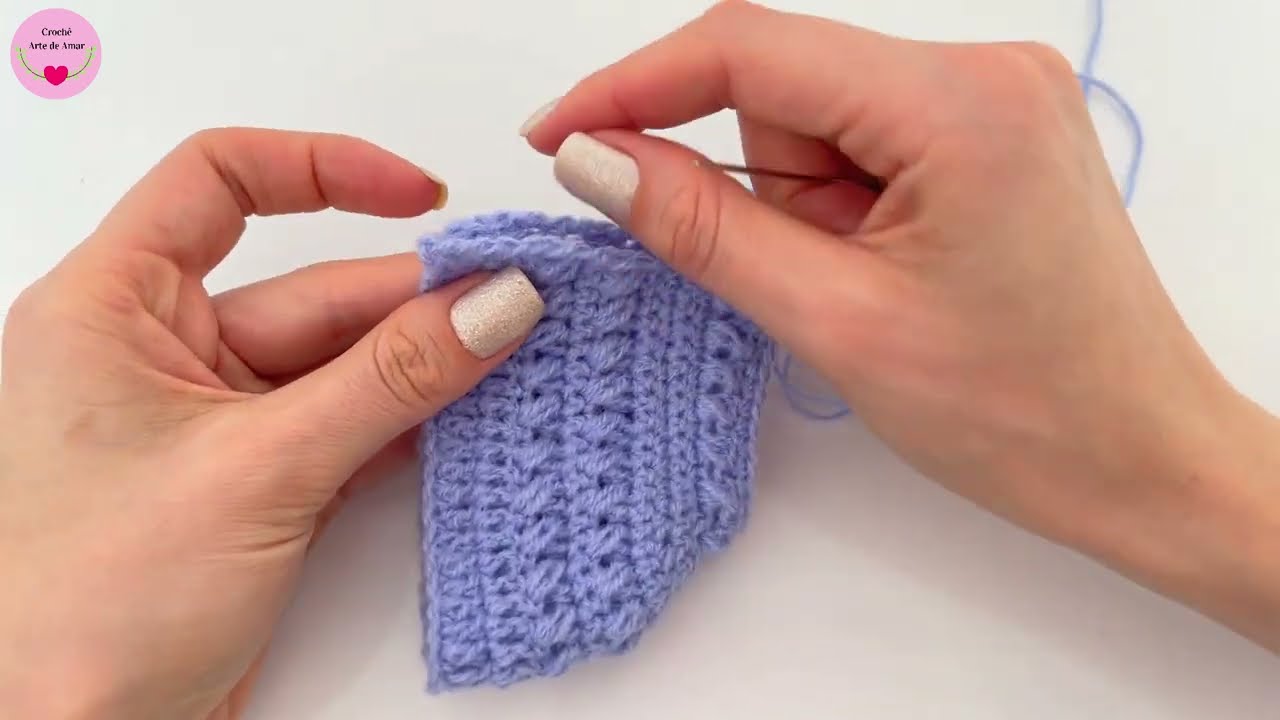
Round 12 (Eyelet Round for Tie): Ch 1. Sc in first 2 sc. Ch 1, skip 1 st, sc in next st. Repeat from * around until you have 2-3 sts left. Sc in remaining sts. Join with a sl st to the top of the first sc. (Approx. 26 sts/ch-1 spaces)
Round 13: Ch 1. Sc in each sc and in each ch-1 space around. Join with a sl st to the top of the first sc. (26 sc)
- This round creates a neat and firm finish for the top edge of the bootie.
FO and weave in all ends securely.
Part 4: The Ankle Tie (Make 2)
Tie: Ch 50-60 (or desired length). Sl st in 2nd ch from hook and in each ch across. FO.
- Weave this chain through the eyelet holes created in Round 12 of the bootie. Tie a bow at the front.
Part 5: Pom-Pom Embellishment (Make 2)
- Take your two small white pompoms. Using a yarn needle, securely attach one pompom to the very center of the toe of each bootie. Ensure they are firmly sewn on, especially if the booties are for an infant, to prevent them from becoming a choking hazard.
Video tutorial
Finishing Touches:
- Give your finished booties a gentle block if desired to even out stitches and perfect their shape.
- Tie the laces neatly at the front.
- Present them as a charming and cozy gift!
I hope you enjoy making these sweet Bobble-Toe Baby Booties! Don’t forget to share your finished projects – I’d love to see them. Happy crocheting!