 by
by 
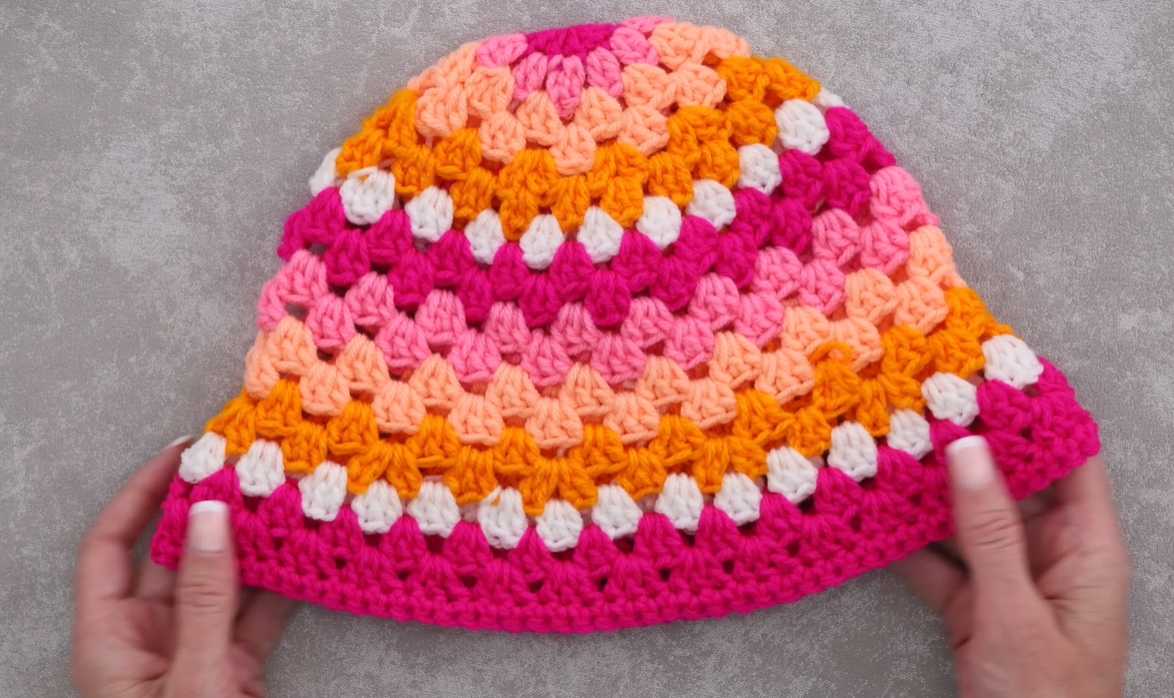
Hello, vibrant yarn lovers! Ready to add a splash of playful color to your accessories? This stunning granny-square style bucket hat, with its delightful gradient of pinks and oranges punctuated by crisp white, is an absolute showstopper! It’s the perfect project to bring a touch of handmade joy to your summer wardrobe or any day that needs a boost of cheer.
If you love the classic granny stitch and enjoy working with multiple colors, this pattern is for you. It’s a fantastic way to practice color changes and create a truly unique, eye-catching hat. Let’s get our hooks ready and dive into this colorful creation!
Skill Level: Easy to Intermediate (familiarity with basic crochet stitches and granny clusters is helpful)
Materials You’ll Need:
- Yarn: Approximately 100-150 grams total of sport, DK, or light worsted weight cotton yarn. Cotton is highly recommended for breathability and shape retention in a hat.
- Color A: Bright Pink (for brim and accents)
- Color B: Hot Pink/Fuchsia
- Color C: Orange
- Color D: Peach/Light Orange
- Color E: White (for connecting squares)
- (Adjust quantities based on your desired color blocking and hat size. You’ll likely use more of the brim color.)
- Crochet Hook: 3.5mm – 4.0mm (or hook size appropriate for your chosen yarn to achieve a nice drape but still hold shape).
- Stitch Marker: Helpful for marking the beginning of rounds.
- Yarn Needle: For weaving in ends.
- Scissors
Abbreviations Used:
- ch: chain
- sl st: slip stitch
- sc: single crochet
- dc: double crochet
- sp: space
- ch-sp: chain space
- cluster (granny cluster): 3 dc in the same stitch/space
- FO: fasten off
Gauge: Not critical for this project, but aiming for a fabric that holds its shape without being too stiff or too floppy. The top of the hat should lay relatively flat before you stop increasing.
Pattern Notes:
- This hat is worked from the top down.
- Color changes happen at the end of each round. You’ll join, then FO and join the new color in the specified stitch/space.
- The hat size provided is for an average adult head (approx. 21-22 inches circumference). Adjust the number of increase rounds in the top for different sizes.
- The “granny stitch” is formed by clusters of 3 DC, often separated by chain spaces.
- Color Progression (suggested): Start with lighter colors for the crown (Peach/Orange/Hot Pink) and transition to brighter/darker colors (Hot Pink/Bright Pink) for the body and brim, with White used for connecting rows throughout.
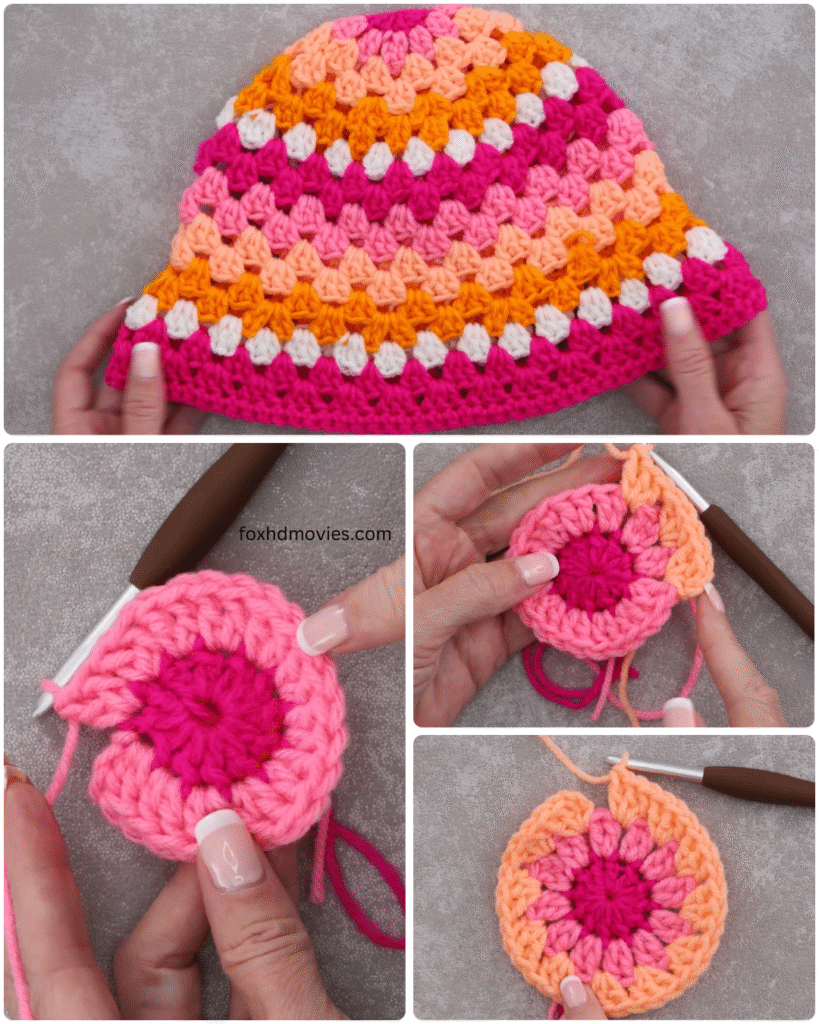
Part 1: The Top of the Hat (Crown)
We start by creating a flat circle for the top of the hat using alternating colors.
With Color D (Peach/Light Orange) or your lightest color:
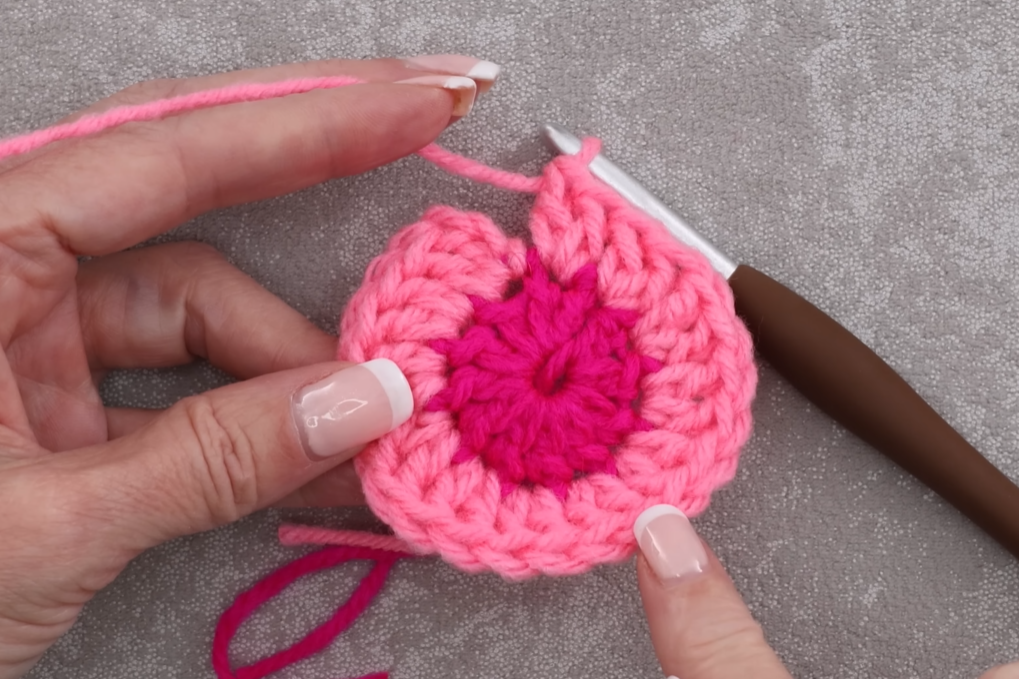
Round 1: Start with a magic ring. Ch 2 (does not count as dc), make 12 dc in the ring. Join with a sl st to the top of the first dc. FO Color D. (12 dc)
With Color E (White):
Round 2: Join Color E in any space between two dc from the previous round. Ch 2, (cluster in same sp, ch 1) around (12 clusters). Join with a sl st to the top of the first dc of the round. FO Color E. (12 clusters, 12 ch-1 sps)
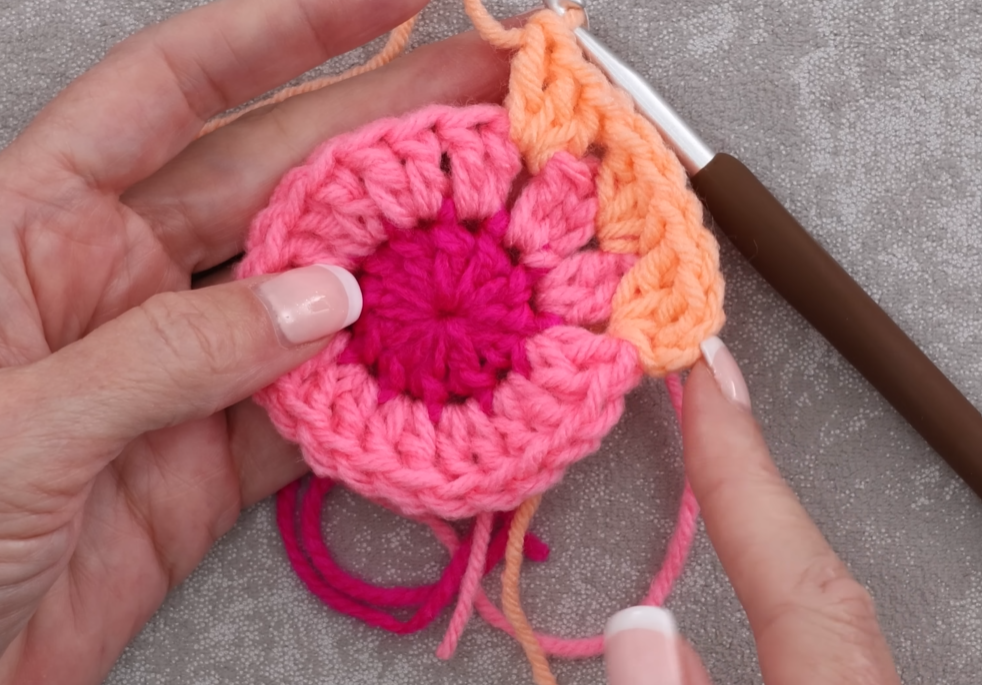
With Color C (Orange):
Round 3: Join Color C in any ch-1 sp. Ch 2, cluster in same sp. Ch 1. (Cluster, Ch 1) in next ch-1 sp. (Cluster, Ch 1, Cluster, Ch 1) in the following ch-1 sp (this effectively puts 2 clusters in every other ch-1 space for increases, separated by a ch 1). Repeat around, alternating between one cluster and two clusters per ch-1 sp (separated by ch 1) to evenly increase. You should have 24 clusters. Join with sl st. FO Color C. (24 clusters)
With Color E (White):
Round 4: Join Color E in any ch-1 sp. Ch 2, *(cluster in next ch-1 sp, ch 1). Repeat from * around, making sure to work 2 clusters (separated by a ch 1) in every 3rd or 4th ch-1 space to keep the circle flat and increasing. Join with sl st. FO Color E. (e.g., 30 clusters)
With Color B (Hot Pink/Fuchsia):
Round 5: Join Color B in any ch-1 sp. Ch 2, *(cluster in next ch-1 sp, ch 1). Repeat from * around, continuing to make increases as needed to keep the circle flat. Join with sl st. FO Color B. (e.g., 36 clusters)
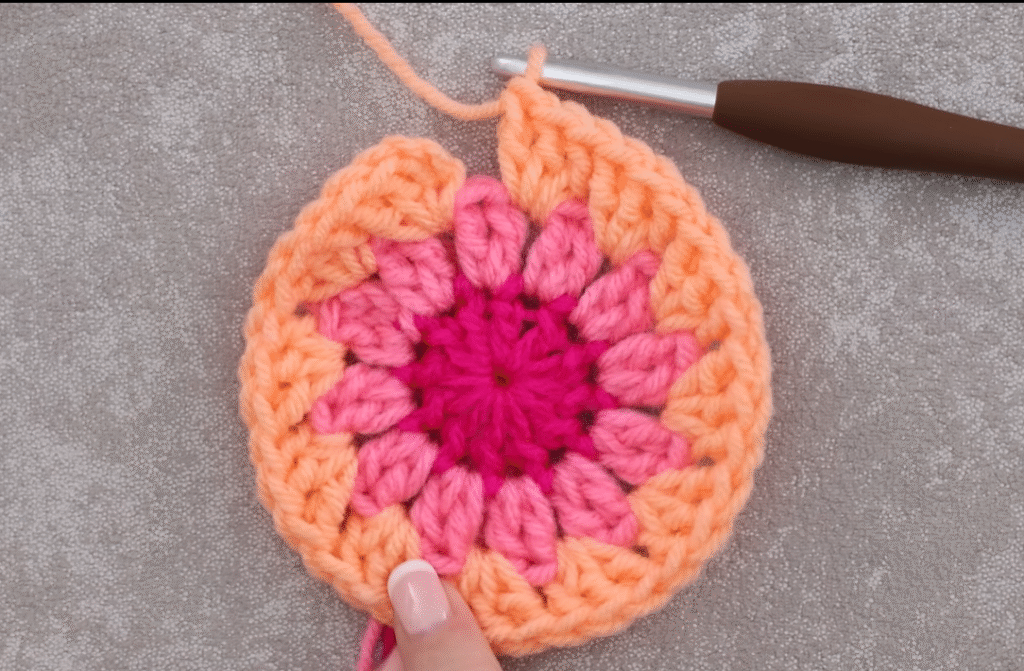
Continue increasing rounds in this manner (adding roughly 6 clusters per round, or more generally, ensuring the circle lies flat) until the circle measures about 6-7 inches (15-18 cm) in diameter. This will be the top of your hat. The photo suggests about 5-6 increase rounds for the crown.
Part 2: The Sides of the Hat (Body)
Once your crown is the desired diameter, we stop increasing to create the straight sides of the hat.
Continue alternating colors for each round, following your desired ombre progression. The photo shows a progression from Hot Pink/Fuchsia into Bright Pink for the body.
Round (e.g., 6): Join new color (e.g., Color E – White) in any ch-1 sp. Ch 2, cluster in same sp. Ch 1. *(Cluster in next ch-1 sp, ch 1). Repeat from * around. Do NOT make any increases in this round or subsequent body rounds. Join with sl st. FO.
Repeat this “no increase” round until the hat body reaches just above your ears, or your desired depth before the brim starts to flare. The hat in the photo looks like it has about 4-5 “no increase” rounds for the body, with white separating the main colors.
Part 3: The Brim
Now we’ll work on the brim, which will gently flare out. The photo shows the brim starting with Hot Pink/Fuchsia and ending with Bright Pink.
Continue alternating colors as per your ombre plan.
Brim Round 1 (Increase Round – Hot Pink/Fuchsia): Join Color B (Hot Pink/Fuchsia) in any ch-1 sp. Ch 2, *(cluster in same sp, ch 1, cluster in next ch-1 sp, ch 1). Repeat from * around. You’ll be making 2 clusters in some spaces (effectively increasing the total number of clusters by about 20-30% in this round). This helps the brim flare. Join with sl st. FO.
Brim Round 2 (No Increase – White): Join Color E (White) in any ch-1 sp. Ch 2, *(cluster in next ch-1 sp, ch 1). Repeat from * around. Join with sl st. FO.
Brim Round 3 (Increase Round – Bright Pink): Join Color A (Bright Pink) in any ch-1 sp. Ch 2, *(cluster in same sp, ch 1, cluster in next ch-1 sp, ch 1). Repeat from * around, ensuring the brim continues to gently flare. Adjust increases as needed. Join with sl st. FO.

Continue alternating increase and no-increase rounds, or adjust your increase frequency, until your brim is the desired width. The hat in the photo has about 3-4 rounds for the brim, with a final solid border.
Part 4: Final Border (Solid Color)
This gives the brim a neat and sturdy edge. The photo shows this in the Bright Pink color.
With Color A (Bright Pink):
Final Round 1: Join Color A in any stitch or ch-1 sp. Ch 1, sc in each dc and each ch-1 sp around. Join with a sl st to the first sc. (This will create a solid edge). Final Round 2: Ch 1, sc in each sc around. Join with a sl st to the first sc. FO, weave in all ends securely.
Video tutorial
Congratulations! You’ve just created your own cheerful and stylish Ombre Granny Bucket Hat! This hat is perfect for adding a pop of color to any outfit and is sure to bring a smile to your face.
Don’t forget to share your finished hat with me on social media! Tag me and use the hashtag #OmbreBucketHat. I can’t wait to see your vibrant creations!
Happy Crocheting!