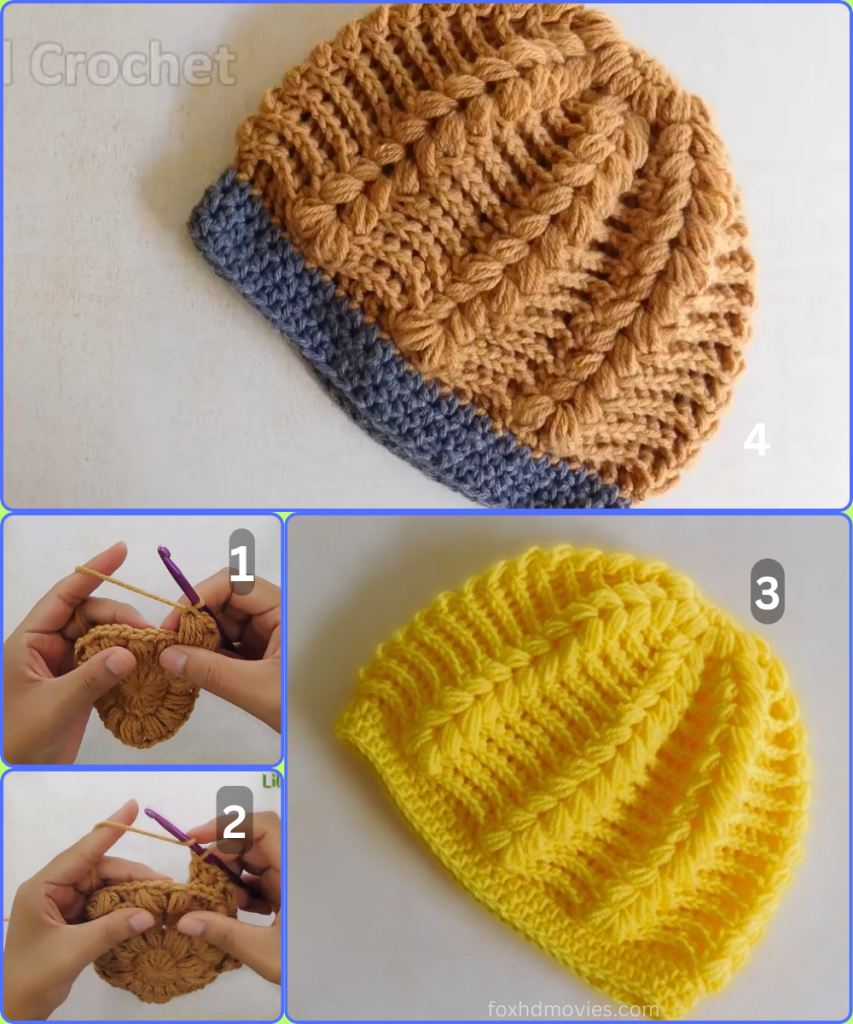
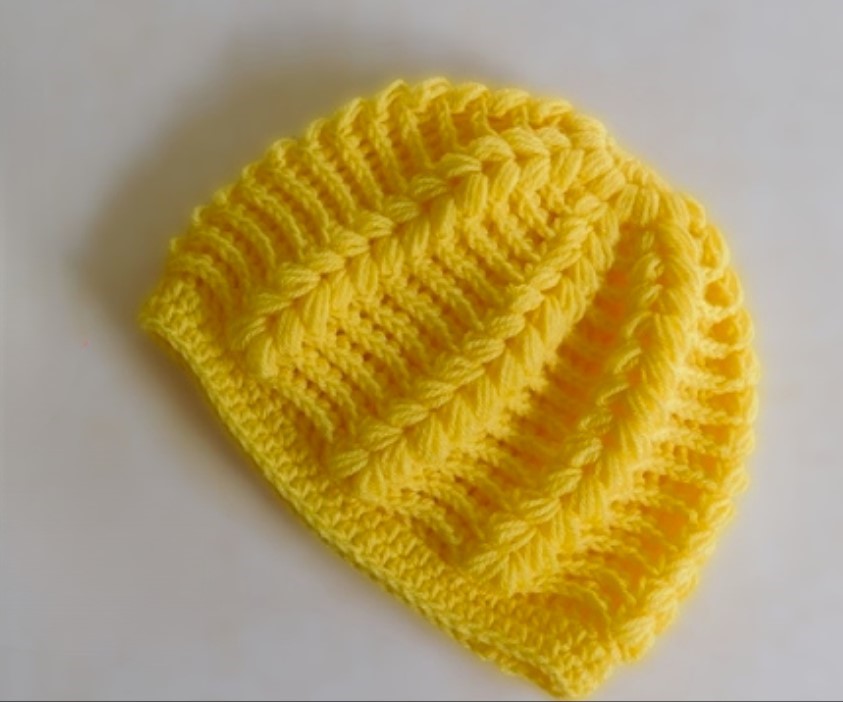
Welcome, crochet lovers, to a new and exciting project! This isn’t your average beanie. This “Braided Sunshine” hat features a stunning, intricate-looking braided texture that will make people wonder if it’s knit or crochet. But don’t let its appearance fool you—it’s made with a clever combination of post stitches and a simple cluster, and this detailed pattern will guide you through every single step.
The design features a classic ribbed brim for a snug fit and a striking textured body that creates beautiful, raised braids. This hat is not only warm and comfortable but also a true work of art.
Materials You’ll Need:
- Yarn: Approximately 150-200 yards of worsted weight (Category 4) yarn. A smooth, solid-colored yarn is best to show off the stitch definition.
- Crochet Hook: A size H/8 (5.00 mm) hook, or the size needed to obtain the correct gauge.
- Scissors
- Yarn Needle: For weaving in ends.
Abbreviations (US Terms):
- ch: chain
- sl st: slip stitch
- sc: single crochet
- hdc: half double crochet
- dc: double crochet
- st(s): stitch(es)
- BLO: back loop only
- Fpdc: front post double crochet
- fp tr: front post treble crochet
- rep: repeat
- Rnd: round
- 3-dc cluster: 3 double crochet cluster (explained below)
Special Stitches:
- 3-dc Cluster: Yarn over, insert hook into the indicated stitch or space, yarn over, pull up a loop, yarn over, and pull through 2 loops (2 loops on hook). Yarn over, insert hook into the same stitch/space, yarn over, pull up a loop, yarn over, and pull through 2 loops. Repeat from * to * one more time (4 loops on hook). Yarn over and pull through all 4 loops on the hook.
- Fpdc (Front Post Double Crochet): Yarn over, insert your hook from front to back around the post of the specified stitch, yarn over, pull up a loop, yarn over and pull through 2 loops, yarn over and pull through the remaining 2 loops.
Gauge:
- For the Brim: 10 sts and 10 rows of sl st BLO = 4 inches.
- For the Body: 16 sts and 8 rows of dc = 4 inches.
- The finished hat should have a circumference of approximately 20-22 inches and a height of about 9 inches.
Part 1: The Ribbed Brim
We will create the brim first, working in rows to create a ribbed texture, and then join it to form a circle.

Starting with your yarn and H/8 hook:
- Row 1: Ch 10. Hdc in the 2nd ch from the hook and in each ch across. Ch 1, turn. (9 hdc)
- Row 2: Sc in the BLO of the first st and in each st across. Ch 1, turn. (9 sc)
- Repeat Row 2 until the brim measures approximately 20 inches, or a length that fits snugly around your head without being too tight. This should be about 50-55 rows.
- Joining: Fold the brim in half, bringing the two short ends together. Sl st through the BLO of the last row and the beginning chain of the first row to join them. Do not fasten off.
Part 2: The Body of the Hat
Now we will build the body of the hat, working in the round.

- Round 1: Ch 2 (does not count as a st). Work 70 dc evenly around the top edge of the brim. Join with a sl st to the first dc. (70 dc)
- Round 2: Ch 2 (does not count as a st). Dc in each st around. Join with a sl st to the first dc. (70 dc)
- Round 3 (The Braided Pattern): Ch 2. Dc in the first 2 sts. fp tr around the post of the 3rd st. Dc in the next 2 sts, fp tr around the post of the 6th st. Rep from * to * around. Join with a sl st to the first dc. (24 fp tr, 48 dc)
- Round 4: Ch 2. Dc in the first 2 sts. fp tr around the post of the fp tr from the previous round. Dc in the next 2 sts, fp tr around the post of the fp tr from the previous round. Rep from * to * around. Join with a sl st to the first dc. (24 fp tr, 48 dc)
- Round 5 (Creating the Bobbles): Ch 1. 3-dc cluster in the first st. Sk 1 st. 3-dc cluster in the next st. Sk 1 st. [3-dc cluster in the next st, sk 1 st] two more times. Rep from * to * around. Join with a sl st to the first cluster. (24 clusters)
- Round 6: Ch 2. fp tr around the first cluster from the previous round. Dc in the next 2 sts, fp tr around the next cluster from the previous round. Rep from * to * around. Join with a sl st to the first fp tr. (24 fp tr, 48 dc)
- Round 7: Ch 2. Dc in the first 2 sts. fp tr around the post of the fp tr from the previous round. Dc in the next 2 sts, fp tr around the post of the fp tr from the previous round. Rep from * to * around. Join with a sl st to the first dc. (24 fp tr, 48 dc)
Repeat Rounds 5-7 two more times, or until the hat is about 7 inches high from the top of the brim.
Part 3: Shaping and Closing the Crown
Now we’ll decrease to close the top of the hat.
- Round 1 (Decrease): Ch 2. Dc2tog across the entire round. (24 dc)
- Round 2 (Decrease): Ch 2. Dc2tog across the entire round. (12 dc)
- Round 3 (Final Decrease): Ch 2. Dc2tog across the entire round. (6 dc)
Fasten off, leaving a long tail for seaming.
Part 4: Finishing Touches
- Thread your yarn needle with the long tail.
- Weave the needle in and out of the last 6 stitches.
- Pull the tail tightly to cinch the top of the hat closed.
- Create a secure knot on the inside of the hat and weave in all remaining ends.
Video tutorial
Your beautiful “Braided Sunshine” beanie is now complete! The texture of this hat is truly impressive and will make a wonderful addition to your handmade wardrobe. Enjoy wearing it on your next cold-weather outing, and be prepared for compliments!
