by
by 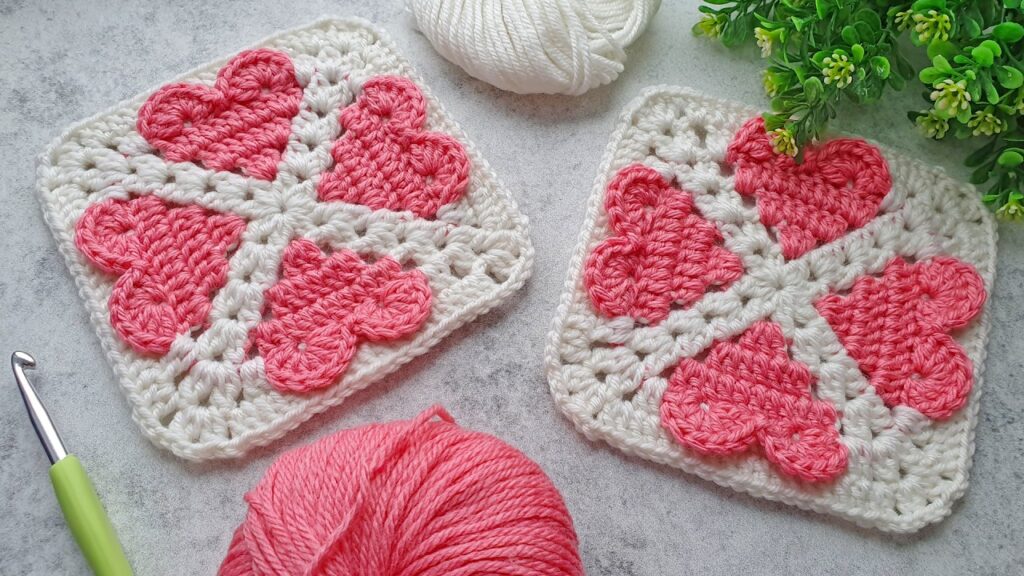
Looking for a sweet and versatile crochet motif? These heart granny squares are just the ticket! Perfect for blankets, bags, pillows, or even as individual coasters, they’re surprisingly simple to make and add a charming touch to any project.
In this tutorial, we’ll walk you through creating these lovely squares with a beautiful central heart design.
What You’ll Need:
- Yarn:
- Worsted weight yarn in two colors: one for the hearts (e.g., pink) and one for the background (e.g., white). A cotton or acrylic blend would work well.
- Crochet Hook:
- Appropriate size for your yarn (e.g., 4.0mm (G) or 5.0mm (H)). Check your yarn label for recommendations.
- Scissors
- Yarn Needle (for weaving in ends)
Abbreviations (US Terms):
- ch: chain
- sl st: slip stitch
- sc: single crochet
- hdc: half double crochet
- dc: double crochet
- tr: treble crochet
- st(s): stitch(es)
- sp: space
- yo: yarn over
- FO: fasten off
Let’s Get Started!
Difficulty: Easy to Intermediate
We’ll start by making the heart shape, then build the granny square around it.
Heart Motif (Make 4 for each square) – Using your Heart Color Yarn:
- Ch 4.
- In the 4th ch from hook, work (3 tr, 3 dc, ch 1, 3 dc, 3 tr, ch 3, sl st). Pull tight to create a heart shape.
- FO, leaving a short tail for weaving in.

Pro Tip: Don’t worry if the heart doesn’t look perfectly defined yet. It will take shape as you add the background!
Assembling the Granny Square – Using your Background Color Yarn:
Now, we’ll join the four hearts and build the square.
Round 1:
- Take two of your crocheted hearts.
- Attach your background color yarn with a sl st into the top center “V” (the ch-1 space) of one heart.
- Ch 2 (counts as 1 hdc). Work 2 hdc into the same ch-1 space. (Total 3 hdc)
- Ch 1.
- Now, working into the side of the heart (the “dip” where the ch-3 was created in the heart pattern), sc 1.
- Ch 1.
- Take your second heart. In its ch-1 space, work 3 hdc.
- Ch 1.
- Working into the side of this heart, sc 1.
- Ch 1.
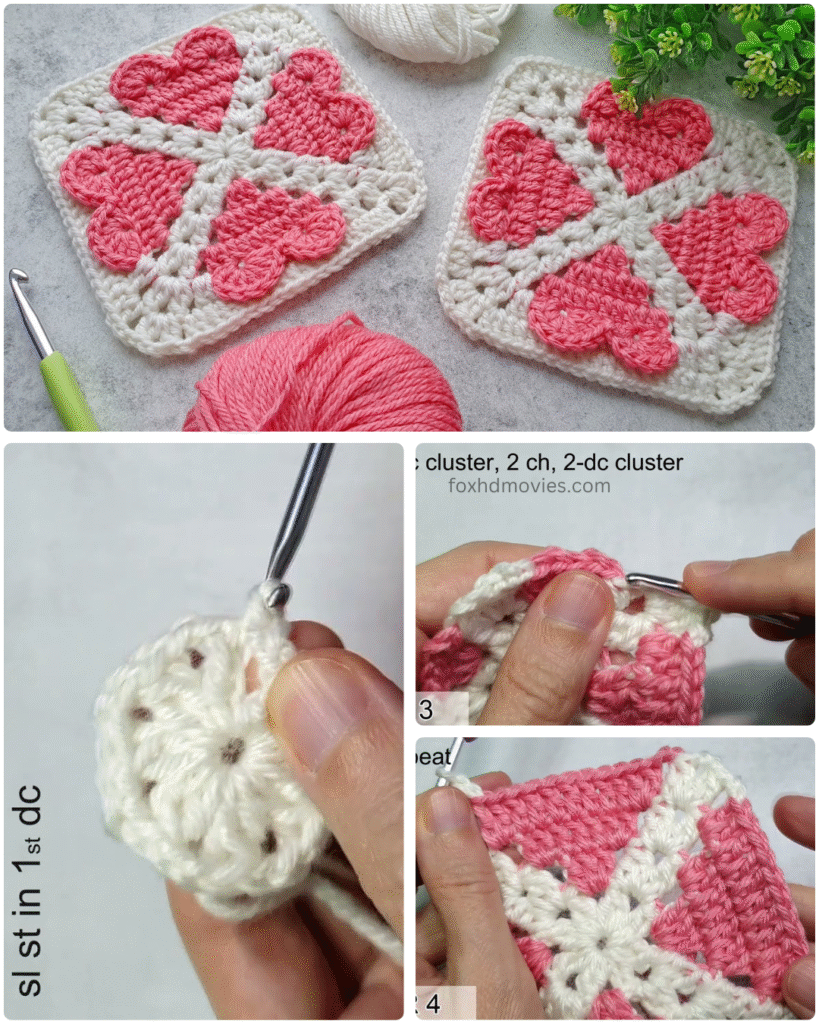
- Sl st to the top of the initial Ch 2 to join.

You now have two hearts joined side-by-side. Repeat this process to join the other two hearts in the same manner.
Round 2: Joining all 4 hearts and forming the square.
- Ch 2 (counts as 1 hdc).
- In the same st, 2 hdc. (Total 3 hdc)
- Ch 1.
- hdc in the next 3 sts.
- Ch 1.
- You’ll now be at a “corner” where two heart sets meet. In this corner space, work (3 hdc, ch 2, 3 hdc). This forms your first corner.
- Ch 1.
- hdc in the next 3 sts.
- Ch 1.
- 3 hdc in the next space (the ch-1 space from the heart).
- Ch 1.
- hdc in the next 3 sts.
- Ch 1.
- Repeat steps 6-12 around, creating the remaining corners and filling in the sides.
- Sl st to the top of the initial Ch 2 to join.

Round 3 (and onwards, if desired): Building the classic granny square.
Now you’ll continue with the traditional granny square pattern.
- Sl st into the next 2 sts until you reach the first ch-2 corner space.
- In the corner space, Ch 3 (counts as 1 dc). Work (2 dc, ch 2, 3 dc) in the same corner space.
- Ch 1.
- In the next ch-1 space along the side, work 3 dc.
- Ch 1.
- Repeat step 4-5 until you reach the next corner.
- In the corner space, work (3 dc, ch 2, 3 dc).
- Repeat steps 3-7 around.
- Sl st to the top of the initial Ch 3 to join.
You can continue adding more rounds in this manner until your square reaches your desired size. Simply work “3 dc” in each ch-1 space along the sides and “(3 dc, ch 2, 3 dc)” in each corner space.
Video tutorial
Finishing Up!
- FO (Fasten Off), leaving a long tail.
- Weave in all your ends securely using your yarn needle. This is crucial for a neat and professional finish!
- Block your squares for a crisp, even shape. This is especially helpful for granny squares!
And there you have it! Beautiful heart granny squares, ready to be joined into a loving blanket, a charming tote bag, or whatever your creative heart desires.
Don’t forget to share your creations with us! Happy crocheting!