 by
by 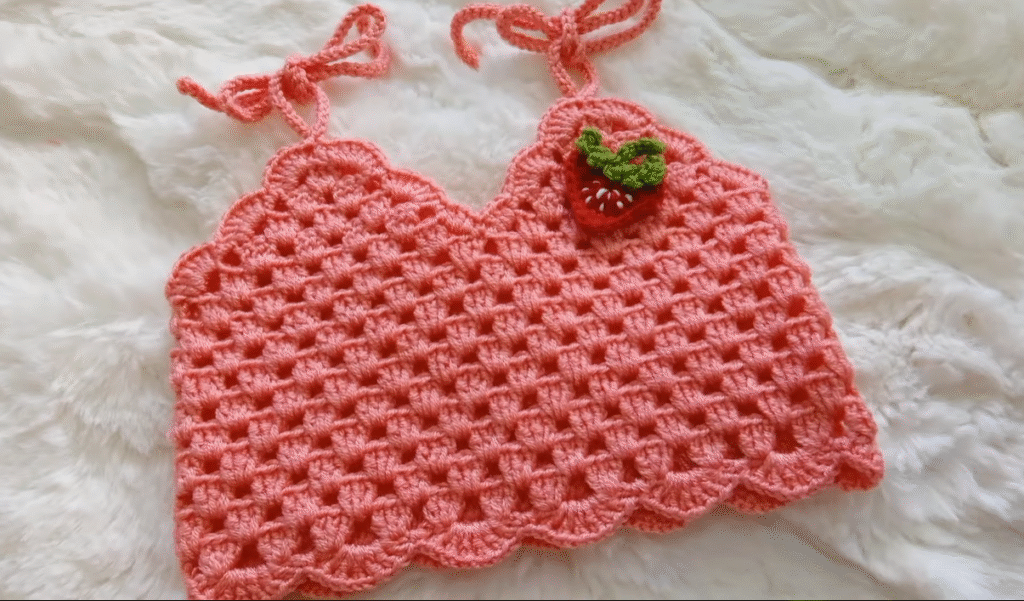
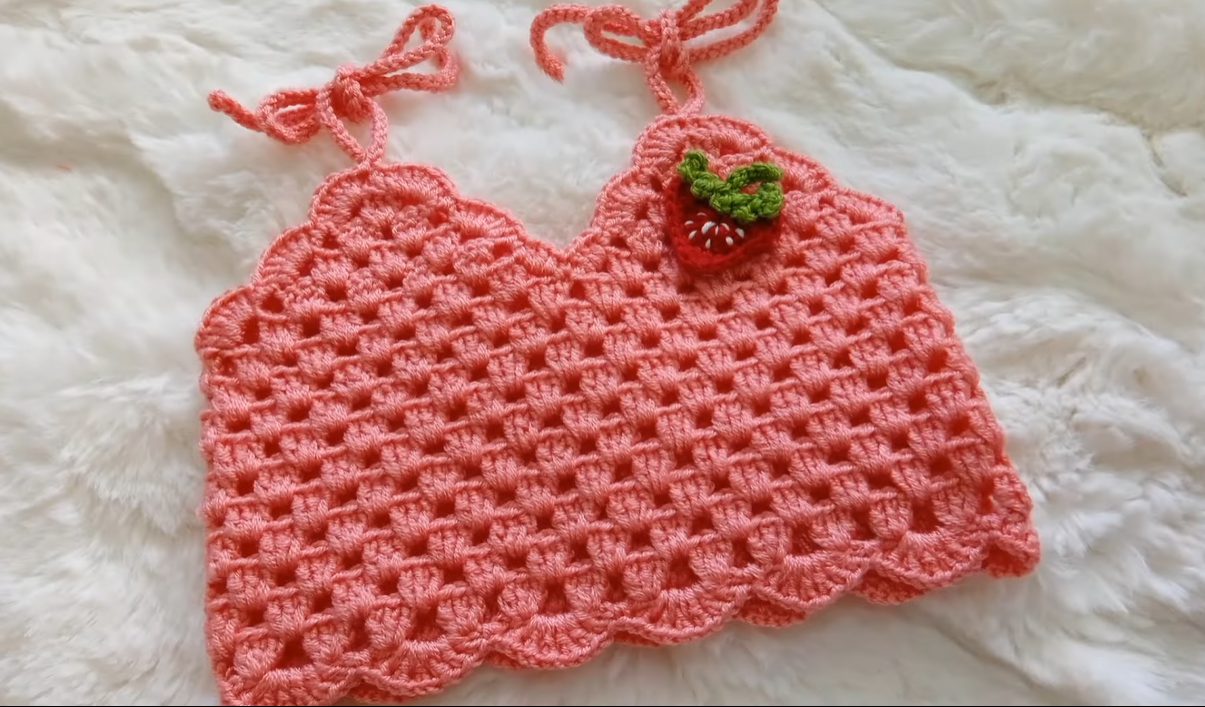
Hello, crochet friends! Get ready for the warmer weather with this absolutely adorable “Sweet Strawberry Top”! This pattern creates a charming halter-style top with a lovely textured stitch, scalloped edges, and the cutest little strawberry embellishment. It’s perfect for babies or toddlers to wear over a onesie or by itself on a sunny day.
This pattern is designed for an average 6-12 month size, but I’ll provide notes on how to adjust it for other sizes.
Skill Level: Intermediate
Materials You’ll Need:
- Yarn:
- DK weight (Light Worsted / #3) yarn in Peach/Light Pink (approx. 100-150 yards)
- Small amounts of Red and Green yarn for the strawberry applique
- Crochet Hook: 4.0 mm (G/6) or size needed to obtain gauge
- Tapestry Needle
- Scissors
- Stitch Markers (helpful!)
Gauge: Working in the pattern stitch (dc, ch 1, sk 1, dc): 16 stitches x 10 rows = 4 inches (10 cm)
Abbreviations (US Terms):
- ch: chain
- sl st: slip stitch
- sc: single crochet
- hdc: half double crochet
- dc: double crochet
- sk: skip
- st(s): stitch(es)
- sp: space
- rep: repeat
- Shell: (2 dc, ch 1, 2 dc) in same stitch or space
- Picot: Ch 3, sl st into first ch.
Pattern Notes:
- Ch 3 at the beginning of a row counts as a dc.
- The top is worked in rows, from the bottom up to the bust, then the straps are added.
- Remember to check your gauge! This is crucial for getting the correct sizing.
The Top (Peach/Light Pink Yarn)
Start with Peach/Light Pink Yarn.
Ch 65.
Row 1 (Foundation): Dc in 4th ch from hook (counts as 2 dc) and dc in each ch across. (63 dc) Turn.
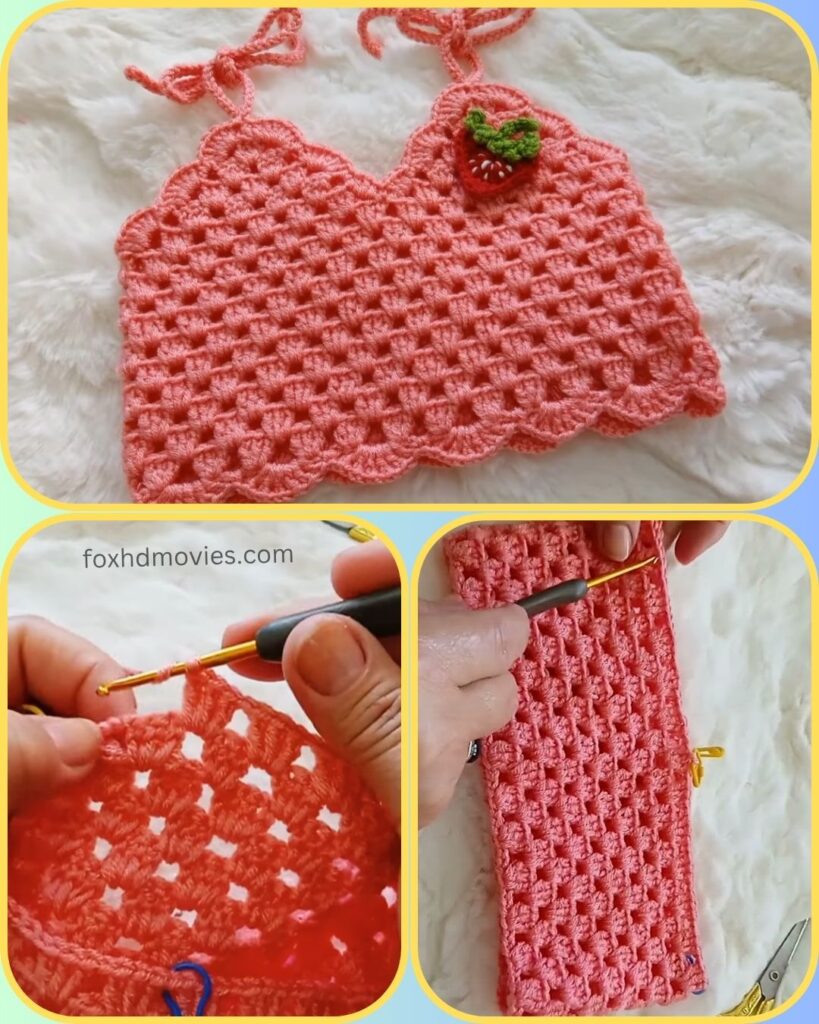
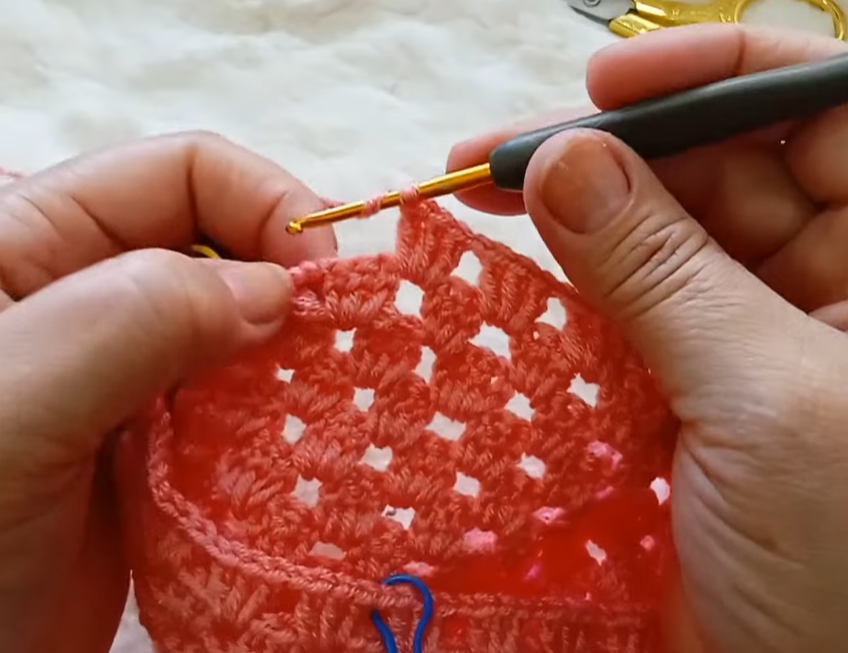
Row 2 (Pattern Stitch): Ch 3 (counts as dc), dc in next st. Ch 1, sk 1 st, dc in next 2 sts. Rep from * across. Turn. (This forms your mesh for the main body).
Row 3: Ch 3, dc in next st. Dc in ch-1 sp, dc in next 2 dc. Rep from * across. Turn. (63 dc)
Row 4 – 10 (or desired length for body): Repeat Rows 2 and 3, alternating. (End on a Row 2 repeat). For a shorter/longer top, adjust the number of repeat rows.
Scalloped Bottom Edge: Row 11: Ch 1, sc in first st. Sk 1 st, 5 dc in next st, sk 1 st, sc in next st. Rep from * across. Fasten off. This creates the pretty scalloped edge along the bottom of the top.
Shaping the Bust/Armholes
Now we will work on the top part of the dress, shaping the bust and armholes. You will attach yarn to one side of the previous row.
Rejoining Yarn: With the right side facing, attach yarn with a sl st in the 8th dc from the right edge of the last full body row (Row 10). Note: You will skip the first 7 stitches on each side to create the armhole opening and the V-neck shaping.
Row 1 (Decrease): Ch 3 (counts as dc), dc in next st. Ch 1, sk 1 st, dc in next 2 sts. Rep from * until 9 stitches remain from end of row. Ch 1, sk 1 st, dc in next 2 sts. Sk last 7 sts. Turn. (You should have 12 groups of (dc, dc, ch 1, sk 1) across).
Row 2 (Decrease): Ch 3, dc in next st. Dc in ch-1 sp, dc in next 2 dc. Rep from * until 3 sts remain. Dc in last 3 sts. (No decrease this row, just consolidating stitches). Turn.
Row 3 (Decrease): Ch 3, dc in next st. Ch 1, sk 1 st, dc in next 2 sts. Rep from * until 3 sts remain. Ch 1, sk 1 st, dc in next 2 sts. Sk last 2 sts. Turn.
Row 4: Ch 3, dc in next st. Dc in ch-1 sp, dc in next 2 dc. Rep from * across. Turn.
Row 5 (Decrease): Ch 3, dc in next st. Ch 1, sk 1 st, dc in next 2 sts. Rep from * until 3 sts remain. Ch 1, sk 1 st, dc in next 2 sts. Sk last 2 sts. Turn.
Row 6: Ch 3, dc in next st. Dc in ch-1 sp, dc in next 2 dc. Rep from * across. Turn.
Continue this pattern of alternating (Ch 1, sk 1) rows with solid dc rows, decreasing by 2 stitches on the “ch 1, sk 1” rows until you have approximately 2 shells/groups of (dc, dc, ch 1, sk 1) remaining across the top center for the V-neck.
Last Row (Top Edge of V-neck): Ch 1, sc in each st and ch-1 sp across. Fasten off.

Straps (Make 2 – Peach/Light Pink Yarn)
Start with Peach/Light Pink Yarn. Ch 50 (or desired length for tie strap). Row 1: Sc in 2nd ch from hook and in each ch across. (49 sc) Fasten off, leaving a tail for sewing.
Sew one strap to each side of the V-neck opening. Securely knot the ties at the shoulders.
Strawberry Applique
Strawberry (Red Yarn): Round 1: Ch 2, 6 sc in 2nd ch from hook. Sl st to first sc. (6 sc) Round 2: Ch 1, 2 sc in each st around. Sl st to first sc. (12 sc) Round 3: Ch 1, sc in next st, 2 sc in next st. Rep from * around. Sl st to first sc. (18 sc) Round 4: Ch 1, sc in each st around. Sl st to first sc. (18 sc) Round 5: Ch 1, sc in next st, sc2tog. Rep from * around. Sl st to first sc. (12 sc) Fasten off, leaving a tail for sewing. Cinch the top opening closed with the tail.
Leaves (Green Yarn): Ch 5. Sl st in 2nd ch from hook, sc in next ch, hdc in next ch, dc in next ch. Ch 3, sl st to same st as last dc. Ch 4, dc in same st, hdc in next ch, sc in next ch, sl st in next ch. Sl st into base. Fasten off.
Assembly: Sew the green leaves to the top of the red strawberry. Using a tapestry needle and a small amount of white or yellow yarn, embroider tiny “seeds” onto the red part of the strawberry if desired.

Finishing:
- Weave in all ends neatly using your tapestry needle.
- Attach Strawberry: Sew the finished strawberry applique securely to one side of the front bodice, near the V-neck, as pictured.
- Block your top gently if desired to help it lay nicely and open up the stitches.
Video tutorial
Your adorable Sweet Strawberry Top is now complete! It’s such a cheerful piece for any little fashionista.
I’d love to see your finished tops! Share your creations on social media using the hashtag #SweetStrawberryTop so I can admire your work!
Happy Crocheting!