by
by 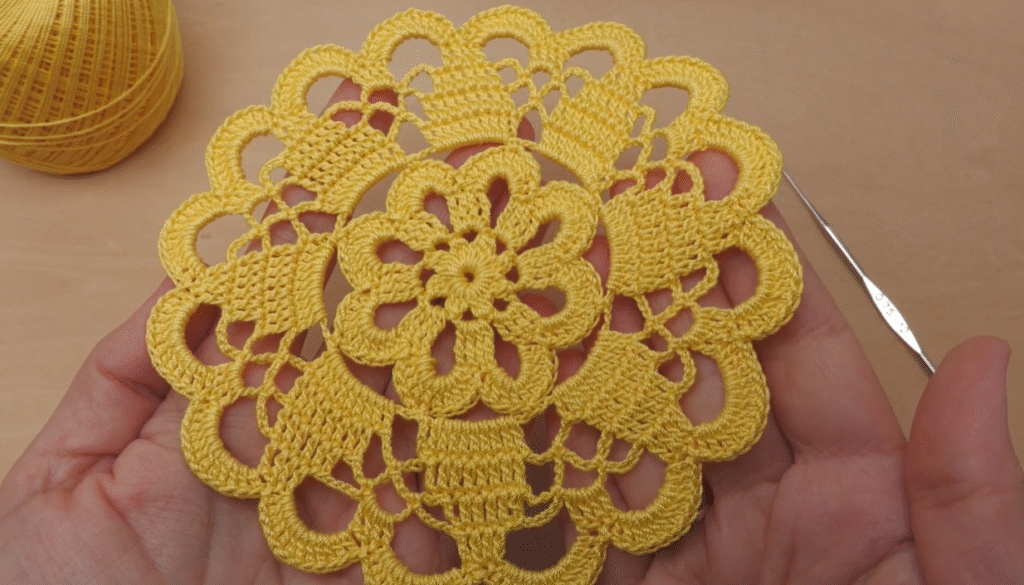
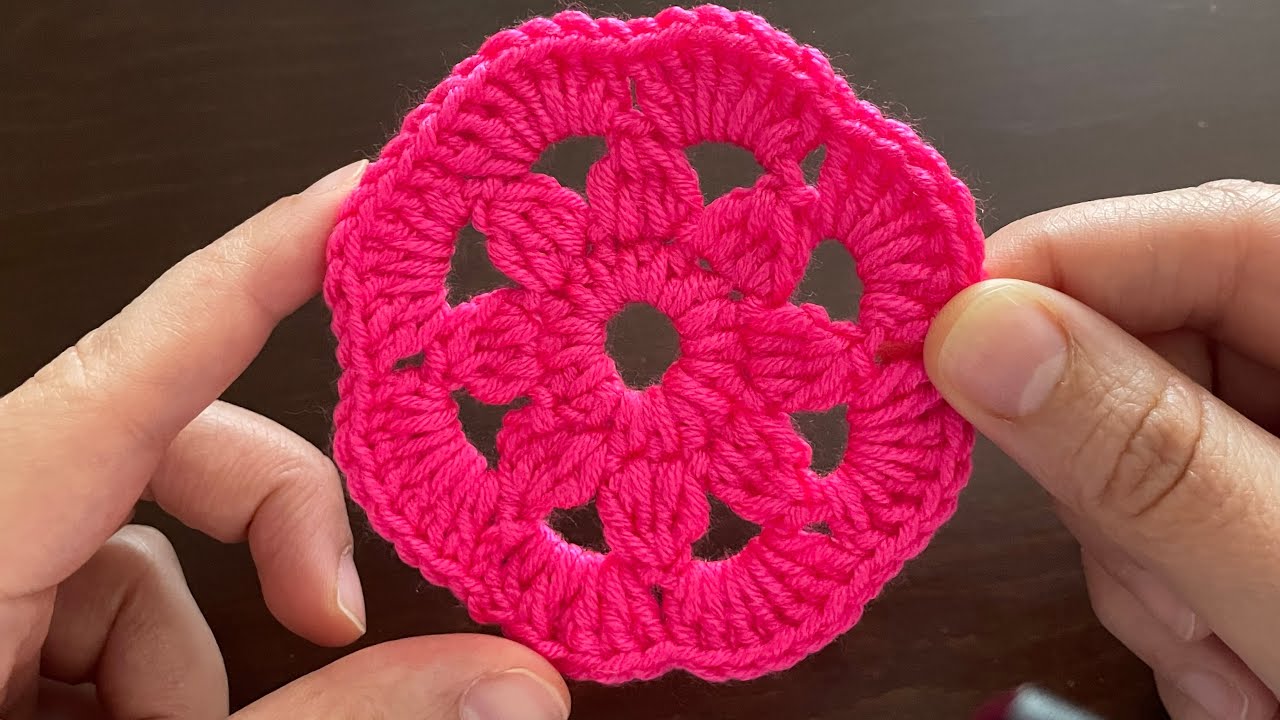
Hello, crochet friends! Get ready to brighten your day with this cheerful and intricate “Sunny Bloom Doily” motif! This beautiful circular design features layers of floral and lacy elements, perfect for coasters, small doilies, or as stunning embellishments. The sample is in a gorgeous sunny yellow, which truly makes the details pop, but this pattern would look lovely in any color you choose!
Let’s grab our hooks and infuse some sunshine into our crafting!
Skill Level: Intermediate

Materials:
- Yarn: Fine weight (fingering or #1) cotton yarn in yellow or your preferred color. Mercerized cotton is highly recommended for its sheen and stitch definition.
- Hook: 1.50mm – 2.00mm steel crochet hook (or size needed to obtain your desired gauge and drape).
- Yarn needle for weaving in ends
- Scissors
Gauge: Not critical for individual motifs, but for reference, the finished doily should measure approximately 5-6 inches in diameter, depending on your yarn and tension.
Abbreviations (US Terms):
- ch: chain
- sl st: slip stitch
- sc: single crochet
- hdc: half double crochet
- dc: double crochet
- tr: treble crochet (yarn over 2 times)
- dtr: double treble crochet (yarn over 3 times)
- st(s): stitch(es)
- sp: space
- picot: ch 3, sl st in 3rd ch from hook
- FO: Fasten off
Pattern for Sunny Bloom Doily
Start: Make a magic ring.
Round 1: Ch 3 (counts as 1 dc), 15 dc in ring. Join with sl st to top of ch 3. (16 dc)
Round 2: Ch 1, sc in first st. Ch 3, sk 1 st, sc in next st. Repeat from * to * 6 more times. Ch 3, sk 1 st, sl st to first sc to join. (8 sc, 8 ch-3 sps)
Round 3 (Small Petals): Sl st into first ch-3 sp. Ch 3 (counts as 1 dc), 2 dc in same ch-3 sp. Ch 2, 3 dc in next ch-3 sp. Repeat from * to * 6 more times. Ch 2, sl st to top of ch 3 to join. (8 sets of 3 dc, 8 ch-2 sps)
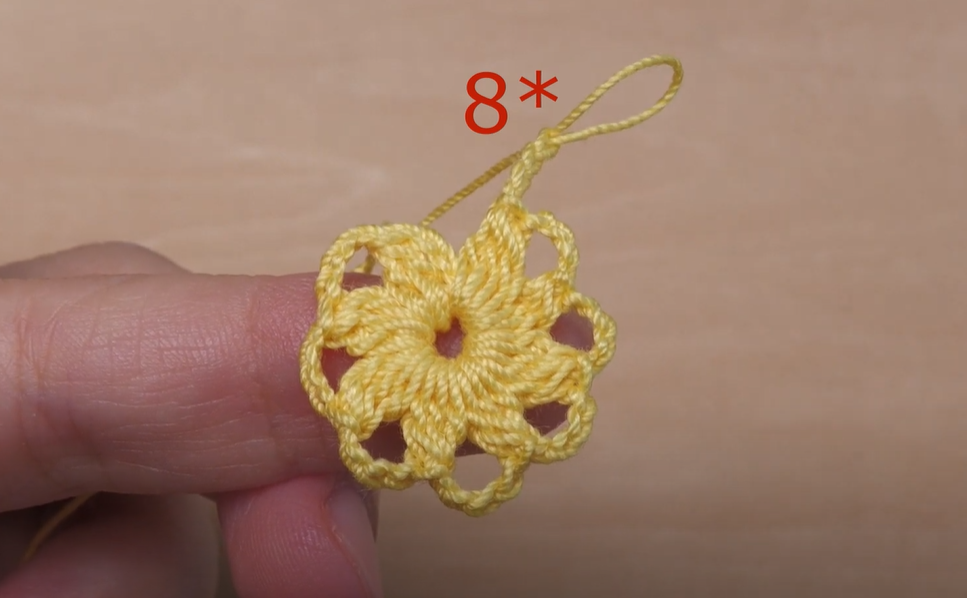
Round 4 (Second Layer of Petals): Sl st into the first dc. Ch 1, sc in same dc. Hdc in next dc. (2 dc, ch 1, 2 dc) in next ch-2 sp. Hdc in next dc, sc in next dc. Sl st in next dc (this sl st anchors the petal). Repeat from * to * 7 more times, omitting the final sl st on the last petal. Join with sl st to first sc. (8 petals created)
Round 5 (Lace Arches): Ch 1, sc in the sl st where the previous petal was anchored (the “valley” between two petals from Round 4). Ch 7, sc in the next sl st at the valley between petals. Repeat from * to * 6 more times. Ch 7, sl st to first sc to join. (8 sc, 8 ch-7 sps)

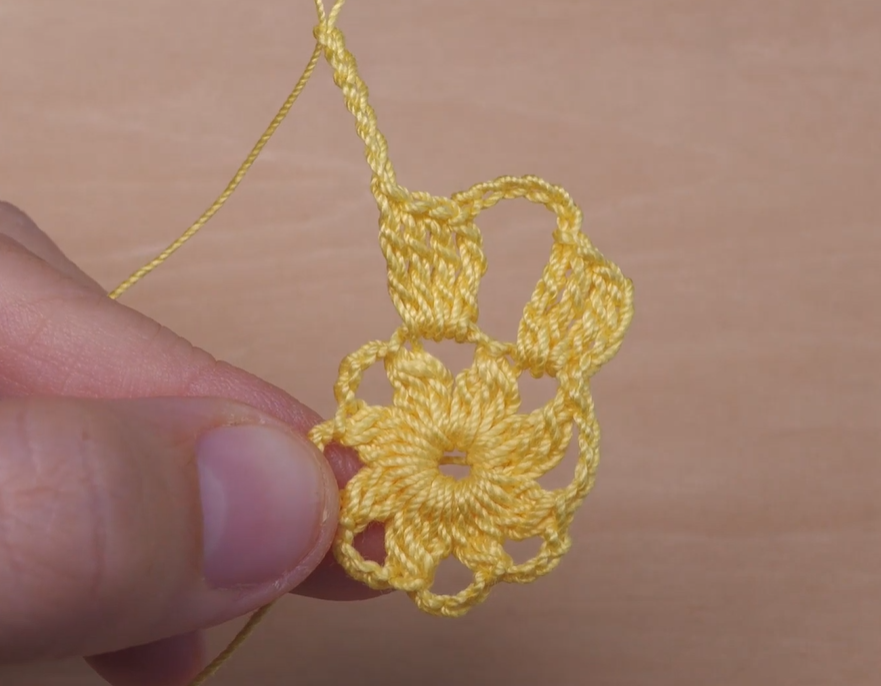
Round 6 (Outer Petal Bases): Sl st into first ch-7 sp. Ch 3 (counts as 1 dc), (4 dc, ch 3, 5 dc) in same ch-7 sp (first large shell/petal base). Ch 1, sk next sc, (5 dc, ch 3, 5 dc) in next ch-7 sp. Repeat from * to * 6 more times. Ch 1, sk next sc, sl st to top of ch 3 to join. (8 large shells, 8 ch-1 sps)
Round 7 (Large Petals): Sl st into the first ch-3 sp of a large shell. Ch 1, (sc, 2 hdc, 5 dc, 2 hdc, sc) in same ch-3 sp. Sl st in next ch-1 sp. Repeat from * to * 7 more times. Sl st to first sc to join. (8 large petals formed)
Round 8 (Outer Picot Edge): Ch 1, sc in the sl st where the previous petal was anchored (the “valley” between two large petals from Round 7). Ch 3, sc in the next sc of the previous round’s petal, ch 3, sc in next hdc, ch 3, sc in next dc, (sc, picot, sc) in the center dc of the 5-dc group, sc in next dc, ch 3, sc in next hdc, ch 3, sc in next sc, ch 3, sc in the next sl st at the valley between petals. Repeat from * to * 7 more times. Sl st to first sc to join.

Finishing:
FO, leaving a long tail for weaving in. Weave in all ends securely. Block your finished doily for the best results. Pin it out to open up the lace and ensure an even shape, then gently mist with water and allow to dry completely.
Video tutorial
Tips for Success:
- Tension Consistency: Even tension is key to making sure your doily lays flat and the lace patterns are well-defined.
- Counting Your Stitches: Especially in intricate patterns, carefully counting your stitches and chain spaces in each round will save you from unraveling later!
- Good Lighting: Working with fine yarn and detailed stitches is much easier with good lighting.
- Don’t Skip Blocking! This step is absolutely crucial for lace projects. It will transform your doily, making the stitches pop and giving it a professional, finished look.
I hope you have a delightful time crocheting this “Sunny Bloom Doily”! It’s a wonderful project for practicing your lace skills and creating something truly beautiful. Please share your finished doilies in the comments below – I’d love to see them!
Happy Crocheting!