by
by 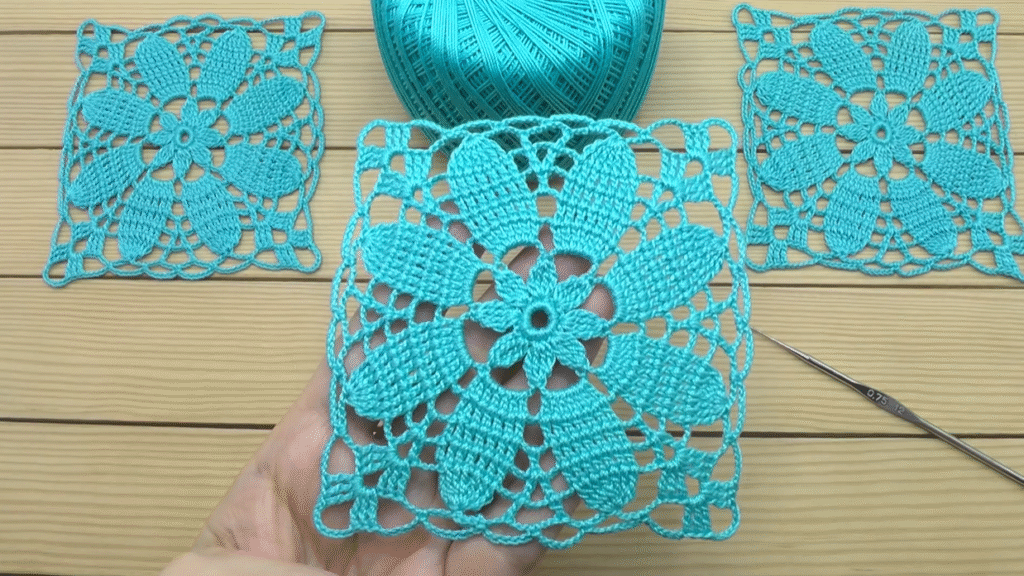
Hello crochet enthusiasts!
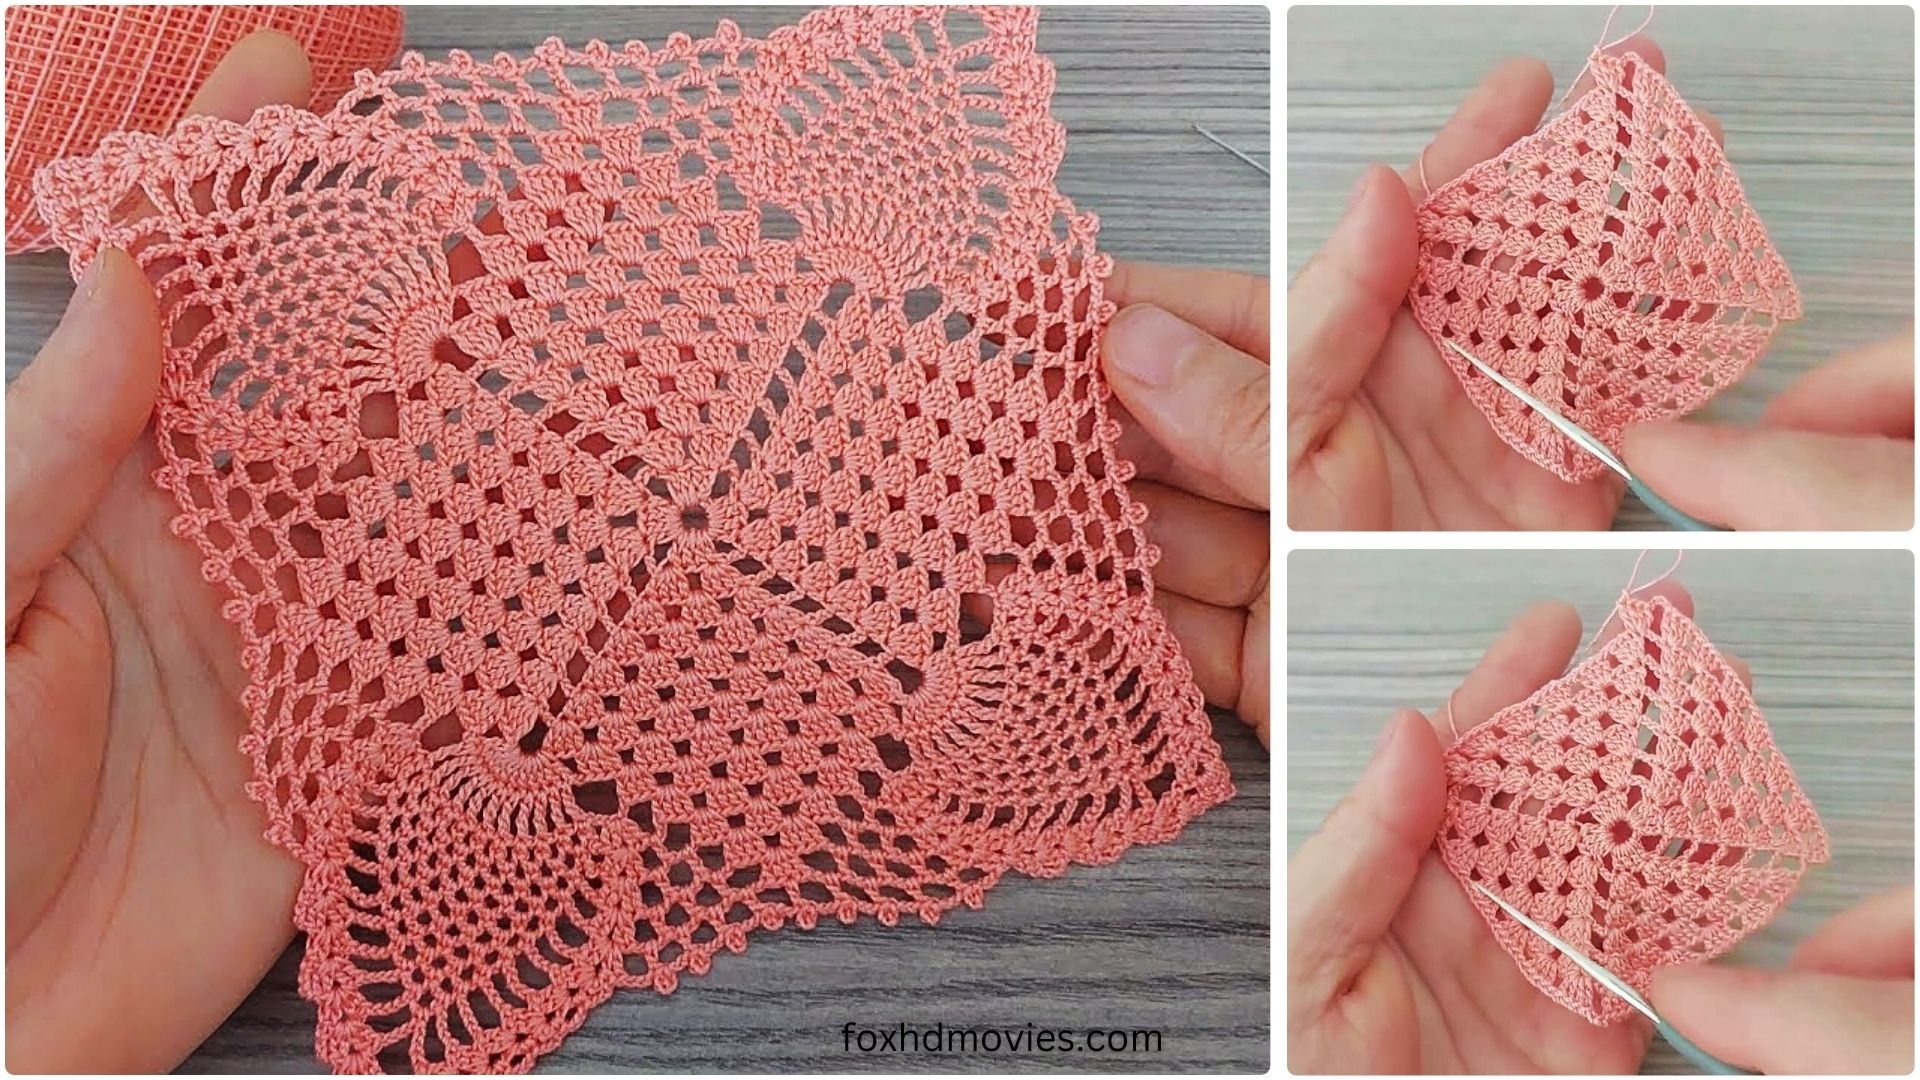
Get ready to add a touch of floral elegance to your next project! Today, we’re diving into a captivating crochet square pattern that features a striking flower in the center, framed by a charming lacy border. This motif is incredibly versatile – whip up a few for coasters, join them for a stunning doily, create a unique shawl, or even piece together a cozy blanket.
The vibrant turquoise yarn in the example truly highlights the petal texture and the intricate lacework. Imagine this in a gradient yarn, soft neutrals, or a mix-and-match of your favorite colors!
Let’s gather our supplies and get started!
Skill Level: Intermediate (familiarity with basic crochet stitches, puff/cluster stitches, and working in the round is helpful)
Materials You’ll Need:
- Yarn: Light Worsted / DK weight cotton or mercerized cotton yarn is recommended for good stitch definition and drape. (The yarn in the image looks like a fine cotton thread, similar to what you’d use for doilies. Adjust your yarn and hook accordingly.)
- Crochet Hook: Size appropriate for your chosen yarn. For a fine thread, a 0.75mm – 1.25mm hook would be suitable (as seen in the image). For DK weight, a 3.0mm – 4.0mm hook might work.
- Yarn Needle: For weaving in ends.
- Scissors
Abbreviations (US Crochet Terms):
- ch: chain
- sl st: slip stitch
- sc: single crochet
- dc: double crochet
- tr: treble crochet
- fpdc: front post double crochet
- puff st: puff stitch (explained in pattern)
- sp: space
- sk: skip
- st(s): stitch(es)
- *to*: repeat instructions between asterisks
Special Stitch: Puff Stitch (Puff St)
- Yarn over, insert hook into indicated stitch/space, yarn over, pull up a loop (3 loops on hook).
- *Yarn over, insert hook into same stitch/space, yarn over, pull up a loop* (5 loops on hook).
- Repeat from * to * one more time (7 loops on hook).
- Yarn over, pull through all 7 loops on hook. Ch 1 to secure (this securing chain is often counted as part of the stitch but is not in this pattern, it just locks the puff).
The Floral Square Motif Pattern (Make as many as desired)
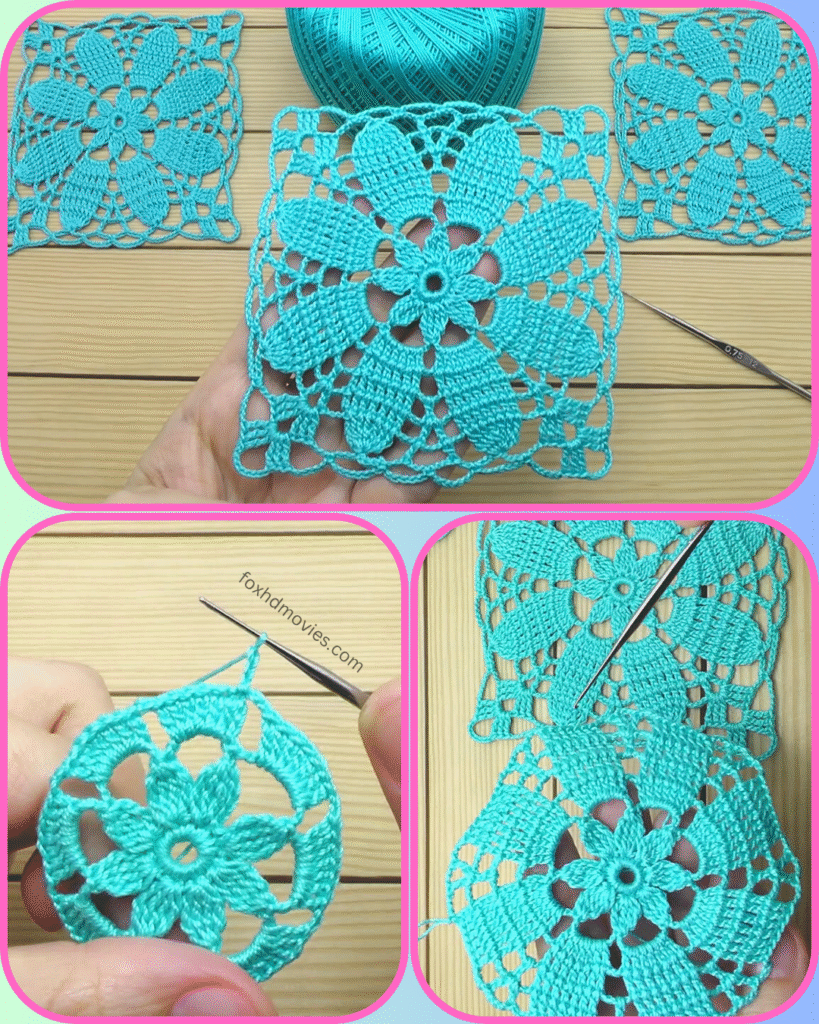
Each motif is worked in the round.

Round 1 (Center Ring): Ch 6, join with sl st to first ch to form a ring. (Alternatively, use a magic ring for a tighter center.)
Round 2 (Petal Bases): Ch 1, *1 sc in ring, ch 3*. Repeat from * to * 7 more times. Join with sl st to first sc. (8 sc, 8 ch-3 sps)
Round 3 (Petals – Puff St): Sl st into first ch-3 sp. *[Work 1 Puff St in the same ch-3 sp (yarn over, insert hook, pull up loop 3 times, yarn over, pull through all 7 loops. Then ch 1 to secure the puff), ch 2]*. Repeat from * to * in each ch-3 sp around. Join with sl st to top of first Puff St. (8 puff sts, 8 ch-2 sps)
Round 4 (Corner Foundation): Sl st into first ch-2 sp. Ch 3 (counts as 1 dc), 2 dc in same ch-2 sp. *Ch 2, sk next puff st, 3 dc in next ch-2 sp*. Repeat from * to * 6 more times. Join with sl st to top of beg ch-3. (24 dc, 8 ch-2 sps) Note: This round sets up the corners for the square shape.
Round 5 (Squaring the Circle): Ch 1, 1 sc in same st. *1 sc in next 2 dc. Corner: In next ch-2 sp, work (2 dc, ch 3, 2 dc). *1 sc in next 3 dc, 1 sc in next ch-2 sp, 1 sc in next 3 dc*. Repeat from * to * 2 more times for the sides. After the last side, 1 sc in next 3 dc, 1 sc in next ch-2 sp. Join with sl st to first sc. (You should now have 4 corners formed by (2dc, ch3, 2dc) and relatively flat sides)
Round 6 (Lacy Border – first layer): Sl st into next st until you reach the corner ch-3 sp. In corner ch-3 sp: Ch 3 (counts as 1 dc), (2 dc, ch 2, 3 dc) in same corner sp. *Ch 2, sk 3 sts, 1 dc in next st, ch 2, sk 3 sts, 1 dc in next st, ch 2, sk 3 sts, (3 dc, ch 2, 3 dc) in next corner ch-3 sp*. Repeat from * to * 3 more times, omitting the last corner on the last repeat. Join with sl st to top of beg ch-3.

Round 7 (Lacy Border – final layer): Sl st into next st until you reach the corner ch-2 sp. In corner ch-2 sp: Ch 3 (counts as 1 dc), (2 dc, ch 3, 3 dc) in same corner sp. *Ch 3, sk next 3 dc, 1 sc in next ch-2 sp, ch 3, sk next dc, 1 sc in next ch-2 sp, ch 3, sk next dc, 1 sc in next ch-2 sp, ch 3, sk next 3 dc, (3 dc, ch 3, 3 dc) in next corner ch-2 sp*. Repeat from * to * 3 more times, omitting the last corner on the last repeat. Join with sl st to top of beg ch-3.
Fasten off and weave in ends.
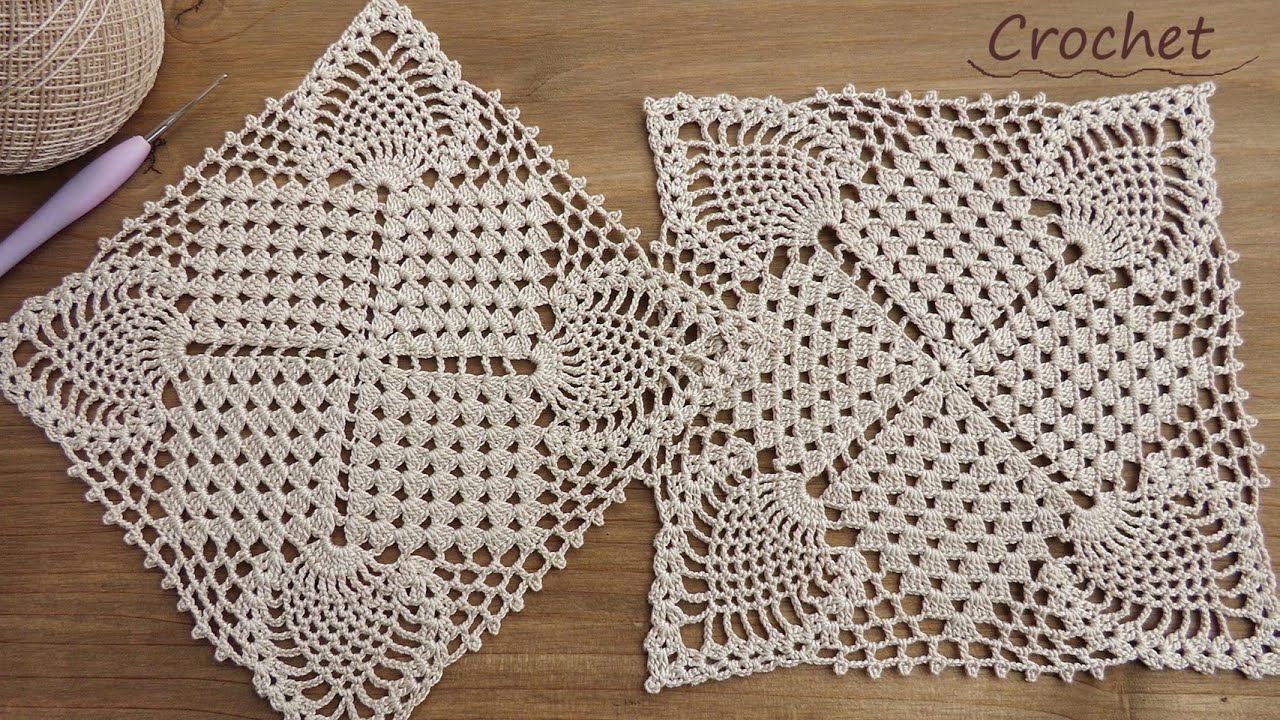
Joining Your Squares (If making a larger project)
If you’re making a larger piece like a blanket or doily, you’ll need to join your squares. The best way to join these motifs while maintaining their delicate look is usually a slip stitch join or a whipstitch join.
- Slip Stitch Join (as you go): On your final round (Round 7) of your second and subsequent squares, when you reach a corner or a ch-3 space that needs to connect to an existing square, substitute a chain with a slip stitch into the corresponding space/stitch of the already completed square.
- Example for a corner join: Instead of
ch 3in the corner, workch 1, sl st into corner ch-3 sp of adjacent square, ch 1. - Example for a side join: Instead of
ch 3, workch 1, sl st into corresponding ch-3 sp of adjacent square, ch 1.
- Example for a corner join: Instead of
- Whipstitch or Mattress Stitch Join: Complete all your squares, then use your yarn needle to stitch them together along the edges where they meet, working through corresponding chain spaces or stitches. This creates a neat seam.

Video tutorial
Finishing Touches
- Blocking is highly recommended! This is especially important for lace projects. Wet your finished squares (or the entire piece), gently squeeze out excess water, and pin them to a blocking mat or soft surface, shaping each square to its desired dimensions and opening up the lace. Allow them to dry completely. Blocking makes a huge difference in the final look and drape of your project!
- Weave in any remaining loose ends securely.
And there you have it! A beautiful, intricate crochet square that you can use in countless ways. Whether it’s a single coaster or part of a grander design, these squares are sure to impress.
Happy crocheting! Don’t forget to share your creations with us – we love seeing your unique touches!