by
by 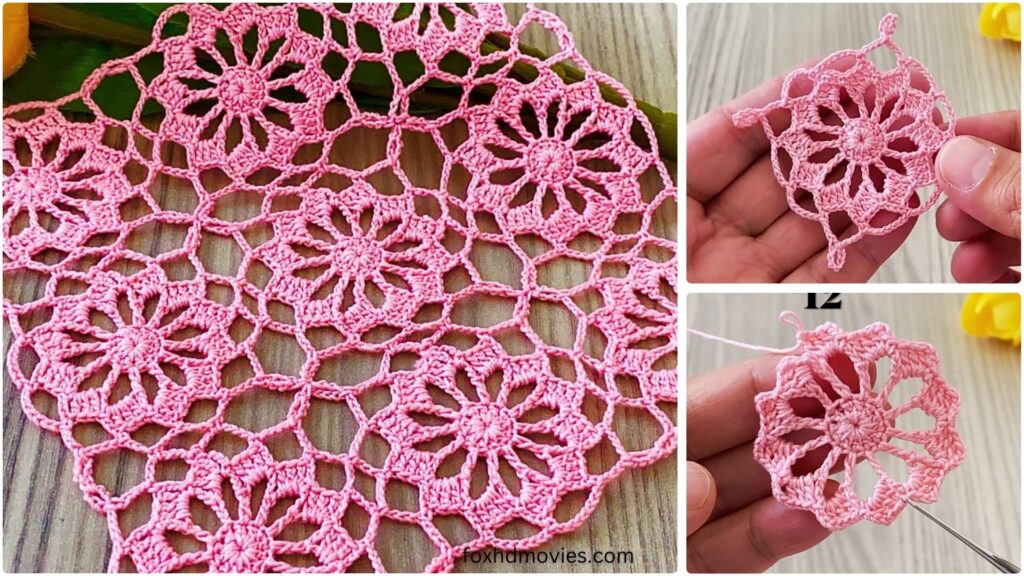
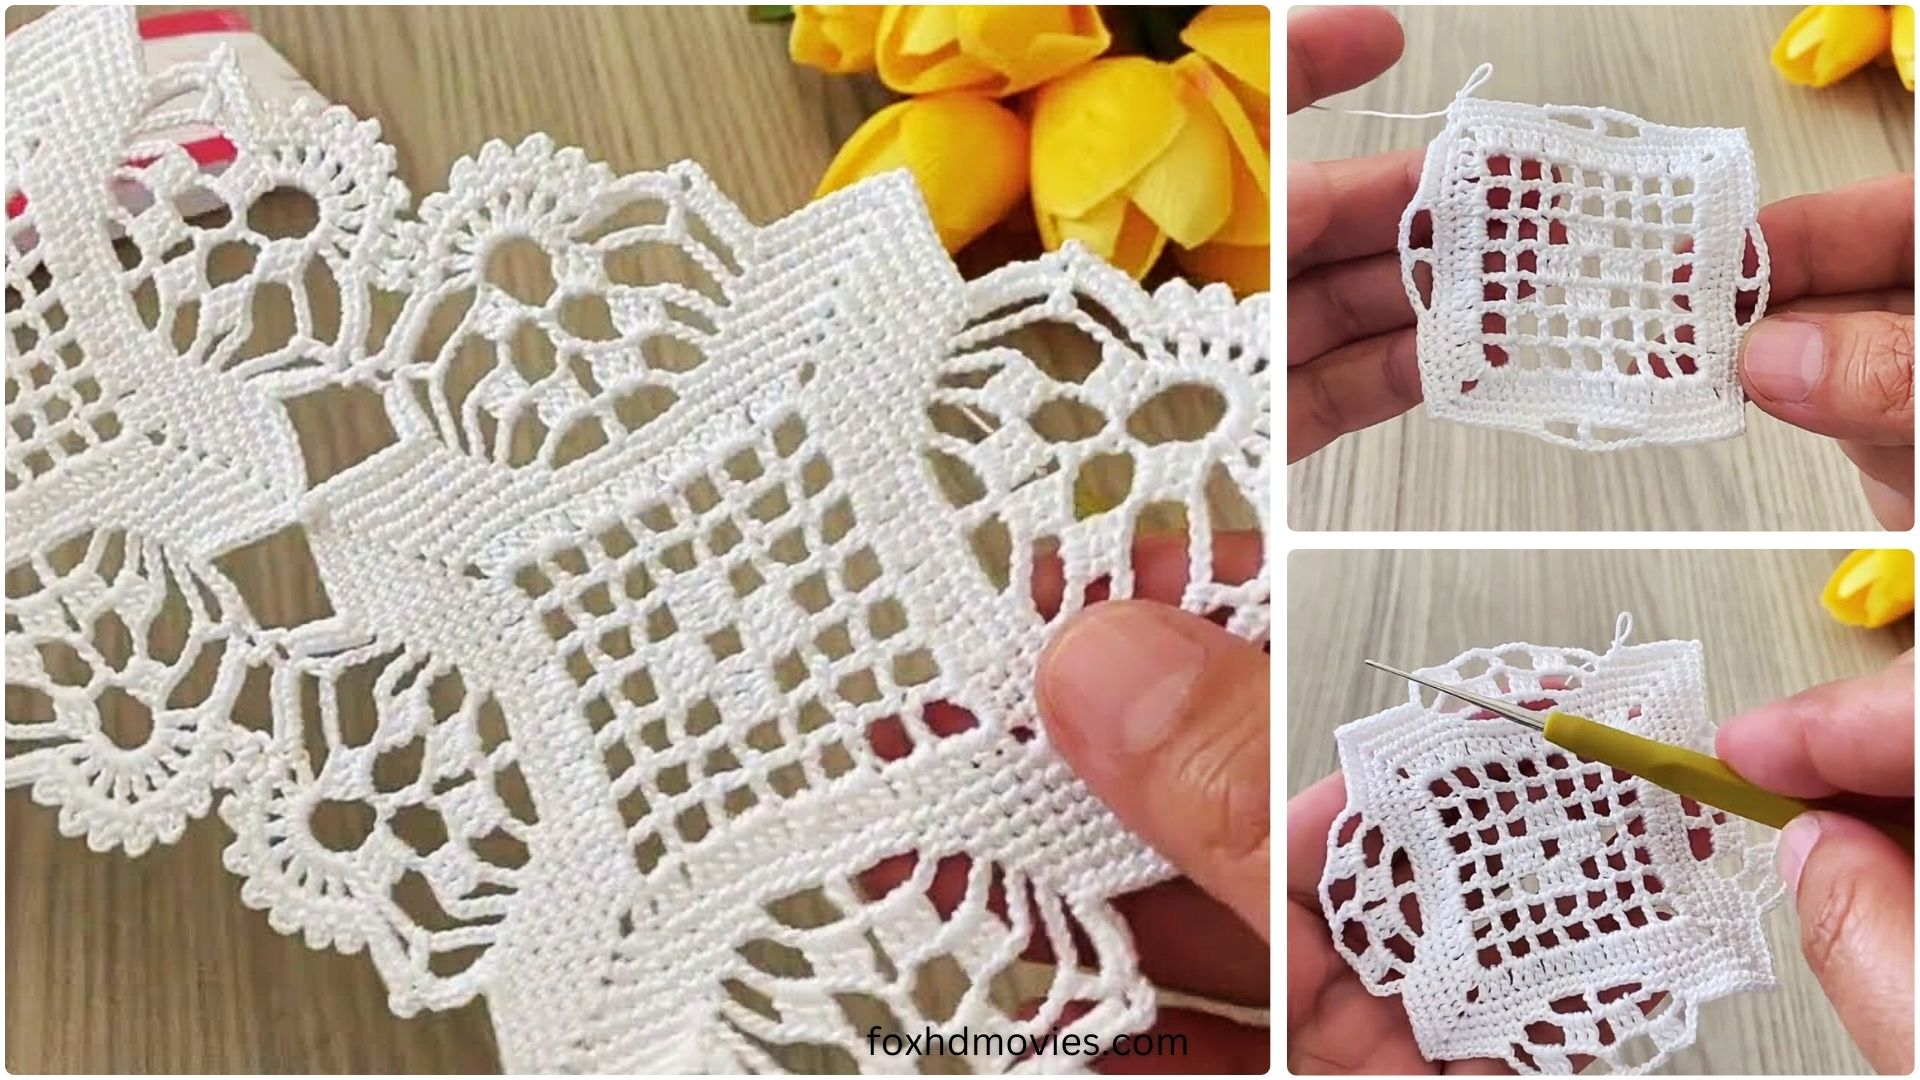
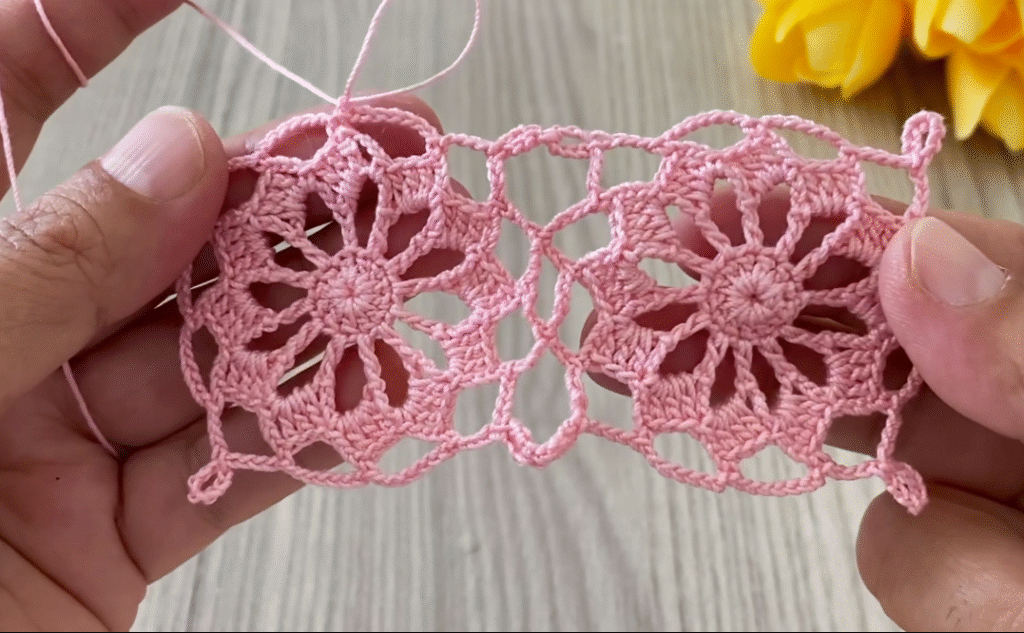
This detailed pattern for a Crochet Lace Square Motif will guide you through the process, building your confidence in lacework. These delicate squares are perfect for joining into an exquisite table runner, a chic blouse, or any other project where you desire a touch of refined elegance.
Skill Level: Intermediate (familiarity with basic stitches and reading patterns is helpful)
Materials:
- For a delicate lace effect: Crochet thread size 10 (or a similar fine yarn like a fingering weight/4-ply cotton).
- For a slightly larger, more accessible practice piece: Light Fingering or DK weight yarn (e.g., mercerized cotton for good stitch definition).
- Crochet hook appropriate for your chosen yarn/thread (e.g., Steel hook size 7 (1.65 mm) for thread, or G/6 (4.0 mm) for DK weight yarn). Refer to your yarn label for recommendations.
- Yarn needle for weaving in ends
- Scissors
- Stitch markers (optional, but very helpful for corners)
- Blocking supplies (blocking mats, pins, spray bottle) – Essential for lace projects!
Gauge:
Gauge is crucial for lace projects, especially if you’re aiming for a specific size or consistent results when joining multiple squares.
- With Crochet Thread Size 10: After blocking, one square should measure approximately 3.5 – 4 inches.
- With DK Weight Yarn: After blocking, one square should measure approximately 5.5 – 6 inches.
Adjust your hook size to achieve this gauge.
Abbreviations (US Crochet Terms):
- ch: chain
- sl st: slip stitch
- sc: single crochet
- hdc: half double crochet
- dc: double crochet
- tr: treble crochet (yarn over 2 times)
- dtr: double treble crochet (yarn over 3 times)
- sk: skip
- sp: space
- st(s): stitch(es)
- beg: beginning
- rep: repeat
- ch-sp: chain space
- picot: ch 3, sl st into the 3rd ch from hook (creates a small decorative loop)
Video tutorial
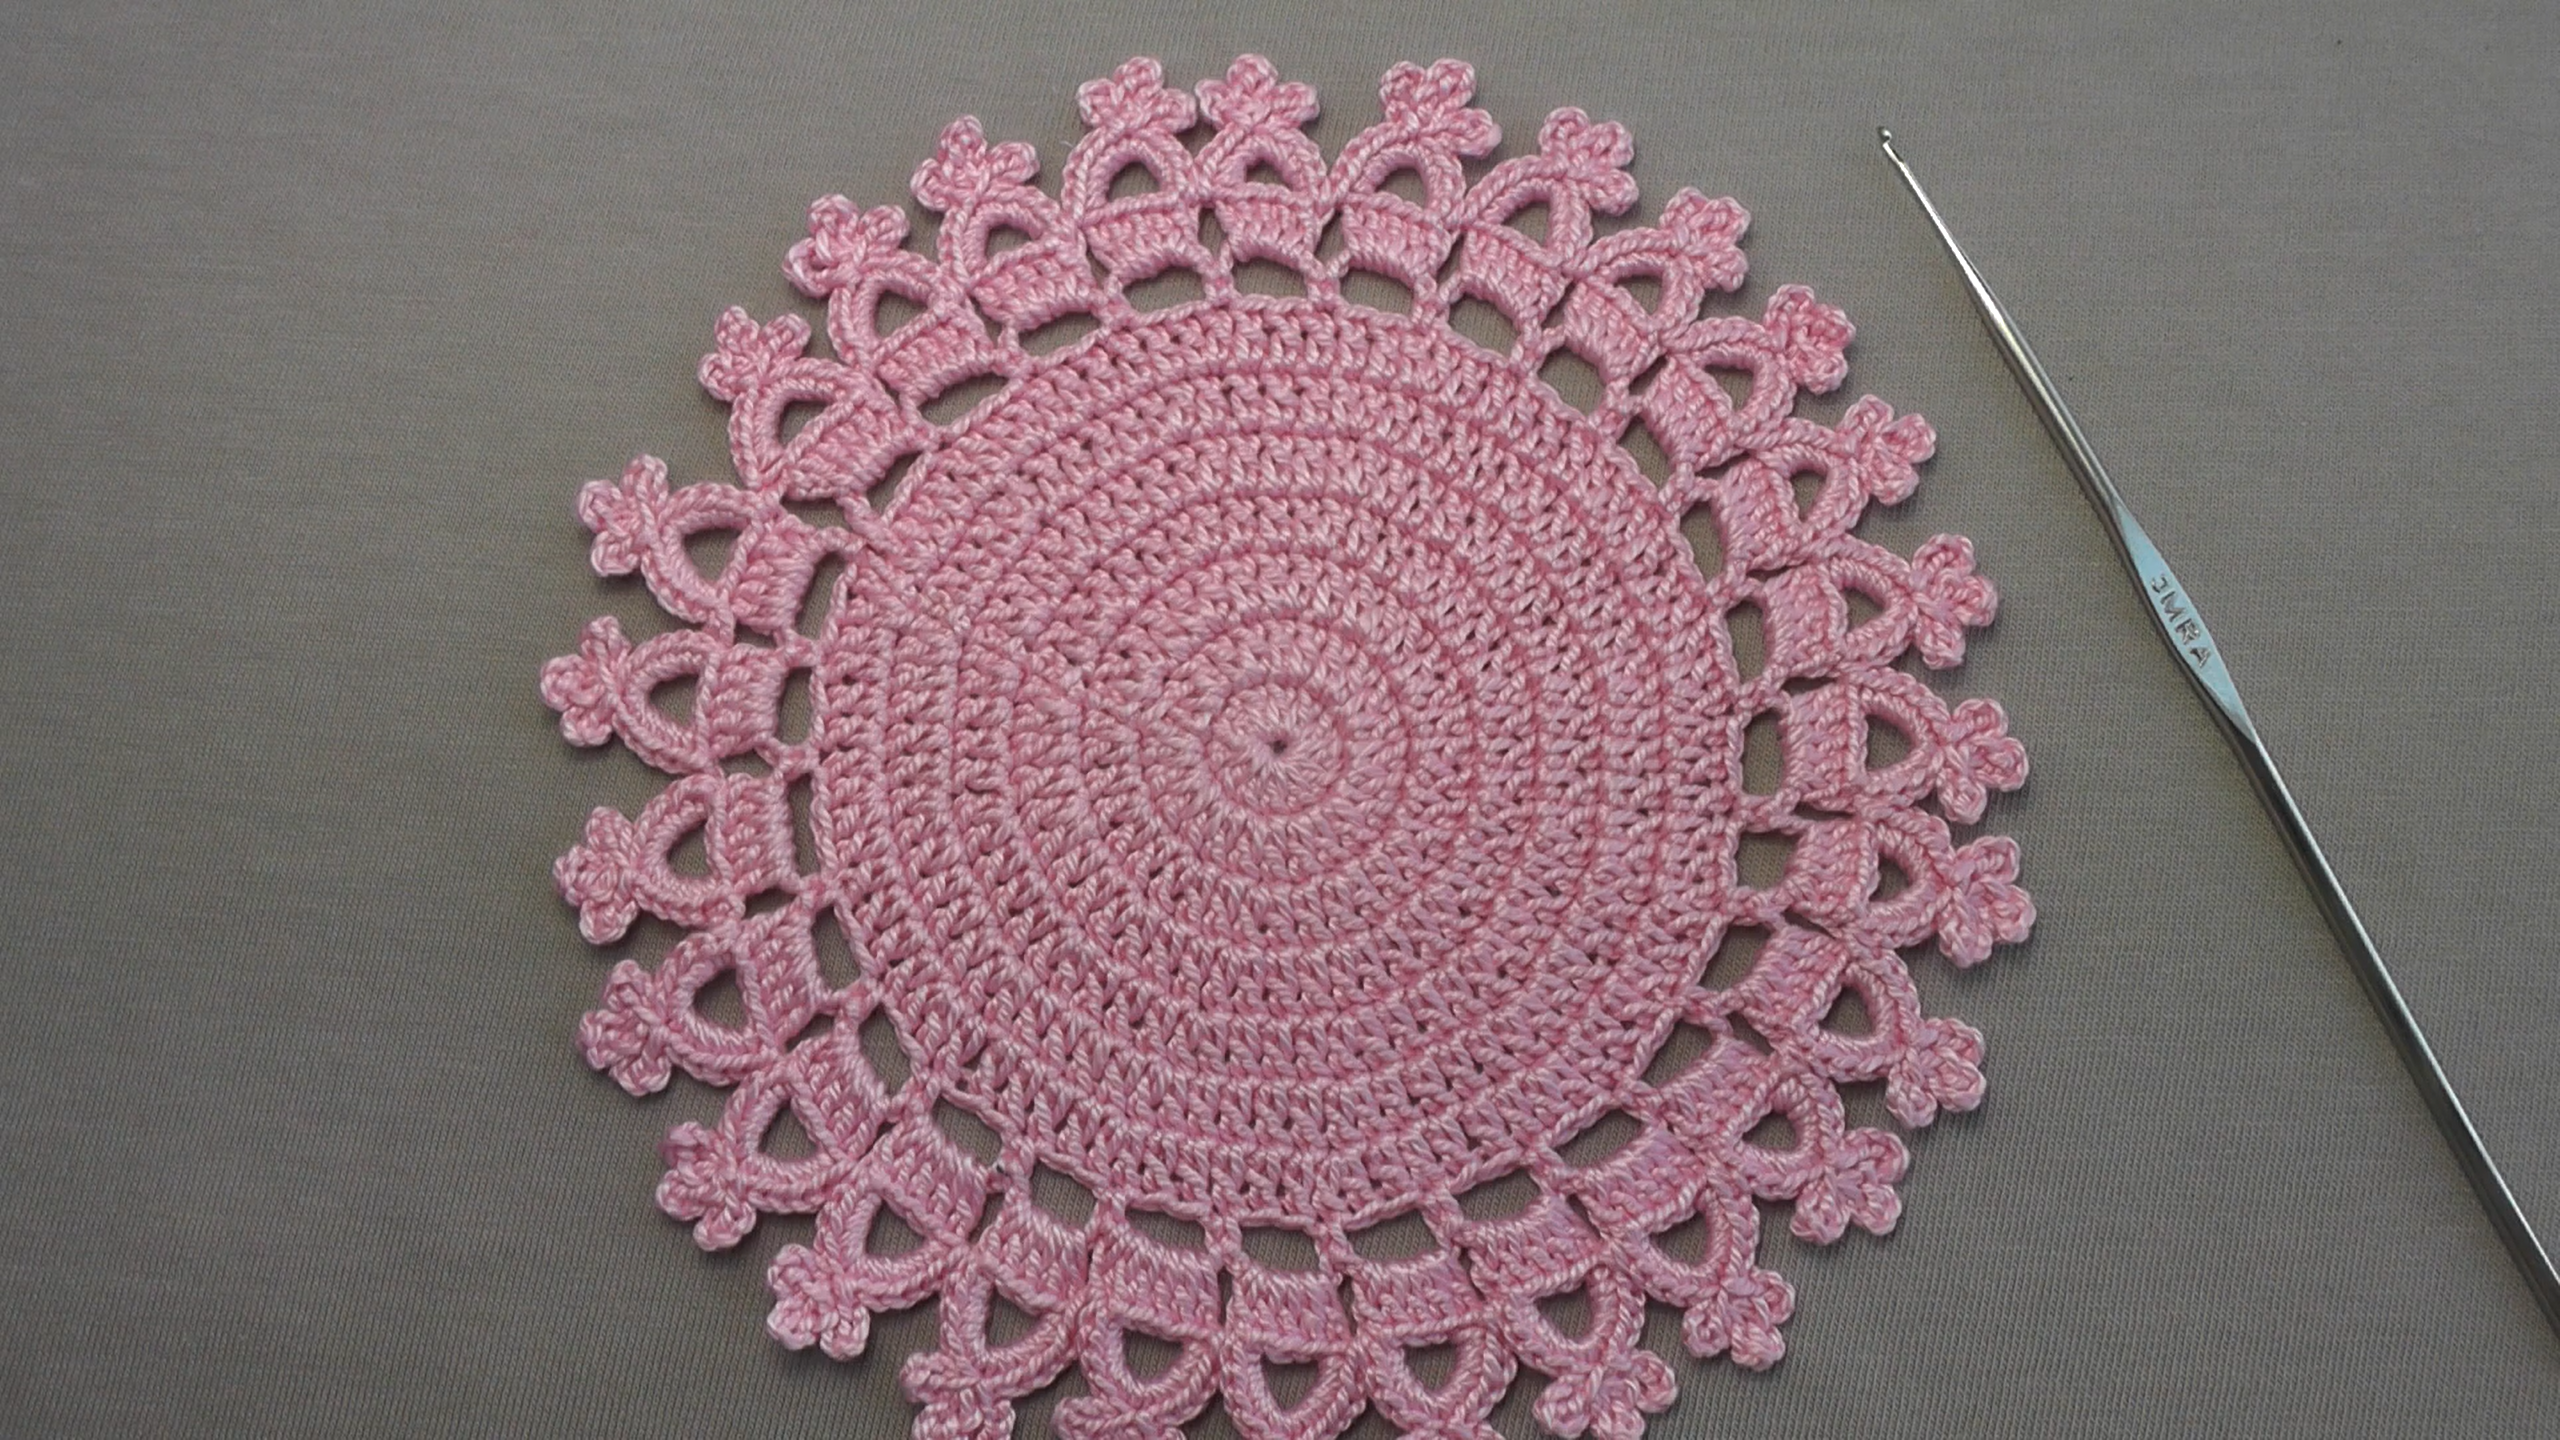
The Lace Square Motif Pattern
We will build this motif from the center out, focusing on creating beautiful openwork and defined corners.
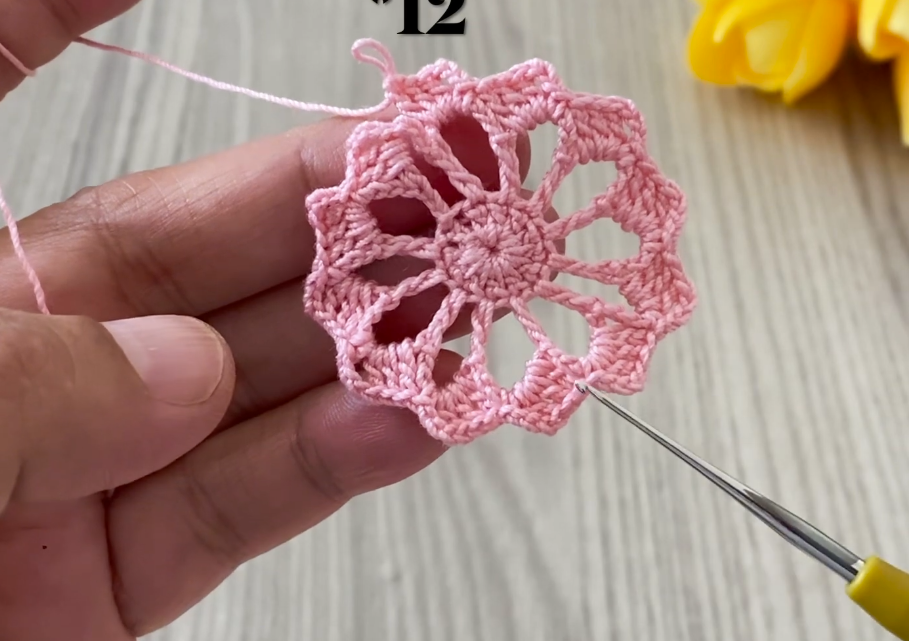
Foundation (Center Ring):
Ch 6, sl st to join in first ch to form a ring. (Alternatively, you can use a magic ring).
Round 1: Ch 4 (counts as 1st tr), 15 tr in ring. Sl st to top of beg ch-4 to join. (16 tr)
Round 2: Ch 1, sc in same st as join. *Ch 5, sk next st, sc in next st.* Rep from * to * 7 more times. Ch 5, sl st to first sc to join. (8 ch-5 loops)
Round 3: Sl st into first ch-5 sp. Ch 3 (counts as 1st dc), (2 dc, ch 3, 3 dc) in same ch-5 sp (this forms your first corner). *Ch 1, sk next sc, (3 dc, ch 3, 3 dc) in next ch-5 sp (this forms your next corner).* Rep from * to * 3 more times. (You will have 4 corners in total). Ch 1, sk last sc. Sl st to top of beg ch-3 to join. You should now have a distinct square shape taking form.
Round 4: Sl st into next 2 dc and into first ch-3 sp (corner). Ch 3 (counts as 1st dc), (2 dc, ch 3, 3 dc) in same ch-3 sp (corner made). *Ch 1, 3 dc in next ch-1 sp. Ch 1, (3 dc, ch 3, 3 dc) in next ch-3 sp (corner made).* Rep from * to * 3 more times. Ch 1, 3 dc in last ch-1 sp. Ch 1, sl st to top of beg ch-3 to join.
Round 5: Sl st into next 2 dc and into first ch-3 sp (corner). Ch 3 (counts as 1st dc), (2 dc, ch 3, 3 dc) in same ch-3 sp (corner made). *Ch 1, 3 dc in next ch-1 sp. Ch 1, 3 dc in next ch-1 sp. Ch 1, (3 dc, ch 3, 3 dc) in next ch-3 sp (corner made).* Rep from * to * 3 more times. Ch 1, 3 dc in next ch-1 sp. Ch 1, 3 dc in last ch-1 sp. Ch 1, sl st to top of beg ch-3 to join.
Round 6 (Adding Decorative Edging): Sl st into next 2 dc and into first ch-3 sp (corner). Ch 1, (sc, ch 3, sc) in same ch-3 sp (this forms a picot corner). *Ch 5, sk 3 dc, sc in next ch-1 sp. Ch 5, sk 3 dc, sc in next ch-1 sp. Ch 5, sk 3 dc, sc in next ch-1 sp. Ch 5, sk 3 dc, (sc, ch 3, sc) in next ch-3 sp (picot corner made).* Rep from * to * 3 more times. Ch 5, sk 3 dc, sc in next ch-1 sp. Ch 5, sk 3 dc, sc in next ch-1 sp. Ch 5, sk 3 dc, sc in next ch-1 sp. Ch 5, sl st to first sc to join.
Fasten off and weave in all ends securely.
The Magic of Blocking (Do NOT Skip This Step!)
Lace crochet looks its best when blocked. Blocking opens up the stitches, evens out your work, and defines the intricate patterns.
- Dampen: Gently wet your motif. You can immerse it in lukewarm water (with a tiny bit of wool wash if using wool) or spray it thoroughly with water until it’s damp, but not dripping.
- Pin: Lay your damp motif flat on a blocking mat or a soft surface that can be pinned into. Gently stretch the motif to its desired square shape, making sure the corners are sharp and the edges are straight. Use rust-proof pins to secure it in place, especially at the corners and along the outer loops.
- Dry: Allow the motif to dry completely, typically 12-24 hours, depending on humidity. Do not rush this step!
- Admire: Once dry, remove the pins and admire your beautifully defined lace square!

Adapting Your Practice Square for a Runner or Blouse
Now that you’ve mastered the motif, let’s talk about turning it into a larger project!
For a Table Runner:
- Determine Size: Decide on the desired length and width of your runner.
- Calculate Motifs: Based on the blocked size of your square, calculate how many motifs you’ll need in length and width. (e.g., for a 60-inch long, 12-inch wide runner with 5-inch squares, you’d need 12 squares long x 2 squares wide = 24 squares).
- Joining Method:
- Whip Stitch: A simple and common method. Line up two squares, wrong sides together, and whip stitch through both loops of the corresponding stitches.
- Slip Stitch Join: Creates a flatter, less visible seam. Line up squares, work through loops on both, and sl st.
- Single Crochet Join: Creates a slightly raised, decorative seam.
- Join-As-You-Go (JAYG): This is ideal for lace! Instead of cutting your yarn and seaming later, you incorporate the joining into the final round of each subsequent square. For this pattern, when you reach the last ch-5 loops before a corner on Round 6, you would use a (ch 2, sl st into corresponding ch-5 sp of previous square, ch 2) to join before continuing. This technique requires a bit of practice but results in seamless pieces.
- Edging: Once all squares are joined, you can add a continuous border around the entire runner using sc, hdc, or even a more elaborate shell or picot edging to finish it beautifully.

For a Blouse/Garment:
Making a lace motif blouse is a more advanced project, but your practice square is the perfect start!
- Design Concept: Sketch out your desired blouse shape. Will it be loose-fitting, a more tailored top, or an overlay?
- Measurements: Take accurate body measurements (bust, waist, hips, length, sleeve length).
- Pattern Drafting (Optional but Recommended): You can either find a commercial pattern designed for modular crochet or draft a simple T-shirt or tank top shape onto paper. This will help you determine how many squares are needed and how to arrange them.
- Lace Weight Consideration: Fine crochet thread will create a very sheer, delicate blouse (often worn over a camisole). A slightly heavier yarn like fingering or sport weight will create a more substantial fabric with good drape.
- Construction:
- Front/Back Panels: Join squares to create the front and back panels to your desired dimensions.
- Shoulder/Side Seams: Join the front and back panels at the shoulders and sides, leaving openings for the neck and armholes.
- Sleeves (Optional): Create additional squares or half-squares for sleeves, joining them to the armholes.
- Shaping: Unlike traditional garment patterns, shaping with motifs is done by strategically omitting squares, using half-squares, or by working additional rows of stitches directly onto the motif edges to create curves (e.g., at the neckline or armholes).
- Neckline/Armhole Edging: Finish all raw edges with a simple sc round, or a decorative picot or shell edging for a refined look.
- Lining: For a blouse, you’ll almost certainly need a lining underneath unless you intend it as an overlay.
This practice motif is your stepping stone to creating magnificent lace crochet projects. Take your time, enjoy the process, and soon you’ll be crafting stunning, airy designs for your home and wardrobe! Happy crocheting