 by
by 
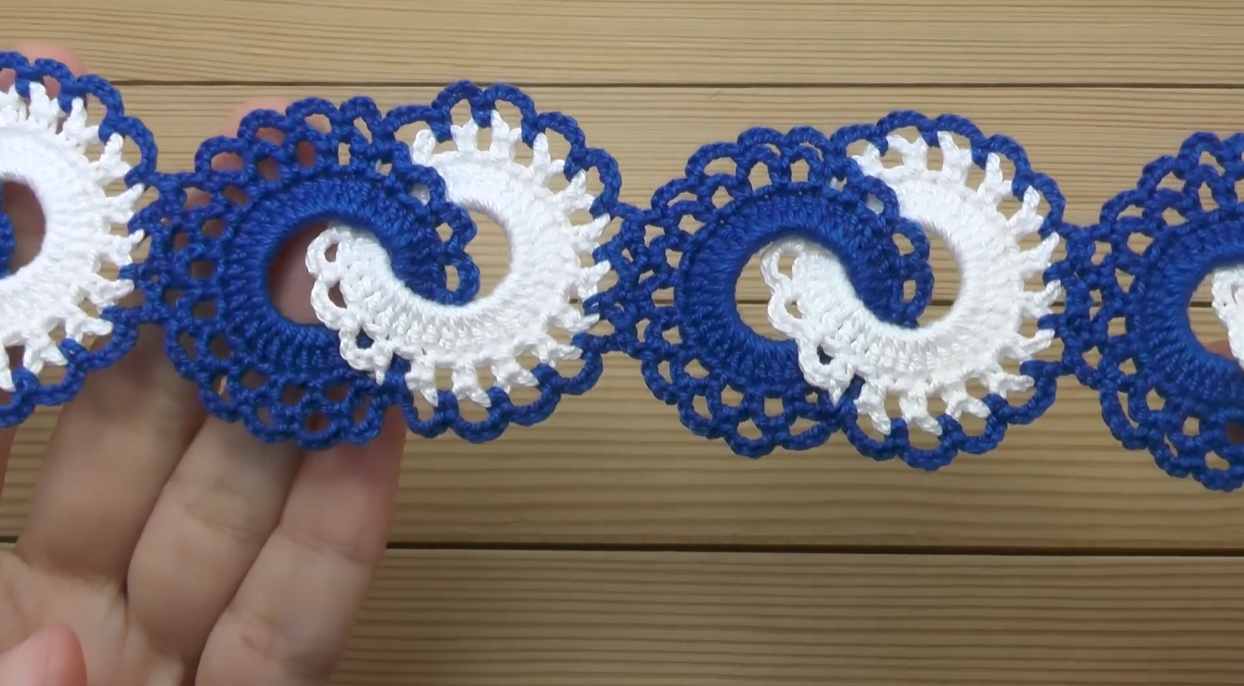
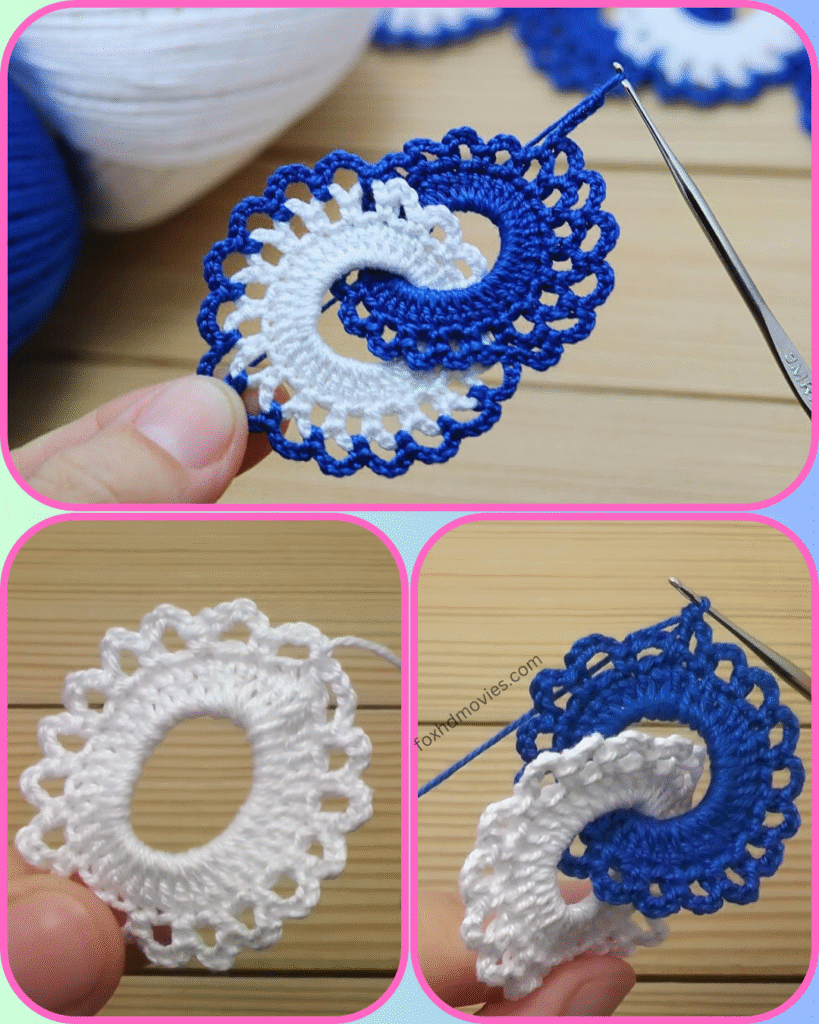
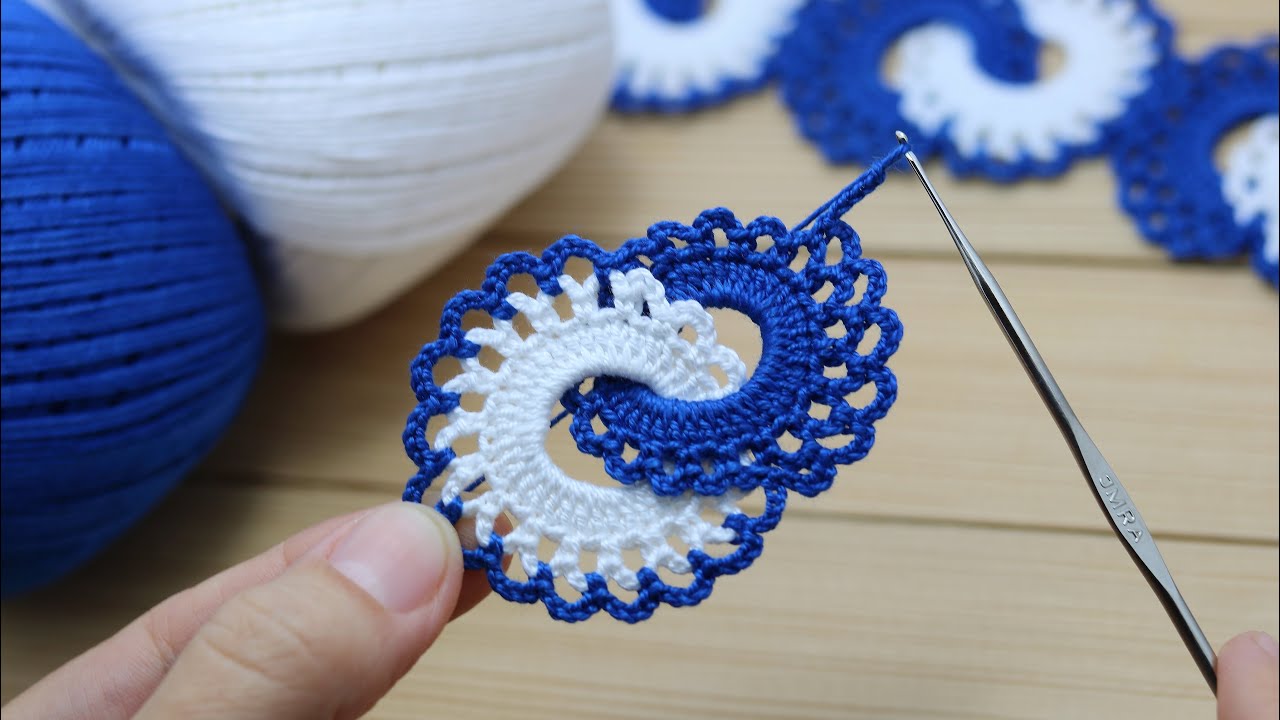
Hello, creative crocheters! Take a look at this captivating design – a beautiful two-toned spiral motif that’s both striking and surprisingly simple to create. Our inspiration photo features a lovely blue and white combination, but imagine the endless possibilities with your favorite colors!
This motif is perfect for adding a touch of unique flair to blankets, garments, bags, or even as decorative coasters. It’s an excellent project for beginners looking to try something a little different, and for experienced crocheters wanting a quick and satisfying make.
What You’ll Need:
- Yarn: Light worsted weight (DK) or sport weight cotton yarn in two contrasting colors. The photo uses blue and white. You can use fine weight yarn for a more delicate look, but the pattern will be written assuming a slightly thicker yarn for easier learning.
- Crochet Hook: A hook size appropriate for your yarn. For DK/sport weight, a 2.5mm to 3.5mm hook would work well. The hook in the image is a 3MM, which is a good choice.
- Scissors
- Yarn Needle (for weaving in ends)
Abbreviations (US Terms):
- ch: chain
- sl st: slip stitch
- sc: single crochet
- hdc: half double crochet
- dc: double crochet
- tr: treble crochet
- beg: beginning
Let’s Get Started! (Pattern for One Spiral Motif)
The magic of this motif comes from crocheting two separate “ribbons” and then joining them together with a final edging round.
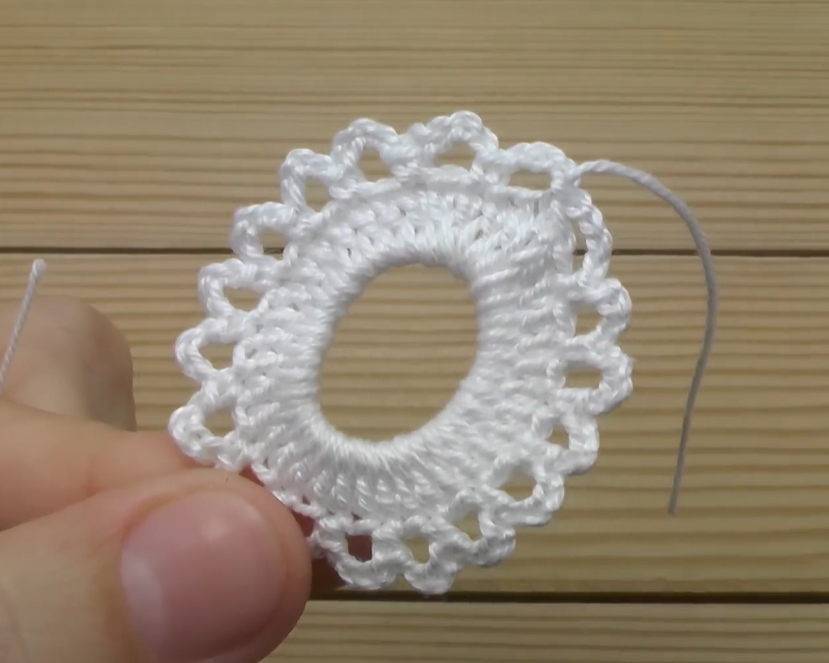
Part 1: The First Spiral Ribbon (White in the photo)
Foundation Chain: Ch 20 (or desired length for a longer/shorter spiral).
Row 1: Starting in the 2nd ch from hook, sc in each ch across. (19 sc) Row 2: Ch 1, turn. Sc in each sc across. (19 sc) Row 3: Ch 1, turn. Sc in each sc across. (19 sc)
Fasten off, leaving a tail for weaving in. You now have a short, flat strip. Don’t worry, it will curl later!
Part 2: The Second Spiral Ribbon (Blue in the photo)
Repeat Part 1 exactly as above, using your second color.
Fasten off, leaving a tail for weaving in.
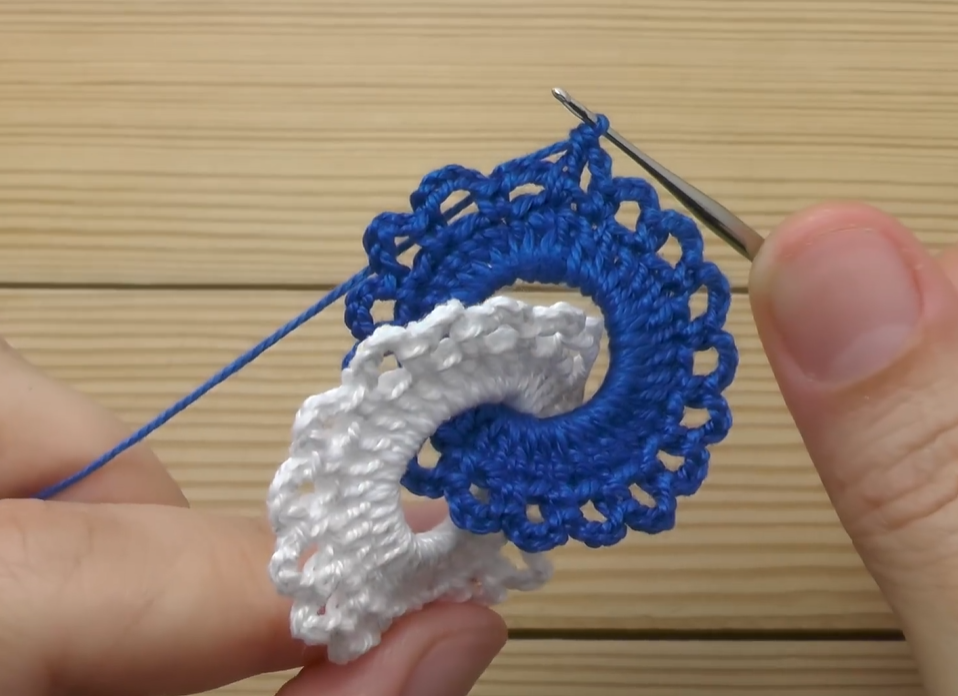
Part 3: Joining and Edging (Blue in the photo)
This is where the magic happens! You’ll take both strips, align them, and crochet around them to create the spiral and the outer decorative edge.
- Take your first ribbon (white) and hold it so one of the short ends is facing you.
- Take your second ribbon (blue) and place it on top of the first, slightly offset so they can intertwine. The short ends should align roughly.
- Attach your second color yarn (blue) to one corner of the white ribbon, through both layers of the fabric, using a sl st.
(Please note: The exact starting point and method for joining can vary. The goal is to start crocheting along one long edge of both ribbons, treating them as one piece as they naturally spiral.)
How to Visualize the Spiral and Crochet Along:
Imagine the two ribbons are intertwined. You will be working stitches around the edge of both ribbons. As you crochet, the tension of the stitches will naturally pull the flat strips into a spiral shape.
Joining & Edging Round (General Guide):
- Work along the outer edge of the combined strips:
- Ch 1 (does not count as st).
- Work approximately 2 sc stitches into the side of each “row” of the ribbons. For example, if you have 3 rows in each ribbon, you’ll place 2 sc in the side of row 1, 2 sc in the side of row 2, and 2 sc in the side of row 3, adjusting as needed to keep the edge flat but encouraging the spiral.
- Corner Detail: When you reach a “corner” (the end of a ribbon), work (sc, ch 2, sc) or (sc, picot, sc) to create a neat turn and add a decorative element.
- Continue working along the outer edge of the spiral, making sure to keep the stitches even. The key is to evenly space your stitches so the spiral curls nicely without buckling.
- The “Scalloped” Edge: The photo clearly shows a scalloped edge around the blue part. This is likely created using small shell stitches or clusters with chain spaces.
- For the scalloped edge: Sk 1 st, (dc, ch 1, dc, ch 1, dc) in next st. Or Sk 2 st, (dc, picot, dc, picot, dc) in next st.
- Adjust the number of dc stitches and chain spaces to achieve the desired scallop size. The picots are a lovely touch seen in the image.
- Continue working around the entire spiral motif, adjusting your stitches as needed to maintain the spiral shape and the evenness of the scalloped edge.
- When you reach your starting point, join with a sl st to the first sc.
Video tutorial
Finishing:
- Fasten off, leaving a long tail.
- Weave in all ends securely.
- Blocking: For a crisp, defined look, gently wet your motif and pin it down to a blocking mat, shaping the spiral. Allow it to dry completely.
Ideas for Your Spiral Motifs:
- Coasters: Perfect for a pop of color on your table.
- Garland: Join several motifs together for a unique decoration.
- Appliques: Sew them onto bags, hats, sweaters, or cushions.
- Blanket Squares: Combine many motifs for a truly stunning blanket.
- Jewelry: Attach to earring findings or a brooch pin for a quirky accessory.
This project is a fantastic way to play with color and shape in crochet. Don’t be afraid to experiment with different yarn weights and color combinations! Happy crocheting! Don’t forget to share your creations using #TwoToneSpiralCrochet – I’d love to see them!