 by
by Hello fellow yarn lovers!
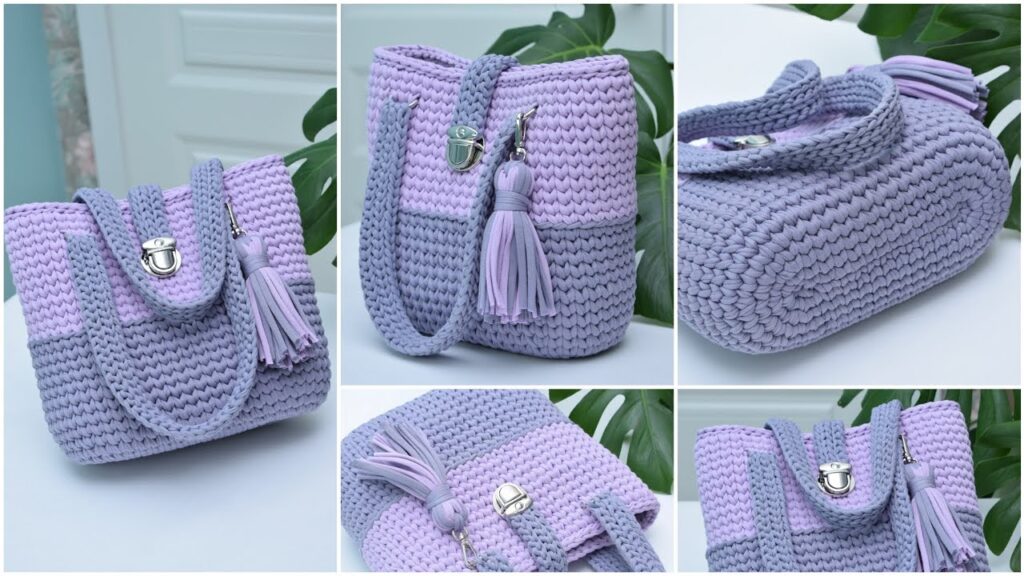
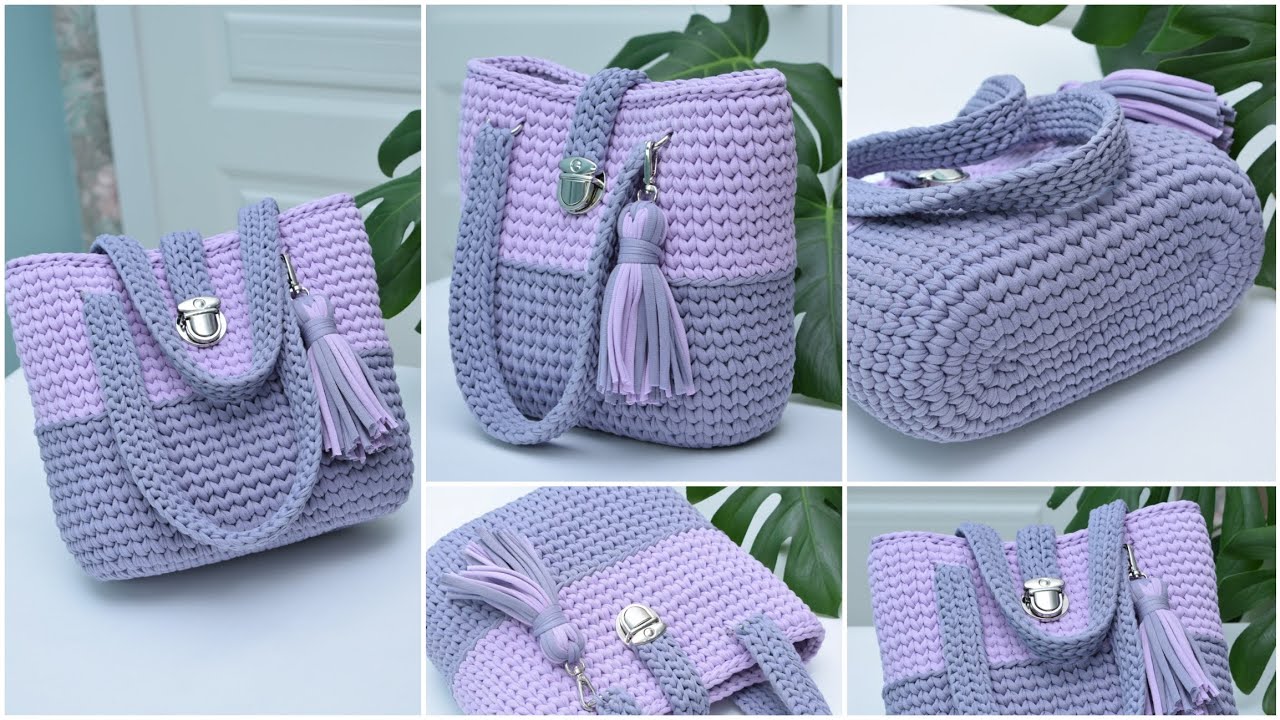
Today, I’m thrilled to share with you a pattern for this absolutely adorable and surprisingly spacious crossbody bag. Inspired by the soft, lovely hues of marshmallows, this bag is not only stylish but also incredibly practical for everyday use. It’s the perfect accessory to add a touch of handmade charm to any outfit!
Difficulty Level: Easy/Intermediate (This can be adjusted based on the actual complexity)
Materials You’ll Need:
- Yarn:
- Approx. [Yarn Quantity – e.g., 200g] of [Yarn Type, e.g., T-shirt Yarn] in Color A (e.g., Lavender)
- Approx. [Yarn Quantity – e.g., 150g] of [Yarn Type, e.g., T-shirt Yarn] in Color B (e.g., Light Grey)
- (Note: Adjust yarn quantities based on your desired size and yarn weight. I recommend having a bit extra just in case!)
- Crochet Hook: [Hook Size, e.g., 6.0mm (J)]
- Stitch Marker
- Yarn Needle
- Scissors
- Bag Clasp/Turn Lock (Optional, but recommended for closure)
- Optional: D-rings or jump rings for attaching the strap (if applicable)
Finished Dimensions (Approximate):
- Height: [e.g., 8 inches / 20 cm]
- Width: [e.g., 7 inches / 18 cm]
- Depth: [e.g., 3 inches / 7.5 cm]
Gauge:
[e.g., 4 single crochets and 4 rows = 2 inches (5 cm) using a 6.0mm hook, worked in the round.] (It’s important to check your gauge to ensure your bag turns out the correct size!)
Abbreviations (US Terms):
- ch – chain
- st(s) – stitch(es)
- sl st – slip stitch
- sc – single crochet
- inc – increase (2 sc in the same stitch)
- sk – skip
- FO – fasten off
- rep – repeat

Let’s Get Crocheting!
Notes:
- This bag is worked [e.g., in continuous rounds, from the bottom up]. Do not join rounds unless otherwise specified. Use a stitch marker to keep track of your first stitch.
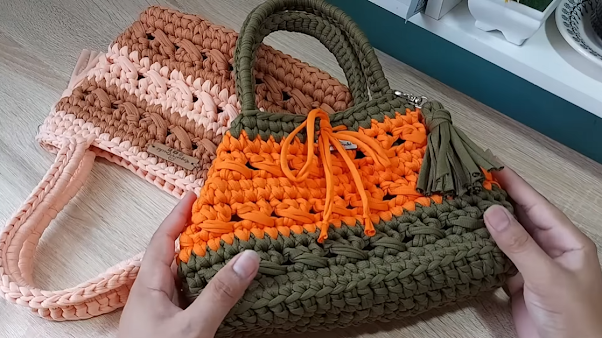
- The color changes create the beautiful striped effect.
- [Add any other important notes about tension, specific stitches, etc.]
Pattern:
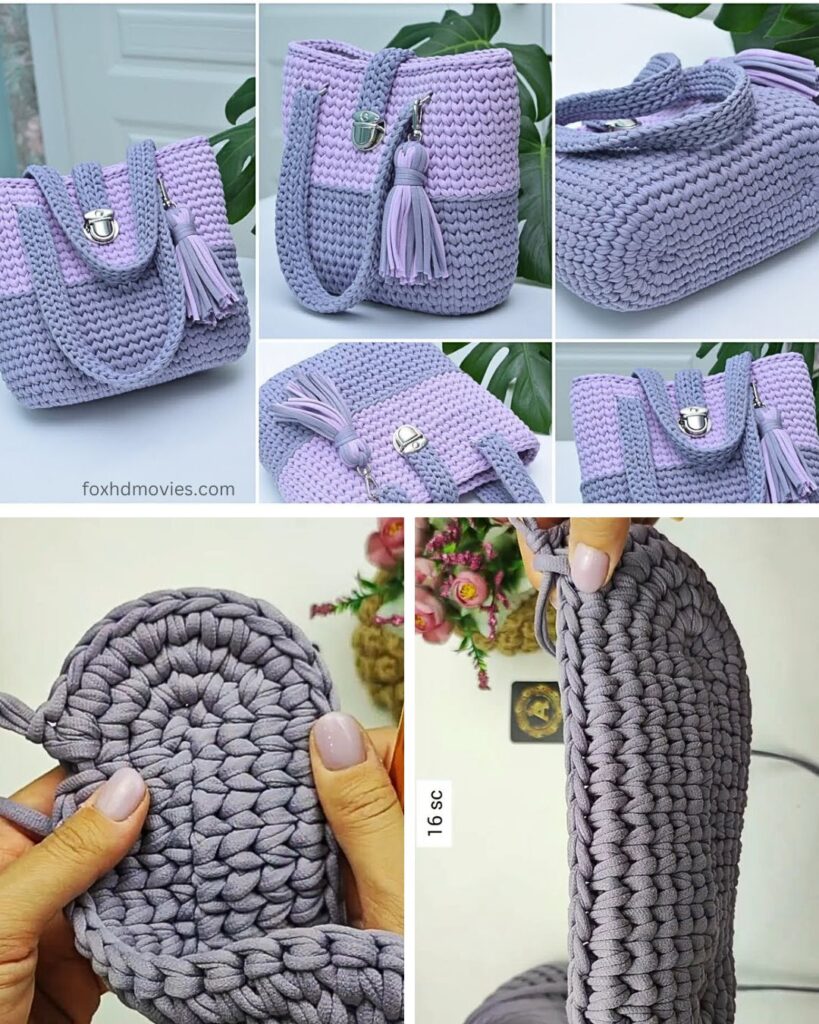
Base of the Bag (Worked in Color A)
- Chain: Ch [e.g., 18]
- Round 1: Sc in the 2nd ch from hook, sc in next [e.g., 15] chs, 3 sc in last ch. Turn your work and continue on the other side of the chain: sc in next [e.g., 15] chs, 2 sc in last ch. (Total stitches: [e.g., 36])
- Round 2: 1 sc in first st, inc in next st, sc in next [e.g., 15] sts, inc in next 3 sts, sc in next [e.g., 15] sts, inc in last 2 sts. (Total stitches: [e.g., 42])
- Round 3: [e.g., Sc around, working 2sc in each of the 6 corner stitches from the previous round.] (Total stitches: [e.g., 48])
- Continue increasing in the corners as needed until your base reaches the desired size and shape. [Provide specific instructions for each round until base is complete.]
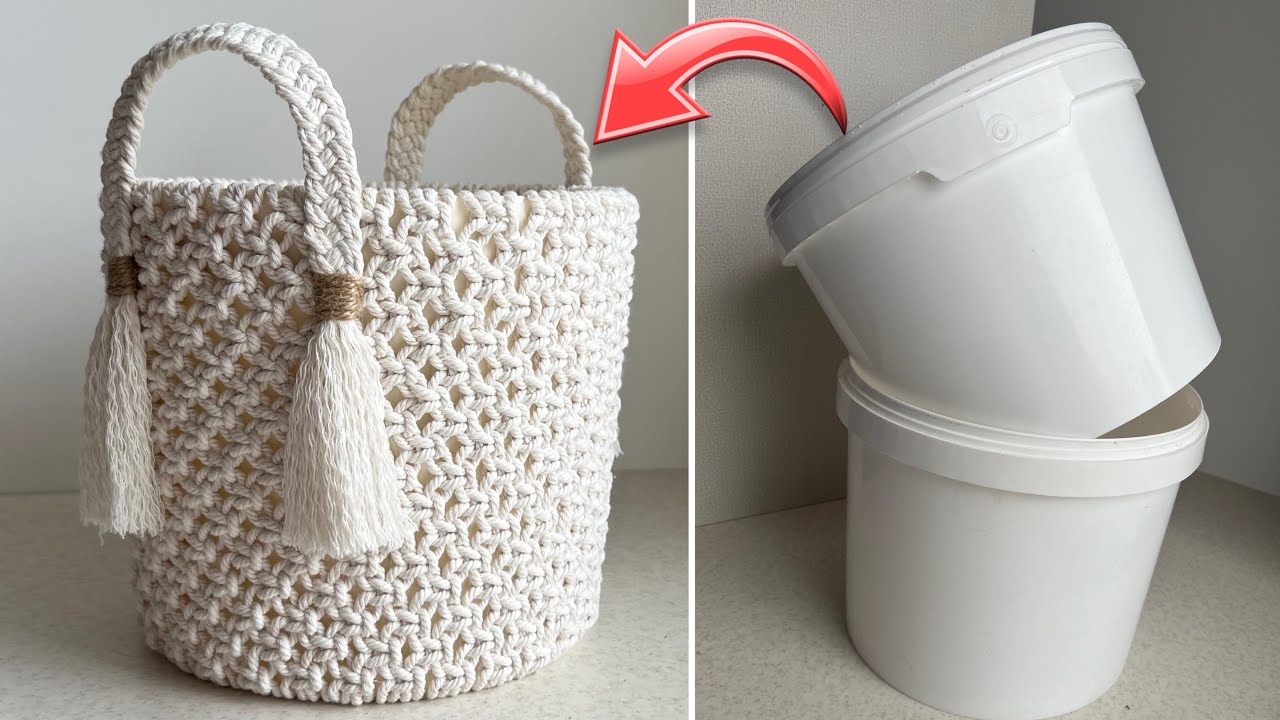
- Self-correction: The bag in the image has a very sturdy, oval base. This implies working several rounds of increases to achieve that flat bottom.

Body of the Bag (Alternating Colors)
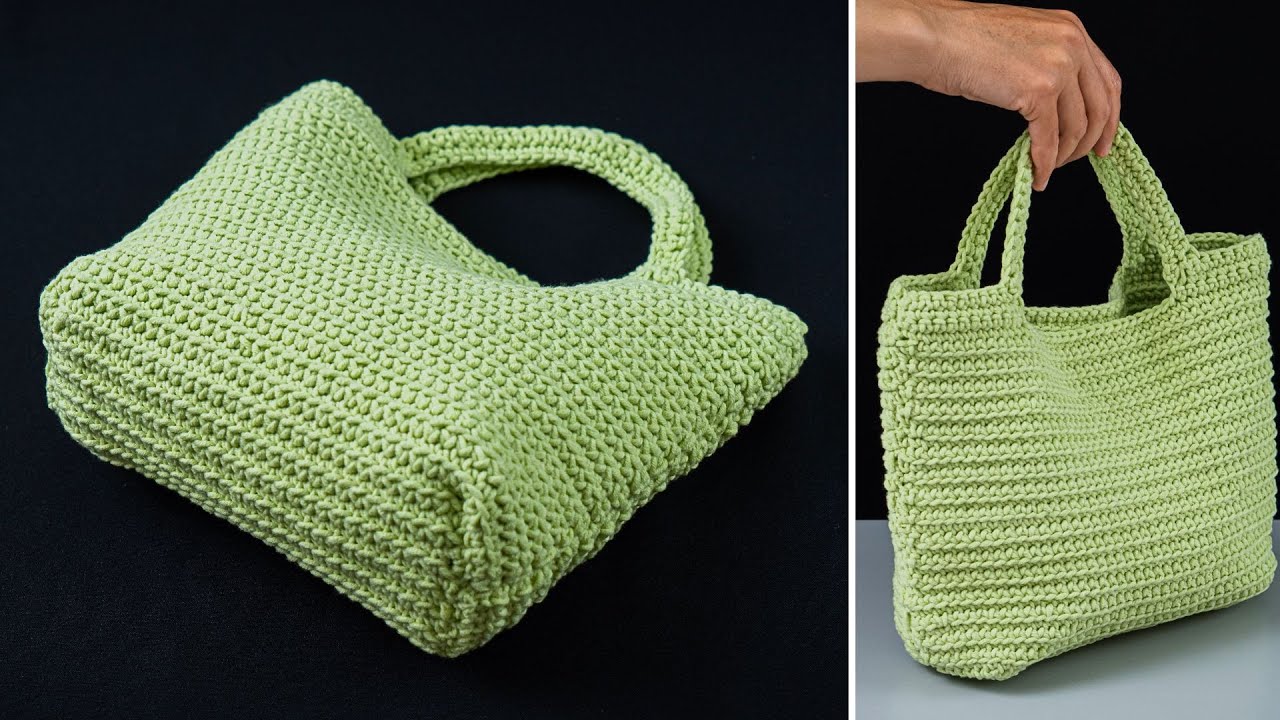
- Round [e.g., 10]: Switch to Color B. Sc in the back loop only (BLO) around. This will create a defined edge for your bag. (Total stitches: [Number of stitches from last base round])
- Round [e.g., 11]: Sc in each st around.
- Round [e.g., 12-15]: Rep Round [e.g., 11].
- Round [e.g., 16]: Switch to Color A. Sc in each st around.
- Round [e.g., 17-20]: Rep Round [e.g., 16].
- Continue alternating colors every [e.g., 4] rounds until the body reaches your desired height.
- Self-correction: The image shows 4-5 rows of each color section.
Top Edge and Strap Attachment Points (Work in Color A)
- Round [e.g., 40]: Sc in each st around.
- Round [e.g., 41]: [Instructions for creating openings for handle or reinforcing the top edge. E.g., Sc around, placing stitch markers where strap attachment rings will go.]
- Round [e.g., 42]: Sl st in each st around for a neat finish. FO and weave in ends.
Handle/Strap:
- Option 1: Crocheted Strap (as seen in the image)
- Using Color A, ch [e.g., 5].
- Row 1: Sc in 2nd ch from hook, sc in next 3 chs. (4 sts)
- Row 2: Ch 1, turn, sc in each st across. (4 sts)
- Repeat Row 2 until the strap reaches your desired length [e.g., 40-50 inches / 100-125 cm].
- Sl st the ends of the strap securely to the inside top edges of the bag, making sure it’s centered and even. Reinforce with extra stitches.
- Option 2: Other Handle Type
- [Instructions for attaching a pre-made leather strap, chain strap, etc.]

Clasp/Closure:
- Following the manufacturer’s instructions, attach your bag clasp or turn lock to the front top flap of the bag and the corresponding spot on the main body of the bag. Ensure it’s centered.
Tassel:
- Using Color A (or a mix of colors), cut several strands of yarn approximately [e.g., 10 inches / 25 cm] long.
- Gather the strands together and fold them in half.
- Tie a separate piece of yarn tightly around the folded loop, about [e.g., 0.5 inch / 1 cm] from the top.
- Wrap another piece of yarn tightly around the top section of the tassel to form the “head.”
- Trim the bottom loops to create an even fringe.
- Attach the tassel to the bag’s clasp or a D-ring using a jump ring or by directly tying it on.
Finishing Touches:
- Weave in all remaining loose ends securely.
- Give your bag a gentle block if needed to help it hold its shape.