 by
by 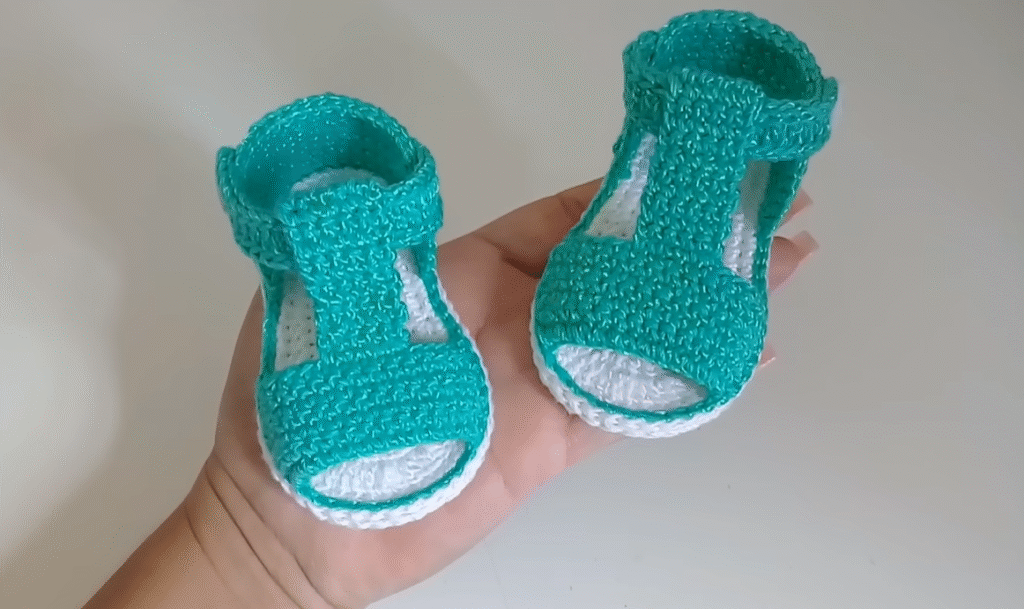
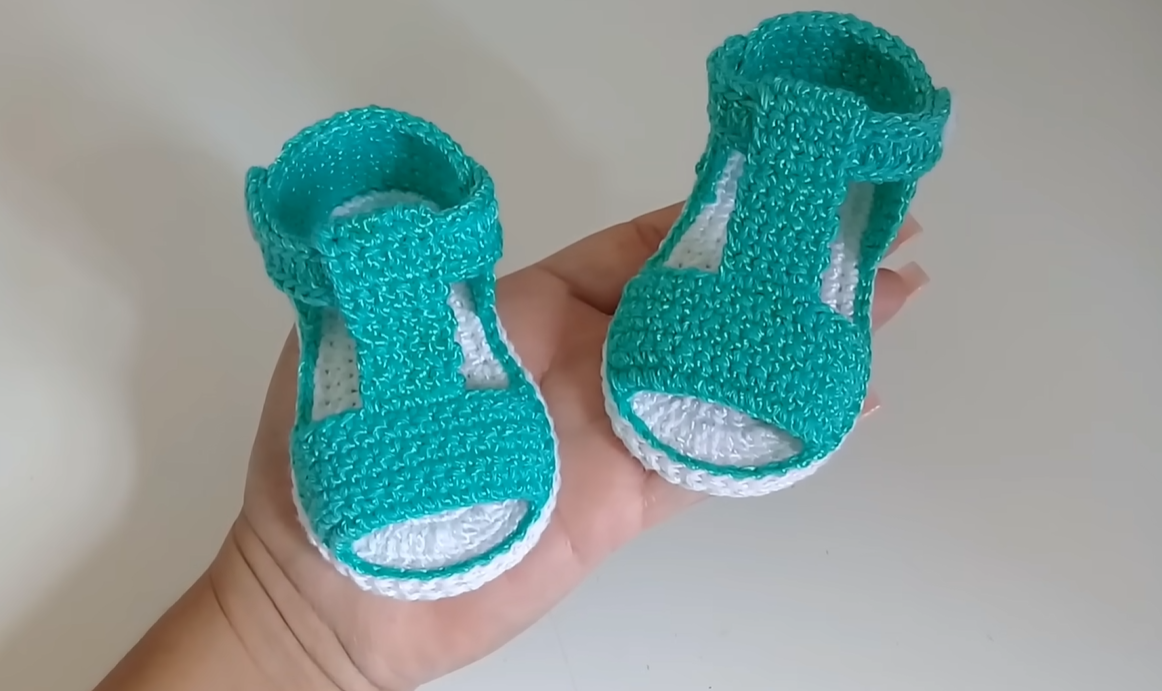
Hello fellow yarn lovers! Are you looking for a sweet and thoughtful gift for a new arrival, or perhaps something special for your own little one’s tiny feet? Look no further! Today, we’re going to create these absolutely charming crocheted baby sandals. They’re perfect for warmer weather and add an adorable touch to any baby outfit.
Skill Level: Easy to Intermediate
Materials You’ll Need:
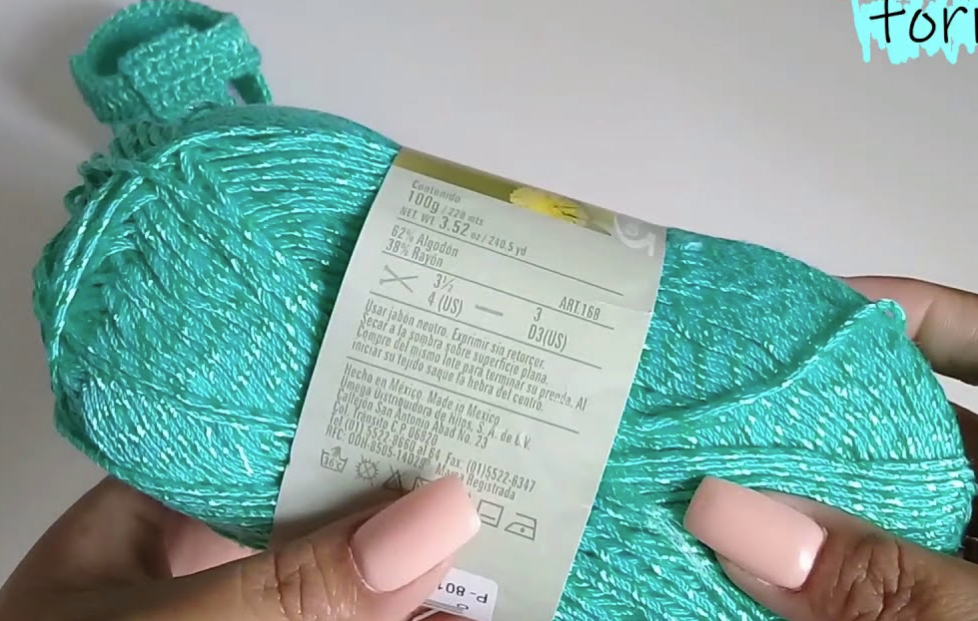
- Yarn: DK (light worsted) weight cotton or baby yarn in two colors (e.g., Teal and White). Cotton is great for breathability for baby feet!
- Crochet Hook: 3.0mm or 3.5mm (depending on your tension and desired size – aim for a fairly dense fabric)
- Yarn Needle: For weaving in ends
- Scissors
- Optional: Small button (for strap closure, if desired, though the pattern below uses a tie/loop closure for simplicity)
Gauge: Not critical for this project, but aiming for a firm fabric will help the sandals hold their shape.
Finished Size: Approximately 0-3 months (Sandal sole length around 9-10 cm). You can adjust the size by changing hook size or adding/subtracting rows to the sole.
Abbreviations (US Terms):
- ch: chain
- sl st: slip stitch
- sc: single crochet
- hdc: half double crochet
- dc: double crochet
- inc: increase (2 stitches in the same stitch)
- sk: skip
- st(s): stitch(es)
- FO: fasten off
Pattern Notes:
- Ch 1 at the beginning of rows does not count as a stitch unless otherwise specified.
- Ch 2 or Ch 3 at the beginning of rows counts as a stitch as specified.
- Work tightly to create a sturdy fabric.
- We’ll make two identical sandals.
Let’s Make the Sandal!
We’ll start by crocheting the sole, then build up the sides, and finally add the straps.
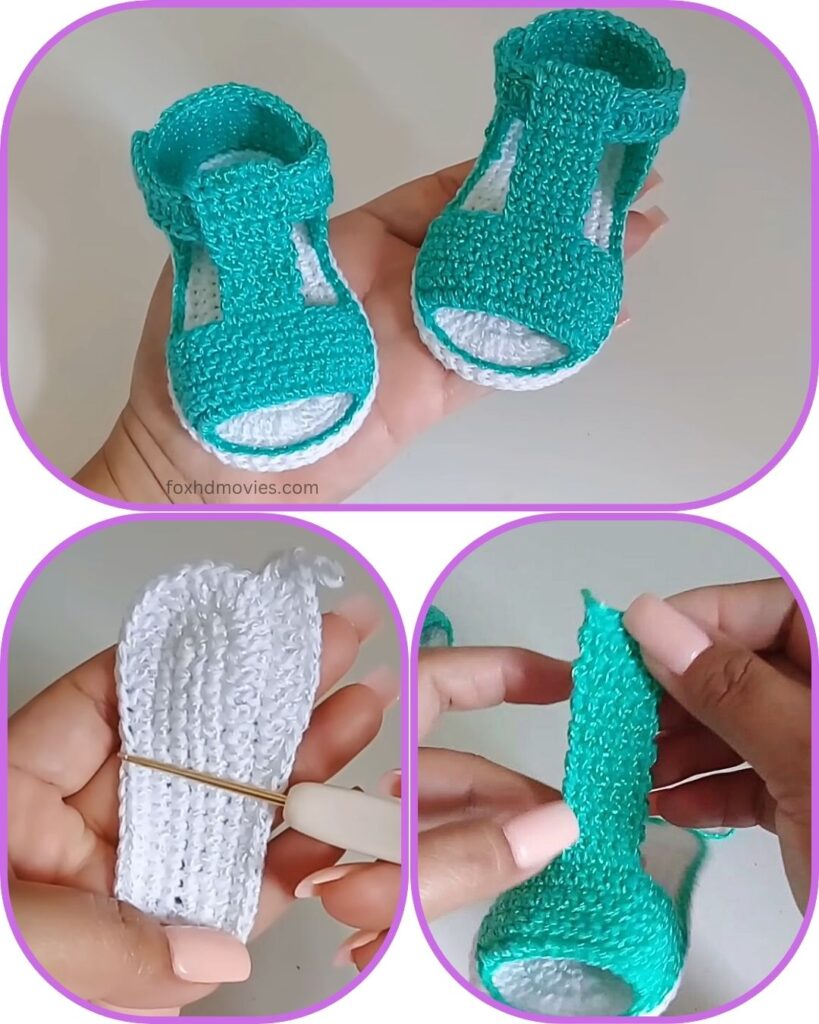
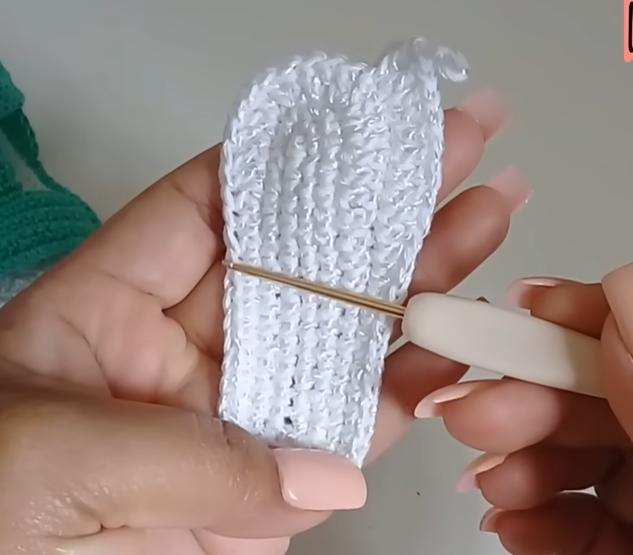
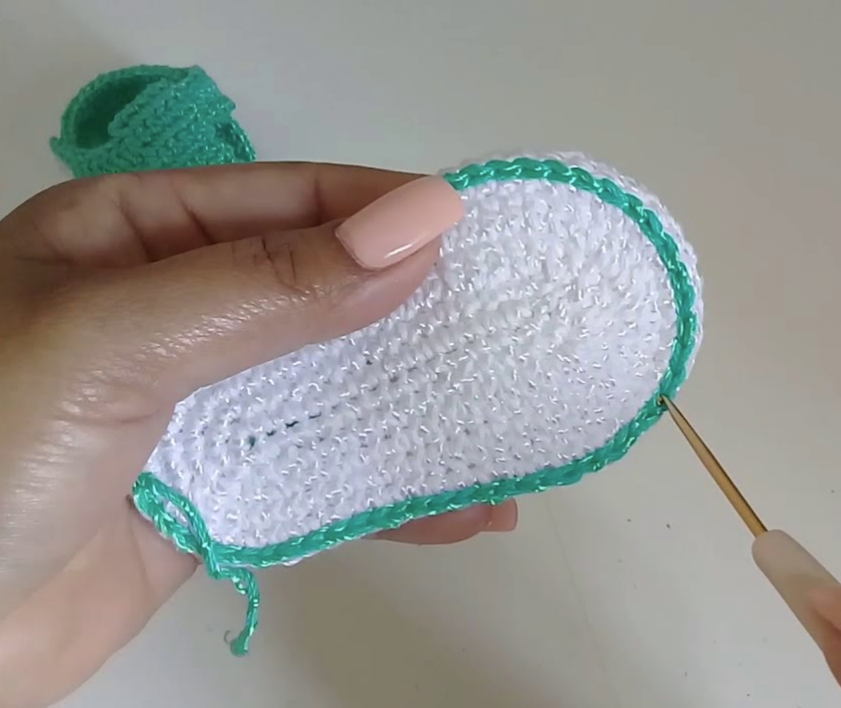
Part 1: The Sole (Make 2)
Using White yarn:
Row 1: Ch 13. Row 2: Sc in 2nd ch from hook, sc in next 9 ch, 4 sc in last ch. Working down the other side of the chain: sc in next 9 ch, 2 sc in last ch. Join with sl st to first sc. (26 sts) Row 3: Ch 1, inc in first st, sc in next 9 sts, inc in next 4 sts, sc in next 9 sts, inc in last 2 sts. Join with sl st to first sc. (34 sts) Row 4: Ch 1, sc around. Join with sl st to first sc. (34 sts) Row 5: Ch 1, sc around. Join with sl st to first sc. (34 sts) FO, weave in ends.
Part 2: The Side Wall/Base (Make 2)
This part will create the teal edge around the sole.
Using Teal yarn:
Row 1: Join teal yarn with a sl st in any st on the sole, working into the back loops only of Row 5 of the sole, ch 1, sc around. Join with sl st to first sc. (34 sts) Row 2: Ch 1, sc around. Join with sl st to first sc. (34 sts) FO, do not cut a long tail, we’ll join for the upper part.
Part 3: The Upper Part of the Sandal (Make 2)
This is where we shape the front and back of the sandal.
Still using Teal yarn:
- To find your starting point for the front of the sandal: Lay your sole flat with the “toe” facing away from you. Count back 8 stitches from the left side of the sole’s center (this will be roughly the middle of the “v” shape at the toe). This is where you’ll join your yarn.
Front Section (Toe):
Row 1: Join teal yarn with a sl st in the 8th st back from the center front as described above. Ch 1, sc in the same st and in the next 10 sts. (11 sc) Row 2: Ch 1, turn. Sc2tog, sc in next 7 sts, sc2tog. (9 sc) Row 3: Ch 1, turn. Sc2tog, sc in next 5 sts, sc2tog. (7 sc) Row 4: Ch 1, turn. Sc2tog, sc in next 3 sts, sc2tog. (5 sc) Row 5: Ch 1, turn. Sc2tog, sc in next st, sc2tog. (3 sc) Row 6: Ch 1, turn. Sc3tog. (1 sc) FO, weave in ends.
Back Section (Heel):
- To find your starting point: With the sandal still facing you, locate the center back of the heel. Count 7 stitches to the left of the center. This is your starting point.
Row 1: Join teal yarn with a sl st in the st 7 stitches to the left of the center back. Ch 1, sc in the same st and in the next 13 sts. (14 sc) Row 2: Ch 1, turn. Sc in each st across. (14 sc) Row 3: Ch 1, turn. Sc in each st across. (14 sc) FO, leave a long tail for sewing the strap.
Part 4: The T-Strap (Make 2)
Using Teal yarn:
Row 1: Ch 20. Row 2: Sc in 2nd ch from hook and in each ch across. (19 sc) FO, leave a long tail for sewing.

Assembly:
- Attach the T-Strap to the Toe: Using your yarn needle and the long tail from the T-strap, sew one end of the T-strap securely to the center of the Row 6 (the single sc) of the Front Section of the sandal. Ensure it’s centered and firm.
- Attach the T-Strap to the Side Walls: The other end of the T-strap will be sewn down the middle of the foot. Position the strap over the foot, ensuring it’s not too tight or too loose. Sew the sides of the strap to the top edge of the Side Wall/Base for about 2-3 cm. This will give it the “T” shape and secure the front of the sandal.
- Attach the Heel Strap (from Back Section): Take the long tail from the Back Section of the sandal.
- Right Sandal: Lay the sandal flat. Bring the right side of the heel strap (the last stitch of Row 3 of the Back Section) up towards the T-strap. You want to create a loop for the button or a tie closure. You can either:
- Sew a button onto the upper T-strap where the heel strap meets it, and then create a buttonhole loop with chains on the heel strap.
- Or, as seen in the picture, simply create a loop with chains on the end of the heel strap. Ch about 6-8 chains (adjust for loop size), sl st back into the last sc of the heel strap to form a loop. Then, the T-strap can simply be tucked through this loop or tied with a small piece of yarn.
- Sew the left side of the heel strap (the first stitch of Row 3 of the Back Section) securely to the side of the sandal base, aligning it with the edge of the T-strap.
- Left Sandal: Repeat the process, but mirror the placement of the loop/buttonhole and the sewn-down side.
- Right Sandal: Lay the sandal flat. Bring the right side of the heel strap (the last stitch of Row 3 of the Back Section) up towards the T-strap. You want to create a loop for the button or a tie closure. You can either:
- Weave in all remaining ends neatly.
Video tutorial
Finishing Touches:
- Give your sandals a gentle block if desired to help them hold their shape.
- Add a cute button if you opted for that closure!
And there you have it! A beautiful pair of handmade crocheted baby sandals, ready to adorn tiny feet. These make wonderful baby shower gifts and are sure to be cherished.
If you make these, I’d love to see your creations! Share them in the comments below or tag me on social media. Happy crocheting!