 by
by 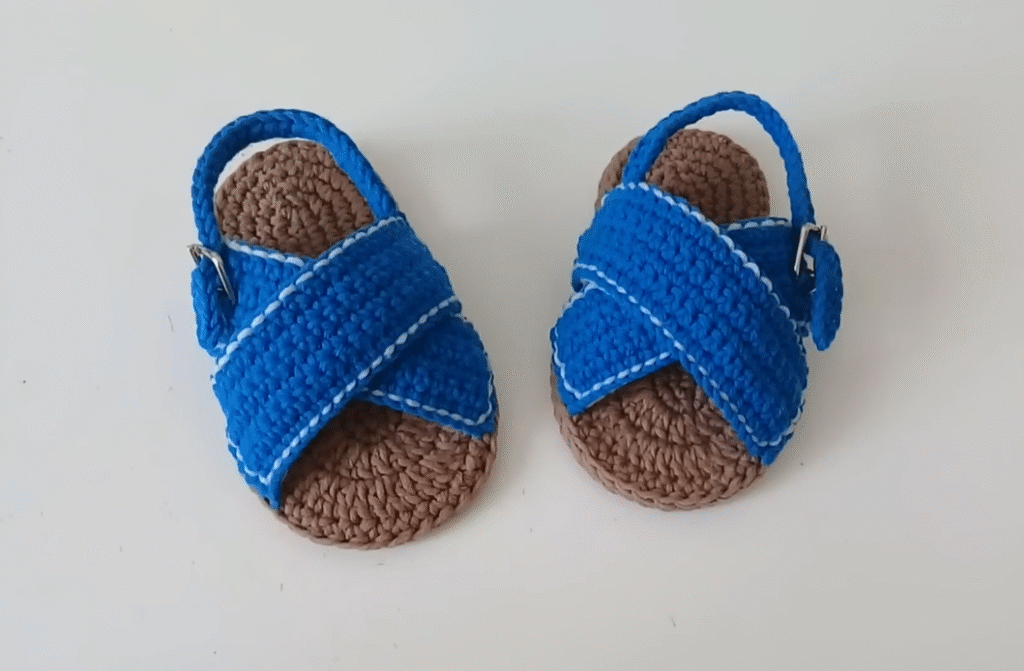
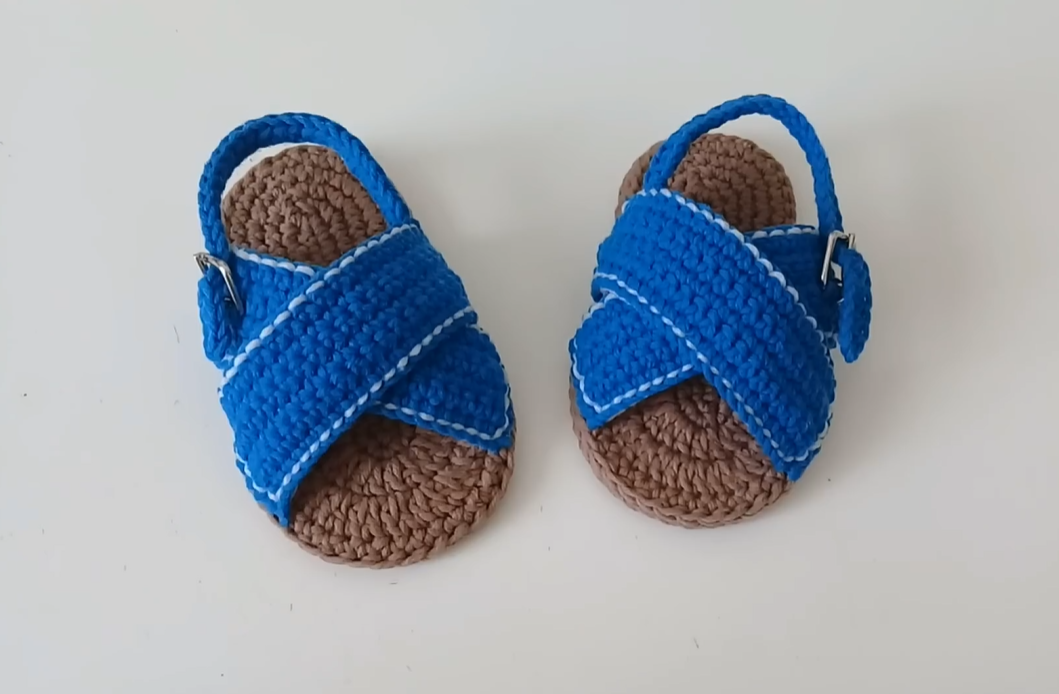
Get your little one ready for sunny adventures with these adorable crochet baby sandals! Inspired by the cool blue and natural brown tones in the picture, this pattern features a sturdy sole, comfortable criss-cross straps, and a secure ankle strap with a charming buckle detail. Perfect for keeping tiny feet cool and stylish during warmer weather.
Skill Level: Intermediate (Familiarity with basic stitches, working in rounds, and assembling multiple pieces is helpful).
Materials:
- Yarn: DK (Light Worsted) weight yarn. A soft cotton or cotton blend is highly recommended for breathability and comfort.
- Sole Color (SC): Brown (or a natural tan) – approx. 20-30 yards per pair.
- Main Color (MC): Blue (or your chosen primary color) – approx. 20-30 yards per pair.
- Accent Color (AC): White (for strap detail) – small amount, approx. 5 yards.
- Crochet Hook: Size G/6 (4.0 mm) or size needed to obtain gauge.
- Yarn Needle: For weaving in ends and attaching straps.
- Scissors
- Stitch Markers: Very helpful for marking the start of rounds and increase points on the sole.
- Small Buckles: 2 (approx. 1/2 inch or 1.25 cm wide), one for each sandal. These are often found in doll-making or scrapbooking sections.
Gauge (Crucial for Sizing!):
Achieving the correct sole length is paramount for these sandals to fit properly.
- Sole Gauge: After completing the sole section, measure its length. Adjust your hook size or initial chain/increase rounds to reach the desired length from the sizing chart below.
- Example: For 0-3 months, your finished sole should measure around 3.5 inches.
Sizing Chart (Approximate Finished Sole Length):
| Size | Approx. Sole Length (inches) | Approx. Sole Length (cm) | Initial Chain (suggested) |
|---|---|---|---|
| 0-3 Months | 3.5 | 9 | Ch 10 |
| 3-6 Months | 4 | 10.5 | Ch 12 |
| 6-9 Months | 4.5 | 11.5 | Ch 14 |
Export to Sheets
- Note: If you want a larger size, increase your initial chain length by 2 stitches per size increment, and you may need to add an extra round to the sole.
Abbreviations (US Crochet Terms):
- ch: chain
- sl st: slip stitch
- sc: single crochet
- hdc: half double crochet
- dc: double crochet
- st(s): stitch(es)
- inc: increase (work 2 sts in the same st)
- SC: Sole Color (Brown)
- MC: Main Color (Blue)
- AC: Accent Color (White)
- ( ): repeat instructions in parentheses a specified number of times
- [ ]: total stitches at the end of the round
Pattern for Ocean Breeze Baby Sandals (Make 2)
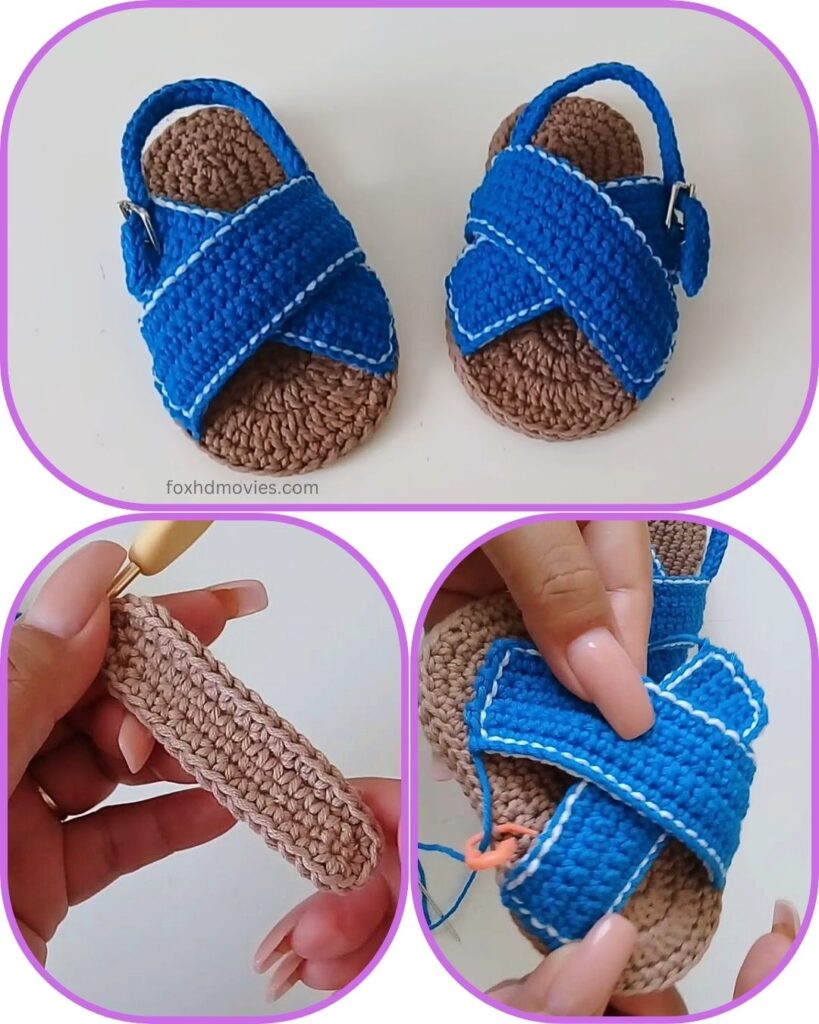
Part 1: The Sole (Make 2 per sandal – top and bottom)
You will make two identical oval soles for each sandal. This gives the sandal a sturdy, double-layered base.
Using Sole Color (SC – Brown):
Round 1: Ch (refer to Sizing Chart for initial chain). Hdc in 3rd ch from hook. Hdc in next (initial chain – 3) stitches. In the last ch, work 3 hdc (this turns the corner). Now working down the other side of the chain, hdc in next (initial chain – 3) stitches. In the very last ch (where you worked your first hdc), work 2 hdc. [Total stitches will vary based on initial chain]. Place stitch marker in the first hdc of the next round.

Round 2: 2 hdc in the first st (inc). Hdc in each st along the side of the sole until you reach the 3 hdc you worked in the last chain. (2 hdc in next st) 3 times (inc for the toe end). Hdc in each st along the other side until you reach the 2 hdc at the heel end. (2 hdc in next st) 2 times (inc for the heel end). Move stitch marker to the first st of the current round.
Round 3 (Optional for larger sizes, or if you need a wider sole): (2 hdc in next st) 2 times (inc). Hdc in each st along the side. (2 hdc in next st, hdc in next st) 3 times (inc for the toe end). Hdc in each st along the other side. (2 hdc in next st, hdc in next st) 2 times (inc for the heel end). Move stitch marker to the first st of the current round.
Sl st to the first hdc of your last sole round to join. Fasten off and weave in ends for your first sole piece. Make a second identical sole piece. Do not fasten off the second sole piece; you will join the two soles together.
Joining the Soles: Place the two sole pieces one on top of the other, aligning them perfectly. Using SC (Brown): Ch 1. Sc through BOTH loops of BOTH sole pieces all around the edge. Sl st to first sc to join. Fasten off SC and weave in ends. This creates a thick, sturdy sole.
Part 2: The Straps (Make 4 Criss-Cross Straps, 2 Ankle Straps)
Using Main Color (MC – Blue):
Criss-Cross Straps (Make 4): Ch 18-22 (adjust length to fit across the top of the baby’s foot). Hdc in 3rd ch from hook and in each ch across. [16-20 hdc] Fasten off MC, leaving a long tail for sewing.
Ankle Straps (Make 2): Ch 20-25 (adjust length to go around the back of the ankle and through the buckle). Hdc in 3rd ch from hook and in each ch across. [18-23 hdc] Fasten off MC, leaving a long tail for sewing.

Part 3: Assembly & Embellishment
1. Attach Criss-Cross Straps:
- Take one sole. Visually (or with markers), determine where the straps will cross on the top of the foot. One strap will start from the inner side of the sole and go towards the outer front, the other from the outer side towards the inner front, crossing in the middle.
- Using your yarn needle and the long tail, sew the end of one criss-cross strap securely to the side of the sole, about 1/3 of the way back from the toe.
- Cross the strap over the top of the foot and sew the other end securely to the opposite side of the sole, further forward, closer to the toe.
- Repeat with the second criss-cross strap, making sure they overlap nicely in the center. Sew the overlap lightly in the center to keep them in place if desired.
2. Attach Ankle Straps & Buckles:
- Thread one end of an ankle strap through one of your small buckles. Fold the end over and sew it securely in place to form a closed loop around the buckle.
- Sew the opposite end of the ankle strap to the outer side of the sandal sole, roughly aligned with where the back of the heel would be.
- Sew the other end of the ankle strap to the inner side of the sandal sole, creating the strap that goes around the back of the heel. The buckle will then sit on the outer side of the ankle.

3. White Accent Stitching:
- Using Accent Color (AC – White) and a yarn needle:
- Starting from the inside of the sandal, bring your needle up through the center of one of the blue criss-cross straps.
- Make small, even running stitches along the middle of each blue strap, following the path of the yarn. You’re essentially embroidering a line onto the strap.
- Continue this white accent stitching on the ankle strap as well.
- Weave in all white yarn ends securely.
Final Touches:
- Weave in all remaining yarn ends securely.
- Make sure both sandals are as identical as possible.
- Gently block the sandals if needed to help them hold their shape.
Video tutorial
Congratulations! You’ve just created a charming pair of Ocean Breeze Crochet Baby Sandals. These are sure to be a comfortable and stylish addition to any baby’s warm-weather wardrobe!