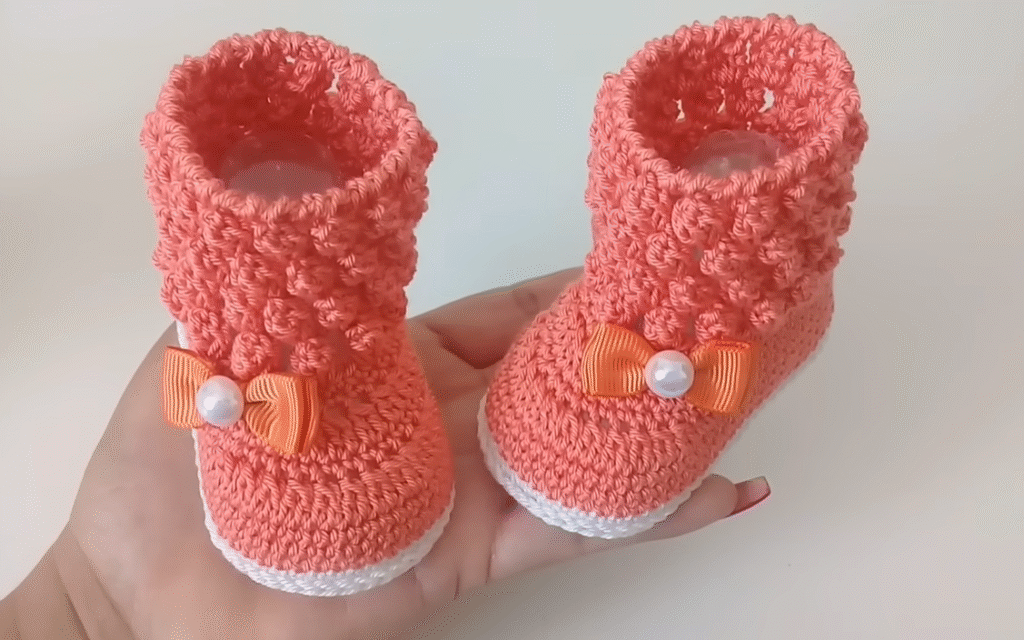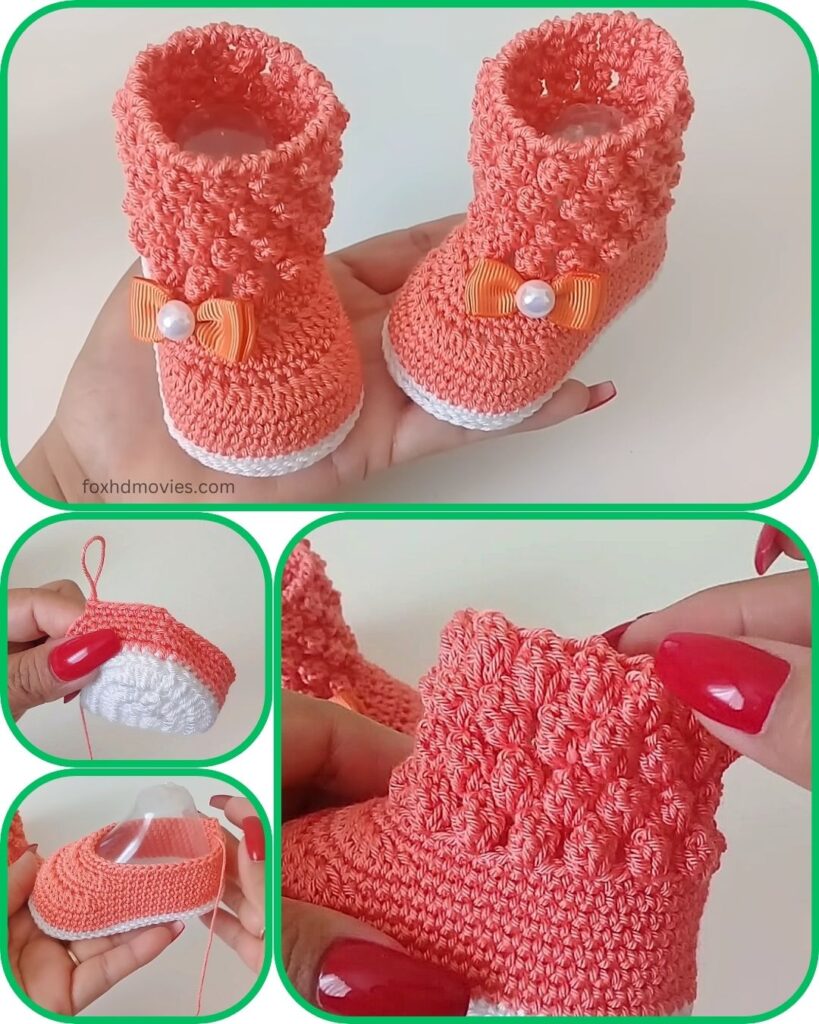
Wrap tiny feet in a cloud of softness with these adorable crochet baby boots! Featuring a warm, solid body and a unique, super-textured cuff (like a “bobble” or “raspberry” stitch), these boots are designed for maximum coziness and cuteness. The sweet little bow with a pearl adds the perfect finishing touch, making them an ideal handmade gift or a stylish addition to any baby’s outfit.
Skill Level: Intermediate (Familiarity with basic stitches, working in rounds, increasing/decreasing, and a textured stitch like puff/bobble is helpful).

Materials:
- Yarn: Worsted Weight (Aran) yarn. A soft acrylic or blend is highly recommended for warmth and comfort.
- Main Color (MC): Coral/Peach (or your chosen primary color) – approx. 60-80 yards.
- Sole/Accent Color (SC): White (or a contrasting color for the sole edge) – small amount, approx. 10-15 yards.
- Crochet Hook: Size H/8 (5.0 mm) or I/9 (5.5 mm), or size needed to obtain gauge. (A slightly larger hook will enhance the “chunky” feel and texture).
- Yarn Needle: For weaving in ends and attaching embellishments.
- Scissors
- Stitch Markers: Very helpful for marking the start of rounds and increase points on the sole.
- Small Bows: 2 pre-made satin or sheer ribbon bows (approx. 1 inch wide).
- Pearl Beads: 2 small pearl beads (approx. 6-8 mm) to attach to the center of the bows.
Gauge (Crucial for Sizing!):
Achieving the correct sole length is paramount for these boots to fit properly.
- Sole Gauge: After completing the sole section, measure its length. Adjust your hook size or initial chain/increase rounds to reach the desired length from the sizing chart below.
- Example: For 0-3 months, your finished sole should measure around 3.5 inches.
Sizing Chart (Approximate Finished Sole Length):
| Size | Approx. Sole Length (inches) | Approx. Sole Length (cm) | Initial Chain (suggested) |
|---|---|---|---|
| 0-3 Months | 3.5 | 9 | Ch 10 |
| 3-6 Months | 4 | 10.5 | Ch 12 |
| 6-9 Months | 4.5 | 11.5 | Ch 14 |
- Note: If you want a larger size, increase your initial chain length by 2 stitches per size increment, and you may need to add an extra round to the sole and/or upper sections.
Abbreviations (US Crochet Terms):
- ch: chain
- sl st: slip stitch
- sc: single crochet
- hdc: half double crochet
- dc: double crochet
- sc2tog: single crochet 2 together (decrease)
- hdc2tog: half double crochet 2 together (decrease)
- BLO: back loop only
- FLO: front loop only
- Bobble: Bobble Stitch (see Special Stitches below)
- st(s): stitch(es)
- sp: space
- inc: increase (work 2 sts in the same st)
- MC: Main Color (e.g., Coral/Peach)
- SC: Sole/Accent Color (e.g., White)
- ( ): repeat instructions in parentheses a specified number of times
- [ ]: total stitches at the end of the round
Special Stitch: Bobble Stitch (Bobble)
(YO, insert hook into st, YO, pull up a loop, YO, pull through 2 loops) 5 times in the same stitch (6 loops on hook). YO, pull through all 6 loops on hook.
Pattern for Chunky Textured Cuff Baby Boots (Make 2)
Part 1: The Sole (Make 2 per pair)
Work in continuous rounds, using a stitch marker to mark the first stitch of each round.
Using Main Color (MC – Coral/Peach):
Round 1: Ch (refer to Sizing Chart for initial chain). Hdc in 3rd ch from hook. Hdc in next (initial chain – 3) stitches. In the last ch, work 3 hdc (this turns the corner). Now working down the other side of the chain, hdc in next (initial chain – 3) stitches. In the very last ch (where you worked your first hdc), work 2 hdc. [Total stitches will vary based on initial chain]. Place stitch marker in the first hdc of the next round.

Round 2: 2 hdc in the first st (inc). Hdc in each st along the side of the sole until you reach the 3 hdc you worked in the last chain. (2 hdc in next st) 3 times (inc for the toe end). Hdc in each st along the other side until you reach the 2 hdc at the heel end. (2 hdc in next st) 2 times (inc for the heel end). Move stitch marker to the first st of the current round.
Round 3: (2 hdc in next st) 2 times (inc). Hdc in each st along the side. (2 hdc in next st, hdc in next st) 3 times (inc for the toe end). Hdc in each st along the other side. (2 hdc in next st, hdc in next st) 2 times (inc for the heel end). Move stitch marker to the first st of the current round.
Check your sole length against the Sizing Chart. Adjust hook size or add/remove initial chains/rounds if needed.
Sl st to the first hdc of your last sole round to join. Fasten off and weave in ends for one sole. For the second sole, do not fasten off; you’ll continue with the upper.
Part 2: Building the Sides & Foot Opening
Using Main Color (MC – Coral/Peach), continuing from the second sole:
Round 1 (Creating the “Wall”): Ch 1. Sc in the BLO of each st around. Sl st to the first sc to join. This round creates a defined edge that makes the boot stand up.
Round 2: Ch 1. Sc in each st around. Sl st to the first sc to join.
Round 3 (Toe Shaping – First Decrease Round): Ch 1. Sc in the first (approx. 10-12) stitches (for the heel/instep area; adjust based on your sole size). Mark the center toe stitch. You’ll be working decreases symmetrically around this point. Now, for the toe decreases: (hdc2tog) 5-6 times across the front of the shoe. Sc in the remaining stitches around the heel/instep. Sl st to the first sc to join. This round begins to pull the toe inwards.
Round 4 (Further Toe Shaping & Opening): Ch 1. Sc in the first (approx. 8-10) stitches (slightly fewer as the front has narrowed). (sc2tog) 3-4 times across the front of the shoe. Sc in the remaining stitches around the heel/instep. Sl st to the first sc to join. The opening for the foot should now be well-defined.
Round 5 (Defining the Top Edge): Ch 1. Sc in each st around the entire opening of the boot (including the decreased toe section). Sl st to the first sc to join. This creates a neat edge for the foot opening before the cuff.

Part 3: The Chunky Textured Cuff
This is the eye-catching part of the boot with a unique texture.
Using Main Color (MC – Coral/Peach):
Round 6 (First Cuff Row – Base for Bobbles): Ch 1. Hdc in each st around. Sl st to the first hdc to join. This gives a solid base for the bobbles to pop out.
Round 7 (Bobble Stitch Round): Ch 1. Sc in the first st. *Bobble in next st, sc in next st.* Repeat from * to * around. Sl st to the first sc to join. This creates the lovely bumpy texture seen in the picture. Ensure the bobbles pop out on the right side of your work.
Round 8 (Back of Bobbles Round): Ch 1. Hdc in each st around. Sl st to the first hdc to join. Work into the top of the scs and bobbles from the previous round. This pushes the bobbles forward and creates the base for the next row of bobbles if desired, or a plain row before the top edge.
Round 9 (Repeat Bobble Stitch Round if desired for a taller cuff): Ch 1. Sc in the first st. *Bobble in next st, sc in next st.* Repeat from * to * around. Sl st to the first sc to join. The picture appears to have 2 rows of bobbles, but they are very close together, almost overlapping. You can achieve this by skipping Round 8 entirely and just repeating Round 7 again, or by making Round 8 a sc row. For this pattern, I’m providing two distinct bobble rows as it’s easier to follow. If you want them closer, skip Round 8 and just repeat Round 7.

Part 4: The Sole Edge & Top Trim
This adds the clean white lines seen in the picture.
Using Sole/Accent Color (SC – White):
Round 1 (Bottom Sole Edge): Join SC yarn with a sl st to any stitch at the bottom edge of the sole (where Round 1 of the body was worked in BLO). Ch 1. Sc in each st around the very bottom edge of the sole, working into the unused front loops of the sole base. Sl st to the first sc to join. Fasten off SC.
Round 2 (Top Cuff Edge): Join SC yarn with a sl st to the back center of the boot opening, at the very top edge. Ch 1. Sc in each st around the top of the cuff. Sl st to the first sc to join. Fasten off SC.

Part 5: Finishing Touches
- Weave in all remaining yarn ends securely.
- Attach the pre-made bows to the center front of the boots, just below the textured cuff, as seen in the picture.
- Carefully sew a small pearl bead to the center of each bow for that extra touch of elegance.
- Make sure both boots are as identical as possible.
- Optional: For added grip, apply non-slip puffy paint or sew on non-slip pads to the bottom of the soles.
Video Tutorial
Congratulations! You’ve just created an incredibly charming and cozy pair of chunky textured baby boots. These are sure to be a treasured item for any little one!


