by
by 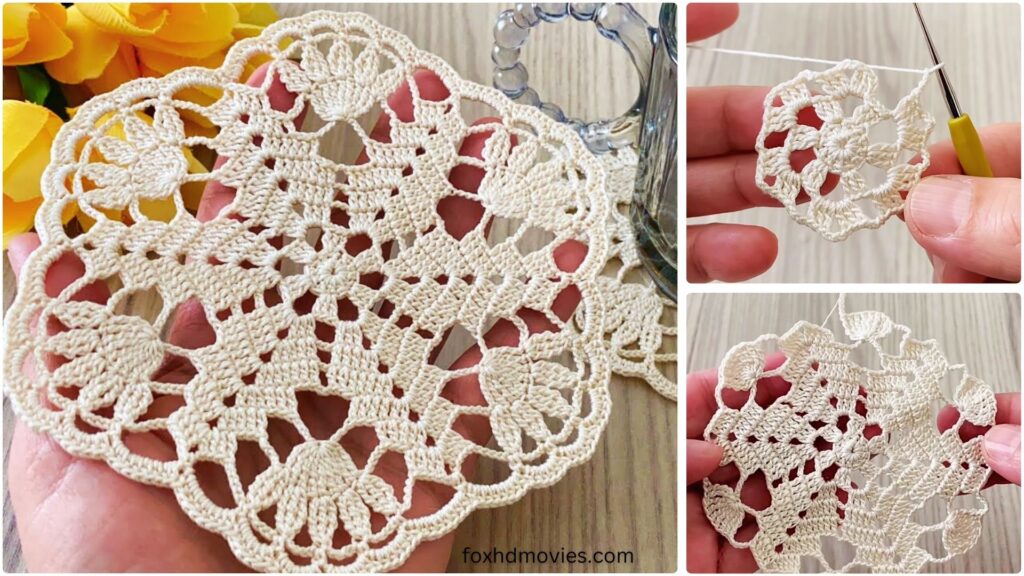
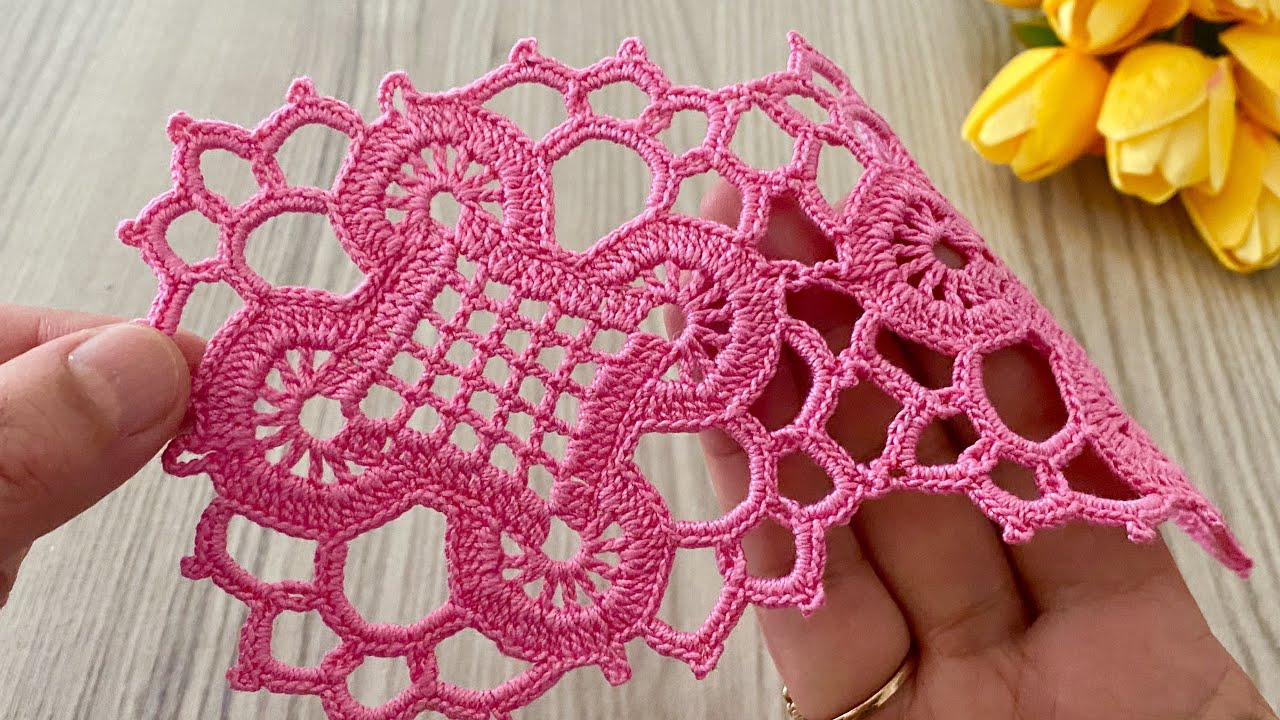
Add a touch of natural elegance to your crochet projects with the “Emerald Blossom” Motif! This beautiful square features a unique textured leaf element that stands out against a delicate background, creating a truly eye-catching design. Perfect for blankets, placemats, scarves, or even decorative wall hangings, this motif will elevate your crafting.
While it involves a few more steps than a basic granny square, the techniques are straightforward and rewarding. Get ready to create something amazing!
Skill Level: Intermediate Beginner / Easy Intermediate
Materials:
- Color A: (Main Motif Color – e.g., a cream or light neutral) – DK or Worsted weight yarn
- Color B: (Leaf Color – e.g., a vibrant green) – DK or Worsted weight yarn
- Color C: (Optional Accent Color – e.g., a darker green or coordinating color) – DK or Worsted weight yarn
- Crochet hook size G/6 (4.0 mm) or H/8 (5.0 mm) – or size needed to obtain gauge
- Yarn needle for weaving in ends
- Scissors
- Stitch markers (optional, but helpful for corners)
Gauge:
A finished motif after all rounds should measure approximately 6×6 inches (if using Worsted weight yarn and H/8 hook). Adjust your hook size to achieve a similar size if you plan to join multiple motifs.
Abbreviations (US Crochet Terms):
- ch: chain
- sl st: slip stitch
- sc: single crochet
- hdc: half double crochet
- dc: double crochet
- tr: treble crochet (yarn over twice, insert hook, YO, pull through 2 loops 3 times)
- dtr: double treble crochet (yarn over three times, insert hook, YO, pull through 2 loops 4 times) – Used for pronounced leaf points
- st(s): stitch(es)
- sp: space
- sk: skip
- FO: Fasten off
- rep: repeat
- BLO: back loop only
- FLO: front loop only
- BPdc: back post double crochet (YO, insert hook from back to front around post of stitch, YO, pull up loop, YO, pull through 2 loops, YO, pull through 2 loops)
- FPdc: front post double crochet (YO, insert hook from front to back around post of stitch, YO, pull up loop, YO, pull through 2 loops, YO, pull through 2 loops)
Let’s Craft the Amazing Motif!
Part 1: The Central Foundation (Color A)
We begin with the core of our motif.
Round 1: With Color A, ch 4, sl st to join into a ring. (Or use a magic ring). Ch 3 (counts as 1st dc), 11 dc in the ring. Sl st to the top of the beg ch-3 to join. (12 dc)
Round 2: Ch 3 (counts as 1st dc), dc in the same st. (inc). Dc in next st, 2 dc in next st (inc). Repeat from * to * 4 more times. Sl st to the top of the beg ch-3 to join. (18 dc)
Round 3: Ch 3 (counts as 1st dc), dc in next st. 2 dc in next st (inc). Dc in next 2 sts, 2 dc in next st (inc). Repeat from * to * 4 more times. Sl st to the top of the beg ch-3 to join. (24 dc) FO Color A and weave in tail.

Part 2: The Leaf Formation (Color B)
This is where our unique leaf element takes shape!
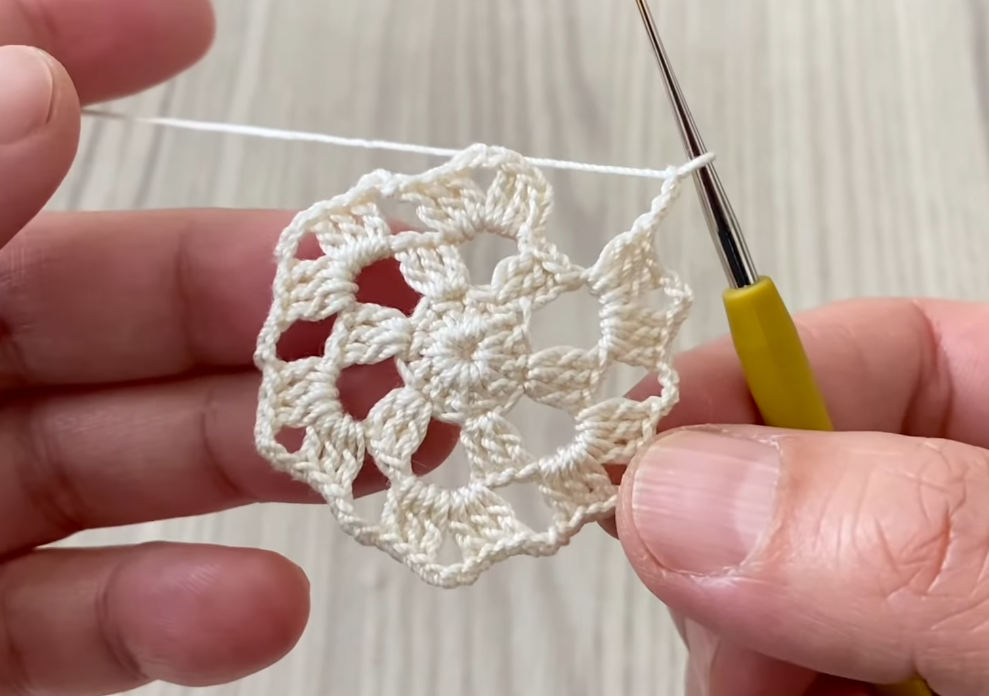
Round 4: Join Color B with a sl st in any dc from Round 3. Ch 1 (does not count as st), sc in the same st. Ch 3, sk next 2 sts, sc in next st. Repeat from * to * 6 more times. (7 ch-3 loops created). Ch 3, sk last 2 sts. Sl st to the first sc to join. (8 ch-3 loops total).
Round 5: Sl st into the first ch-3 sp. In the same ch-3 sp, work: (sc, hdc, dc). This forms the start of your first leaf. In the next ch-3 sp, work: (hdc, dc, tr, ch 3, tr, dc, hdc). This is a large leaf point. In the next ch-3 sp, work: (dc, hdc, sc). This forms the end of your first leaf. Sk next ch-3 sp (this space will be part of the gap between leaves). In the next ch-3 sp, work: (sc, hdc, dc). In the next ch-3 sp, work: (hdc, dc, tr, ch 3, tr, dc, hdc). In the next ch-3 sp, work: (dc, hdc, sc). Repeat from * to * once more. Sl st to the first sc to join. You should have 3 large leaf points (tr, ch 3, tr) and 3 smaller leaf “sides” (sc, hdc, dc and dc, hdc, sc). FO Color B and weave in tail.

Part 3: Squaring Up the Motif (Color A, or Color C for contrast)
Now we’ll transform our leaf-edged circle into a classic square motif.
Round 6: Join Color A (or C) with a sl st into the ch-3 sp of any large leaf point (where you worked tr, ch 3, tr). Ch 3 (counts as 1st dc), (2 dc, ch 2, 3 dc) in the same ch-3 sp. This is your first corner. Ch 1. In the (dc, hdc, sc) cluster, work 3 dc (grouping over these sts). Ch 1. In the (sc, hdc, dc) cluster, work 3 dc. Ch 1. In the ch-3 sp of the next large leaf point, work (3 dc, ch 2, 3 dc). This is your next corner. Repeat from * to * twice more. Ch 1. In the (dc, hdc, sc) cluster, work 3 dc. Ch 1. In the (sc, hdc, dc) cluster, work 3 dc. Ch 1. Sl st to the top of the beg ch-3 to join. You should now clearly see a square shape forming.

Round 7: Ch 3 (counts as 1st dc). (2 dc, ch 2, 3 dc) in the first ch-2 sp (corner). Ch 1. Work 3 dc in each ch-1 sp along the side (you should have 3 dc groups). Ch 1. In the next ch-2 sp (corner), work (3 dc, ch 2, 3 dc). Repeat from * to * twice more. Ch 1. Work 3 dc in each ch-1 sp along the side. Ch 1. Sl st to the top of the beg ch-3 to join.
Round 8 (Optional Edging/Sizing): Ch 1, sc in each dc around, and (sc, ch 1, sc) in each corner ch-2 sp. Sl st to first sc. This round creates a clean edge. You can add more rounds of sc or hdc if you want a larger square. FO and weave in all remaining ends.
Your “Emerald Blossom” Motif is Complete!
Isn’t it stunning? The raised leaf texture adds so much character.
Video tutorial
Tips for an Amazing Finish:
- Blocking: For the best results, especially if you plan to join multiple motifs, wet or steam block your finished squares. This will open up the stitches, even out the edges, and help the motif lie flat.
- Yarn Choices: Experiment with different yarn fibers! Cotton will give a crisp, defined leaf, while acrylic will be soft and cozy.
- Color Play:
- Use a variegated yarn for the “leaf” rounds for a truly unique look.
- Reverse the colors: try a dark background with a lighter leaf!
- Add a fourth accent color for the final edging round.
- Joining Methods:
- Whip Stitch: A classic and reliable method for joining squares.
- Single Crochet Join: Creates a slightly raised, decorative seam.
- Join-As-You-Go (JAYG): If you’re making a larger project, learning JAYG will save you a lot of seaming at the end. You’ll join your squares as you crochet the final round.
- Beyond Blankets: These motifs would be gorgeous for cushion covers, garment panels (like the back of a vest or sweater), placemats, or even sewn onto bags as a decorative applique.
Happy crocheting, and enjoy creating your amazing leafy motifs!