 by
by 
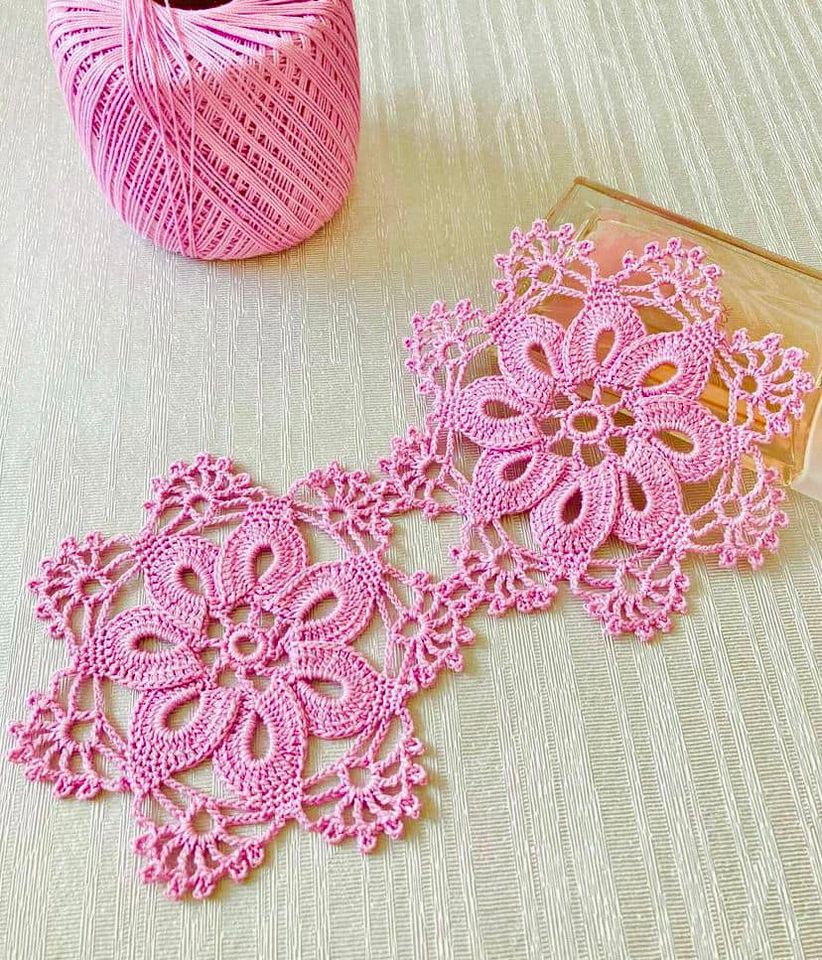
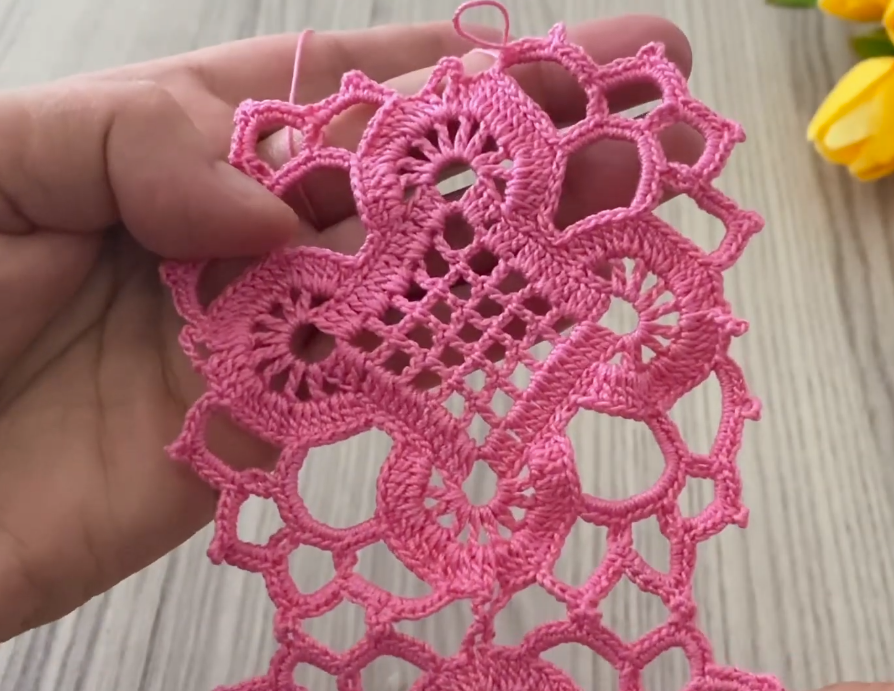
Prepare to fall in love with your next crochet project! The “Elegance Bloom” motif is designed to be truly beautiful, intricate, and incredibly versatile. Whether you dream of a delicate table runner, a flowing, ethereal shawl, or a stunning, unique blouse, this motif can be endlessly joined and adapted to create a piece that’s truly yours.
This motif combines delicate lacework with a central floral element, creating a balanced design that’s eye-catching without being overly complicated. Once you master the repeat, you’ll be able to create a breathtaking fabric.
Skill Level: Intermediate (Familiarity with basic stitches, clusters, and working into chain spaces is helpful.)
Materials:
- For a delicate Runner/Shawl/Blouse: Fingering weight (1) or Sport weight (2) yarn. A blend with silk, merino, or cotton would be exquisite for drape.
- For a slightly more substantial Runner/Cushion: DK weight (3) or Light Worsted (4) yarn.
- Crochet hook size appropriate for your chosen yarn (e.g., C/2 – 2.75mm for fingering, D/3 – 3.25mm for sport, G/6 – 4.0mm for DK/light worsted). Check your yarn label for recommendations.
- Yarn needle for weaving in ends
- Scissors
- Stitch markers (helpful for corners or repeating sections)
Gauge:
Gauge will vary significantly based on your yarn and hook. For reference, using a sport weight yarn and a 3.25mm hook, one finished motif should measure approximately 4-5 inches square. Consistency in gauge is crucial if you plan to join multiple motifs.
Abbreviations (US Crochet Terms):
- ch: chain
- sl st: slip stitch
- sc: single crochet
- hdc: half double crochet
- dc: double crochet
- tr: treble crochet
- dtr: double treble crochet (YO 3 times, insert hook, YO, pull through 2 loops 4 times)
- FPdc: front post double crochet
- BPdc: back post double crochet
- sk: skip
- sp: space
- st(s): stitch(es)
- beg: beginning
- rep: repeat
- *…*: repeat instructions between asterisks
- […] : work instructions within brackets into the indicated stitch or space
- cl: cluster (see special stitches)
- V-st: V-stitch (see special stitches)

Special Stitches:
- 3-dc Cluster (3-dc cl): YO, insert hook into st/sp, YO, pull up a loop, YO, pull through 2 loops (2 loops on hook). YO, insert hook into same st/sp, YO, pull up a loop, YO, pull through 2 loops (3 loops on hook). YO, insert hook into same st/sp, YO, pull up a loop, YO, pull through 2 loops (4 loops on hook). YO, pull through all 4 loops on hook. Ch 1 to close cluster (optional, often called a popcorn stitch when closed, but here it simply binds the cluster).
- V-Stitch (V-st): [dc, ch 1, dc] in indicated st/sp.
The “Elegance Bloom” Motif Pattern
We’ll work this motif in rounds, starting from the center.
Round 1: The Heart of the Bloom (Color A, or main color for a solid motif)
- Ch 4, sl st to join into a ring. (Alternatively, use a magic ring).
- Ch 3 (counts as first dc), 11 dc into the ring. Sl st to top of beg ch-3 to join. (12 dc)
- Fasten off Color A.
Round 2: Petal Foundations (Color B, or continue with main color)
- Join Color B with a sl st into any dc from Round 1.
- Ch 3 (counts as first dc). In the same st, work 1 dc. Ch 1.
- *In next dc, work [2 dc, ch 1].* Repeat from * to * 10 more times.
- Sl st to top of beg ch-3 to join. (12 groups of 2 dc, 12 ch-1 spaces)
Round 3: Forming the Petals (Color B)
- Sl st into the first ch-1 sp.
- Ch 3 (counts as first dc). In same ch-1 sp, work [dc, ch 2, 2 dc]. This forms your first petal.
- *In next ch-1 sp, work [2 dc, ch 2, 2 dc].* Repeat from * to * 10 more times.
- Sl st to top of beg ch-3 to join. (12 petals)
- Fasten off Color B.
Round 4: Squaring the Circle – First Corner Setup (Color C, or main color) This round starts to define the square shape and create our first large chain spaces.
- Join Color C with a sl st into any ch-2 sp of a petal.
- Ch 1, sc in same ch-2 sp.
- *Ch 5, sc in next ch-2 sp.* Repeat from * to * 10 more times.
- Ch 5, sl st to first sc to join. (12 ch-5 loops)

Round 5: Building the Square – First Corners & Sides (Color C) This round clearly defines the square.
- Sl st into the first 2 ch of the ch-5 loop.
- Ch 3 (counts as first dc). In the same ch-5 loop, work [2 dc, ch 3, 3 dc]. This is your first corner!
- *Ch 1. In the next ch-5 loop, work [3 dc].
- Ch 1. In the next ch-5 loop, work [3 dc].
- Ch 1. In the next ch-5 loop (this will be your third ch-5 loop from the previous corner), work [3 dc, ch 3, 3 dc]. This is your next corner!*
- Repeat from * to * 2 more times.
- Ch 1. In the next ch-5 loop, work [3 dc].
- Ch 1. In the next ch-5 loop, work [3 dc].
- Ch 1. Sl st to top of beg ch-3 to join. (You should have 4 corners (3 dc, ch 3, 3 dc) and 8 groups of 3 dc along the sides, separated by ch-1 sps).
Round 6: The Delicate Edge – Final Touches (Color C) This round adds a delicate, almost picot-like edge to the square and prepares for easy joining.
- Sl st into the next 2 dc and into the ch-3 corner sp.
- Ch 3 (counts as first dc). In the same ch-3 sp, work [2 dc, ch 3, 3 dc]. This is your new corner!
- *Ch 1. In the next ch-1 sp, work [3-dc cl (as defined in special stitches)].
- Ch 1. In the next ch-1 sp, work [3-dc cl].
- Ch 1. In the next ch-1 sp, work [3-dc cl].
- Ch 1. In the next ch-3 corner sp, work [3 dc, ch 3, 3 dc]. This is your next corner!*
- Repeat from * to * 2 more times.
- Ch 1. In the next ch-1 sp, work [3-dc cl].
- Ch 1. In the next ch-1 sp, work [3-dc cl].
- Ch 1. In the next ch-1 sp, work [3-dc cl].
- Ch 1. Sl st to top of beg ch-3 to join.
- Fasten off and weave in all ends securely.

Your “Elegance Bloom” Motif is Complete!
Versatility & Project Ideas
The true beauty of this motif lies in its adaptability.
1. For a Stunning Crochet Runner:
- Method: Make multiple motifs. You can join them in a straight line for a narrow runner, or create a wider runner by joining them in a grid (e.g., 2 motifs wide by X motifs long).
- Joining: Use a join-as-you-go method for a seamless look, or whip stitch/single crochet join them after all motifs are made. The ch-1 spaces and corner ch-3 spaces are perfect for joining.
- Edging: Once joined, add a border to the entire runner. A simple shell stitch or a picot edge (ch 3, sl st into first ch) around the perimeter would beautifully finish it.
2. For an Ethereal Shawl:
- Method: Begin by joining motifs to create a central triangle or rectangle, then expand outwards by adding more motifs. A common shawl shape is a large triangle formed by joining rows of motifs, increasing the number of motifs in each subsequent row.
- Yarn Choice: Fingering or sport weight yarn is highly recommended for drape. A blend with silk or alpaca would make it wonderfully soft and luxurious.
- Joining: Join-as-you-go is excellent for shawls as it minimizes post-crochet seaming.
- Edging: A simple row of sc or dc, followed by a delicate picot or small shell border, will add a professional touch.
3. For a Unique Blouse:
- Method: This is a more advanced project. You would typically crochet motifs and join them to form the front and back panels, and possibly sleeves. You’d need to consider sizing and shaping carefully.
- Sizing: Before starting, measure a well-fitting top. Sketch out how many motifs wide and long your front and back panels would need to be. Remember that crochet fabric has stretch.
- Shaping: For armholes and necklines, you might need to use half-motifs or fill in gaps with mesh stitches or single crochet.
- Yarn Choice: Light cotton or bamboo blends would be comfortable for a garment.
- Finishing: Edge the neckline, armholes, and bottom hem with a simple sc or hdc border for a neat finish.
Video tutorial
Tips for Crocheting Your “Elegance Bloom” Motif:
- Weave in ends as you go: This intricate design can accumulate a lot of ends, especially if you’re using multiple colors. Weaving them in as you finish each color will save you a headache later!
- Blocking: For intricate motifs like this, blocking is highly recommended. It will open up your stitches, even out the shape, and give your finished project a professional, polished look. Gently wet your finished motif(s), pin them to shape on a foam board, and let them dry completely.
- Practice: Make a few practice motifs to get comfortable with the stitch pattern before embarking on a large project.
Enjoy creating your “Elegance Bloom” motifs! This design truly allows your crochet to shine and will result in a treasured, handmade piece. Happy hooking!