 by
by 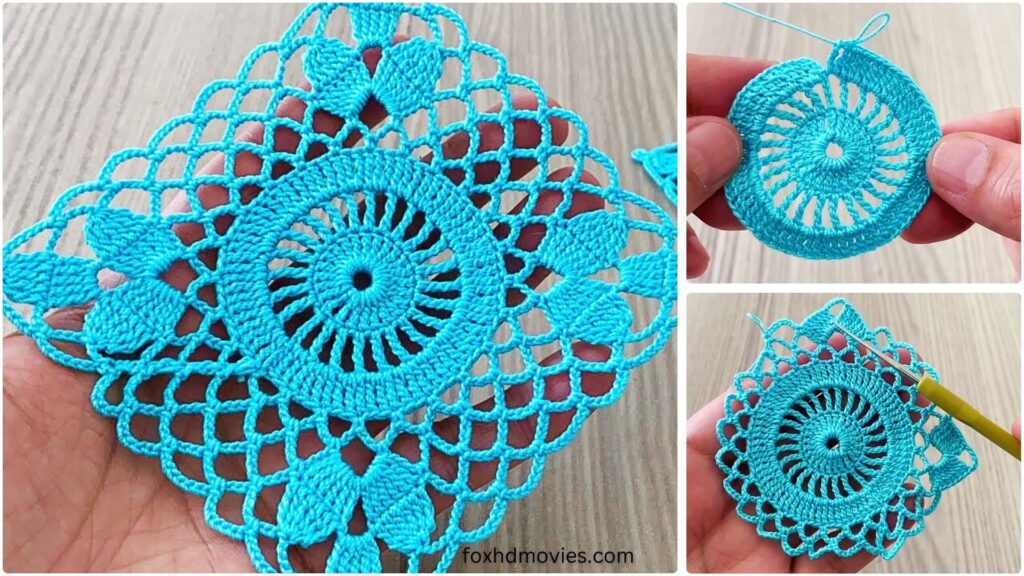
Imagine a beautifully coordinated set for your home and wardrobe – a charming table runner and a stylish, airy blouse, both crafted from the same elegant floral crochet squares. This pattern is designed to be accessible for those with a solid grasp of basic crochet stitches, allowing you to create stunning pieces that will draw compliments.
We’ll start by perfecting the versatile floral square motif, and then I’ll guide you through arranging and joining them for both the runner and the blouse.
Skill Level: Intermediate Beginner (comfortable with basic stitches, joining, and simple shaping)
Materials:
- For the Motifs:
- DK weight yarn (or Light Worsted) in your chosen colors. You’ll need at least three colors for the effect shown in the previous flower square (Flower Center, Petals, and Square Border/Main color). Choose colors that complement your home decor for the runner and your skin tone/wardrobe for the blouse.
- Crochet hook size G/6 (4.0 mm) or size needed to obtain gauge.
- For Assembly/Finishing:
- Yarn needle for weaving in ends and joining motifs.
- Scissors.
- Measuring tape.
- Stitch markers (helpful for garment assembly).
- For the Blouse (Optional additions):
- Ribbon, fabric elastic, or additional yarn for ties/cinching.
- Fabric for lining (optional, but recommended for modesty, especially if using a lighter yarn/hook).
Gauge:
For consistent sizing across your projects, it’s crucial to maintain gauge. After completing Round 4 of the Floral Square Motif (the first full square round), your motif should measure approximately 4 inches (10 cm). Adjust your hook size if necessary to achieve this measurement.
Abbreviations (US Crochet Terms):
- ch: chain
- sl st: slip stitch
- sc: single crochet
- hdc: half double crochet
- dc: double crochet
- tr: treble crochet (or triple crochet)
- sp: space
- st(s): stitch(es)
- beg: beginning
- rep: repeat
- YO: yarn over
- BLO: back loop only
- FLO: front loop only
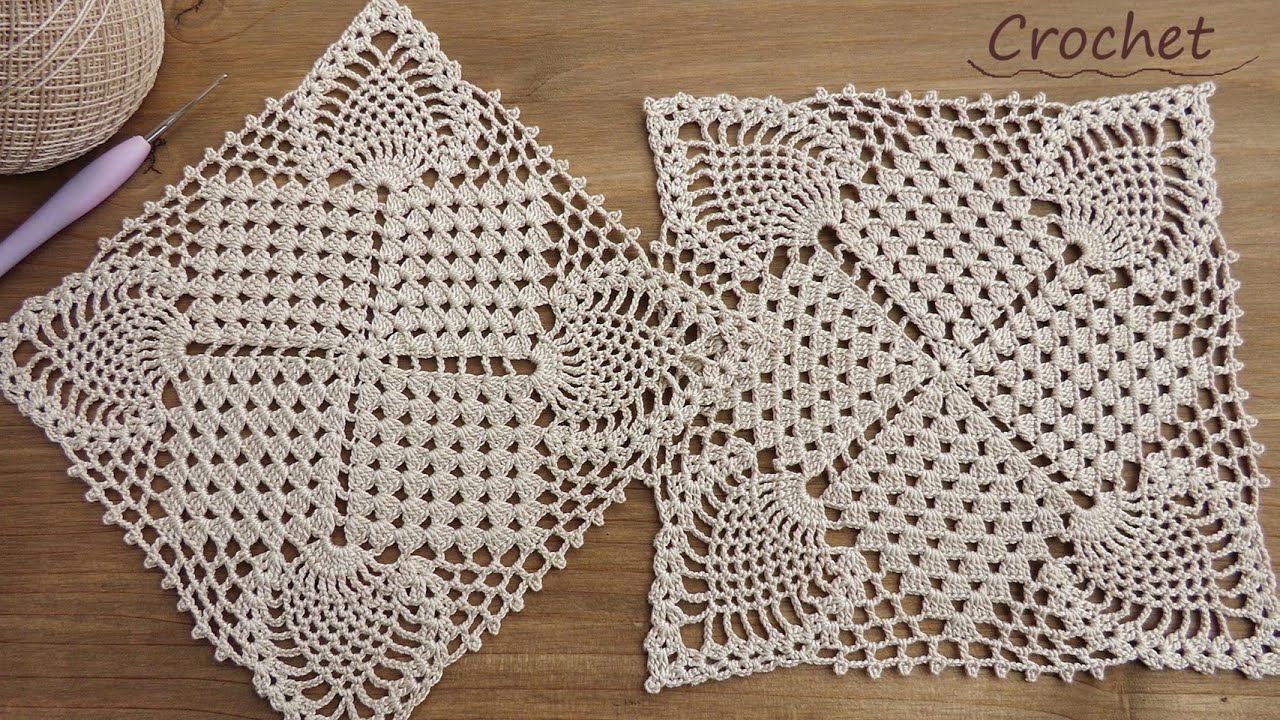
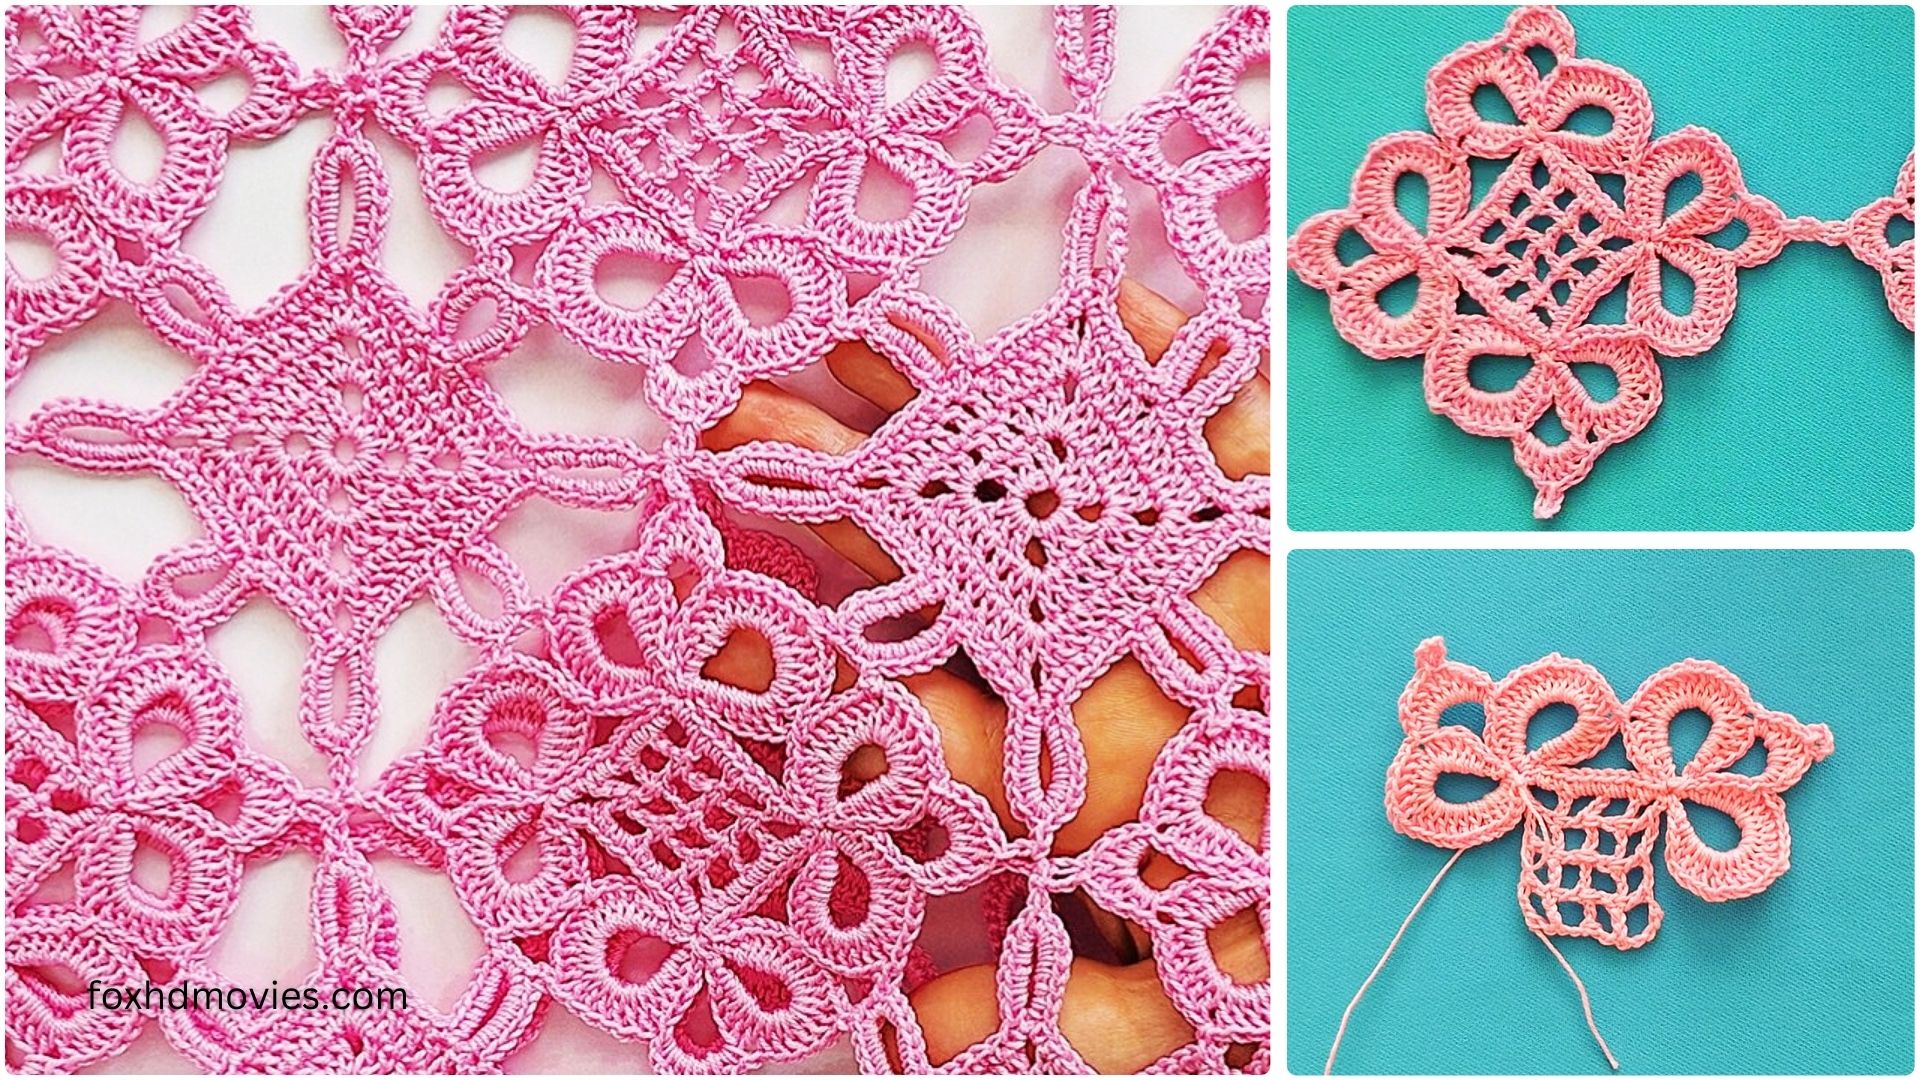
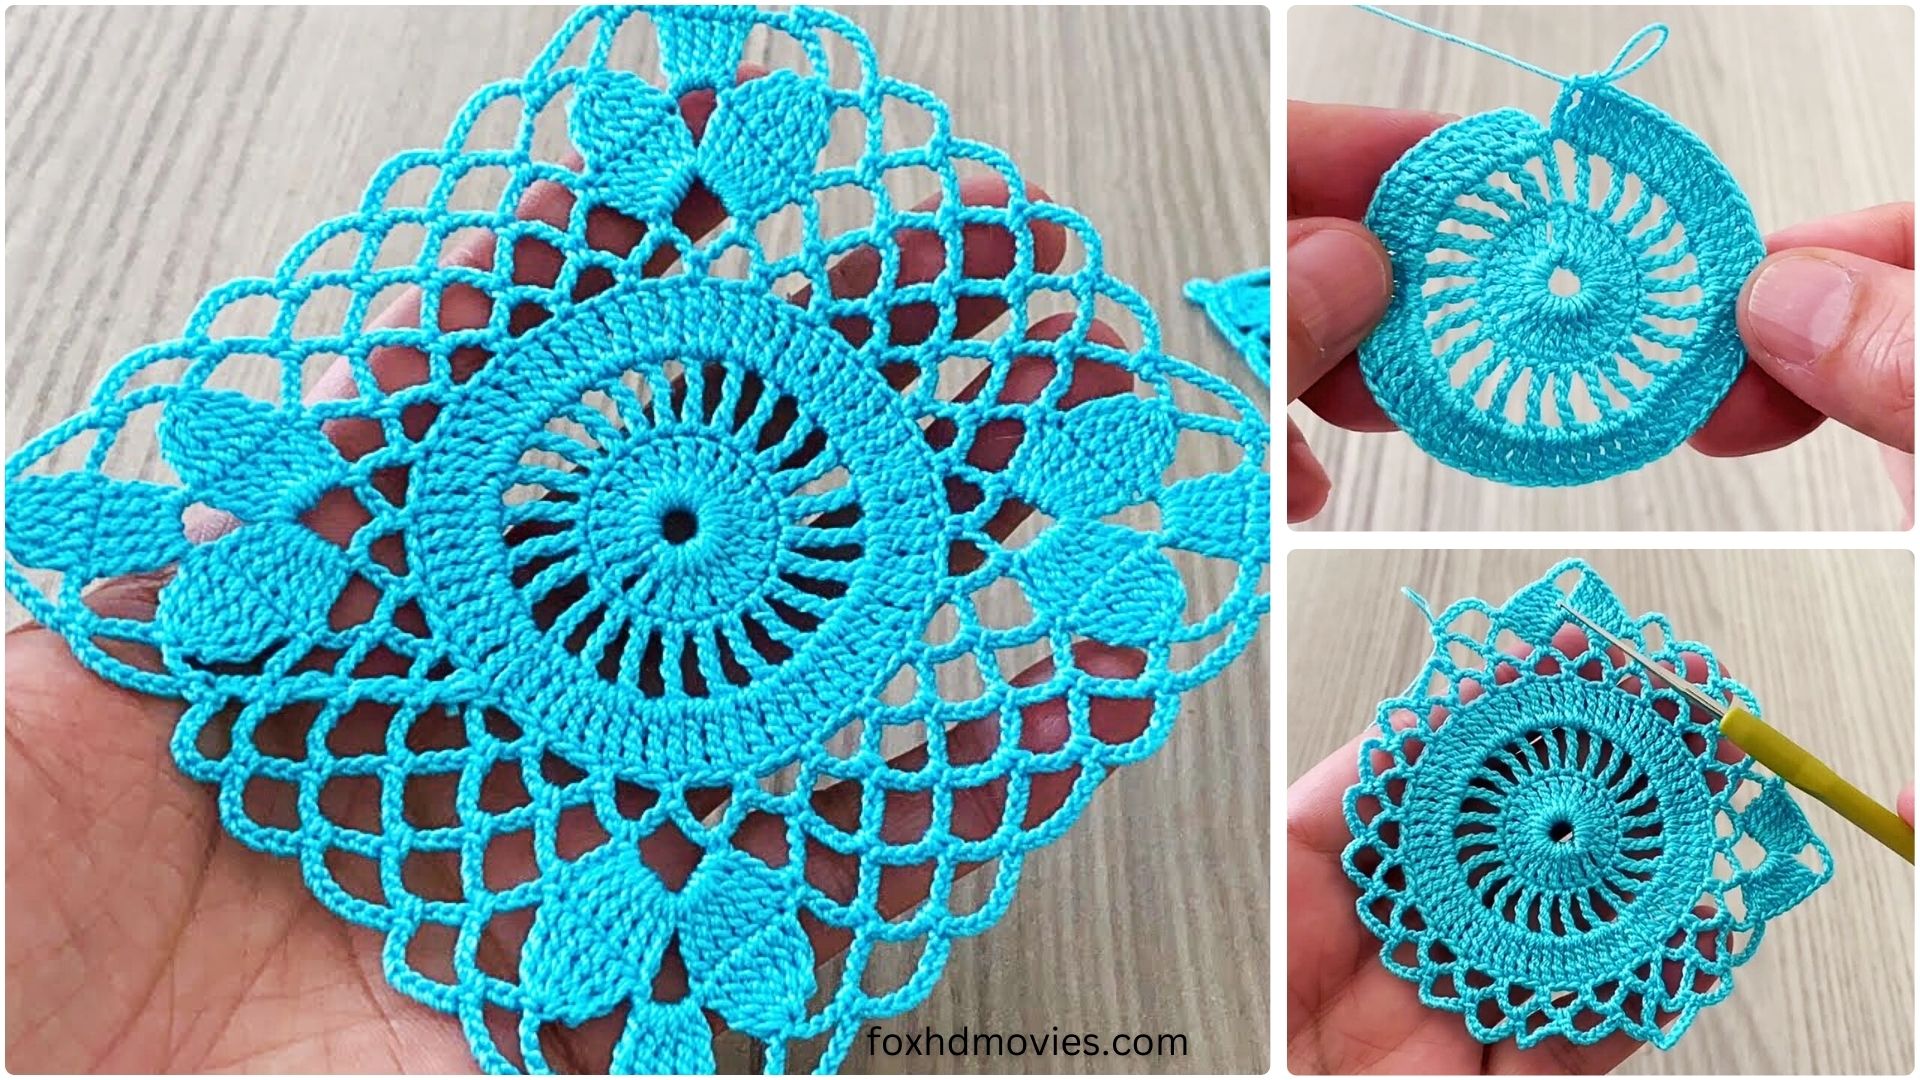
Part 1: The Easy Crochet Floral Square Motif (Make Many!)

This is the foundation for both projects. Practice a few until you’re comfortable before embarking on your larger pieces.
Color Key:
- Color A: Flower Center
- Color B: Petals
- Color C: Square Border / Main Color
Round 1 (Flower Center – Color A): Ch 4, sl st to join into a ring. (Alternatively, use a magic ring). Ch 2 (does NOT count as a stitch), 12 hdc in the ring. Sl st to the first hdc to join. (12 hdc) Fasten off Color A and weave in the end.
Round 2 (Petals – Color B): Join Color B with a sl st into any hdc from Round 1. Ch 2 (does NOT count as a stitch), (dc, ch 2, dc) in the same st. *Skip next st, (dc, ch 2, dc) in the next st.* Repeat from * to * 4 more times. Skip the last st. Sl st to the top of the first dc to join. (6 petal clusters, each with a ch-2 space) Fasten off Color B and weave in the end.
Round 3 (Square Shaping – Color C): Join Color C with a sl st into any ch-2 sp of a petal from Round 2. Ch 3 (counts as first dc). In the same ch-2 sp, work (2 dc, ch 2, 3 dc). This is your first corner! *Ch 1. In the next ch-2 sp (of the next petal), work 3 dc. Ch 1. In the next ch-2 sp, work (3 dc, ch 2, 3 dc). This is your next corner!* Repeat from * to * once more. Ch 1. In the next ch-2 sp, work 3 dc. Ch 1. Sl st to the top of the beg ch-3 to join. (4 corners of (3dc, ch 2, 3dc) and 4 sides of 3dc separated by ch-1 sps).
Round 4 (Completing the Square – Color C): Sl st into the next 2 dc and into the first ch-2 sp (corner). Ch 3 (counts as first dc). In the same ch-2 sp, work (2 dc, ch 2, 3 dc). This is your new corner! *Ch 1. In the next ch-1 sp, work 3 dc. Ch 1. In the next ch-1 sp, work 3 dc. Ch 1. In the next ch-2 sp (corner), work (3 dc, ch 2, 3 dc). This is your next corner!* Repeat from * to * twice more. Ch 1. In the next ch-1 sp, work 3 dc. Ch 1. In the next ch-1 sp, work 3 dc. Ch 1. Sl st to the top of the beg ch-3 to join. Fasten off and weave in all remaining ends securely.
Part 2: Assembling the Crochet Floral Square Motif Runner
A beautiful runner for your table, dresser, or console.

1. Determine Size & Number of Motifs:
- Measure the length and width you desire for your runner.
- Since each square is 4×4 inches, divide your desired length by 4 to get the number of squares in a row, and your desired width by 4 to get the number of rows.
- Example for a 12×36 inch runner: You’d need 3 squares wide and 9 squares long (3×9 = 27 motifs).
- Crochet the required number of motifs.
2. Layout:
- Lay out all your finished motifs on a flat surface in your desired arrangement to visualize the final look.
3. Joining Method (Choose One):
- Whip Stitch (Invisible Join):
- Place two squares right sides facing each other, aligning the stitches.
- Thread your yarn needle with Color C (or a matching color).
- Working through the back loops only (or both loops for a stronger seam), whip stitch along the edge, catching one loop from each square. This creates a neat, almost invisible seam.
- Join all squares into horizontal strips first, then join the strips together.
- Single Crochet Join (Raised Seam):
- Place two squares wrong sides facing each other.
- Join Color C (or a contrasting color) with a sl st in the corner ch-sp of both squares.
- Ch 1, then sc through both layers into each st and ch-1 sp across the edge, placing 1 sc in each dc, and 1 sc in each ch-1 sp. For corners, work (sc, ch 1, sc) through both corner ch-sps.
- This creates a decorative, raised seam.
4. Adding an Optional Border (Highly Recommended for a Finished Look): Once all your squares are joined, you can add a border around the entire runner.
- Join Color C (or a new border color) with a sl st in any corner ch-2 sp.
- Round 1: Ch 1, sc evenly around the entire runner. Work (sc, ch 1, sc) in each corner. When you encounter the joined seams, try to place a sc directly into the seam to secure it. Sl st to the first sc.
- Round 2 (Optional Scallop/Shell Border): Ch 1, sc in the first st. *Skip 2 sts, (dc, ch 1, dc) in the next st. Skip 2 sts, sc in the next st.* Repeat from * around, adjusting as needed at corners to maintain the pattern (you might need to skip more or fewer stitches, or work extra stitches in the corner). Sl st to the first sc.
- Fasten off and weave in ends.
Part 3: Assembling the Crochet Floral Square Motif Blouse
This will be a light, open-work top perfect for layering. Remember that crochet garments made of motifs often have an open weave; consider a simple fabric lining if you desire more opacity.
1. Sizing and Planning:
- Take Measurements: You’ll need your bust circumference, desired length from shoulder to hem, and armhole circumference.
- Create a Sketch/Grid: Draw a simple outline of a blouse front and back. Lay out how many 4×4 inch squares you’ll need to achieve your desired dimensions.
- Bust: Divide your bust circumference by 4 (your square width). This will give you the number of squares needed across the front and back. For instance, if your bust is 36 inches, you’d likely need 9 squares across (4.5 for the front, 4.5 for the back, or 5 for front/4 for back, depending on ease). Round up or down to whole or half squares as necessary.
- Length: Divide your desired length by 4.
- Example (approx. US Women’s Small/Medium):
- Front: 4-5 squares wide, 4-5 squares long.
- Back: 4-5 squares wide, 4-5 squares long.
- Sleeves: Varies greatly. You might use 2-3 squares deep for short sleeves, or join a tube of squares for longer sleeves.
- Crochet all necessary motifs.
2. Joining the Body Panels:
- Front and Back Panels: Join squares using the Whip Stitch or Single Crochet Join method (as described for the runner) to create a large rectangular panel for the front and another for the back. Make sure to match the number of squares per row and column.
- Shoulder Seams: Place the front and back panels right sides together. Join the top edges for the shoulder seams, leaving a wide opening for the neck. The width of the neck opening will determine how wide the “boat neck” or “scoop neck” will be. Use stitch markers to mark where the shoulder seams begin and end.
- Side Seams: Join the side edges of the front and back panels, leaving openings for the armholes. Mark your desired armhole depth with stitch markers before joining.
3. Armholes and Sleeves (Optional):
- Simple Armhole Edging: If you’re not adding sleeves, simply work a few rounds of sc or hdc around the armhole opening to neaten it, or add a simple shell border.
- Adding Sleeves:
- Square Sleeves: Create additional smaller panels of squares for the sleeves. Join them into a tube, then join the tube to the armhole opening of the main blouse body.
- Crochet directly: You can also pick up stitches around the armhole opening and crochet a sleeve directly, working in the round. For a simple short sleeve, work several rounds of hdc or dc, decreasing slightly as you go for a tapered look.

4. Neckline Finishing:
- Work a few rounds of sc or hdc around the entire neckline opening to create a clean edge. You can also add a decorative border like a scallop or crab stitch (reverse sc).
5. Hem Finishing:
- Work a few rounds of sc or hdc around the bottom edge of the blouse. A simple shell border would also look lovely here.
6. Adding a Lining (Recommended):
- Since crochet fabric often has an open weave, especially with individual motifs, a simple fabric lining will provide modesty and comfort.
- You can hand-stitch or machine-stitch a simple sleeveless camisole or tank top made of a breathable fabric (like cotton or rayon) into the inside of your crocheted blouse at the shoulders and armholes.
7. Final Touches:
- Weave in all remaining loose ends securely.
- Block your finished runner and blouse to even out stitches and shapes. This is especially important for garments! Pin them to shape on a blocking mat, spray with water, and let dry completely.
Video tutorial
Tips for Both Projects:
- Consistency is Key: Try to maintain the same tension throughout all your motifs for a uniform look.
- Weave in Ends as You Go: It will save you a lot of time and effort at the end!
- Try On/Lay Out Often: For the blouse especially, constantly try it on or lay it out on your grid to check sizing and fit.
- Embellishments: Feel free to add small beads, sequins (if safe for intended use), or embroidery to individual motifs for extra sparkle!
You’re now equipped to create a gorgeous, coordinated set of crochet floral square motif pieces. Enjoy the process of watching your blooms come to life! Happy crocheting