 by
by 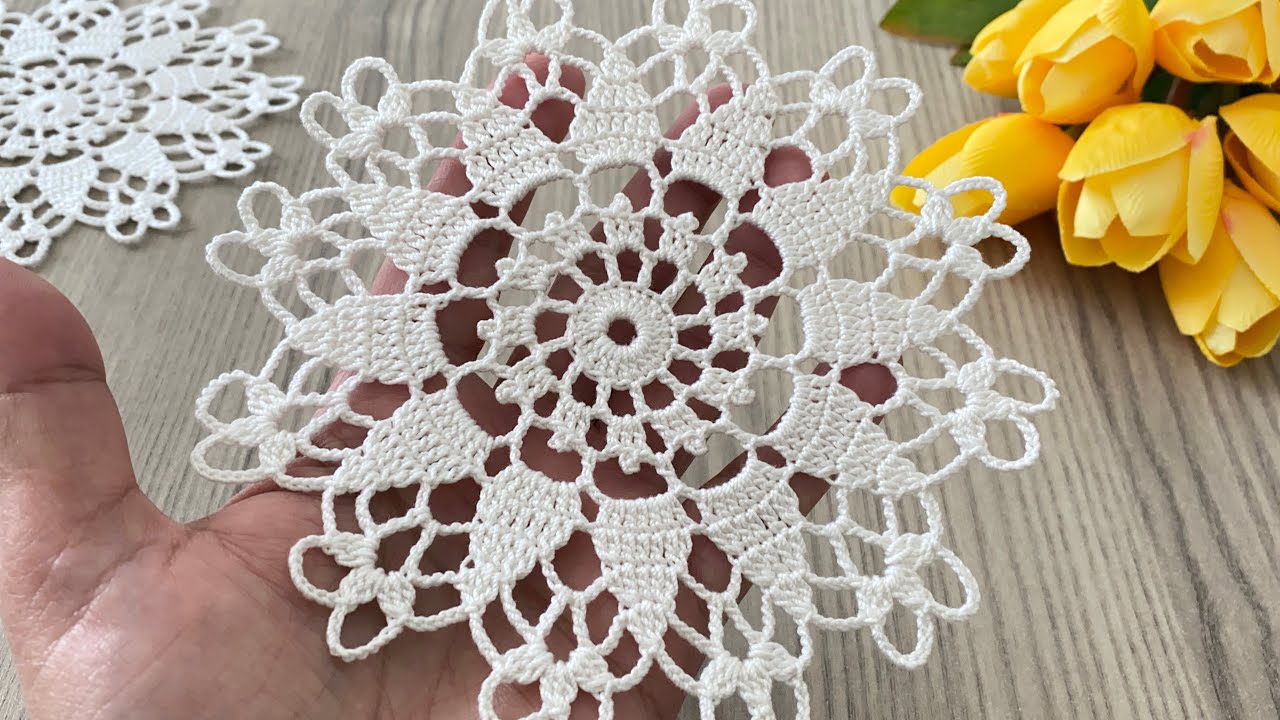
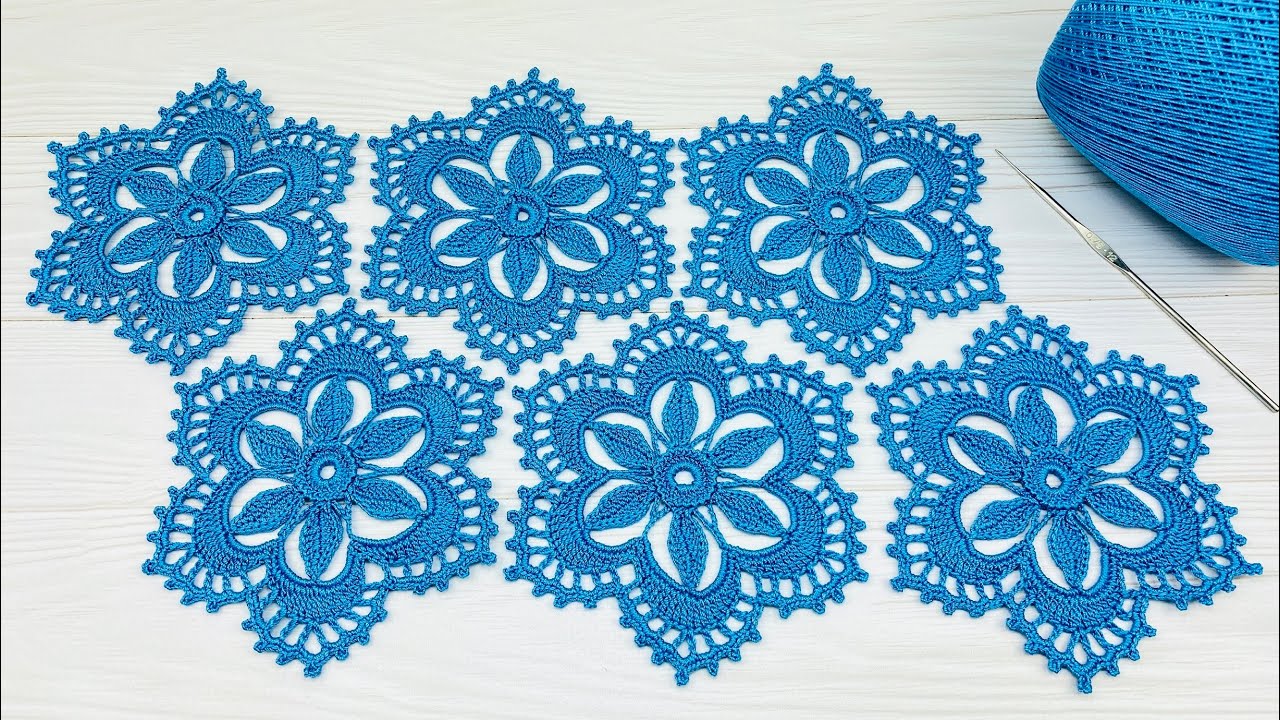
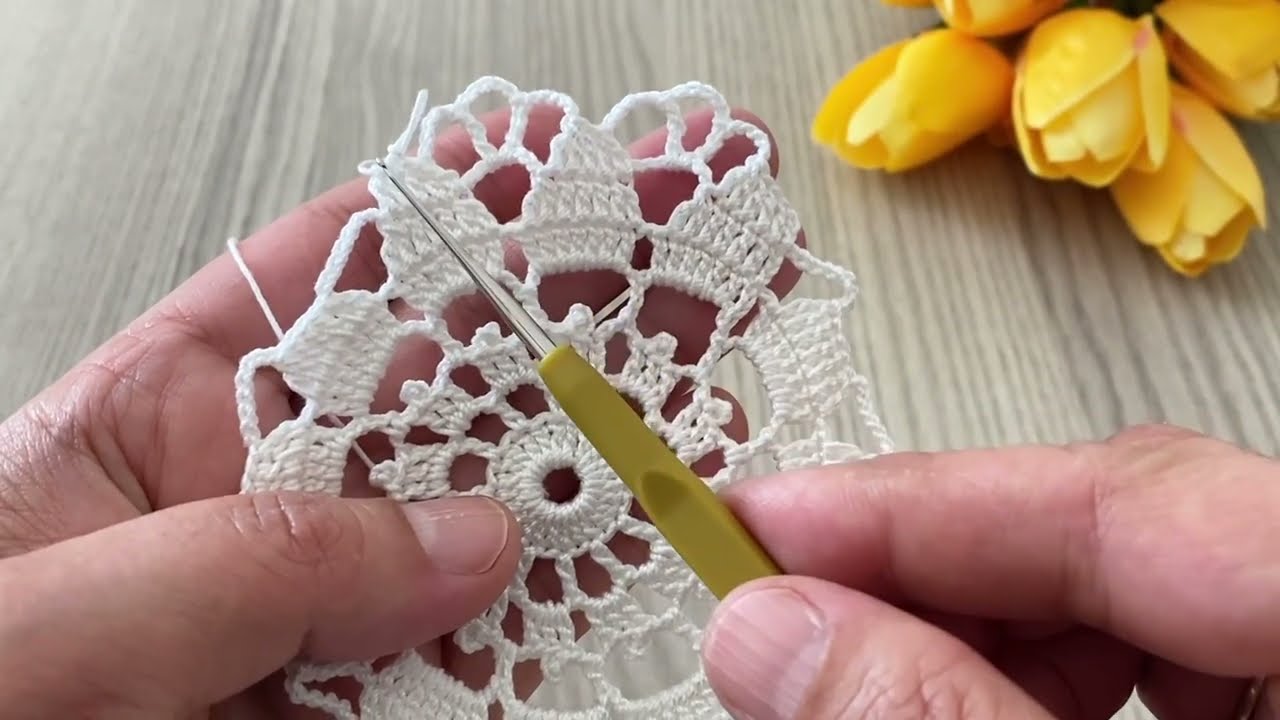
This “Radiant Bloom” motif offers a fresh, circular design that is surprisingly easy to master. Its inherent versatility means you can crochet a single motif for a beautiful coaster, join several for a delicate table runner, create a repeating pattern for a stunning shawl, or even incorporate it into a unique blouse design.
The beauty of this pattern lies in its repetition and adaptability. Once you’ve mastered the main motif, you’ll be able to envision endless possibilities!
Skill Level: Intermediate (familiarity with basic stitches, working in the round, and joining techniques is helpful)
Materials:
- For Lace Runner/Shawl:
- Fingering weight (1) or Sport weight (2) cotton or cotton blend yarn for a delicate drape. (e.g., Aunt Lydia’s Crochet Thread size 10 for very fine lace, or a light DK for a more substantial look).
- Crochet hook appropriate for your yarn choice (e.g., 1.5mm – 2.5mm for lace thread, 3.0mm – 3.5mm for sport/light DK).
- For Blouse (incorporating motifs):
- DK weight (3) or Light Worsted (4) yarn in cotton, linen, or a blend for good drape and breathability.
- Crochet hook appropriate for your yarn choice (e.g., 3.75mm – 4.5mm).
- Yarn needle for weaving in ends
- Scissors
- Stitch markers (optional, but helpful for repeats)
Gauge (Approximate):
- For Lace Thread (1.5mm hook): One finished motif (after all rounds) will measure approximately 4-5 inches in diameter.
- For DK Weight Yarn (4.0mm hook): One finished motif will measure approximately 6-7 inches in diameter.
- Note: Gauge isn’t critical for a single motif, but for projects requiring multiple motifs joined, consistency is key!
Abbreviations (US Crochet Terms):
- ch: chain
- sl st: slip stitch
- sc: single crochet
- hdc: half double crochet
- dc: double crochet
- tr: treble crochet (yarn over 2 times)
- dtr: double treble crochet (yarn over 3 times)
- sk: skip
- sp: space
- st(s): stitch(es)
- beg: beginning
- rep: repeat
- YO: yarn over
- Picot: ch 3, sl st into the 3rd ch from hook (creates a tiny loop)
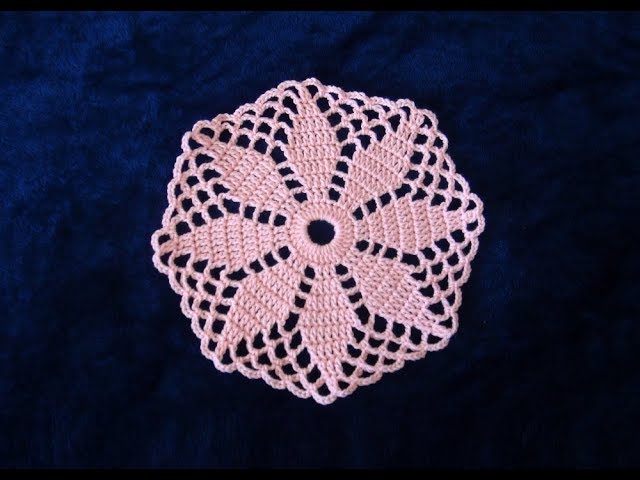
The Radiant Bloom Motif Pattern
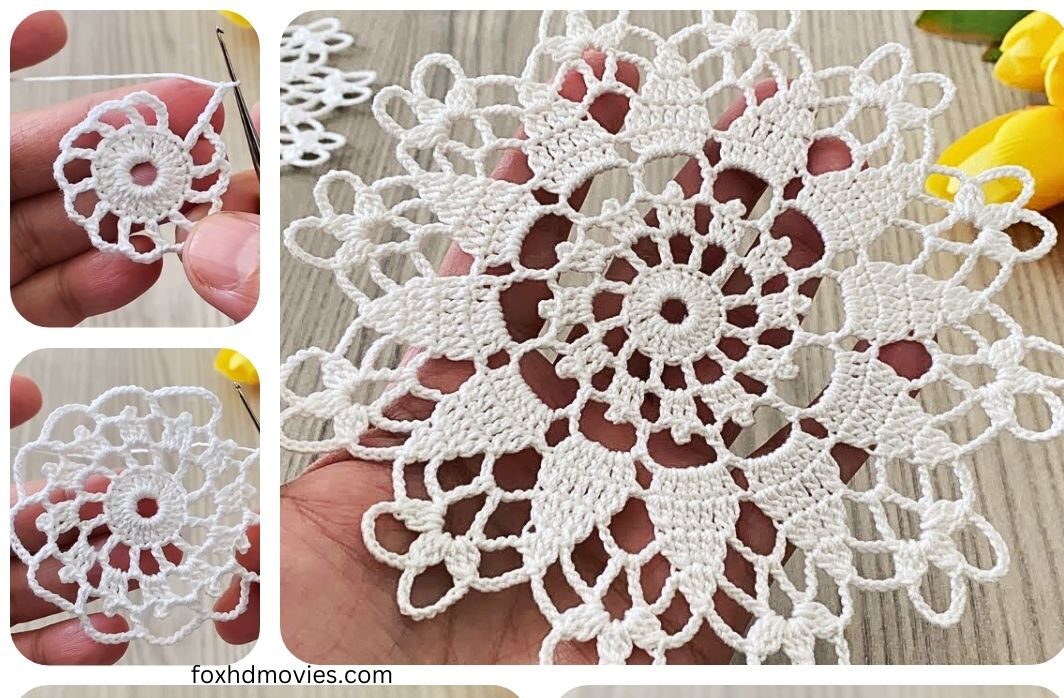
We will build this motif from the center outwards, creating an elegant, openwork design.
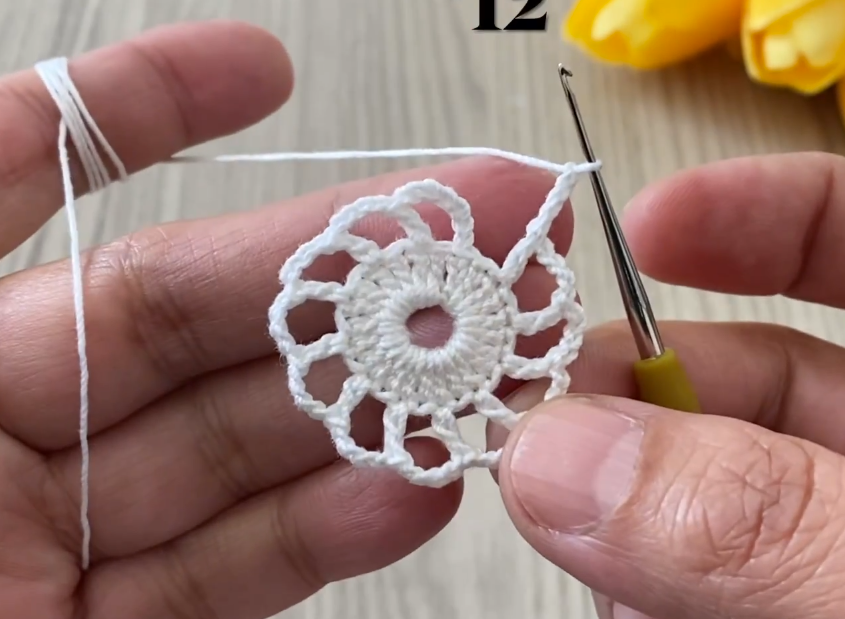
Round 1 (Center): Ch 6, sl st into the first ch to form a ring. Ch 3 (counts as first dc), 15 dc into the ring. Sl st to the top of beg ch-3. (16 dc)
Round 2 (First Petal Layer): Ch 1 (does not count as st), sc in the same st as join. *Ch 3, sk next dc, sc in next dc.* Rep from * to * 6 more times. Ch 3, sk last dc, sl st to first sc. (8 ch-3 loops)
Round 3 (Forming Petals): Sl st into first ch-3 sp. Ch 3 (counts as first dc), (2 dc, ch 3, 3 dc) in the same ch-3 sp (this forms your first “petal” segment with a corner). *Ch 1, sk next sc, (3 dc, ch 3, 3 dc) in next ch-3 sp.* Rep from * to * 6 more times. Ch 1, sk last sc, sl st to top of beg ch-3. (8 petal segments separated by ch-1 sps)
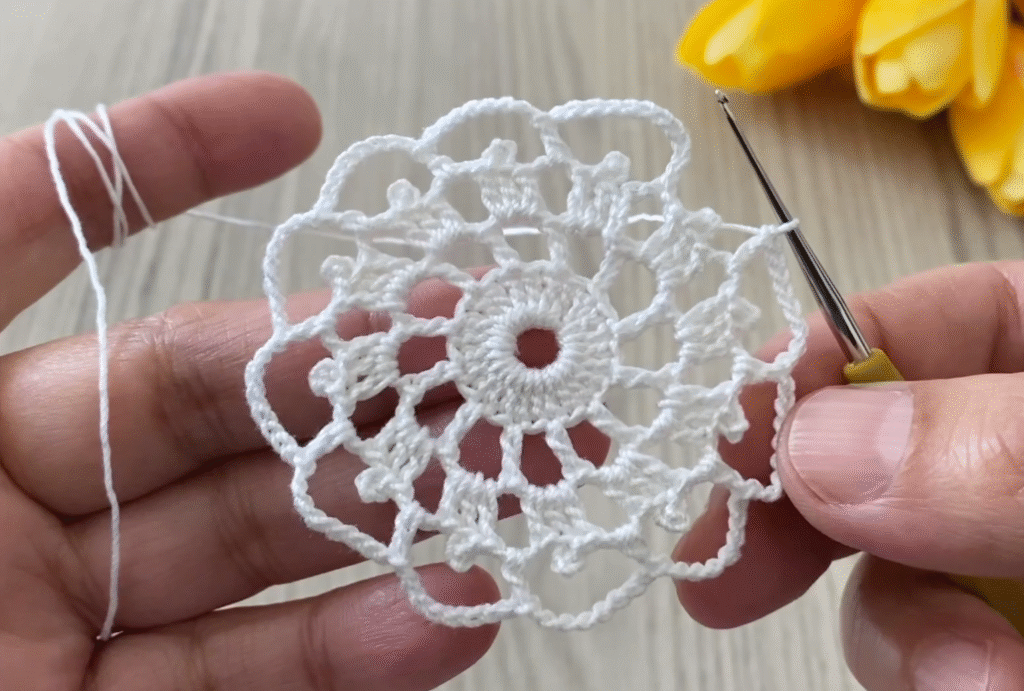
Round 4 (Expanding Petals): Sl st into next 2 dc and into the first ch-3 sp (petal corner). Ch 3 (counts as first dc), (2 dc, ch 3, 3 dc) in the same ch-3 sp. *Ch 1, 3 dc in next ch-1 sp. Ch 1, (3 dc, ch 3, 3 dc) in next ch-3 sp.* Rep from * to * 6 more times. Ch 1, 3 dc in next ch-1 sp. Ch 1, sl st to top of beg ch-3. (8 larger petal segments, each now with a 3dc group between them)
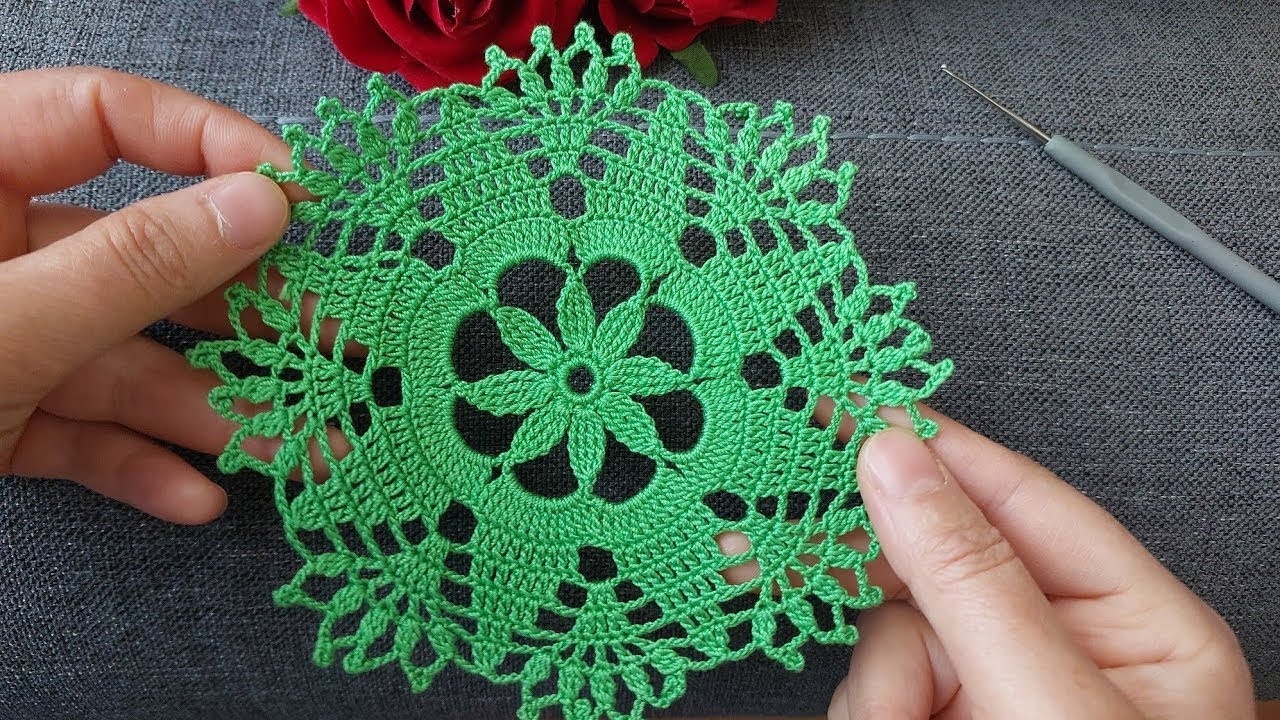
Round 5 (Creating Lace Points): Sl st into next 2 dc and into the first ch-3 sp (petal corner). Ch 1 (does not count as st), sc in the same ch-3 sp. *Ch 5, sc in next ch-1 sp. Ch 5, sc in next ch-1 sp. Ch 5, sc in next ch-3 sp (next petal corner).* Rep from * to * around. Ch 5, sc in next ch-1 sp. Ch 5, sc in next ch-1 sp. Ch 5, sl st to first sc. (24 ch-5 loops)
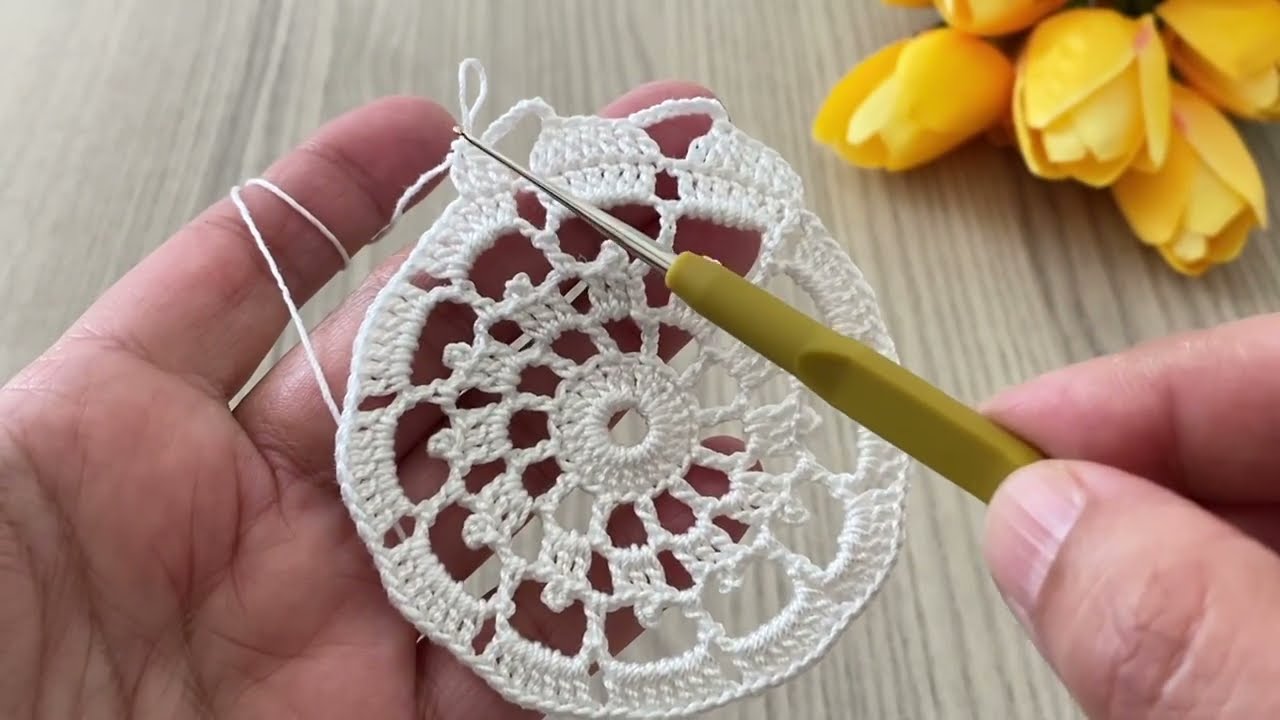
Round 6 (Final Lace Edging): Sl st into first ch-5 sp. Ch 1 (does not count as st), sc in the same ch-5 sp. *Ch 3, dc in the next sc. (dtr, Picot, dtr) in the next ch-5 sp (this forms a large pointed peak). dc in the next sc. Ch 3, sc in the next ch-5 sp.* Rep from * to * around. Ch 3, dc in the next sc. (dtr, Picot, dtr) in the next ch-5 sp. dc in the next sc. Ch 3, sl st to first sc. Fasten off and weave in all ends.
Blocking is Essential! For any lace project, blocking makes a world of difference. Gently wet your finished motif(s), pin them out to your desired shape and size on a foam board or towel, and let them dry completely. This will open up your stitches and highlight the beautiful lace design.
Adapting Your “Radiant Bloom” Motifs:
Here’s how to turn your beautiful motifs into various projects:
1. Lace Table Runner:
- How many motifs? Decide on your desired runner length. Measure one blocked motif, then calculate how many you’ll need. For example, if each motif is 6 inches and you want a 3-foot (36-inch) runner, you’ll need 6 motifs in a row.
- Joining Method:
- “Join-as-you-go” (JAYG): This is highly recommended for a seamless look. When working the final round (Round 6) of a new motif, replace the central Picot with a sl st or sc into the corresponding Picot or space of an already completed motif. For example, instead of
(dtr, Picot, dtr), you would work(dtr, sl st into Picot of adjacent motif, dtr). Adjust surrounding chains as needed to maintain tension. - Whip Stitch/Slip Stitch: Once all motifs are completed and blocked individually, lay them out and carefully whip stitch or slip stitch them together along the connecting points or loops from Round 6.
- “Join-as-you-go” (JAYG): This is highly recommended for a seamless look. When working the final round (Round 6) of a new motif, replace the central Picot with a sl st or sc into the corresponding Picot or space of an already completed motif. For example, instead of
- Edging: You can leave the edges as is for a natural look, or add a simple border of sc, ch 1, sc around the entire runner for a finished edge.
2. Elegant Shawl:
- Arrangement: Shawls can vary greatly.
- Rectangular Shawl: Join motifs in a rectangular grid (e.g., 3 motifs wide by X motifs long).
- Triangular Shawl: Start with one motif, then add two below it, then three, creating a growing triangle. You’ll need to strategically join and potentially fill in gaps with smaller lace elements or solid stitches.
- Yarn Choice: A soft merino wool, alpaca blend, or high-quality cotton blend in a fingering or sport weight will provide excellent drape and warmth.
- Joining: JAYG is highly recommended for shawls as it creates a very cohesive fabric.
- Border: Add a wider, more elaborate border using shell stitches, picots, or even more complex lace patterns around the entire shawl to give it a luxurious finish.
3. Unique Blouse/Garment Inlay:
This is where creativity truly shines!
- As a Yoke: Create a circular or semi-circular arrangement of motifs to form the yoke (upper chest/shoulder area) of a blouse. You would then pick up stitches around the outer edge of the motif arrangement to crochet the body of the blouse (either in solid stitches or another simple lace pattern).
- Back Panel: Create a large square or rectangular panel of joined motifs for the back of a blouse.
- Sleeve Details: Use a single motif as a cuff detail, or join a few to create a decorative band on the sleeves.
- Strategic Placement: Integrate a single motif into a solid fabric garment (e.g., crochet a solid t-shirt and then attach a motif as an applique or create an opening for the motif to be inserted).
- Yarn Choice: Use a breathable yarn like cotton, bamboo, or linen in a DK or light worsted weight for comfort.
- Construction: This usually involves planning and potentially drafting a simple pattern for the main body of the blouse, then determining where and how the lace motifs will be joined or inserted. You might need to work increases or decreases around the lace sections to transition smoothly into the main garment fabric.
Video tutorial
Tips for Working with Lace:
- Stitch Count is Key: Always count your stitches and chain spaces at the end of each round. This is crucial for lace patterns to maintain symmetry and shape.
- Use Stitch Markers: Place markers in your chain-3 corner spaces or at the beginning/end of repeats to help you keep track.
- Read Ahead: Always read the next few rounds of the pattern before you start to understand the flow and how the stitches build upon each other.
- Good Lighting: Lace work is intricate; good lighting will prevent eye strain.
- Practice: Make a few single motifs to get comfortable with the pattern before embarking on a larger project.
With the “Radiant Bloom” motif, you have a beautiful building block for countless elegant crochet creations. Let your imagination guide you and happy crocheting!