by
by 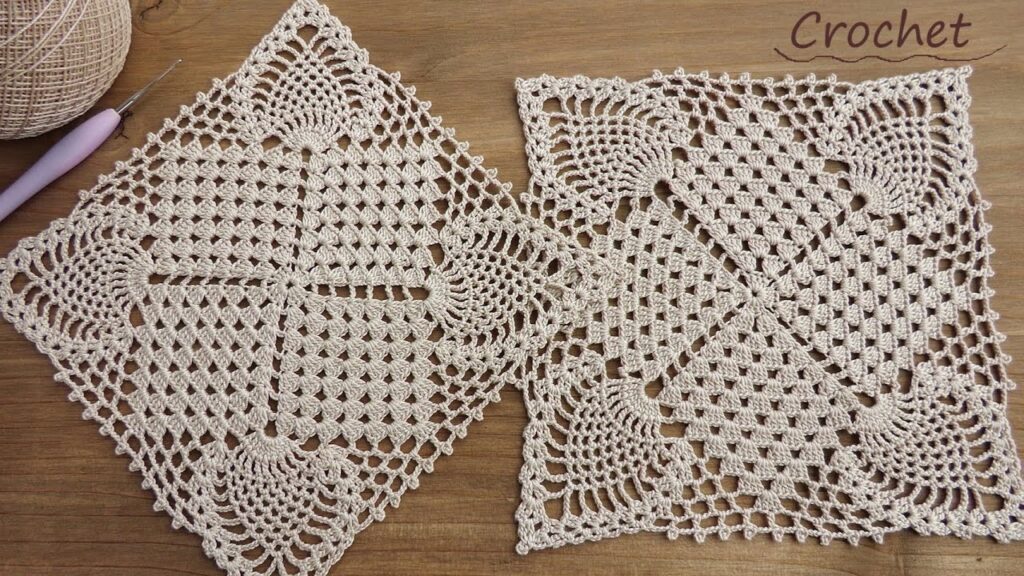
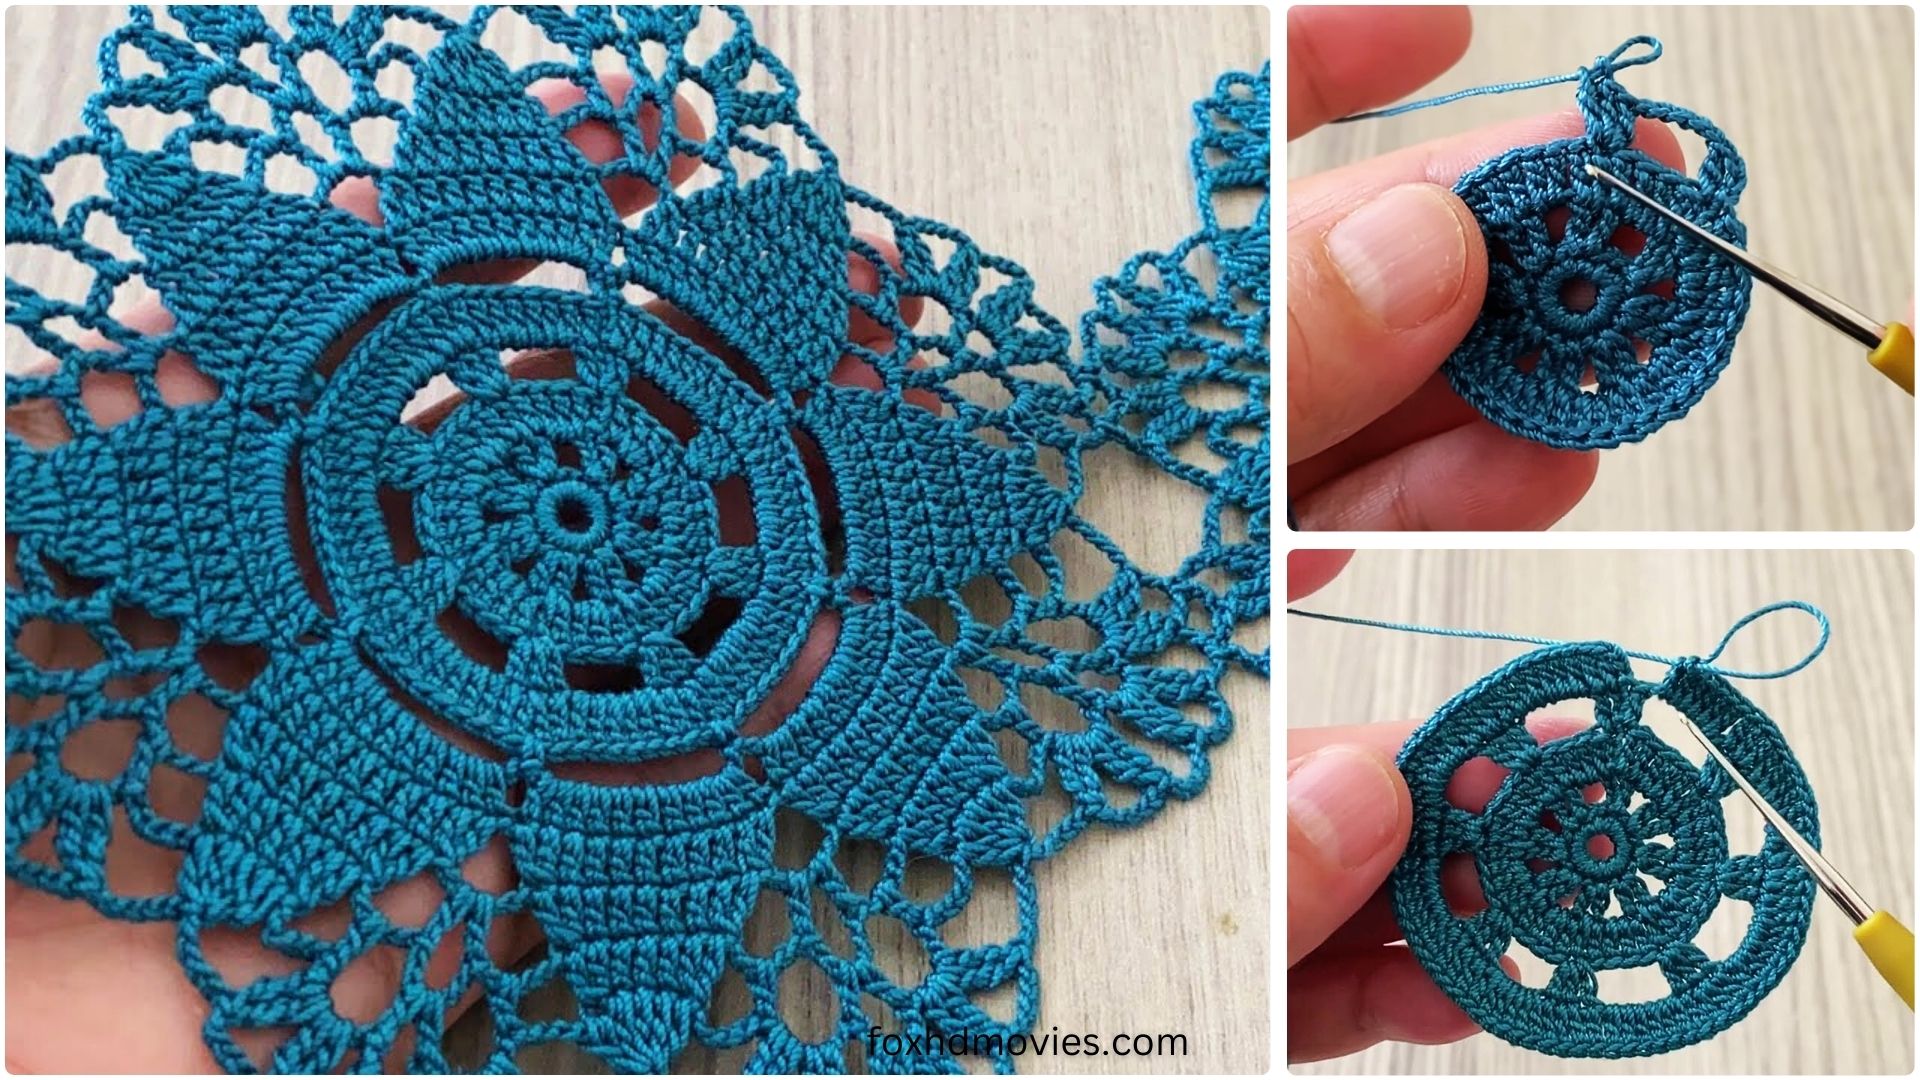
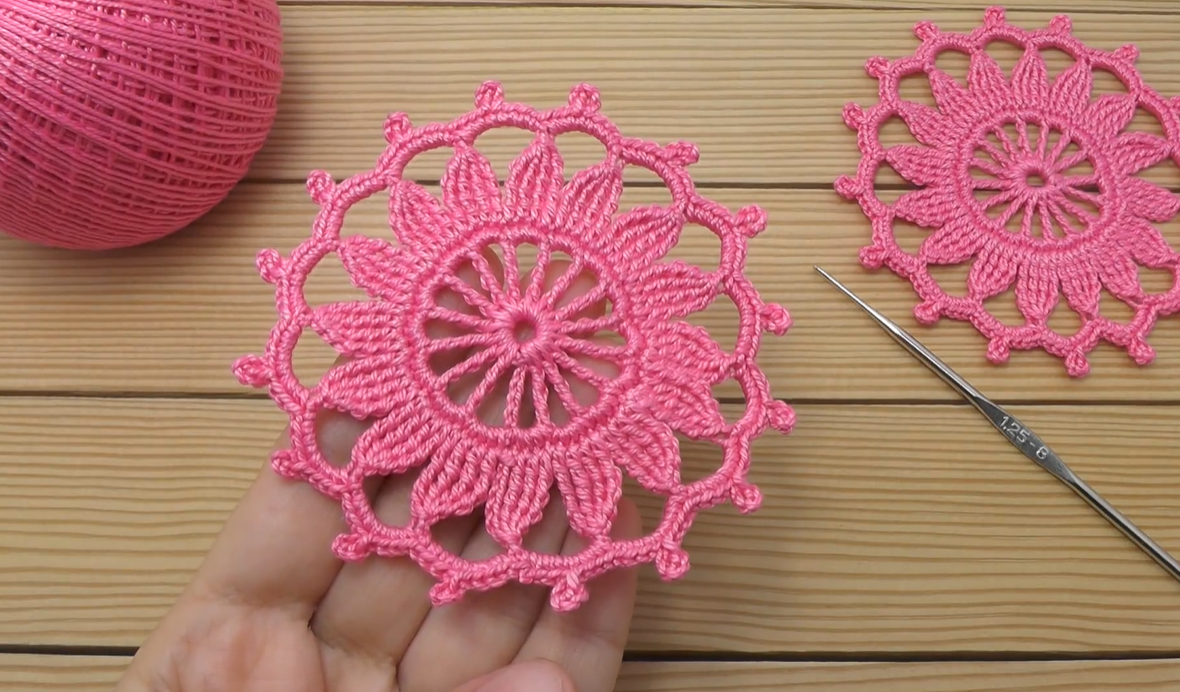
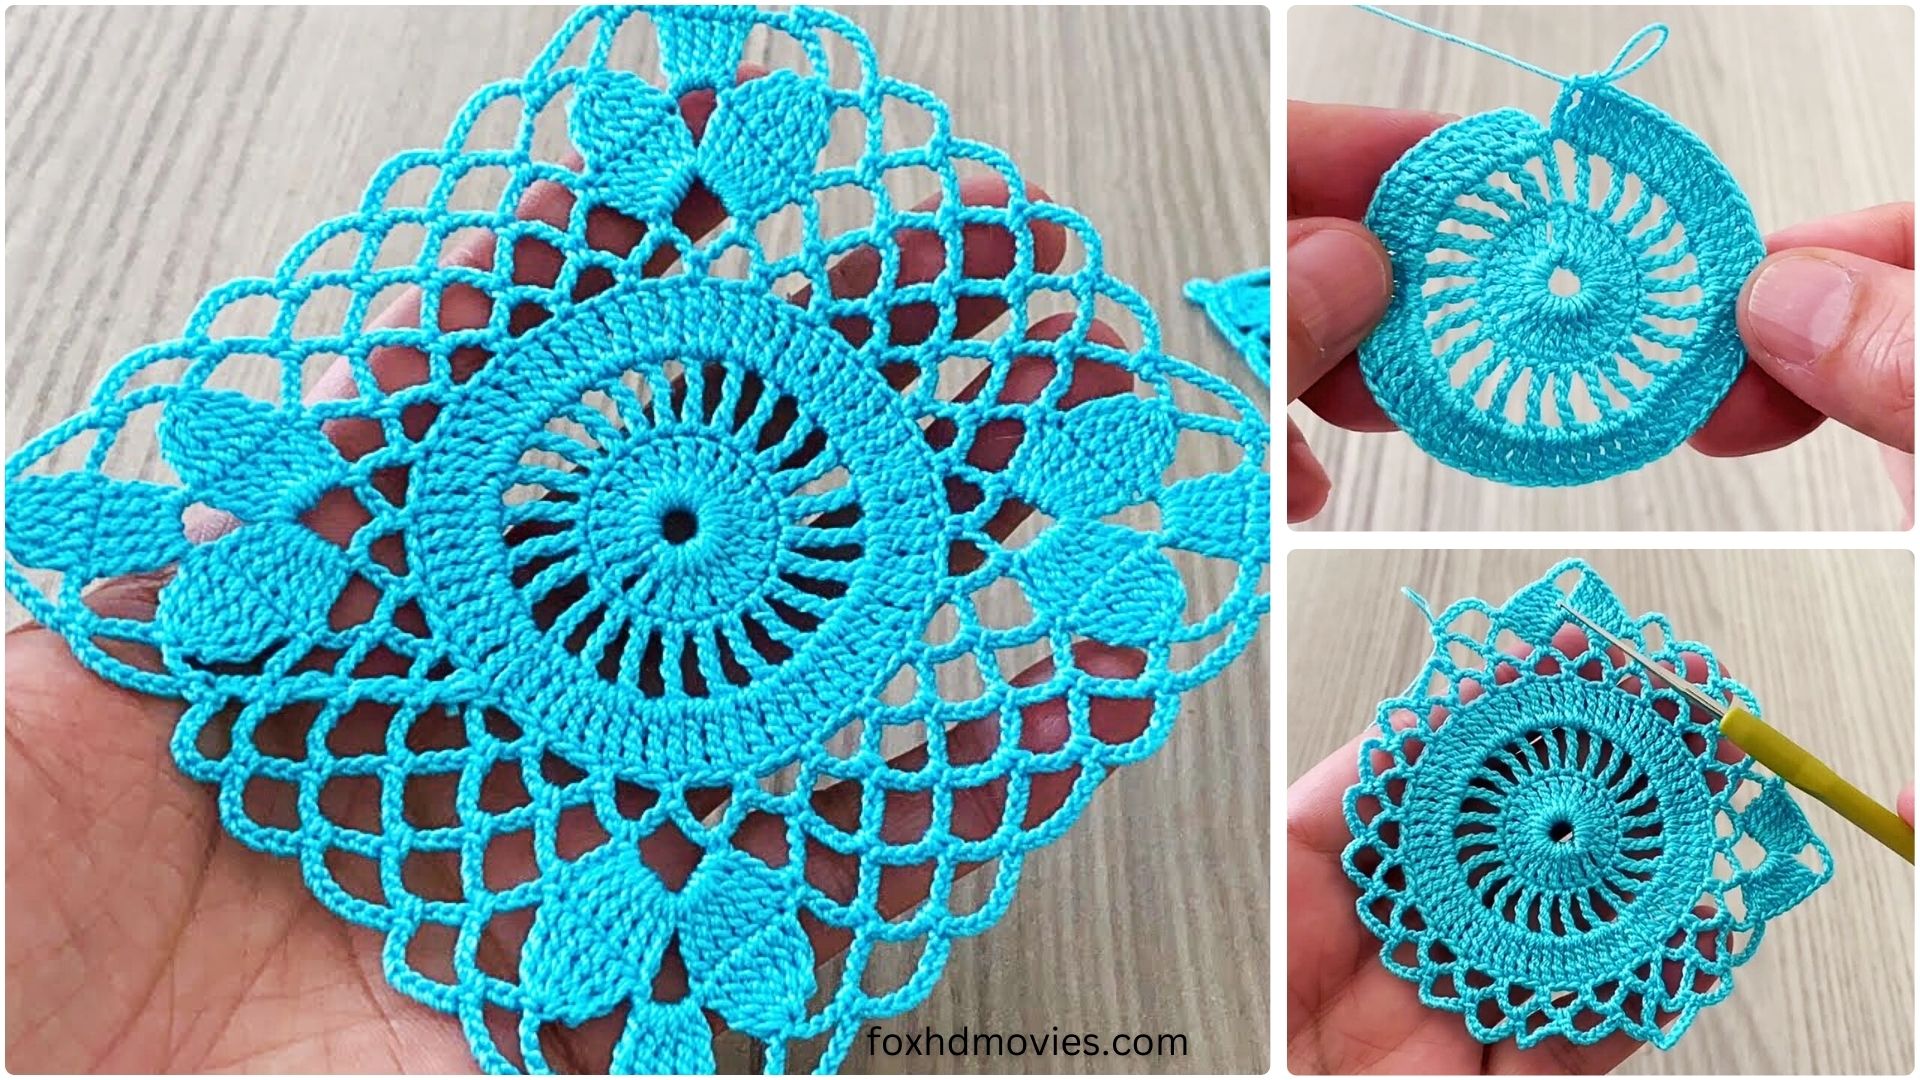
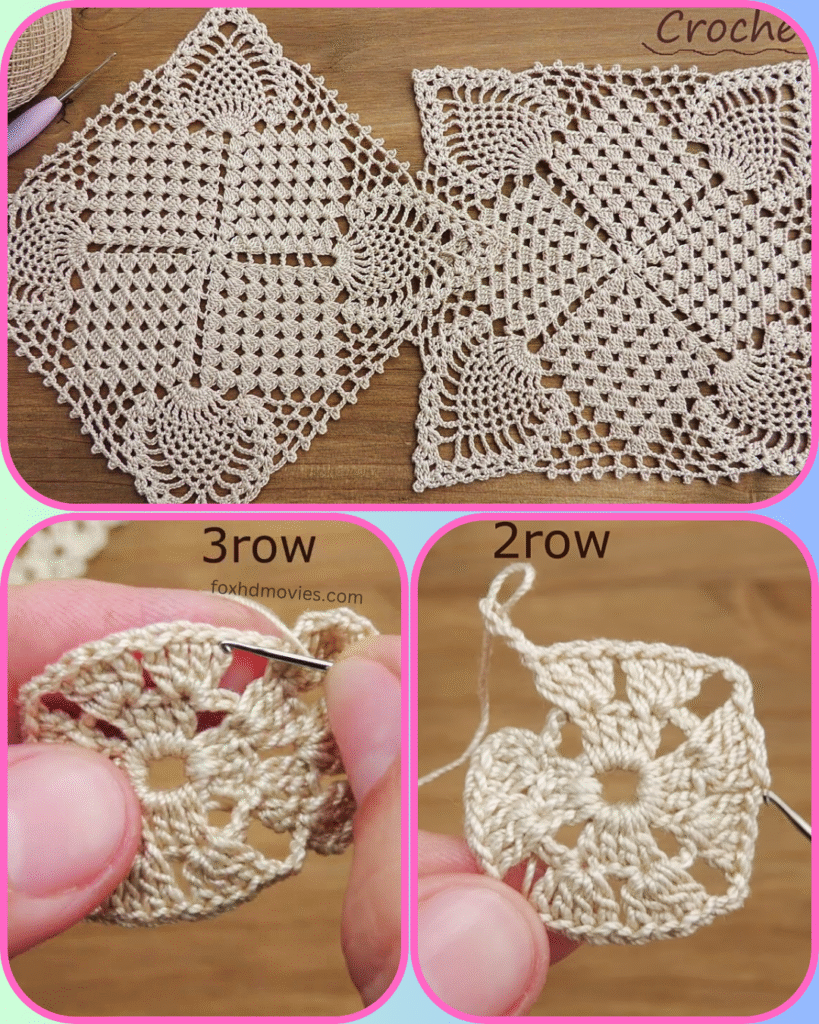
Hello crochet enthusiasts! Today, we’re going to create a beautiful, classic square motif that’s perfect for doilies, tablecloths, or even as individual decorative pieces. This “Elegant Ecru Square” features a lovely lacy texture and a charming radiating pattern, making it a timeless addition to any home decor.
Let’s gather our supplies and get started!
Skill Level: Intermediate
Materials:
- Yarn: Lace weight or #1 fine weight yarn in a neutral color like ecru, off-white, or cream (the sample uses a classic ecru).
- Hook: 1.50mm – 2.00mm steel crochet hook (or size needed to obtain gauge for your chosen yarn weight). The exact size will depend on your yarn and desired drape.
- Yarn needle for weaving in ends
- Scissors
Gauge: After Round 5, your square should measure approximately 3.5 – 4 inches across, depending on your yarn and tension. (Gauge is important if you plan to join multiple squares).
Abbreviations (US Terms):
- ch: chain
- sl st: slip stitch
- sc: single crochet
- dc: double crochet
- tr: treble crochet
- dtr: double treble crochet (yarn over 3 times, insert hook, yarn over, pull through 2 loops 4 times)
- st(s): stitch(es)
- sp: space
- sk: skip
- FO: Fasten off
Pattern for Elegant Ecru Square
Start: Ch 8, sl st to first ch to form a ring. (Alternatively, make a magic ring if you prefer).
Round 1: Ch 3 (counts as 1 dc), 15 dc in ring. Join with sl st to top of ch 3. (16 dc)
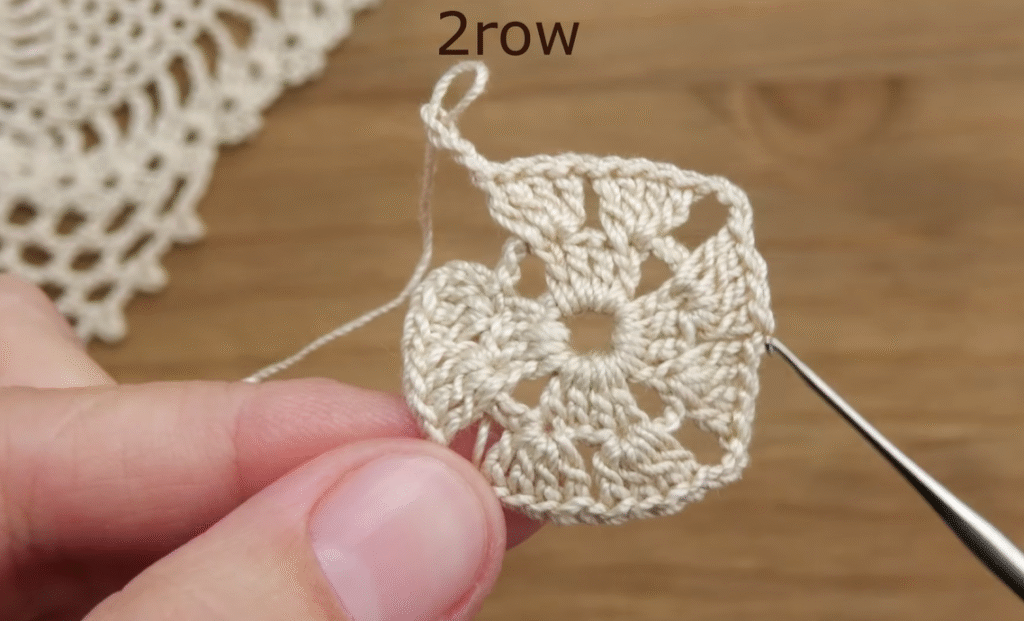
Round 2: Ch 1, sc in first st. Ch 5, sk 1 st, sc in next st. Repeat from * to * 6 more times. Ch 5, sk 1 st, sl st to first sc to join. (8 sc, 8 ch-5 sps)
Round 3: Sl st into first ch-5 sp. Ch 3 (counts as 1 dc), (2 dc, ch 3, 3 dc) in same ch-5 sp (first corner made). Ch 1, sk next sc, (3 dc, ch 3, 3 dc) in next ch-5 sp. Repeat from * to * 6 more times. Ch 1, sk next sc, sl st to top of ch 3 to join. (8 shells, 8 ch-1 sps)
Round 4: Sl st into first ch-3 corner sp. Ch 3 (counts as 1 dc), (2 dc, ch 3, 3 dc) in same ch-3 sp (corner). Ch 2, sk next ch-1 sp, 3 dc in next ch-3 corner sp. (3 dc, ch 3, 3 dc) in next ch-3 sp (corner). Repeat from * to * 2 more times. Ch 2, sk next ch-1 sp, 3 dc in next ch-3 corner sp. Sl st to top of ch 3 to join. (You should now have 4 defined corners).
Round 5: Sl st into first ch-3 corner sp. Ch 3 (counts as 1 dc), (dc, ch 3, 2 dc) in same ch-3 sp (corner). Ch 2, sk 3 dc, dc in next ch-2 sp, ch 2, sk 3 dc, (2 dc, ch 3, 2 dc) in next ch-3 sp (corner). Repeat from * to * 2 more times. Ch 2, sk 3 dc, dc in next ch-2 sp, ch 2, sk 3 dc, sl st to top of ch 3 to join.
Round 6: Sl st into first ch-3 corner sp. Ch 3 (counts as 1 dc), (dc, ch 3, 2 dc) in same ch-3 sp (corner). Ch 3, sk 2 dc, sc in next ch-2 sp, ch 3, sk next dc, sc in next ch-2 sp, ch 3, sk 2 dc, (2 dc, ch 3, 2 dc) in next ch-3 sp (corner). Repeat from * to * 2 more times. Ch 3, sk 2 dc, sc in next ch-2 sp, ch 3, sk next dc, sc in next ch-2 sp, ch 3, sk 2 dc, sl st to top of ch 3 to join.

Round 7: Sl st into first ch-3 corner sp. Ch 3 (counts as 1 dc), (dc, ch 3, 2 dc) in same ch-3 sp (corner). Ch 3, sk 2 dc, sc in next ch-3 sp, ch 3, sc in next ch-3 sp, ch 3, sc in next ch-3 sp, ch 3, sk 2 dc, (2 dc, ch 3, 2 dc) in next ch-3 sp (corner). Repeat from * to * 2 more times. Ch 3, sk 2 dc, sc in next ch-3 sp, ch 3, sc in next ch-3 sp, ch 3, sc in next ch-3 sp, ch 3, sk 2 dc, sl st to top of ch 3 to join.
Round 8 (Lace Edge): Sl st into first ch-3 corner sp. Ch 1, (sc, ch 3, sc) in ch-3 sp (corner). Ch 5, sk 2 dc, sc in next ch-3 sp. Ch 5, sc in next ch-3 sp. Repeat from * to * 2 more times. Ch 5, sk 2 dc. Repeat from * to * 3 more times. Sl st to first sc to join.
Round 9 (Picot Edge): Sl st into first ch-3 corner sp. Ch 1, (sc, ch 3, sl st in 3rd ch from hook – picot made, sc) in ch-3 sp (corner). Ch 5, sk next sc, sc in next ch-5 sp. Repeat from * to * 3 more times. Ch 5, sk next sc. Repeat from * to * 3 more times. Sl st to first sc to join.

Finishing:
FO, leaving a long tail for weaving in. Weave in all ends securely. For best results and to showcase the intricate lace pattern, block your finished square. Pin it to a blocking mat or foam board, gently spray with water, and let it dry completely.
Video tutorial
Tips for Success:
- Yarn Choice Matters: Using a thinner yarn and a smaller hook will create a delicate, traditional doily-like square, as seen in the image. Thicker yarn will result in a larger, more dense square.
- Counting is Key: Take your time and count your stitches and chain spaces in each round. This will help you catch mistakes early.
- Relax Your Tension: For lacier projects, try to maintain a relaxed tension to prevent your work from becoming stiff or curling.
- Blocking is Essential: Do not skip blocking! It will dramatically improve the appearance of your square, making the lace open up and the edges crisp.
I hope you enjoy crocheting this Elegant Ecru Square! It’s a truly rewarding project that results in a beautiful piece of handmade art. Don’t hesitate to share your finished squares in the comments below!
Happy Crocheting!