 by
by 
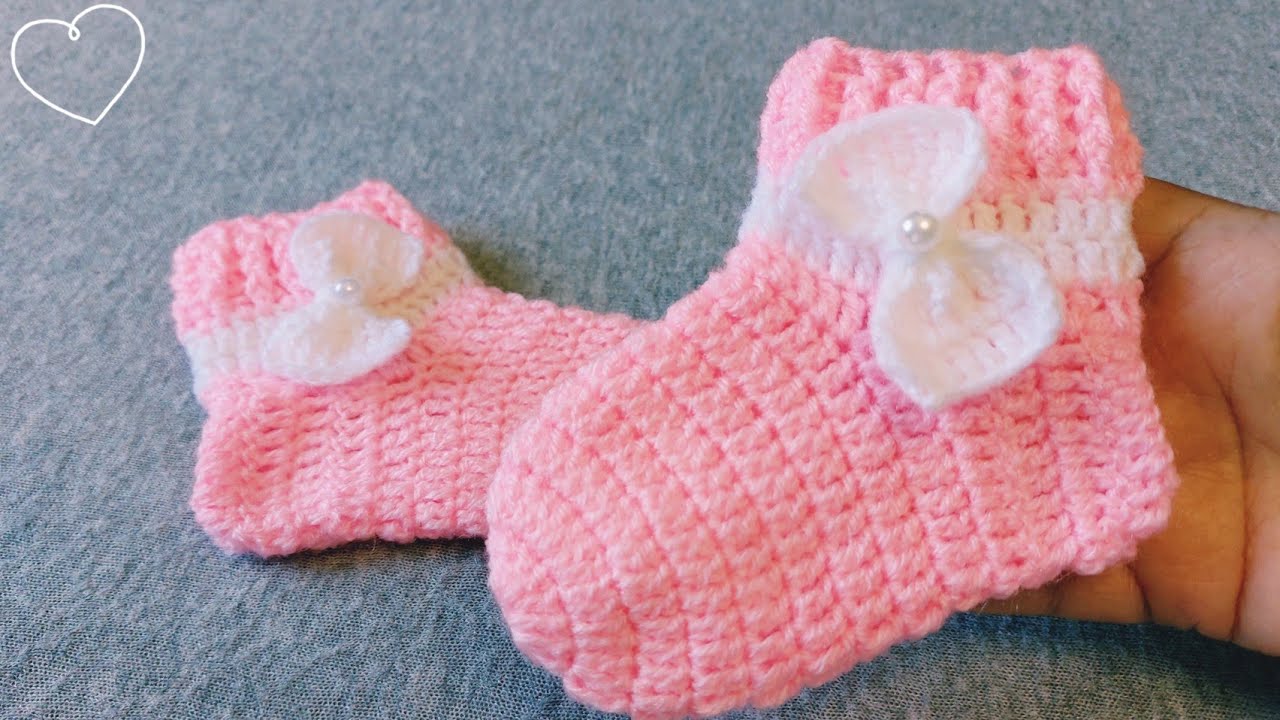
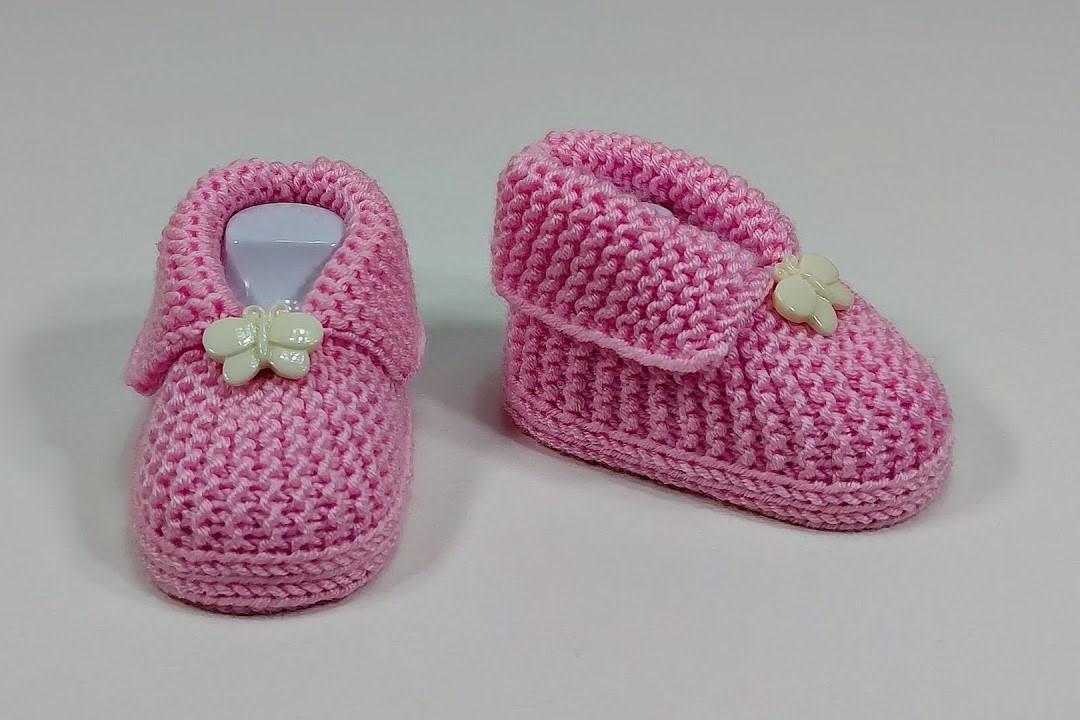
Hello fellow yarn enthusiasts! Today, I’m thrilled to share a delightful project that combines simplicity with cuteness: crocheting precious baby shoes using just four mini squares. Yes, you read that right! This pattern is perfect for using up small amounts of yarn and creates a surprisingly functional and utterly charming pair of tiny shoes.
These little booties work up quickly and are a fantastic project for beginners looking to practice their basic crochet stitches and shaping techniques. Imagine the joy of gifting these handmade treasures to expecting parents or dressing your own little one in something so special.

So, grab your favorite yarn scraps, and let’s get started on these “Sweet Steps”!
Materials You’ll Need:
- Worsted weight yarn in your desired color(s). You won’t need much – scraps work wonderfully!
- Crochet hook size G/6 (4.0 mm) or the size recommended for your yarn.
- Scissors
- Yarn needle for weaving in ends
- Optional: Buttons, small appliques, or ribbon for embellishments.
Abbreviations (US Crochet Terms):
- ch: chain
- sc: single crochet
- hdc: half double crochet
- dc: double crochet
- sl st: slip stitch
- st(s): stitch(es)
- rep: repeat
Gauge:
While gauge isn’t critical for this small project, aim for approximately 4 single crochet stitches per inch to ensure a nicely sized baby shoe.
Finished Size:
The finished size will depend on your yarn weight and hook size. Using worsted weight yarn and a G/6 hook, the booties will generally fit a newborn to 3-month-old baby (approximately 3-3.5 inches in foot length). You can adjust the size slightly by going up or down a hook size.
Video tutorial
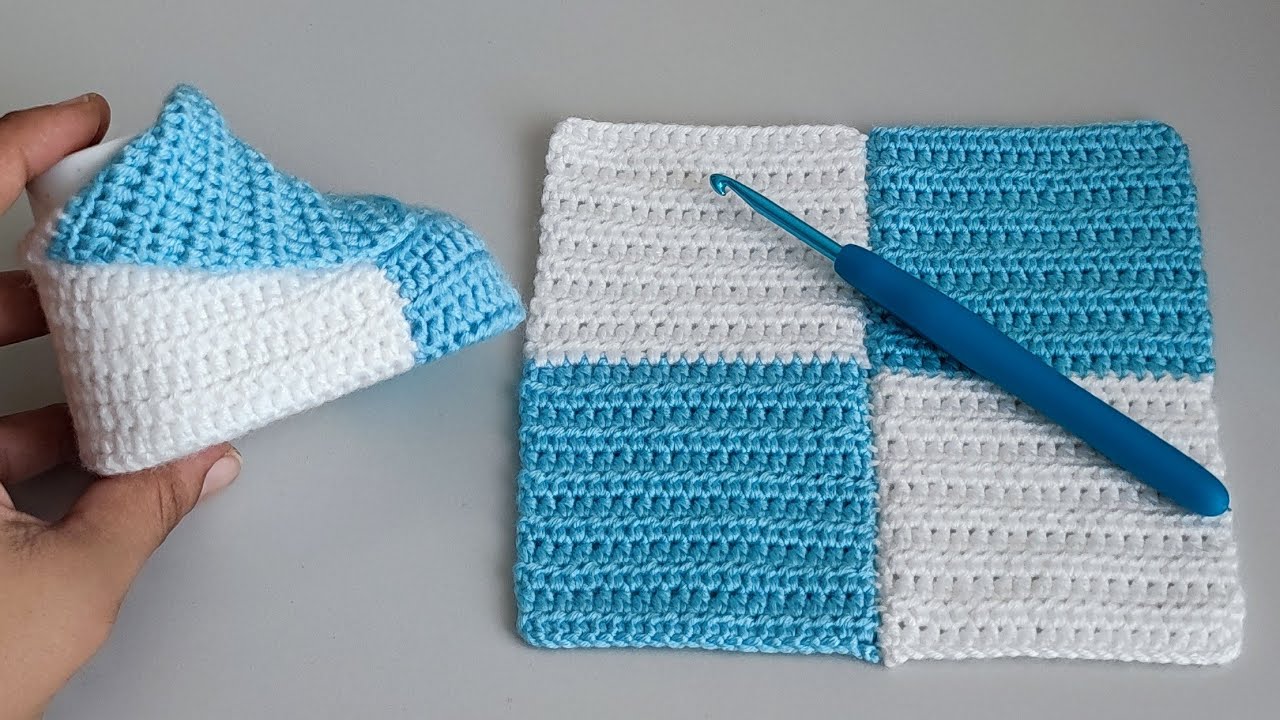
Let’s Crochet the Mini Squares (Make 4):
Each baby shoe is made from two identical mini squares.
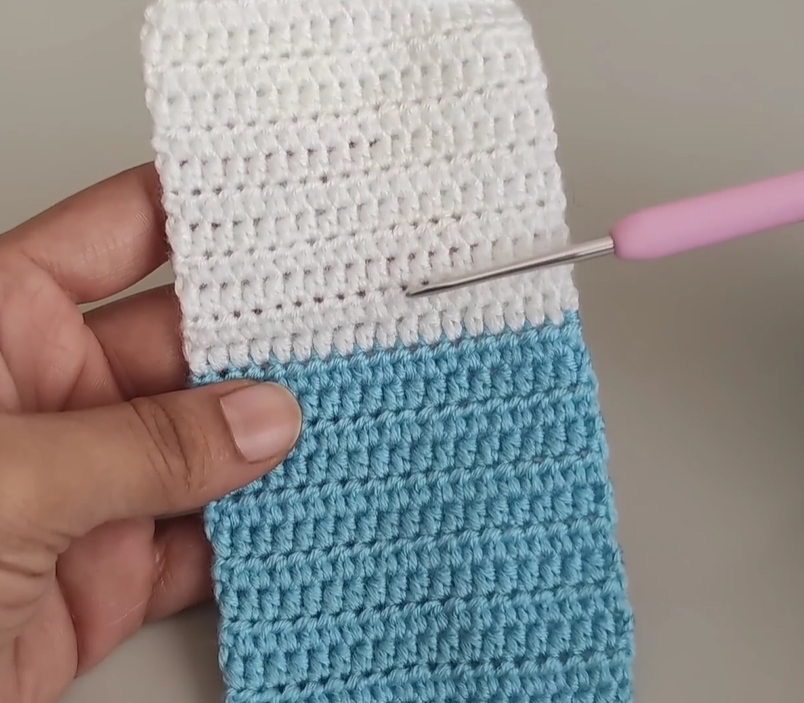
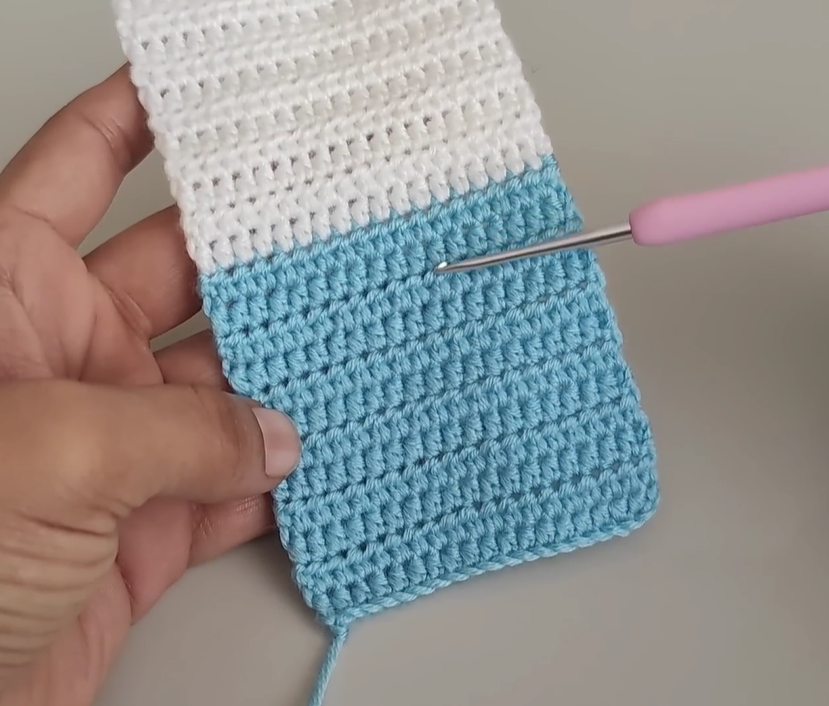
- Foundation Chain: Ch 16.
- Row 1: Sc in the second ch from the hook and in each ch across (15 sc). Turn.
- Row 2 – 8 (or until your square is approximately 3 inches by 3 inches): Ch 1 (does not count as a st), sc in each st across (15 sc). Turn.
- Fasten off, leaving a long tail for sewing on two of the squares.
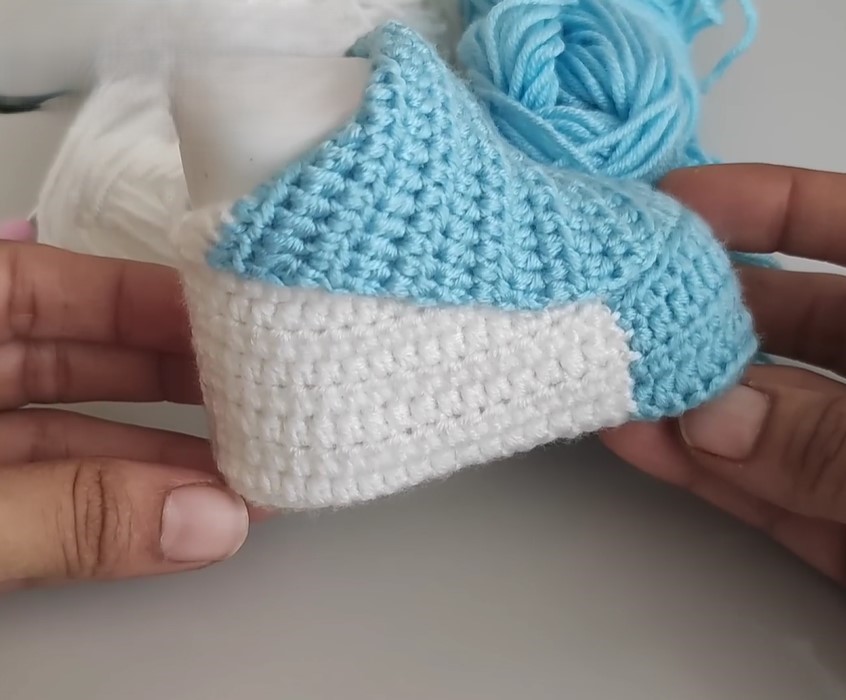
Assembling the Baby Shoe:
Now comes the fun part – transforming these simple squares into adorable booties!
- Positioning the Squares: Take two of your finished squares. Imagine one square as the sole and the other as the upper part of the shoe.
- Creating the Toe: Fold the “upper” square in half. With your yarn needle and the long tail, sew the two short edges together for approximately 1.5 inches (this will form the rounded toe of the shoe). Leave the remaining open.
- Attaching the Upper to the Sole: Now, align the sewn edge of the “upper” square with one of the short edges of the “sole” square. Using your yarn needle and the remaining long tail, whip stitch or mattress stitch the edges together.
- Shaping the Heel: Continue sewing the long sides of the “upper” square to the long sides of the “sole” square, leaving an opening at the back for the baby’s foot. As you sew, you’ll naturally start to see the shoe shape forming. You’ll want to gather the back slightly to create a snugger fit around the heel.
- Securing the Seam: Once you’ve sewn most of the way around, leaving enough space for the foot opening, fasten off securely and weave in your ends.
- Repeat: Repeat steps 1-5 with the remaining two squares to create the second baby shoe.
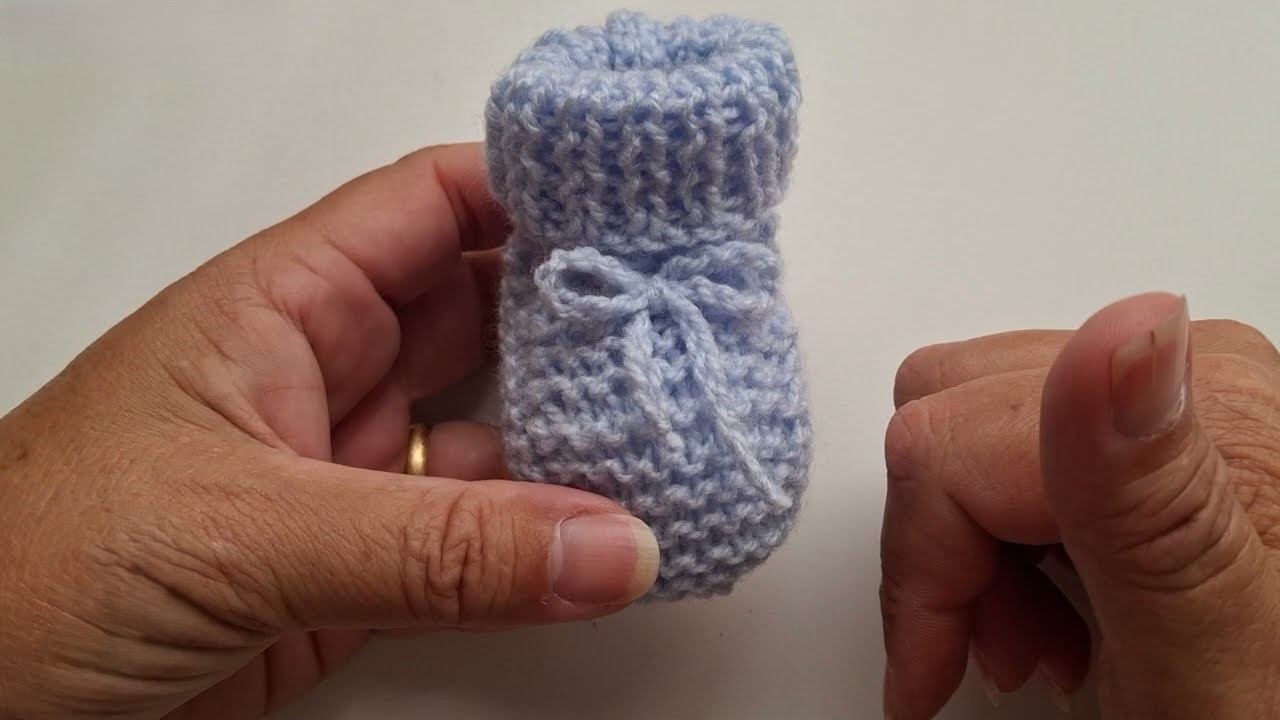
Adding the Finishing Touches (Optional):
- Ankle Strap: You can add a simple ankle strap by chaining a length of yarn (long enough to go around the baby’s ankle and have a small overlap), and attaching it to the sides of the shoe with a button or a tie.
- Embellishments: Sew on small buttons, crochet flowers, or cute appliques to the front or sides of the shoes for extra charm. You could also weave a ribbon through the stitches around the ankle opening.
- Contrasting Cuff: For a pop of color, you could work a few rounds of single crochet in a different color around the ankle opening.
Tips and Variations:
- Stripes: Create squares with stripes for a playful look.
- Color Blocking: Use different colors for each of the four squares for a vibrant pair of booties.
- Texture: Experiment with different crochet stitches within the squares for added texture.
- Sizing: To make the shoes slightly larger or smaller, you can adjust the number of rows in your squares or use a different weight of yarn and corresponding hook size.
Care Instructions:
Gently hand wash your crocheted baby shoes in lukewarm water with mild soap. Reshape and lay flat to dry.
Share Your Sweet Steps!
I would absolutely love to see your finished baby shoes! Please share photos of your creations on social media using the hashtag #SweetStepsBooties.
This simple yet satisfying project is a testament to the versatility of crochet. Who knew four little squares could transform into something so precious and practical? Happy crocheting, and may your little ones take their first steps in comfort and style!