by
by 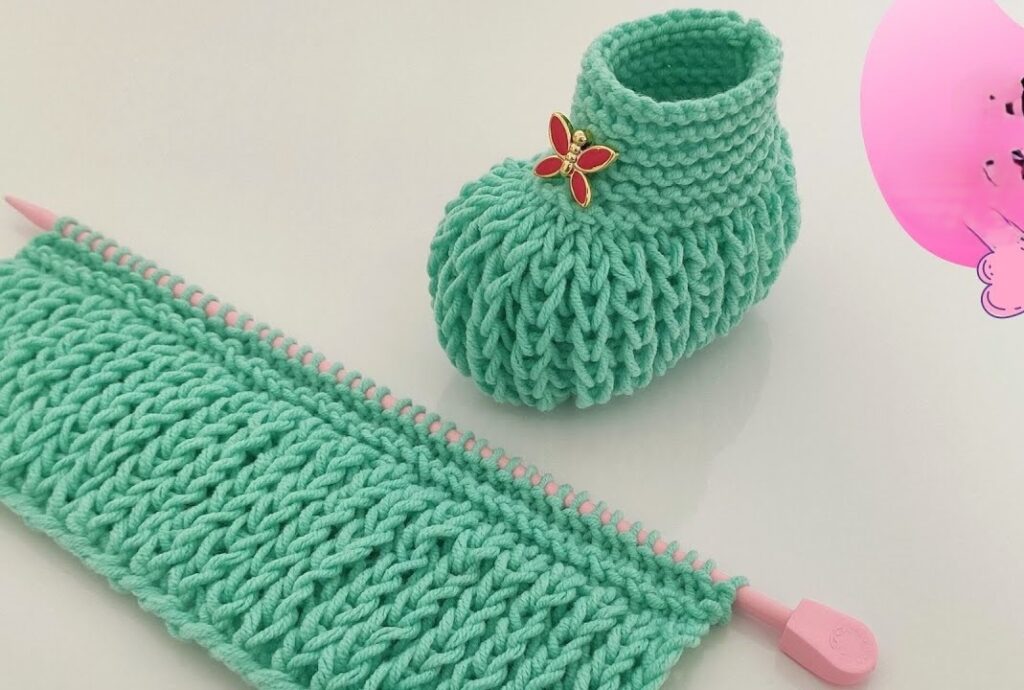
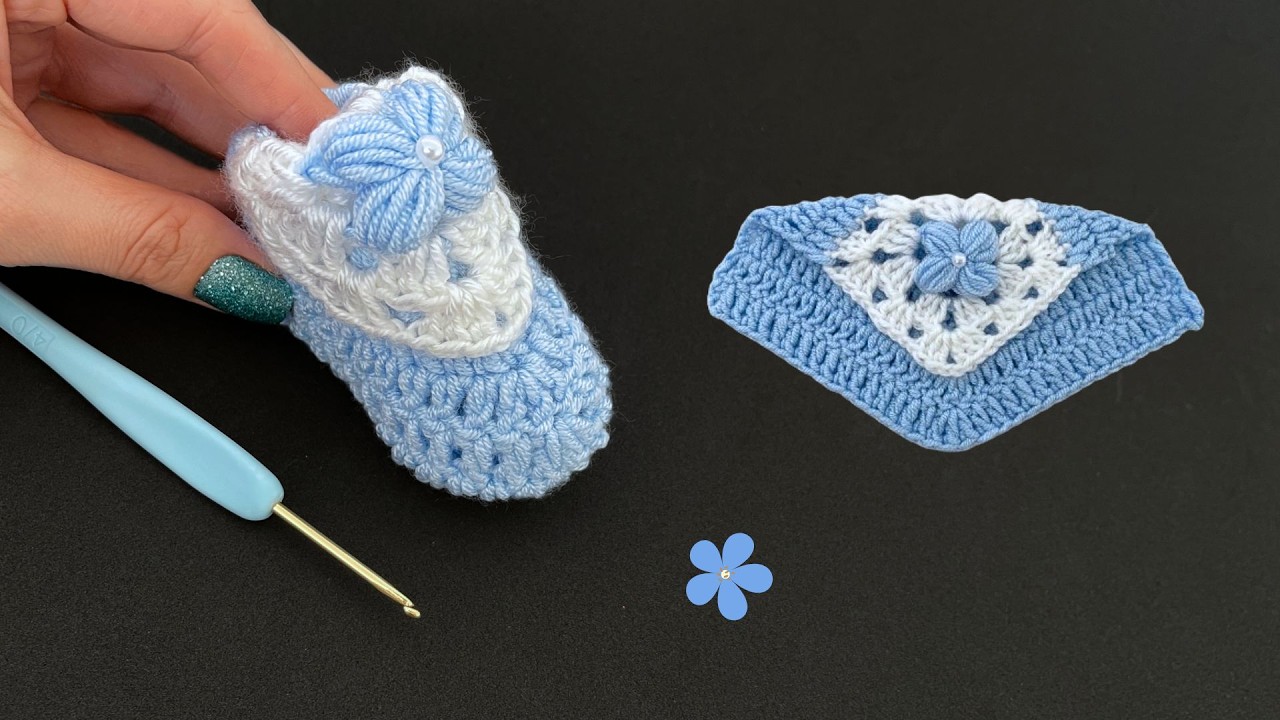
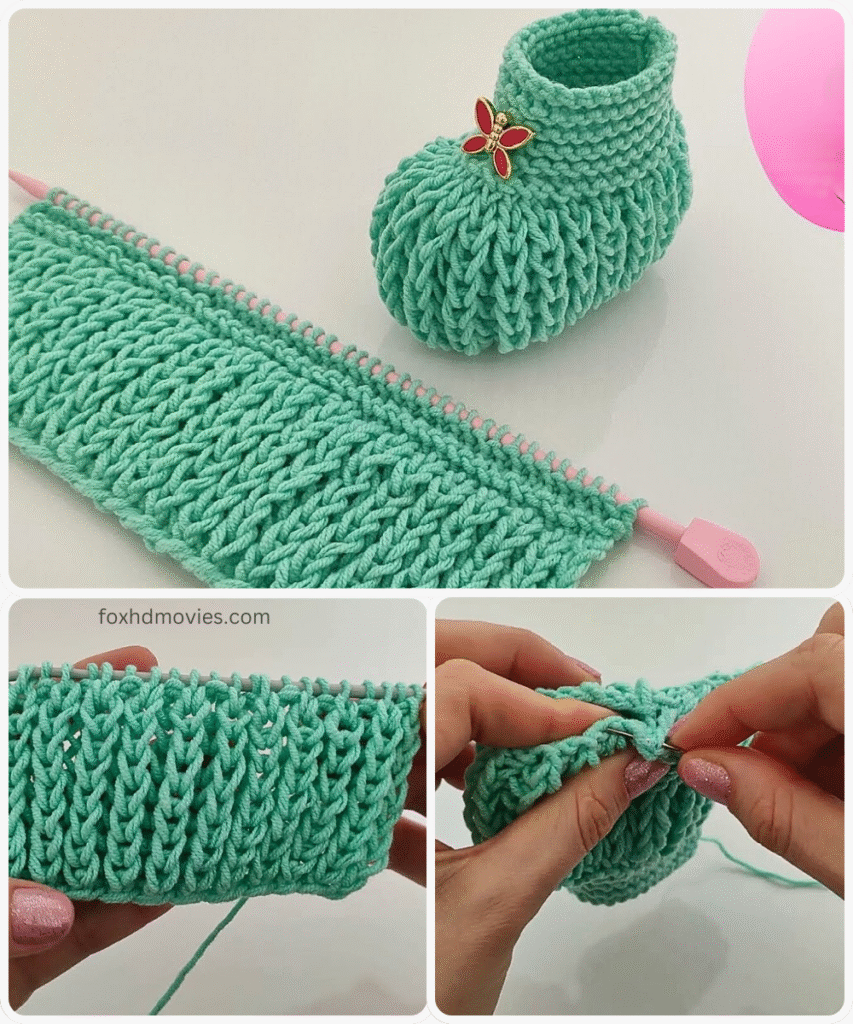
Here is a simple knitting pattern for a baby shoe that is easy for beginners, often made from a knitted rectangle that is folded and seamed.
Very Easy Knitted Baby Shoe Pattern
This pattern creates a simple, soft baby shoe or slipper from a basic knitted piece. It’s designed to be easy and uses fundamental knitting stitches.
Skill Level: Beginner
Size: 0-3 Months (approx. 3.5 – 4 inches sole length)
Note: To adjust the size, you will need to change the number of stitches cast on and the number of rows knitted.
Materials:
- Approximately 50-80 yards of DK or worsted weight yarn (check your gauge).
- Knitting needles appropriate for your yarn to achieve gauge (e.g., Size US 5-7 / 3.75-4.5 mm).
- Tapestry needle for seaming and weaving in ends.
- Scissors
- Stitch holder or scrap yarn (optional, for holding stitches if adding a tie).
Gauge:
Using your chosen yarn and needles, knit a swatch in garter stitch: 18 stitches and 34 rows = 4 inches (10 cm) in garter stitch (every row knit).
Checking your gauge is helpful to get the intended size.
Abbreviations:
- k: knit
- p: purl
- st(s): stitch(es)
- CO: Cast on
- BO: Bind off
- garter st: knit every row
- st st: stocking stitch (knit on right side rows, purl on wrong side rows)
Notes:
- This pattern is worked flat in one piece.
- The shoe is shaped by folding and seaming.
- The sample size is for 0-3 months, assuming you meet the gauge.

Pattern Instructions:
Make 2 (for a pair)
The Main Piece (Garter Stitch Rectangle)
We will knit a simple rectangle. Garter stitch (knitting every row) creates a stretchy, non-rolling fabric perfect for easy booties.
Step 1: Cast On CO 28 stitches onto one knitting needle. (Adjust number of stitches for width/height of shoe opening – more stitches make a wider opening/taller cuff).
Step 2: Knit in Garter Stitch Knit every row until the piece measures approximately 3.5 – 4 inches (9 – 10 cm) from the cast-on edge. This length will form the sole and the toe section of the shoe.
Note: For a larger size, knit more rows here. For a smaller size, knit fewer rows.
Step 3: Bind Off BO all stitches loosely.
You should now have a knitted rectangle.

Assembly:
Now we will fold and seam the rectangle to create the shoe shape.
- Lay your knitted rectangle flat.
- Fold the rectangle in half lengthwise. The short ends should meet.
- Using your tapestry needle and a length of yarn, seam the raw edges together along the entire length of the fold. This forms the heel and the sole seam. Stitch neatly.
- Now you have a tube shape, with the seam running along the bottom (the sole) and up the back (the heel). The cast-on and bound-off edges are the top opening.
- Turn the tube so the heel seam is at the back. Lay it flat so the heel seam is centered at the back. The raw edge opposite the heel seam is the toe.
- Thread your tapestry needle with yarn. Starting from one side edge, weave the needle in and out through the stitches along the raw edge of the toe area.
- Once you have woven through the entire toe edge, pull the yarn tail tightly to gather the stitches and close the toe. Cinch it as tightly as you can.
- Secure the gathering by stitching back and forth a few times across the gathered opening.
- Turn the shoe right side out. The gathered end is the toe, the seam is the sole/heel, and the cast-on/bound-off edges form the ankle opening.
Video tutorial
Finishing:
- Weave in all remaining loose ends securely on the inside of the shoe using your tapestry needle.
- Repeat all steps to make the second shoe.
Optional Simple Tie (Knitted I-Cord or Garter Stitch Strip):
- Knitted Strip: CO 4 stitches. Knit every row (garter stitch) until the strip is long enough to tie around the baby’s ankle (approx. 10-12 inches). BO. Make 2. Thread one tie through some stitches on each side of the ankle opening of the shoe.
- Crocheted Chain: If you are comfortable with basic crochet, chain about 40-50 stitches using your yarn. FO. Make 2. Thread one chain through stitches around the ankle.