by
by 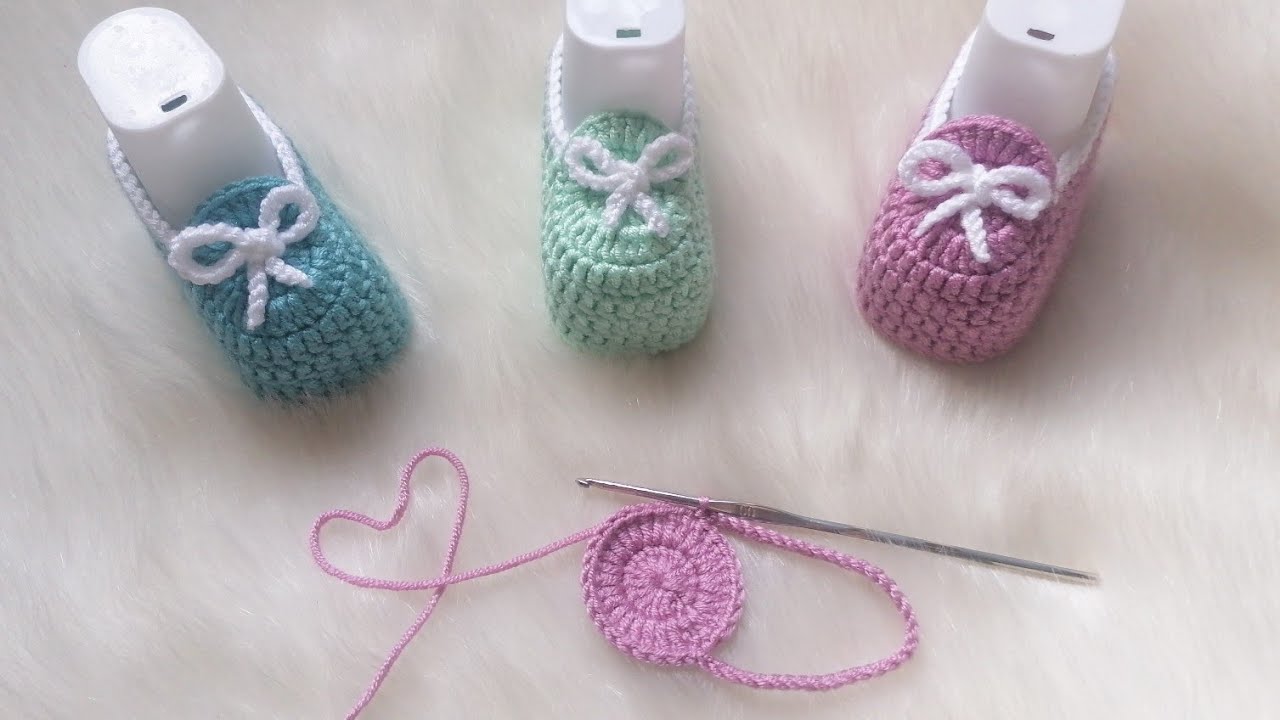
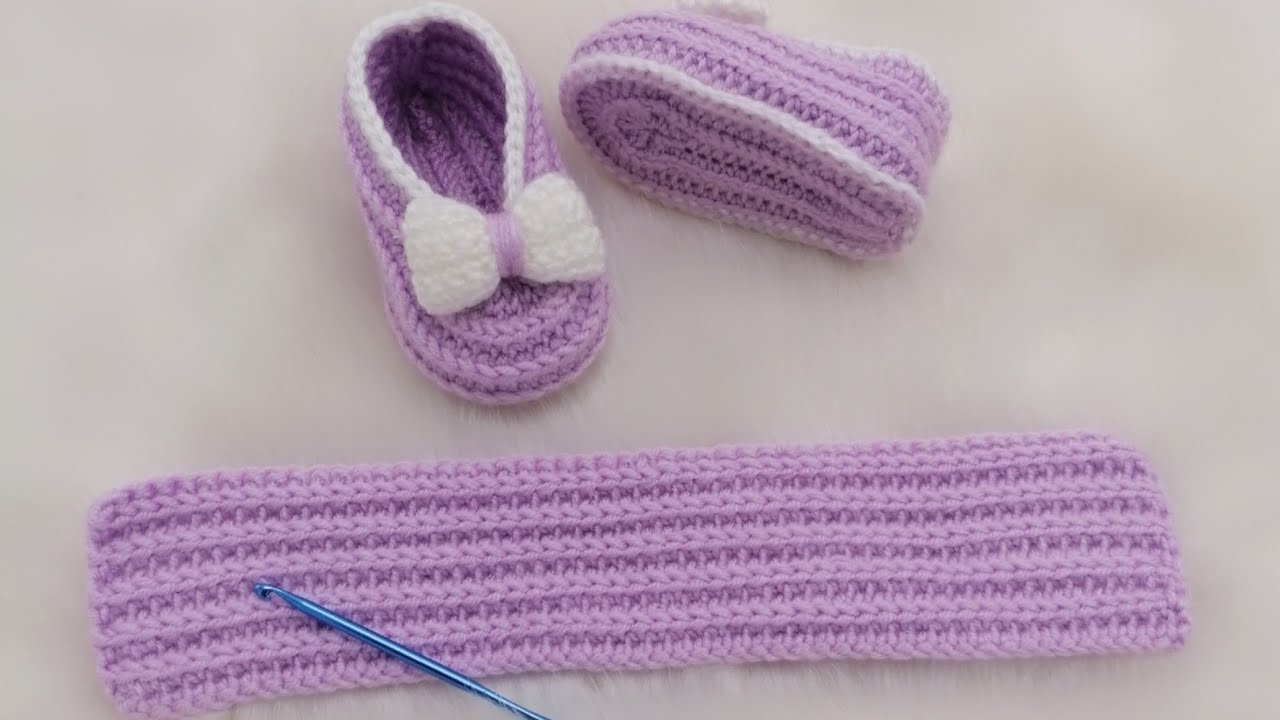
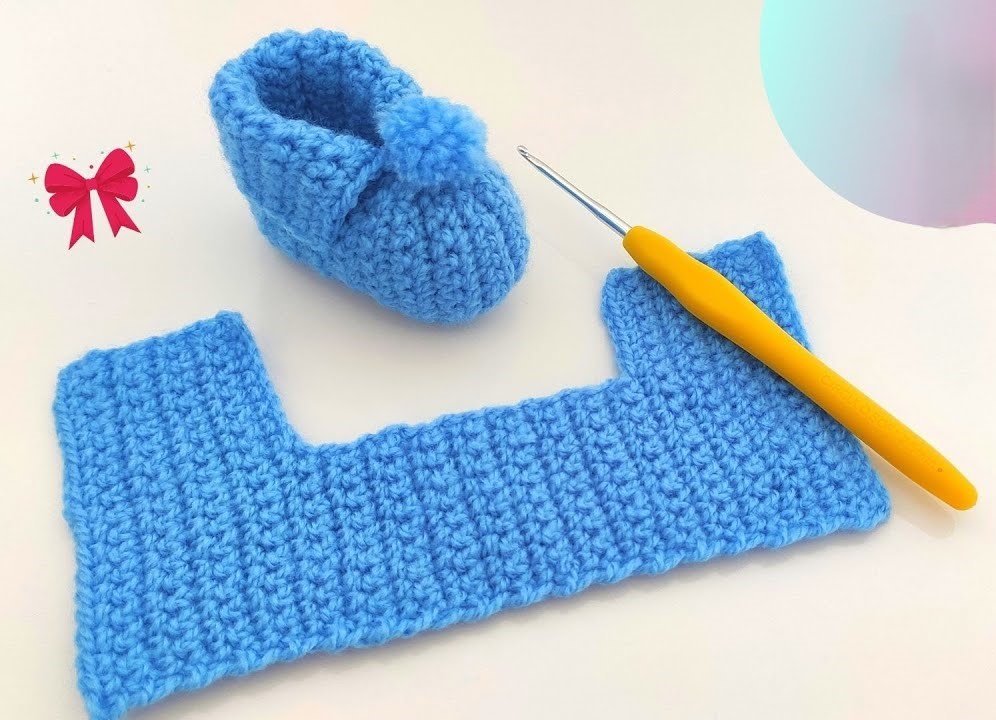
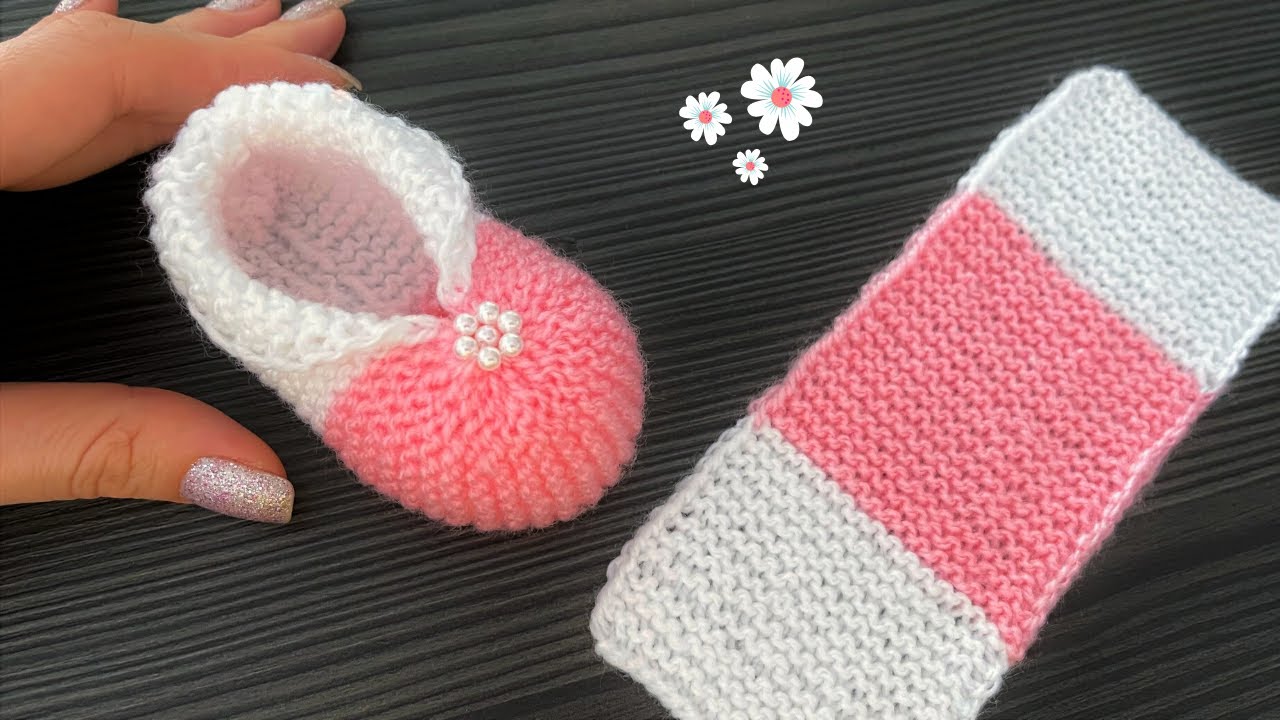
Welcome, fellow yarn enthusiasts! Today, we’re embarking on a delightful journey to crochet the cutest little baby slippers. This pattern is designed to be relatively simple, making it perfect for confident beginners and seasoned crocheters alike. Get ready to transform your yarn scraps into tiny treasures that will keep those precious little feet warm and cozy.
Materials You’ll Need:
- Yarn: Worsted weight yarn in your desired color(s). A soft, baby-friendly yarn is always a wonderful choice. You won’t need much – scraps work perfectly! Consider using two contrasting colors for a fun touch.
- Crochet Hook: A size G/6 (4.0 mm) crochet hook, or the size recommended for your chosen yarn.
- Scissors: For snipping yarn ends.
- Yarn Needle: For weaving in those pesky loose ends.
- Stitch Markers (Optional but Recommended): These little helpers can be lifesavers for keeping track of rounds.
- Measuring Tape (Optional): To ensure the size is just right.
Abbreviations (US Crochet Terms):
- ch: chain
- st(s): stitch(es)
- sl st: slip stitch
- sc: single crochet
- hdc: half double crochet
- dc: double crochet
- inc: increase (work 2 sc in the same stitch)
- dec: decrease (sc2tog – single crochet two stitches together)
- BLO: back loop only
- FLO: front loop only
Gauge:
While gauge isn’t critical for baby items, knowing yours can help ensure consistent sizing. A typical gauge for worsted weight yarn with a 4.0 mm hook is approximately 16 sc stitches and 20 rows in a 4-inch (10 cm) square.
Sizing:
This pattern is written for a newborn to 3-month-old size (approximately 3.5 inches/9 cm foot length). Adjust your hook size or yarn weight to make slightly larger or smaller slippers. You can also add or subtract rounds in the sole to customize the length.
Video pattern
Let’s Get Started!
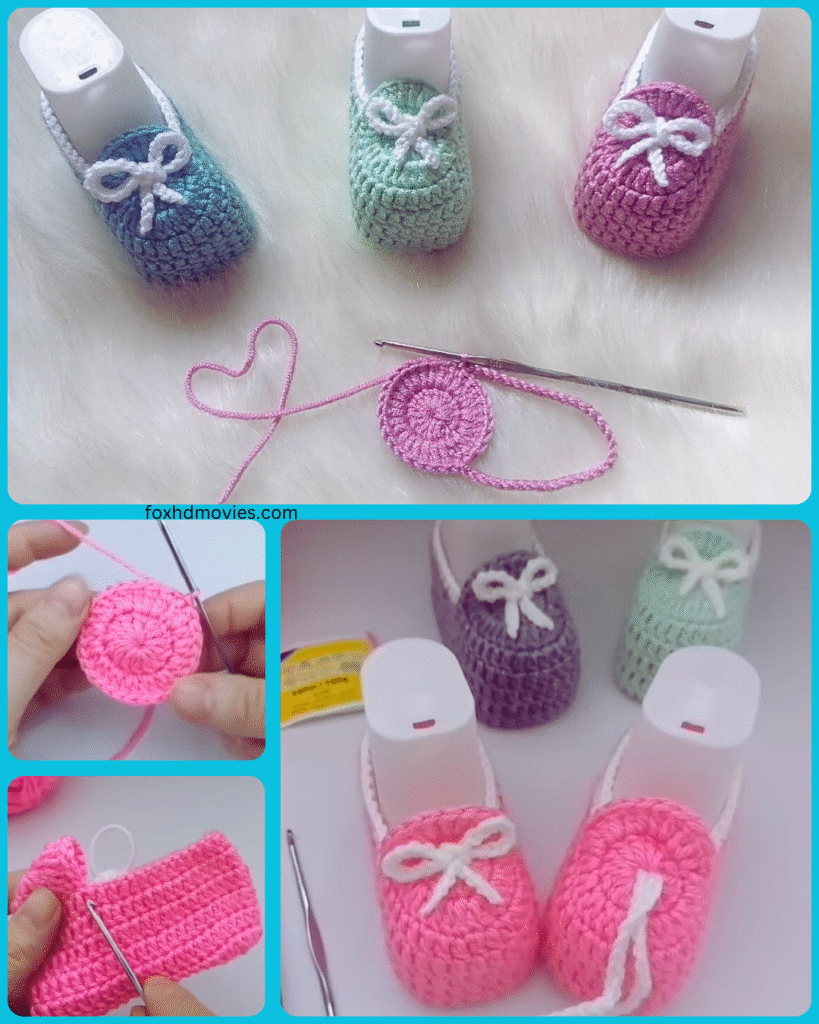
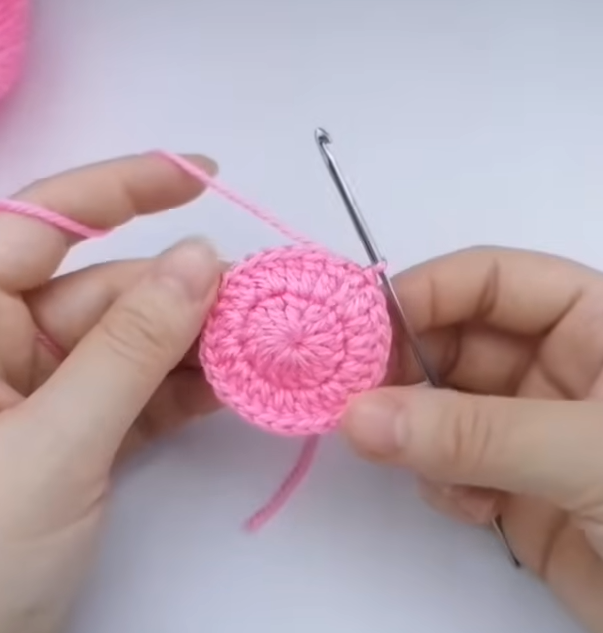
Sole (Make 2):
We’ll begin by creating the sole of the slipper.
- Round 1: Ch 9. Sc in the 2nd ch from the hook and in the next 6 chs. 3 sc in the last ch. Working on the other side of the chain, sc in the next 6 chs. 2 sc in the last ch. Sl st to the first sc to join. (18 sts)
- Round 2: Ch 1 (does not count as a st). 2 sc in the first st. Sc in the next 6 sts. 2 sc in each of the next 3 sts. Sc in the next 6 sts. 2 sc in each of the last 2 sts. Sl st to the first sc to join. (24 sts)
- Round 3: Ch 1. 2 sc in the first st. Sc in the next 8 sts. (sc, 2 sc) repeat 3 times. Sc in the next 8 sts. (sc, 2 sc) repeat twice. Sl st to the first sc to join. (30 sts)
- Round 4: Ch 1. 2 sc in the first st. Sc in the next 10 sts. (sc, sc, 2 sc) repeat 3 times. Sc in the next 10 sts. (sc, sc, 2 sc) repeat twice. Sl st to the first sc to join. (36 sts)
At the end of Round 4, you should have a small oval shape for the sole. Fasten off and weave in the ends for both soles.
Upper:
Now, we’ll work on the upper part of the slipper, attaching it to one of the soles.
- With the right side of one sole facing you, join your yarn with a sl st to any stitch.
- Round 1: Ch 1. Sc in the same st and in each st around. Sl st to the first sc to join. (36 sts)
- Round 2: Ch 1. Sc in each st around. Sl st to the first sc to join. (36 sts)
- Round 3: Ch 1. Sc in the next 10 sts. Hdc in the next 16 sts. Sc in the last 10 sts. Sl st to the first sc to join. (36 sts)
- Round 4: Ch 1. Sc in the next 10 sts. Hdc in the next 16 sts. Sc in the last 10 sts. Sl st to the first sc to join. (36 sts)
- Round 5: Ch 1. Sc in the next 10 sts. Hdc in the next 16 sts. Sc in the last 10 sts. Sl st to the first sc to join. (36 sts)
Shaping the Toe:
Now, we’ll shape the front of the slipper to create the toe.
- Round 6: Ch 1. Sc in the next 10 sts. Dec over the next 2 sts. Repeat 8 times. Sc in the last 10 sts. Sl st to the first sc to join. (28 sts)
- Round 7: Ch 1. Sc in the next 10 sts. Dec over the next 2 sts. Repeat 4 times. Sc in the last 10 sts. Sl st to the first sc to join. (24 sts)
- Round 8: Ch 1. Sc in the next 10 sts. Dec over the next 2 sts. Repeat twice. Sc in the last 10 sts. Sl st to the first sc to join. (22 sts)
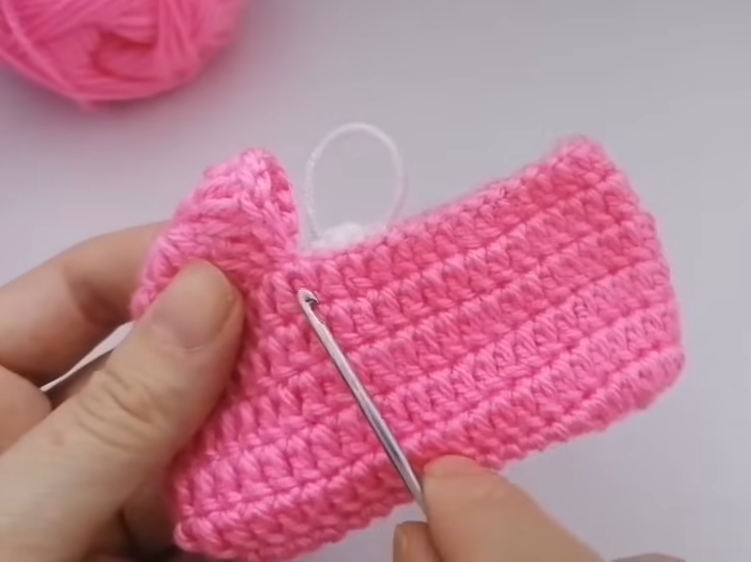
Fasten off and weave in the end.
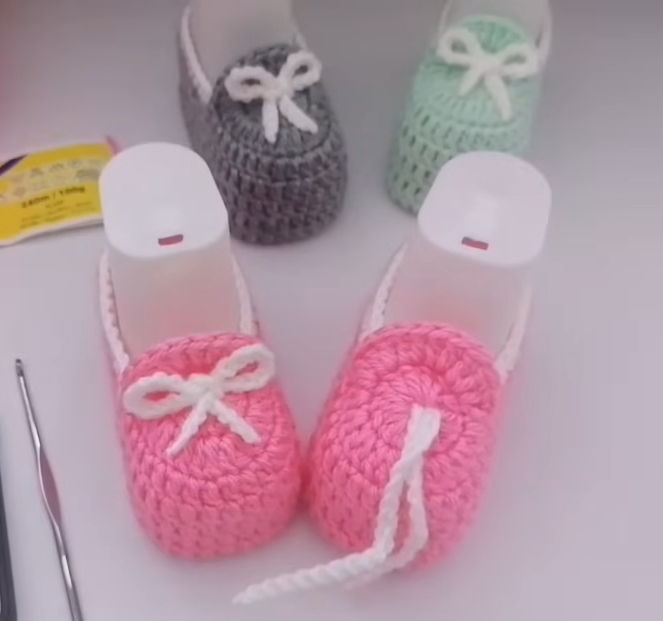
Ankle Strap (Make 2):
We’ll now create a little strap to help keep the slipper on those wiggly feet.
- Join your yarn to the side of the upper, approximately where the color change (if you used one) begins or about halfway along the side.
- Ch 12 (adjust the number of chains for a longer or shorter strap).
- Sc in the 2nd ch from the hook and in each ch across. (11 sts)
- Sl st to the other side of the upper, in a position mirroring where you started.
Fasten off and weave in the ends. Repeat for the other side of the same slipper.
Finishing:
- Repeat the entire process to create the second slipper.
- Weave in any remaining loose ends securely.
Optional Embellishments:
Now for the fun part – adding a touch of personality!
- Buttons: Sew a small decorative button onto the end of each ankle strap and create a loop on the slipper body to fasten it.
- Crochet Flowers or Appliqués: Add a sweet little flower, heart, or star to the toe or side of the slipper.
- Contrasting Edging: Work a round of slip stitch or a simple crochet edging in a contrasting color around the opening of the slipper.
- Ties: Instead of straps, create two sets of chains (about 15-20 chs long) and attach them to the sides of the slipper to tie closed.
Care Instructions:
Gently hand wash in cool water with mild soap and lay flat to dry.
Congratulations!
You’ve now created a beautiful pair of handmade crochet baby slippers! These little booties make a thoughtful and cherished gift for baby showers or just because. Imagine those tiny feet snuggled inside your creation!