 by
by 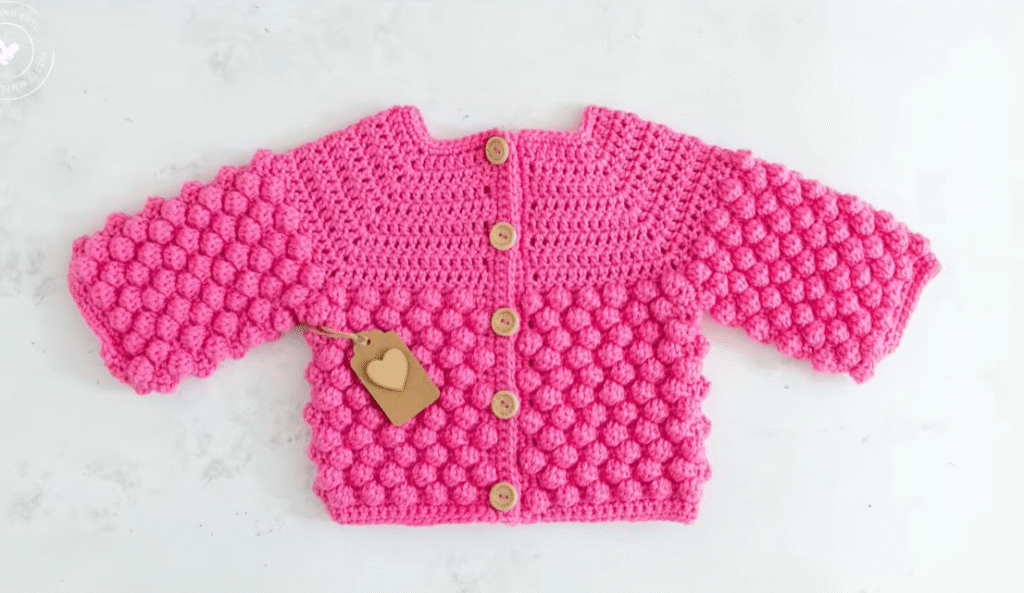
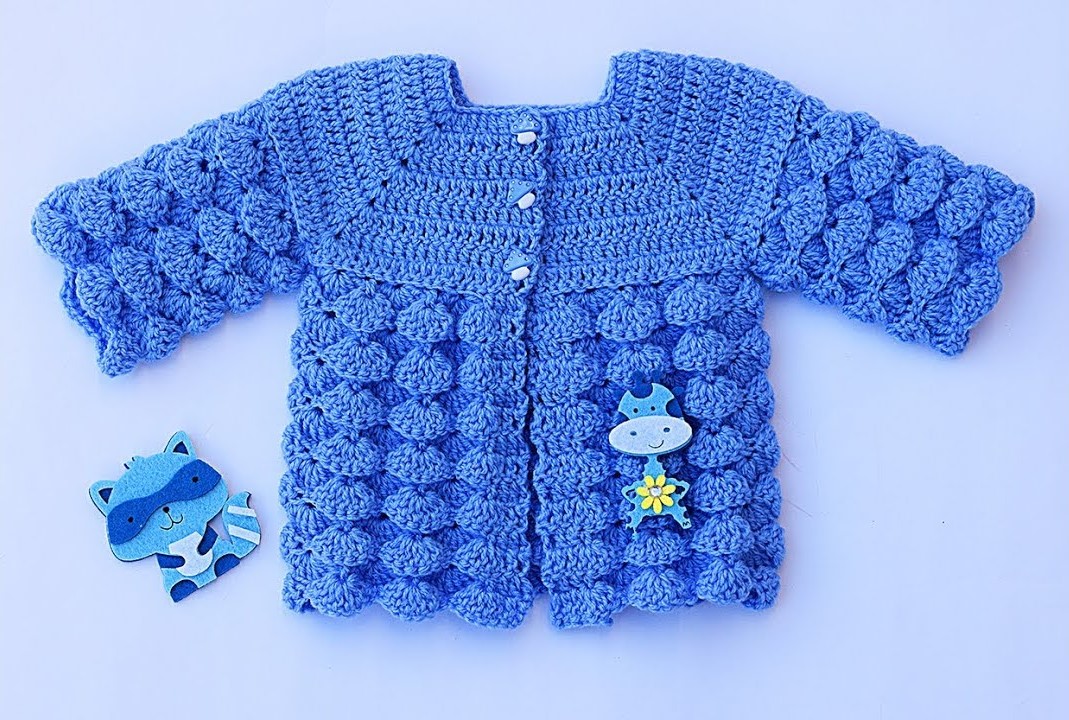
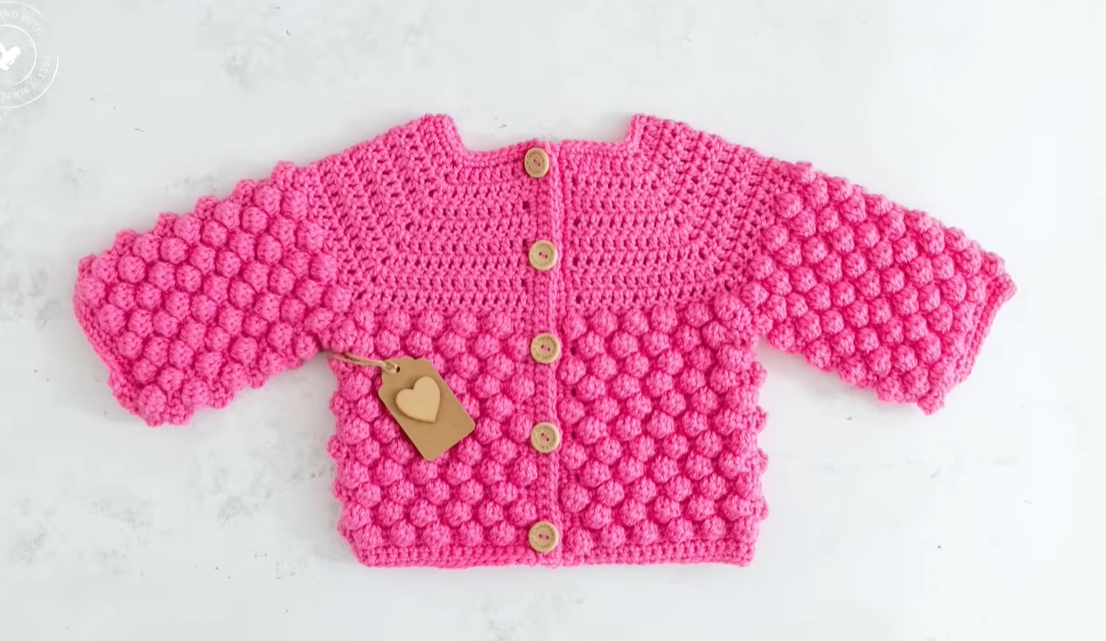
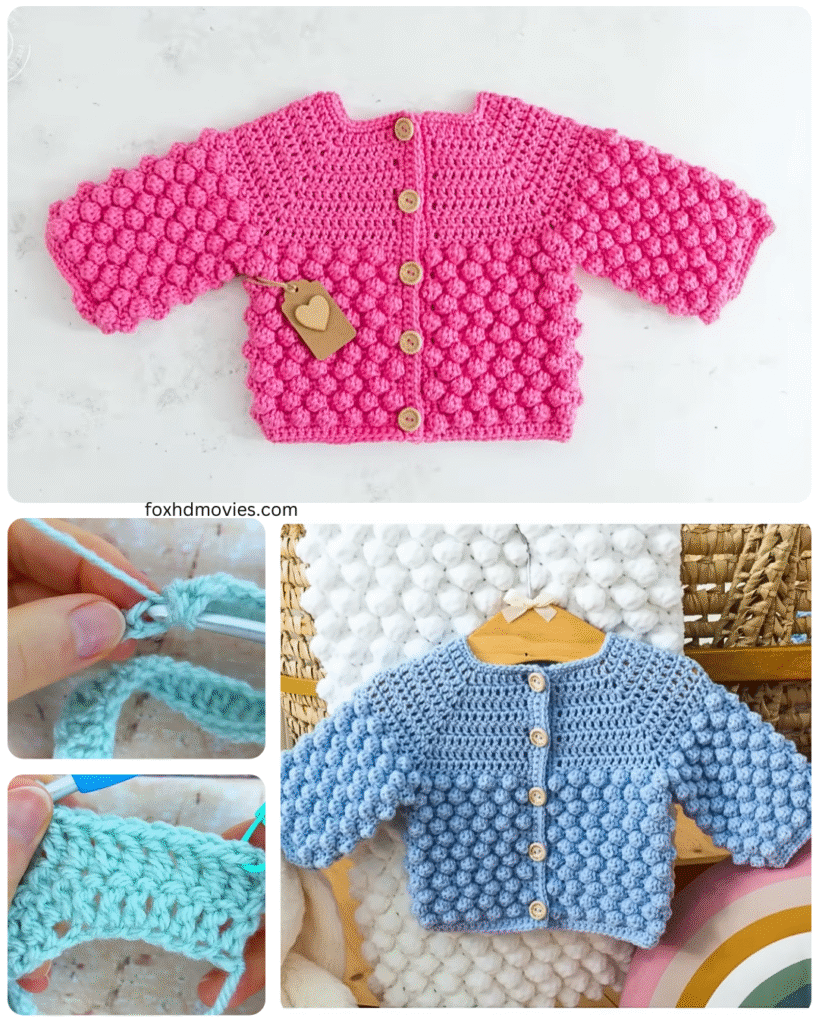
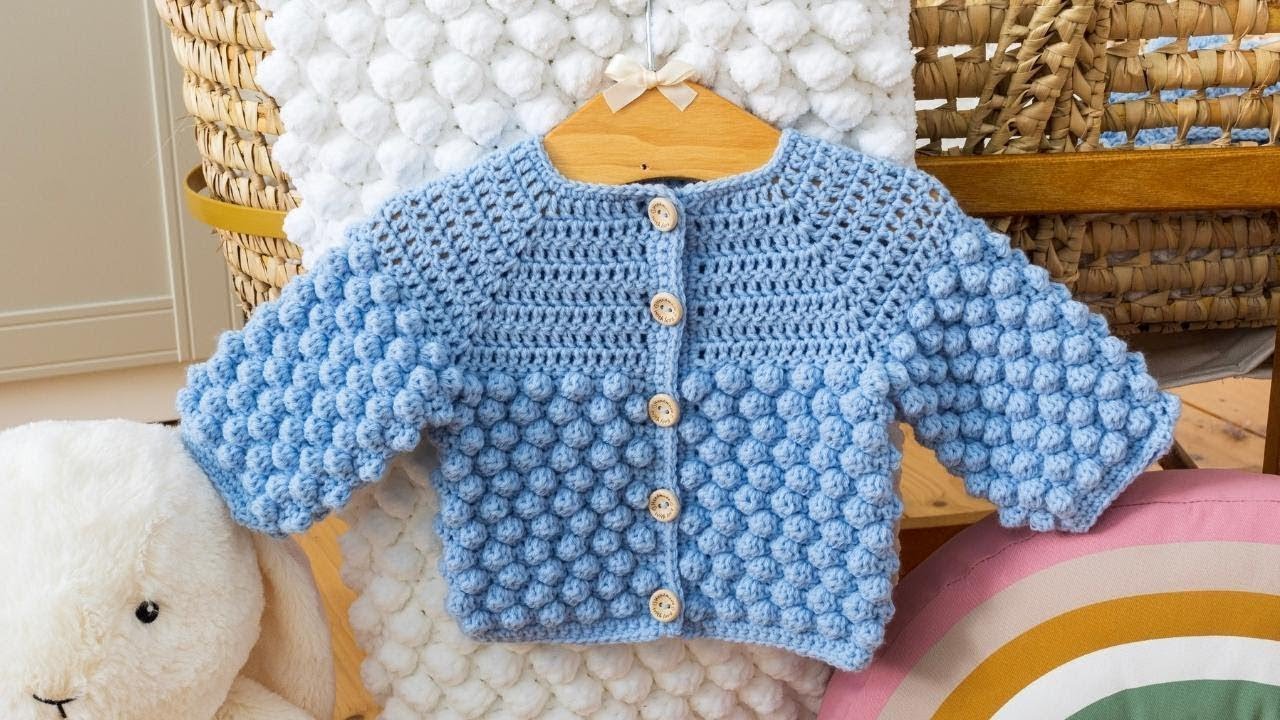
Hello fellow yarn enthusiasts! Are you ready to embark on a crochet adventure that results in the most adorable little garment? Today, I’m thrilled to share the pattern for a Bobble Stitch Crochet Baby Cardigan that’s guaranteed to elicit “oohs” and “aahs.” The texture of the bobble stitches adds such a sweet, playful touch, making it perfect for your own little one or as a cherished handmade gift.
This pattern is designed with comfort and cuteness in mind. The simple construction makes it a satisfying project for intermediate crocheters, while adventurous beginners are welcome to give it a try too! So, grab your favorite soft yarn, your trusty hook, and let’s bring this charming cardigan to life!
What You’ll Need:
- Yarn: Approximately 300-400 yards of DK weight yarn in your chosen color. Soft, baby-friendly yarns like cotton, merino wool, or acrylic blends are excellent choices.
- Crochet Hook: Size G/6 (4.0 mm) or the size needed to obtain gauge.
- Scissors
- Tapestry Needle for weaving in ends.
- Stitch Markers (optional but helpful)
- Buttons: 3-4 small buttons (approximately 0.5-0.75 inches in diameter).
Finished Size: This pattern is written for a 0-3 month size, but instructions for adjustments to create larger sizes will be included.
Gauge: 16 double crochet (dc) stitches and 8 rows = 4 inches in dc.
Special Stitch:
- Bobble Stitch (BO): Yarn over, insert hook into stitch, yarn over, pull up a loop (3 loops on hook). Yarn over, pull through 2 loops (2 loops on hook). 1 Repeat this 4 more times in the same stitch (6 loops on hook). Yarn over, pull through all 6 loops.
Video tutorial
Pattern:
Yoke:
- Chain 50.
- Row 1 (RS): Dc in the 4th chain from the hook (counts as first dc), dc in each chain across. (47 dc)
- Row 2 (WS): Ch 3 (counts as first dc), turn, dc in the next 6 dc, BO in the next dc, dc in the next 5 dc, BO in the next dc, dc in the next 13 dc, BO in the next dc, dc in the next 5 dc, BO in the next dc, dc in the last 7 dc. (47 sts)
- Row 3: Ch 3, turn, dc in each stitch across.
- Row 4: Ch 3, turn, dc in the next 7 dc, BO in the next dc, dc in the next 6 dc, BO in the next dc, dc in the next 15 dc, BO in the next dc, dc in the next 6 dc, BO in the next dc, dc in the last 8 dc. (47 sts)
- Row 5: Ch 3, turn, dc in each stitch across.
- Row 6: Ch 3, turn, dc in the next 8 dc, BO in the next dc, dc in the next 7 dc, BO in the next dc, dc in the next 17 dc, BO in the next dc, dc in the next 7 dc, BO in the next dc, dc in the last 9 dc. (47 sts)
- Row 7: Ch 3, turn, dc in each stitch across.
- Row 8: Ch 3, turn, dc in the next 9 dc, BO in the next dc, dc in the next 8 dc, BO in the next dc, dc in the next 19 dc, BO in the next dc, dc in the next 8 dc, BO in the next dc, dc in the last 10 dc. (47 sts)
- Rows 9-14: Repeat Rows 3-8.

Divide for Sleeves:
- Row 15: Ch 3, turn, dc in the next 11 dc (right front), ch 3, skip the next 9 dc (right sleeve opening), dc in the next 15 dc (back), ch 3, skip the next 9 dc (left sleeve opening), dc in the last 12 dc (left front). (12 dc, ch-3, 15 dc, ch-3, 12 dc)

Body:
- Row 16: Ch 3, turn, dc in the next 12 dc, 3 dc in the ch-3 space, dc in the next 15 dc, 3 dc in the ch-3 space, dc in the last 12 dc. (45 dc)
- Rows 17-30: Ch 3, turn, dc in each stitch across.
Bottom Edging:
- Row 31: Ch 1, turn, single crochet (sc) in each stitch across.
- Row 32: Ch 1, turn, sc in each stitch across. Fasten off.
Sleeves (Make 2):
- Join yarn with a slip stitch to any skipped stitch of the sleeve opening.
- Round 1: Ch 3, dc in each of the 9 skipped stitches, and work 3 dc evenly spaced in the ch-3 space under the arm. (12 dc) Join with a slip stitch to the first dc.
- Rounds 2-12: Ch 3, dc in each stitch around. Join with a slip stitch to the first dc.
- Round 13: Ch 1, sc in each stitch around. Join with a slip stitch to the first sc.
- Round 14: Ch 1, sc in each stitch around. Join with a slip stitch. Fasten off.
Front Edging and Button Bands:
- Join yarn at the bottom right front edge.
- Work sc evenly up the right front edge, around the neckline, and down the left front edge.
- Next Row: Ch 1, turn, sc in each stitch across.
- Button Band (Right Side): Ch 1, turn, sc in the first few stitches, *ch 3, skip 2 stitches, sc in the next few stitches*; repeat from * to * to create 3-4 buttonholes evenly spaced. Continue sc to the end.
- Button Band (Left Side): Ch 1, turn, sc in each stitch across. Fasten off.
Finishing:
- Weave in all loose ends securely.
- Sew the buttons onto the left front button band, aligning them with the buttonholes on the right front band.
Size Adjustments:
- Larger Sizes: To increase the size, you can add more foundation chains for the yoke and work more rows before dividing for the sleeves. You may also need to add more rounds to the body and sleeves. Remember to adjust the number of stitches and rows evenly to maintain the proportions.

Tips and Tricks:
- Feel free to play with different yarn colors for a unique look!
- You can add a border of a contrasting color for extra flair.
- Make sure to check your gauge to ensure the finished cardigan will be the correct size.
And there you have it! A beautifully textured and utterly adorable Bobble Stitch Crochet Baby Cardigan. I hope you enjoyed making this project. Don’t forget to share your finished creations – I’d love to see them! Happy crocheting!