by
by 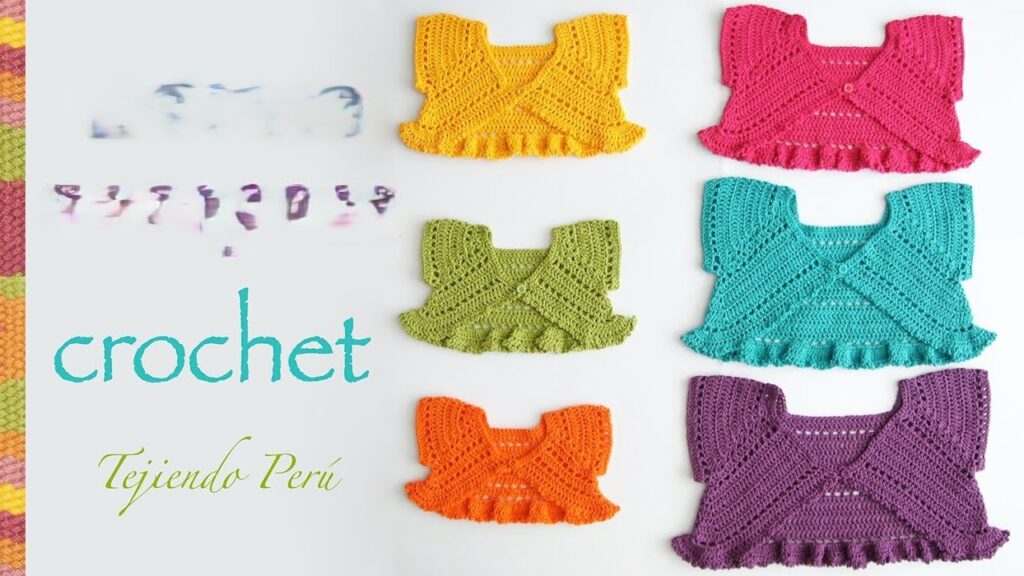
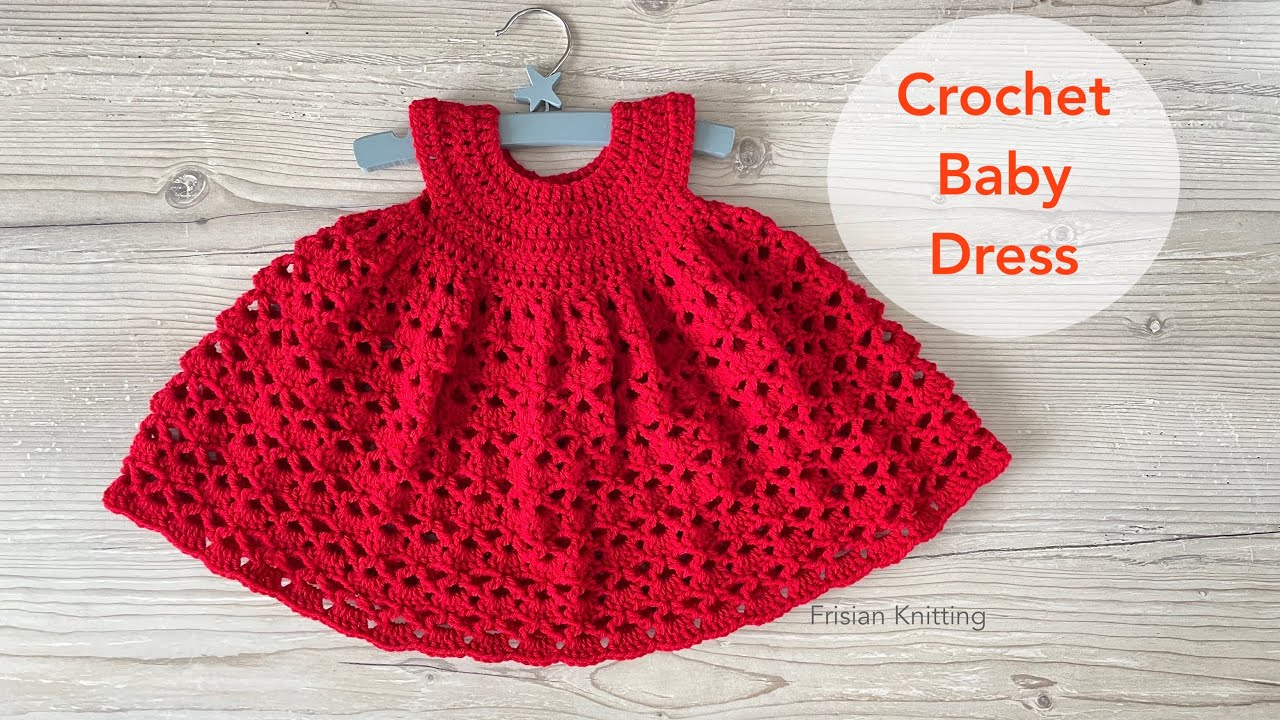
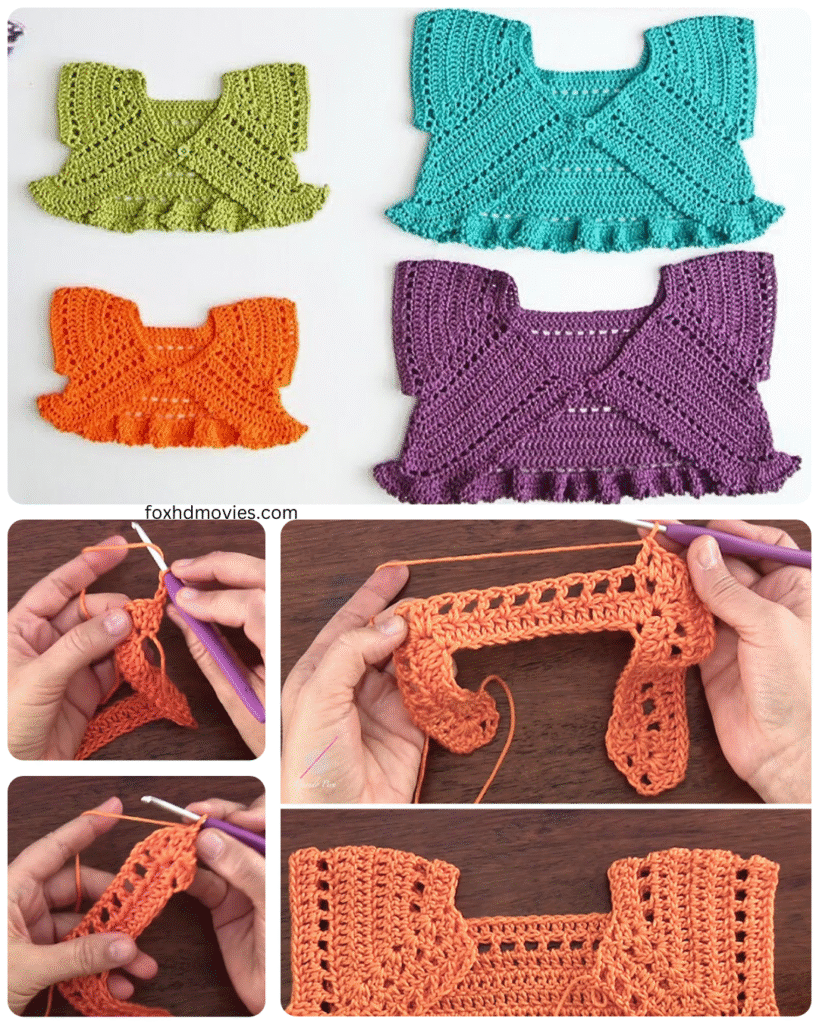
Hello crafty friends! Are you ready to create something truly enchanting for a special child in your life? Today, we’re embarking on a whimsical crochet adventure to make a delightful Butterfly Bolero! This adorable little garment features sweet butterfly wing details on the back, making it perfect for adding a touch of magic to any outfit.
This project is a wonderful way to use up some colorful yarn scraps and practice your shaping skills. While it involves a few different elements, the basic stitches are beginner-friendly, making it accessible for intermediate beginners and beyond. Imagine the joy on your little one’s face as they flutter around in their very own butterfly bolero!
So, gather your hooks and yarn, and let’s spread our creative wings!
What You’ll Need:
- Worsted Weight Yarn: Choose 2-3 coordinating colors. Approximately 200-300 yards total, depending on the size you’re making.
- Crochet Hook: Size H/8 (5.0 mm) or the size recommended for your yarn.
- Scissors: For snipping yarn.
- Yarn Needle: For weaving in ends.
- Measuring Tape: To ensure the right fit.
- Stitch Markers: Helpful for marking rows and shaping.
- Buttons (optional): 1-2 small buttons for fastening, if desired.
Sizing:
This pattern is written for a child approximately aged 3-5 years (chest circumference 22-24 inches). Adjustments for smaller or larger sizes will be noted throughout the pattern.
- To adjust the size: Increase or decrease the initial chain for the body and the number of rows for the body length. For the butterfly wings, adjust the number of stitches in the foundation chain and the number of rows.
Abbreviations (US Crochet Terms):
- ch = chain
- sl st = slip stitch
- sc = single crochet
- hdc = half double crochet
- dc = double crochet
- tr = treble crochet
- inc = increase (work 1 2 sts in the same stitch)
- dec = decrease (work 2 sts together)
- st(s) = stitch(es)
- rep = repeat
- RS = right side
- WS = wrong side
Video tutorial
Pattern:
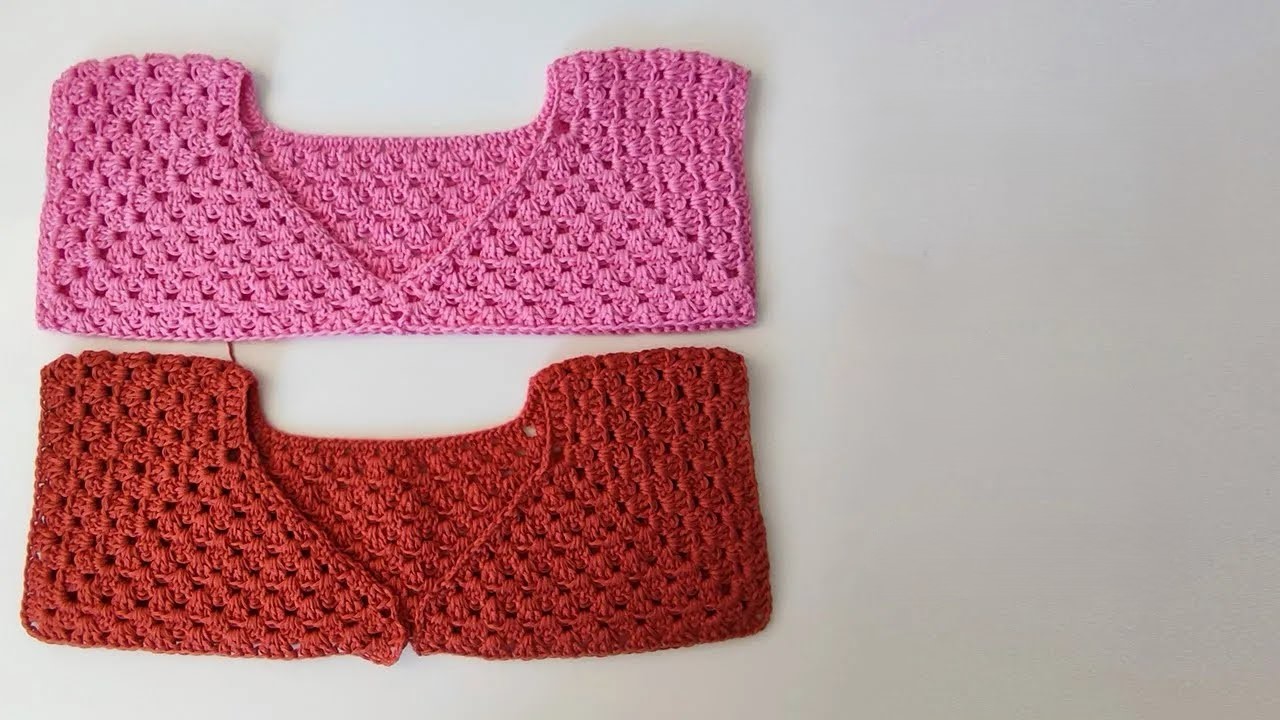
Part 1: The Body of the Bolero
We’ll start by creating the main body of the bolero in one piece, working from the back.
- Foundation Chain: With your main color, chain 70 (adjust this number for the chest circumference. Add or subtract in multiples of 2. For a smaller size, try around ch 60; for a larger size, try ch 80).
- Row 1: Hdc in the third ch from the hook (the first two chains count as the first hdc), and in each ch across. Turn. (68 hdc)
- Row 2: Ch 2 (does not count as a stitch), hdc in each st across. Turn. (68 hdc)
- Rows 3-18 (Adjust for length): Repeat Row 2. Continue until the back measures approximately 8-9 inches in length (adjust this for the child’s height).
- Divide for Armholes:
- Ch 1, sc in the first 18 sts. Ch 4 (armhole). Skip the next 16 sts. Sc in the next 18 sts. Ch 4 (armhole). Skip the last 16 sts. Sc in the last 18 sts. Turn. (18 sc – armhole – 18 sc – armhole – 18 sc)
- Row 19: Ch 2 (does not count as a stitch), hdc in each sc across, and work 4 hdc in each of the chain-4 armhole spaces. Turn. (18 hdc + 4 hdc + 18 hdc + 4 hdc + 18 hdc = 62 hdc)
- Rows 20-24 (Adjust for front length): Ch 2 (does not count as a stitch), hdc in each st across. Turn. (62 hdc)
- Shape the Front Edges (Optional): To create a slightly curved front, you can work a decrease at the beginning and end of the next few rows. For example:
- Row 25: Ch 2, hdc2tog, hdc across until the last 2 sts, hdc2tog. Turn.
- Row 26: Ch 2, hdc across. Turn.
- Repeat these two rows 1-2 times.
- Fasten off the body and weave in all ends.
Part 2: The Butterfly Wings (Make 2)
We’ll create two separate butterfly wings that will be attached to the back of the bolero. Use your contrasting colors for a vibrant effect!

Wing 1 (Repeat for Wing 2):
- Foundation Chain: With your first wing color, chain 25.
- Row 1: Hdc in the third ch from the hook and in each ch across. Turn. (23 hdc)
- Row 2: Ch 2, hdc in the first st, *ch 1, skip 1 st, hdc in the next st; repeat from * across. Turn. (12 hdc spaces)
- Row 3: Ch 2, hdc in the first st, *2 hdc in the ch-1 space, hdc in the next st; repeat from * across. Turn. (34 hdc)
- Row 4: Ch 2, hdc in the first st, hdc in the next 2 sts, dc in the next 2 sts, tr in the next 3 sts, dc in the next 2 sts, hdc in the next 4 sts, dc in the next 2 sts, tr in the next 3 sts, dc in the next 2 sts, hdc in the last 3 sts. Turn.
- Row 5: Ch 2, hdc in each st across. Turn. (34 hdc)
- Change to your second wing color.
- Row 6: Ch 1, sc in the first st, *ch 2, skip 1 st, sc in the next st; repeat from * across. Turn. (17 sc and 16 ch-2 spaces)
- Row 7: Ch 1, sc in the first st, *2 sc in the ch-2 space, sc in the next st; repeat from * across. Turn. (33 sc)
- Shape the Wing Edge: Work a decorative edge along one long side of the wing (this will be the outer edge). You can use:
- (Sl st, ch 3, sl st in the same st) repeat along the edge.
- Or a simple row of single crochet.
- Fasten off and weave in the ends.
Part 3: Attaching the Wings
- Lay the bolero body flat with the wrong side facing up.
- Position the butterfly wings on the upper back of the bolero, aligning the straight edge of the wing with the top edge of the back piece, near the armholes.
- Using your yarn needle and the yarn you used for the wings, securely sew the straight edge of each wing to the back of the bolero. Leave the decorative, curved edge of the wings free to “flutter.”
Part 4: Edging and Finishing (Optional)
- Edging: With your main color or a contrasting color, work a round of single crochet around the entire outer edge of the bolero (including the armhole openings and the front edges). This will give a neat and finished look.
- Button Loops (Optional): If you want to add buttons for fastening, create small chain loops on one of the front edges during your edging round, positioned appropriately for your buttons.
- Attach Buttons (Optional): Sew the buttons onto the opposite front edge, aligning them with the button loops.
- Weave in all remaining ends.

Flutter into Style!
Congratulations! Your lovely Butterfly Crochet Bolero is now complete. Imagine the smiles and twirls as your little one wears this whimsical creation. It’s perfect for layering over dresses, tops, or even costumes, adding a touch of handmade charm and playful elegance.
Tips and Variations:
- Color Combinations: Get creative with your color choices! Use bright, contrasting colors for a bold butterfly effect or softer, pastel shades for a more delicate look.
- Yarn Weight: While worsted weight is suggested, you can experiment with other yarn weights, adjusting your hook size accordingly. Just remember that the size of the bolero will change.
- Embellishments: Add small crocheted flowers, beads, or even embroidered details to the wings for extra flair.
- Solid Wings: For a simpler look, you can crochet the wings in a solid color without the openwork design.
- Antennae (Optional): You can crochet small antennae and attach them to the back neckline for an extra touch.