 by
by 
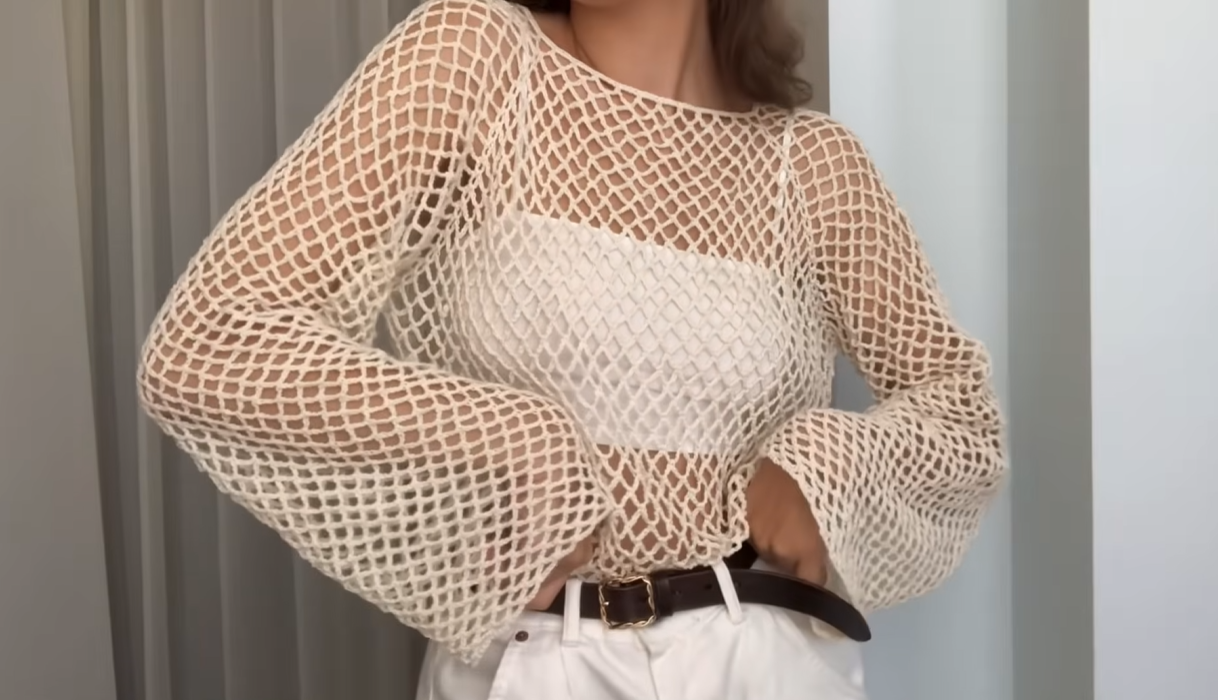
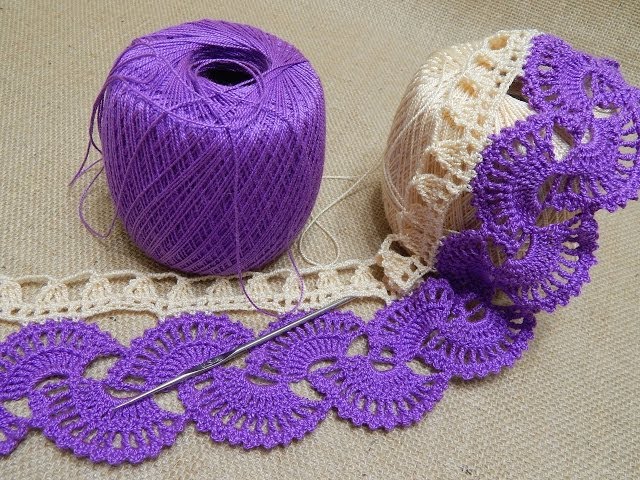
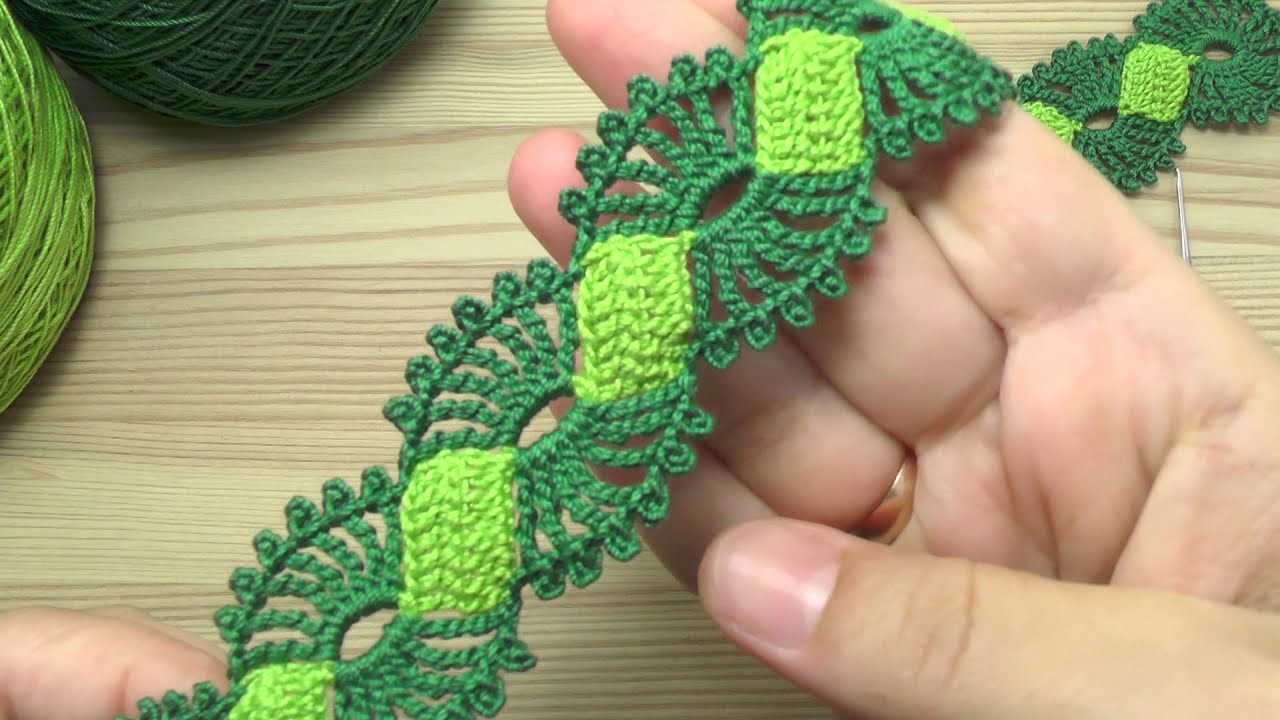
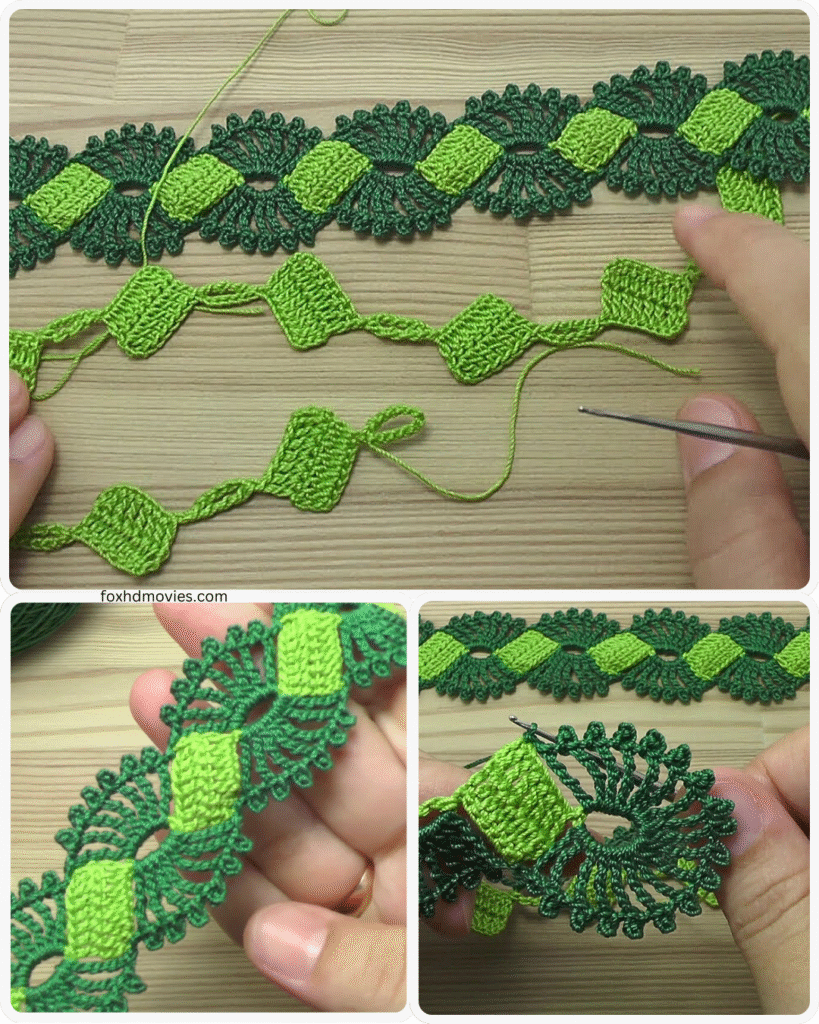
Hello fellow yarn enthusiasts! Today, we’re diving into a project that’s both elegant and surprisingly versatile: Crochet Cord Lace Tape. This delicate trim, with its raised, cord-like texture, adds a touch of handmade charm to all sorts of creations, from embellishing garments and home decor to adding a special touch to gifts and crafts.
Don’t let the intricate look fool you! Once you get the hang of the basic stitches and the shaping technique, you’ll find this project quite meditative and rewarding. So, grab your favorite fine yarn and a suitable hook, and let’s get started on creating some beautiful crochet cord lace tape!
What You’ll Need:
- Fine Crochet Thread or Yarn: Choose a thread or yarn in your desired color and fiber. Cotton, linen, or a fine acrylic blend work well for lace. The amount will depend on the length of tape you want to create.
- Small Crochet Hook: Select a hook size appropriate for your chosen yarn or thread. A common size for fine lace thread is between 1.0mm and 1.75mm.
- Scissors: For snipping your yarn.
- Yarn Needle (optional but recommended): For weaving in ends neatly.
- Blocking Pins (optional): For shaping and setting your finished lace tape.
- Blocking Board or Foam Mat (optional): For pinning your work during blocking.

Understanding the Basics: The Foundation of Your Lace
Our Crochet Cord Lace Tape primarily utilizes two fundamental crochet stitches:
- Chain (ch): The foundation of most crochet projects.
- Single Crochet (sc): A tight, dense stitch that creates the “corded” effect.
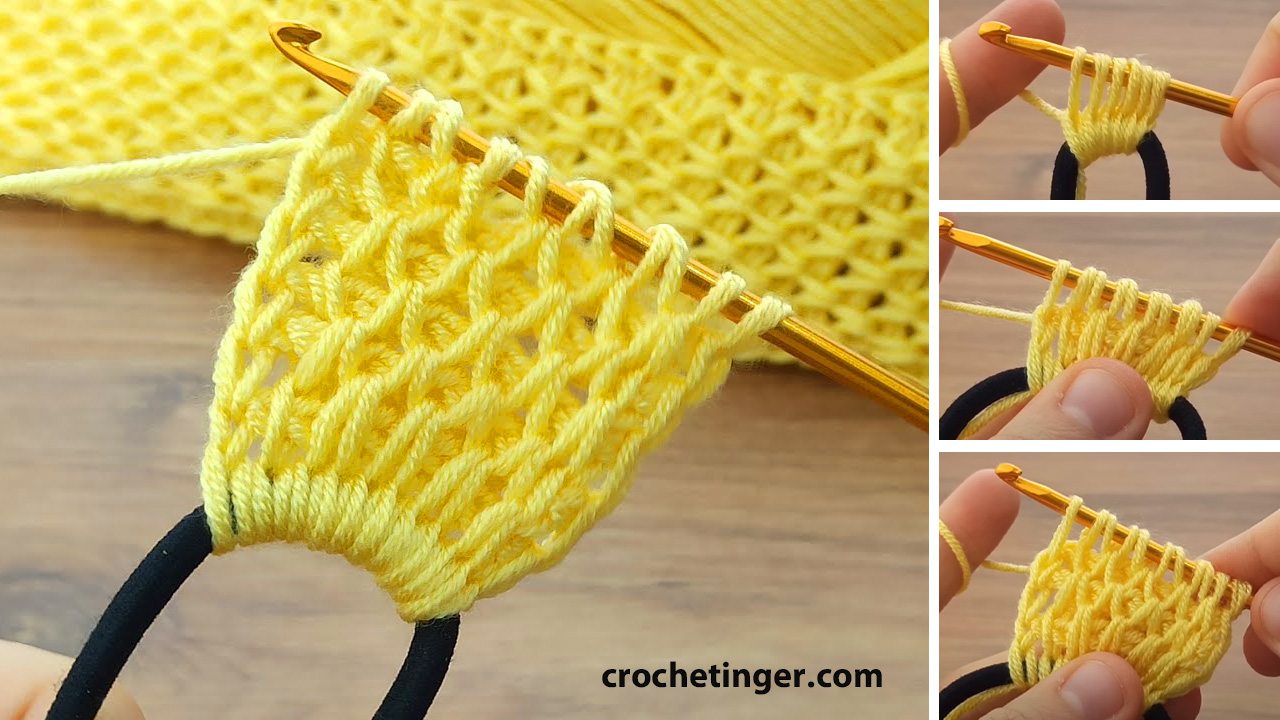
The magic of this lace lies in how these simple stitches are worked and shaped. We’ll be working in rows, and the strategic placement of single crochet stitches will build up the raised, cord-like lines.
The Pattern: Step-by-Step to Lacy Elegance
Let’s get our hands busy! This pattern creates a tape with a central “cord” and delicate loops on either side. Feel free to adapt the width and loop size to your preference by adjusting the initial chain and the number of chains for the loops.
- Foundation Chain: Chain 15 (adjust this number for the desired width of your central “cord” area. An odd number generally works best for symmetry).
- Row 1: Starting in the second chain from the hook, single crochet (sc) in each chain across. Turn. (14 sc)
- Row 2: Chain 3 (this creates the first loop). Skip the first single crochet. Single crochet (sc) in the next 12 single crochet stitches. Chain 3. Skip the last single crochet. Slip stitch (sl st) into the top of the first chain of the initial chain-3. Turn.
- Row 3: Chain 1. Single crochet (sc) in each of the 12 single crochet stitches from the previous row. Turn. (12 sc)
- Row 4: Chain 3. Skip the first single crochet. Single crochet (sc) in the next 10 single crochet stitches. Chain 3. Skip the last single crochet. Slip stitch (sl st) into the top of the first chain of the initial chain-3. Turn.
- Row 5: Chain 1. Single crochet (sc) in each of the 10 single crochet stitches from the previous row. Turn. (10 sc)
- Row 6: Chain 3. Skip the first single crochet. Single crochet (sc) in the next 8 single crochet stitches. Chain 3. Skip the last single crochet. Slip stitch (sl st) into the top of the first chain of the initial chain-3. Turn.
- Row 7: Chain 1. Single crochet (sc) in each of the 8 single crochet stitches from the previous row. Turn. (8 sc)
- Row 8: Chain 3. Skip the first single crochet. Single crochet (sc) in the next 6 single crochet stitches. Chain 3. Skip the last single crochet. Slip stitch (sl st) into the top of the first chain of the initial chain-3. Turn.
- Row 9: Chain 1. Single crochet (sc) in each of the 6 single crochet stitches from the previous row. Turn. (6 sc)
- Row 10: Chain 3. Skip the first single crochet. Single crochet (sc) in the next 4 single crochet stitches. Chain 3. Skip the last single crochet. Slip stitch (sl st) into the top of the first chain of the initial chain-3. Turn.
- Row 11: Chain 1. Single crochet (sc) in each of the 4 single crochet stitches from the previous row. Turn. (4 sc)
- Row 12: Chain 3. Skip the first single crochet. Single crochet (sc) in the next 2 single crochet stitches. Chain 3. Skip the last single crochet. Slip stitch (sl st) into the top of the first chain of the initial chain-3. Turn.
- Row 13: Chain 1. Single crochet (sc) in the next 2 single crochet stitches. Turn. (2 sc)
- Row 14: Chain 3. Skip the first single crochet. Single crochet (sc) in the last single crochet. Chain 3. Slip stitch (sl st) into the top of the first chain of the initial chain-3. Turn.
- Row 15: Chain 1. Single crochet (sc) in the single crochet from the previous row. Turn. (1 sc)
- Row 16: Chain 3. Skip the single crochet. Slip stitch (sl st) into the top of the first chain of the initial chain-3. Fasten off. You’ve now completed one segment of the lace tape. To continue making a longer piece, you’ll essentially repeat the pattern, joining the new foundation chain to the last loop created.

Continuing the Tape:
To create a longer piece of lace tape:
- After fastening off the first segment, join your yarn with a slip stitch into the last loop you created (the chain-3 loop).
- Chain 15 (or the number you used for your initial foundation chain).
- Starting in the second chain from the hook, single crochet (sc) in each chain across.
- Continue following the pattern from Row 2 onwards.
Video tutorial
Tips and Variations:
- Vary the Loop Size: Experiment with different chain lengths for the loops to create a more open or closed lace.
- Change the “Cord” Width: Adjust the number of chains in your initial foundation chain to make the central cord wider or narrower.
- Add Picots: For an even more decorative edge, you can add picots (chain 3, slip stitch into the first chain) to the loops.
- Use Different Stitches for the “Cord”: While single crochet creates a lovely corded effect, you could experiment with half double crochet (hdc) or even a tight double crochet (dc) for a different texture.
- Color Play: Use different colors for each segment or even within a segment for a unique look.
Blocking Your Lace:
Blocking is highly recommended for lace projects as it helps to open up the stitches, define the pattern, and give your tape a professional finish.
- Gently hand wash your finished lace tape in lukewarm water with a mild soap.
- Carefully squeeze out excess water (do not twist or wring).
- Lay the tape flat on a blocking board or foam mat.
- Using rust-proof pins, gently stretch and pin the lace to your desired shape, paying attention to the loops and the straight edges.
- Allow the lace to dry completely.
- Once dry, carefully remove the pins.
Endless Possibilities: Using Your Crochet Cord Lace Tape
Now that you’ve created your beautiful crochet cord lace tape, it’s time to put it to use! Here are just a few ideas:
- Garment Embellishment: Add it to necklines, cuffs, hemlines, or as decorative accents on blouses, dresses, and cardigans.
- Home Decor: Use it to trim curtains, tablecloths, placemats, or create delicate edgings for cushions and throws.
- Craft Projects: Incorporate it into scrapbooking, card making, gift wrapping, or as a decorative element on handmade bags and pouches.
- Jewelry Making: Create delicate chokers, bracelets, or earrings by incorporating the lace tape.
- Wedding Decor: Use it to adorn invitations, favors, bouquets, or table settings for a touch of vintage elegance.