by
by 
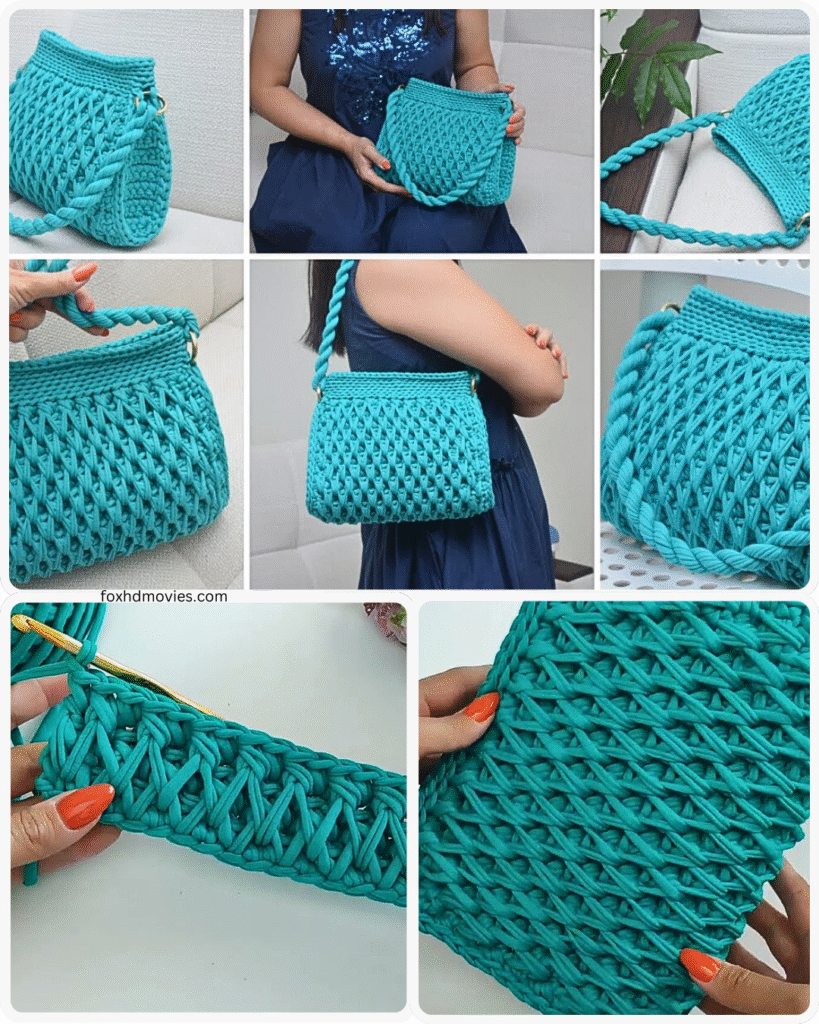
Craft a stylish and textured accessory with this detailed pattern for a Crochet Honeycomb Stitch Bag. The honeycomb stitch, also known as the smock stitch, creates a dense and beautiful fabric resembling a beehive, perfect for a sturdy and eye-catching tote.
Skill Level: Intermediate
Materials:
- Approximately 400-600 yards of Worsted Weight (Aran) or Bulky weight cotton or cotton blend yarn. (The amount will vary depending on your desired bag size and yarn choice. Cotton provides good structure and durability).
- Crochet hook appropriate for your chosen yarn (check yarn label for recommendation, a size or two smaller than recommended can create a denser fabric suitable for bags).
- Stitch markers
- Tapestry needle for weaving in ends
- Optional: Fabric for lining, sewing machine or needle and thread, bag handles (leather, bamboo, or fabric)
Gauge:
Achieving the correct gauge is important for the final size of your bag. Using your chosen yarn and hook, work the honeycomb stitch pattern as described below. After a few inches, measure a 4×4 inch square. Adjust hook size if necessary to obtain the correct gauge.
Honeycomb Stitch Gauge Swatch (worked in rows):
Chain a multiple of 2 + 1. Row 1: Sc in 2nd ch from hook and in each ch across. Turn. Row 2: Ch 1 (does not count as a stitch here and throughout), sc in first st, *sk next st, work a long sc into the st 2 rows below the next st, sc in next st*; repeat from * to last st, sc in last st. Turn. Row 3: Ch 1, sc in first st, *work a long sc into the st 2 rows below the next st, sk next st, sc in next st*; repeat from * to last st, sc in last st. Turn. Repeat Rows 2 and 3 for the pattern.
Measure your 4×4 inch swatch to check gauge.

Notes:
- This pattern is written in US crochet terms.
- The honeycomb stitch is created by alternating single crochet stitches with long single crochet stitches worked into a previous row.
- The long single crochet is typically worked into the single crochet directly below the skipped stitch, two rows down.
- Turning chains do not count as stitches.
- Place a stitch marker in the first stitch of each row to help keep track.
- For a sturdier bag, consider using a cotton or cotton blend yarn and a hook size slightly smaller than recommended for the yarn.
- You can easily adjust the width and height of your bag by changing the starting chain and the number of pattern repeats.
Abbreviations:
- ch: chain
- sc: single crochet
- sk: skip
- st(s): stitch(es)
- long sc: long single crochet (explained in pattern)
- RS: Right Side
- WS: Wrong Side
Pattern Instructions:
This pattern is for a rectangular bag worked flat and then seamed.

Bag Base:
Chain a number of stitches for the desired width of your bag. The number of chains should be a multiple of 2 + 1 for the honeycomb stitch pattern to work correctly.
Row 1 (RS): Sc in the 2nd ch from the hook and in each ch across. (You should have an odd number of stitches). Turn.
Row 2 (WS): Ch 1, sc in each st across. Turn.
Repeat Row 2 for a few more rows to create a sturdy base for your bag. The number of rows will determine the depth of your bag’s base.
Bag Body (Honeycomb Stitch):
Now you will begin working the honeycomb stitch pattern.
Row 3 (RS): Ch 1, sc in the first st. *Sk the next st, work a long sc into the sc st 2 rows below the next st (the sc directly below the skipped stitch in Row 1 or a subsequent Row 1-equivalent). Sc in the next st.* Repeat from * to the last st. Sc in the last st. Turn.
To work a long sc: Insert your hook into the designated stitch (2 rows below), yarn over, pull up a loop to the height of your current row, yarn over and pull through both loops on your hook.
Row 4 (WS): Ch 1, sc in the first st. *Work a long sc into the sc st 2 rows below the next st (the sc directly below the skipped stitch in the previous honeycomb row). Sk the next st. Sc in the next st.* Repeat from * to the last st. Sc in the last st. Turn.
Repeat Rows 3 and 4 alternately until your bag reaches the desired height. End with a Row 3 repeat.
Top Edging:
To create a neat top edge for your bag:
Next Row (WS): Ch 1, sc in each st across. Turn.
Repeat the last row for 1-3 more rows for a reinforced top edge.
Fasten off and leave a long tail for seaming.
Finishing:
- Seaming: Fold the fabric in half with the RS facing each other. Using your tapestry needle and the long tail, seam the side edges of the bag using a mattress stitch or whip stitch. Repeat on the other side.
- Weave in Ends: Securely weave in all remaining loose ends using your tapestry needle.
- Handles: Attach your chosen bag handles to the top of the bag. You can sew them directly to the fabric, or attach them through the stitches of the top edging.
- Optional Lining: For a more finished look and to prevent stretching, you can sew a fabric lining for your bag and stitch it in place along the top edge.
Video tutorial
Customization:
- Size: To make a wider bag, increase the starting chain (make sure it’s an odd number). To make a taller bag, work more repeats of the honeycomb stitch rows.
- Strap: Instead of handles, you can crochet a long strap in single crochet or the honeycomb stitch and attach it to the sides of the bag.
- Color: Use one solid color for a classic look, or experiment with stripes or color blocking to highlight the stitch pattern.
- Closure: Add a button and loop, a magnetic snap, or a zipper to the top of your bag for a secure closure.