by
by 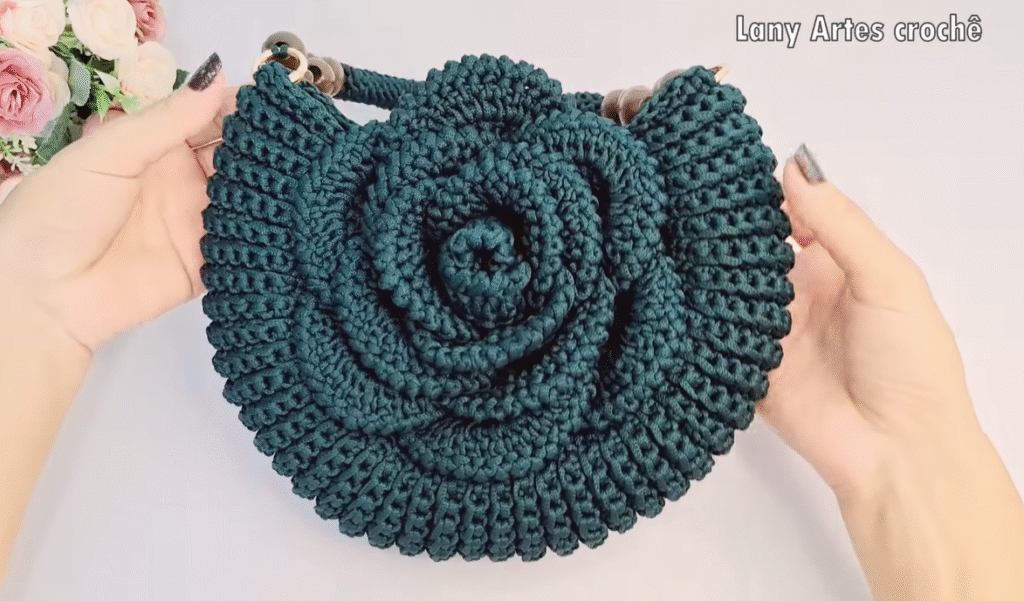
Detailed Crochet Rose Bag Pattern
This pattern will guide you through creating a beautiful crochet rose bag. The bag features 3D crochet roses attached to a base bag, creating a lovely textured effect.
Materials Needed:
- Yarn in desired colors (for roses and bag). I recommend cotton yarn for durability and stitch definition.
- Crochet hooks appropriate for your yarn.
- Scissors
- Yarn needle
- Lining fabric (optional)
- Bag handles (optional)
- Stitch markers (optional)
Abbreviations:
- ch – chain
- sl st – slip stitch
- sc – single crochet
- hdc – half double crochet
- dc – double crochet
- tr – treble crochet
- inc – increase (2 sc in one stitch)
Gauge:
Gauge is not critical for this project, but consistent tension will ensure a neat finish.
Finished Size:
The finished size of the bag will depend on the yarn and hook size used, as well as the number of roses and the size of the base bag.
Pattern Instructions:
The pattern is divided into four parts:
- Part 1: Crochet the Roses
- Part 2: Crochet the Bag Base
- Part 3: Attach the Roses to the Bag
- Part 4: Add Finishing Touches
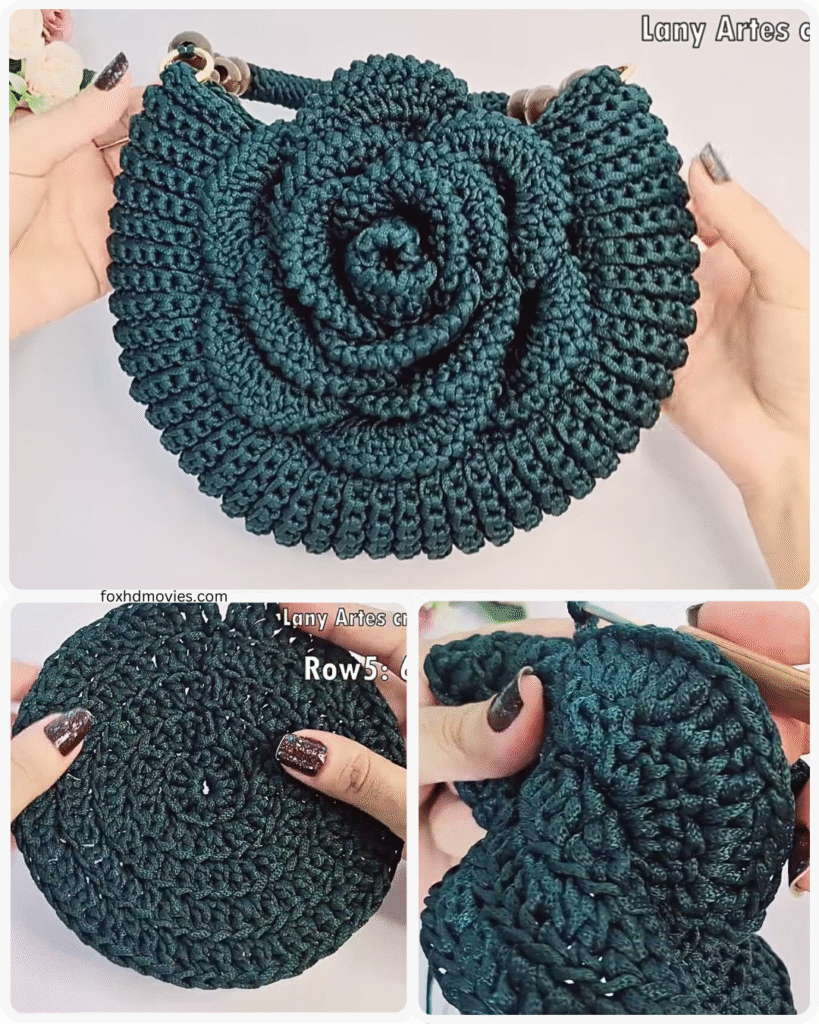
Part 1: Crochet the Roses
Each rose is made in rounds, starting with the center and working outwards to create the petals.
Make the Center of the Rose:
- Start with a magic ring.
- Round 1: 6 sc into the magic ring. Tighten the ring and join with a sl st to the first sc. (6 sts)
- Round 2: Ch 1, 2 sc in each stitch around. Join with a sl st to the first sc. (12 sts)
Form the Petals:
The number of rounds and the number of stitches can be adjusted to create roses of different sizes.
- Round 3: Ch 1, (1 sc, 1 hdc, 1 dc, 1 hdc, 1 sc) in the next stitch, repeat from * to * around. Join with a sl st to the first sc.
- Round 4: Ch 1, sc in the first stitch, hdc in the next stitch, 3 dc in the next stitch, hdc in the next stitch, sc in the next stitch, repeat from * to * around. Join with a sl st to the first sc.
- Round 5: Ch 1, sc in the first 2 stitches, hdc in the next stitch, (2 dc, ch 2, 2 dc) in the next stitch, hdc in the next stitch, sc in the next 2 stitches, repeat from * to * around. Join with a sl st to the first sc.
Continue adding rounds in the same pattern, increasing the number of stitches in each petal formation as desired, until the rose reaches the desired size. For larger roses, you can add treble crochets (tr) to the petal pattern and increase the number of sc stitches between the petals.
Finish the Rose:
- Fasten off and weave in the ends.
- Make several roses in desired colors. The number of roses will depend on the size of your bag and how densely you want to cover it.
Part 2: Crochet the Bag Base
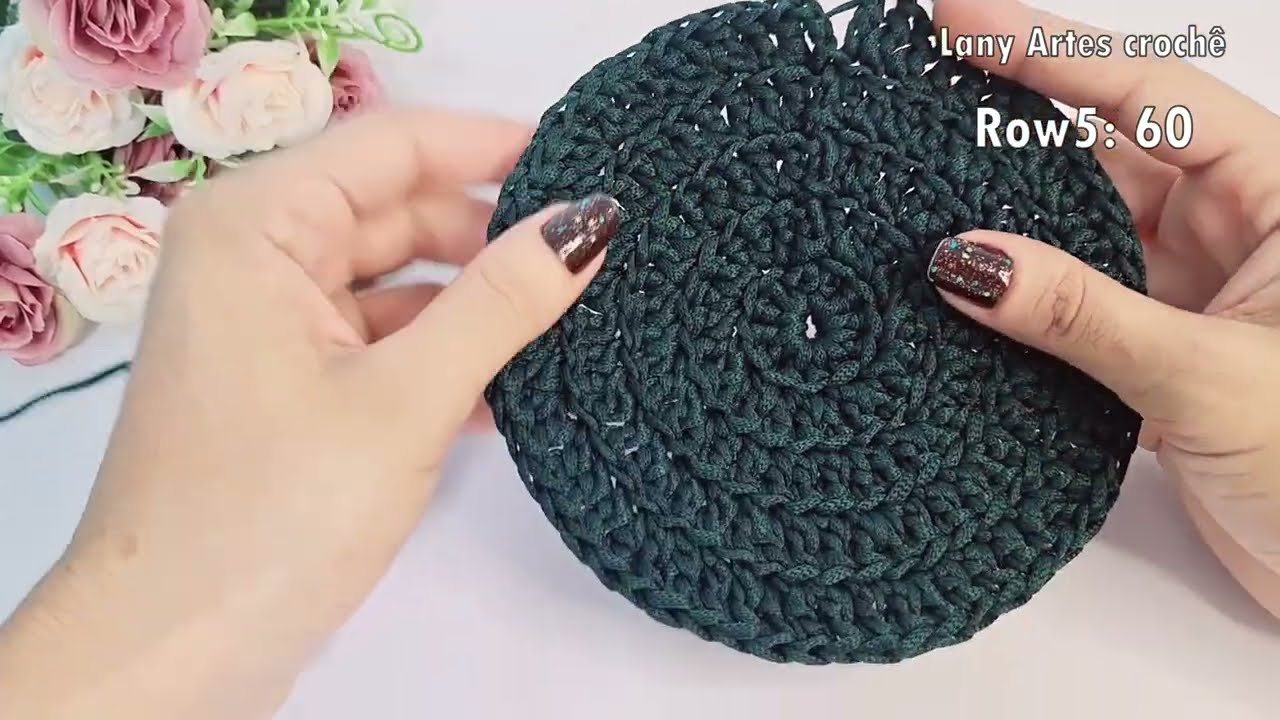
The base of the bag can be a square, rectangle, or circle. Here’s how to crochet a simple rectangular base:
Create the Base:
- Start with a foundation chain of your desired length for the base of the bag.
- Row 1: Sc in the second chain from the hook and in each chain across. Ch 1, turn.
- Repeat Row 1 until the base reaches your desired width.
Form the Sides:
- After the base is complete, crochet around the edges to build the sides.
- Round 1: Ch 1, sc around the entire base, placing 3 sc in each corner stitch. Join with a sl st to the first sc.
- Round 2: Ch 1, sc in each stitch around. Join with a sl st to the first sc.
- Repeat Round 2 until the sides reach the desired height.
- For a taller bag, continue repeating Round 2.
- You can also incorporate different crochet stitches for the sides, such as hdc or dc, to create different textures.
- For a circular base, start with a magic ring and increase stitches in each round (6 sc in round 1, 12 sc in round 2, 18 sc in round 3, etc.).

Part 3: Attach the Roses to the Bag
- Position the Roses: Arrange the crocheted roses on the front of the bag in your desired pattern. You can create a dense covering of roses or space them out for a more delicate look.
- Sew the Roses: Using the yarn needle and yarn, sew each rose securely to the bag. Make sure they are firmly attached.
Part 4: Add Finishing Touches
- Add Lining (Optional): Cut fabric to match the dimensions of your bag. Sew the lining pieces together and then sew the lining into the bag. This will give your bag more structure and prevent small items from falling through the crochet stitches.
- Attach Handles (Optional):
- Use pre-made handles or crochet your own.
- Attach the handles securely to the bag. You can sew them on or use rings or other hardware.
- Add a Closure (Optional): You can add a zipper, button, or snap for closure. A magnetic snap is a simple and effective option.
Video tutorial
Tips:
- Use a stitch marker to keep track of the beginning of rounds, especially when working in the round.
- Experiment with different yarn colors for a vibrant look. You can use different colors for the roses and the bag base.
- Adjust the size of the roses and the bag according to your preference.
- You can add embellishments such as beads, sequins, or embroidery to further customize your bag.
- If you want a more structured bag, consider using a thicker yarn or double-stranding the yarn. You can also use plastic canvas inside the crochet for added support.