 by
by 
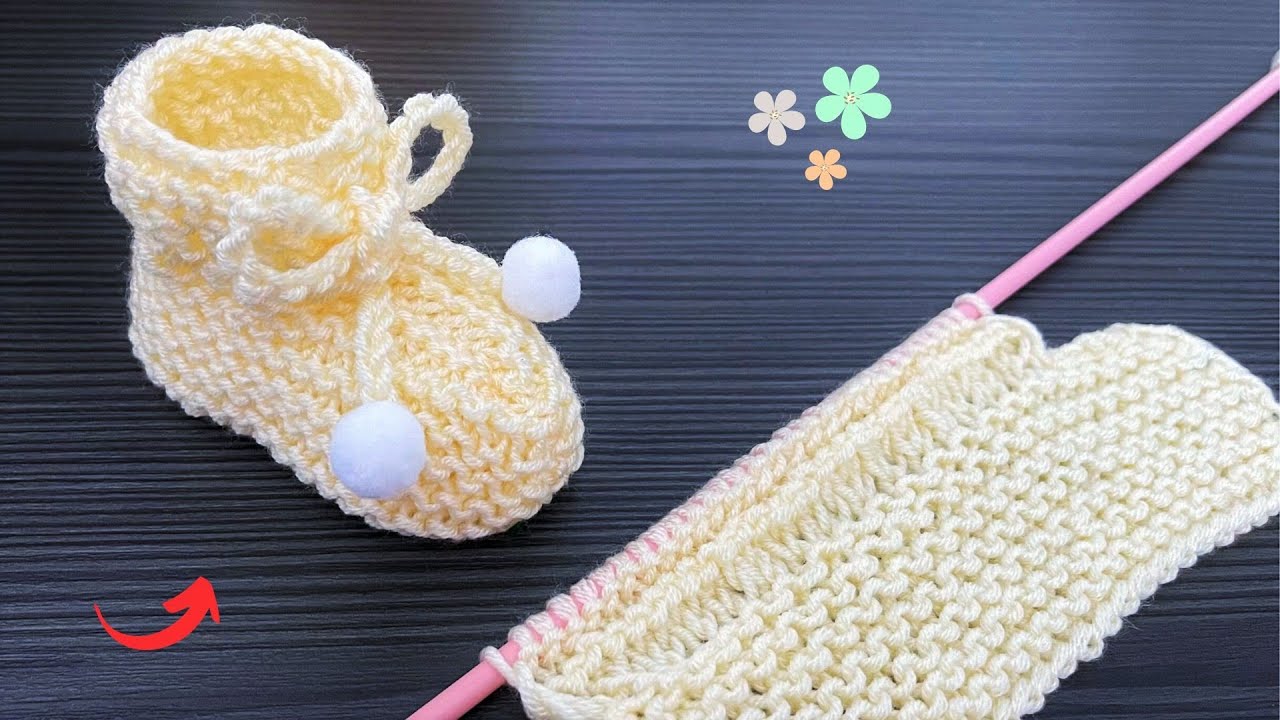
Here is a simple knitting pattern for a baby shoe (bootie) that is very beginner-friendly, often made from a single knitted rectangle or square that is folded and seamed.
Easiest Knitted Baby Shoe Pattern
This pattern creates a simple baby bootie from a knitted rectangle. It’s perfect for beginner knitters.
Skill Level: Beginner
Size: 0-3 Months (approx. 3.5 – 3.75 inches sole length)
Note: To adjust the size, you will need to change the number of stitches cast on (affects width/height) and the number of rows knitted (affects length).
Materials:
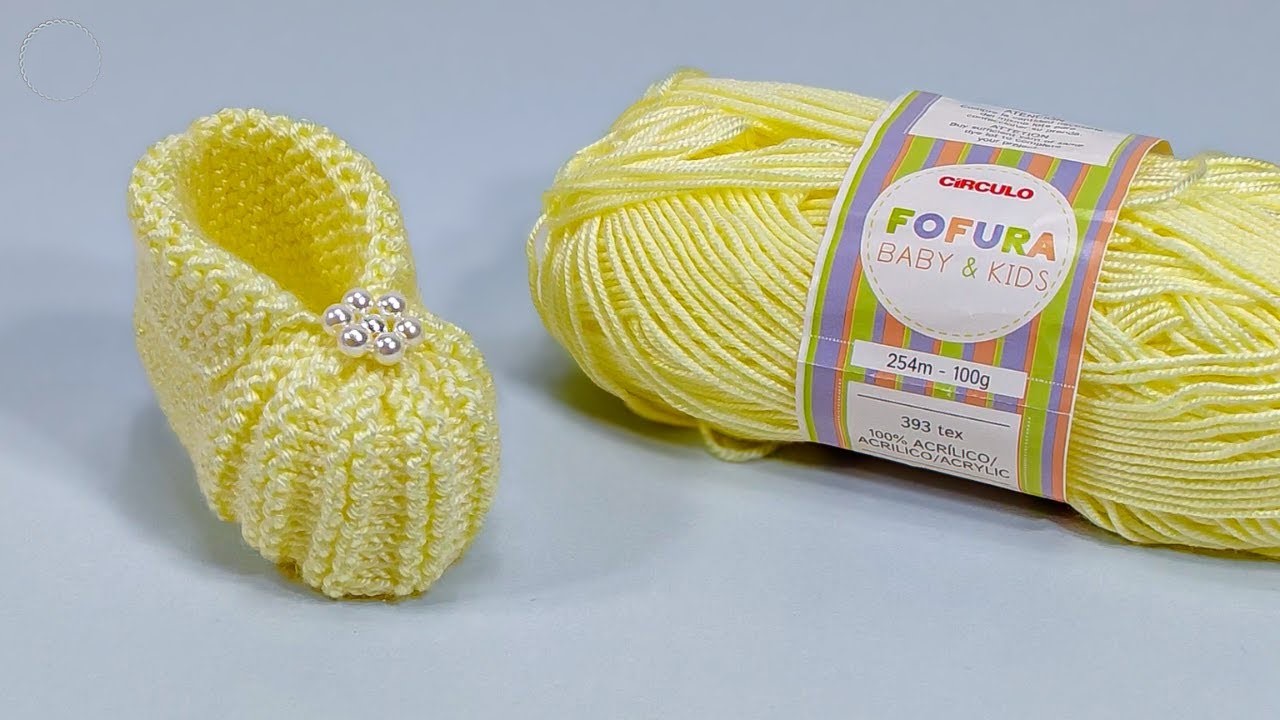
- Approximately 50-70 yards of DK weight yarn.
- Knitting needles size US 5 (3.75 mm) or size needed to obtain gauge.
- Tapestry needle for seaming and weaving in ends.
- Scissors
Gauge:
Using knitting needles size US 5 (3.75 mm) in Garter Stitch (knit every row): 18 stitches and 34 rows = 4 inches (10 cm).
Note: Gauge is important in knitting! Knit a swatch to check your gauge. If your swatch is smaller, try larger needles. If your swatch is larger, try smaller needles.
Abbreviations:
- k: knit
- st(s): stitch(es)
- BO: Bind off
- CO: Cast on
Notes:
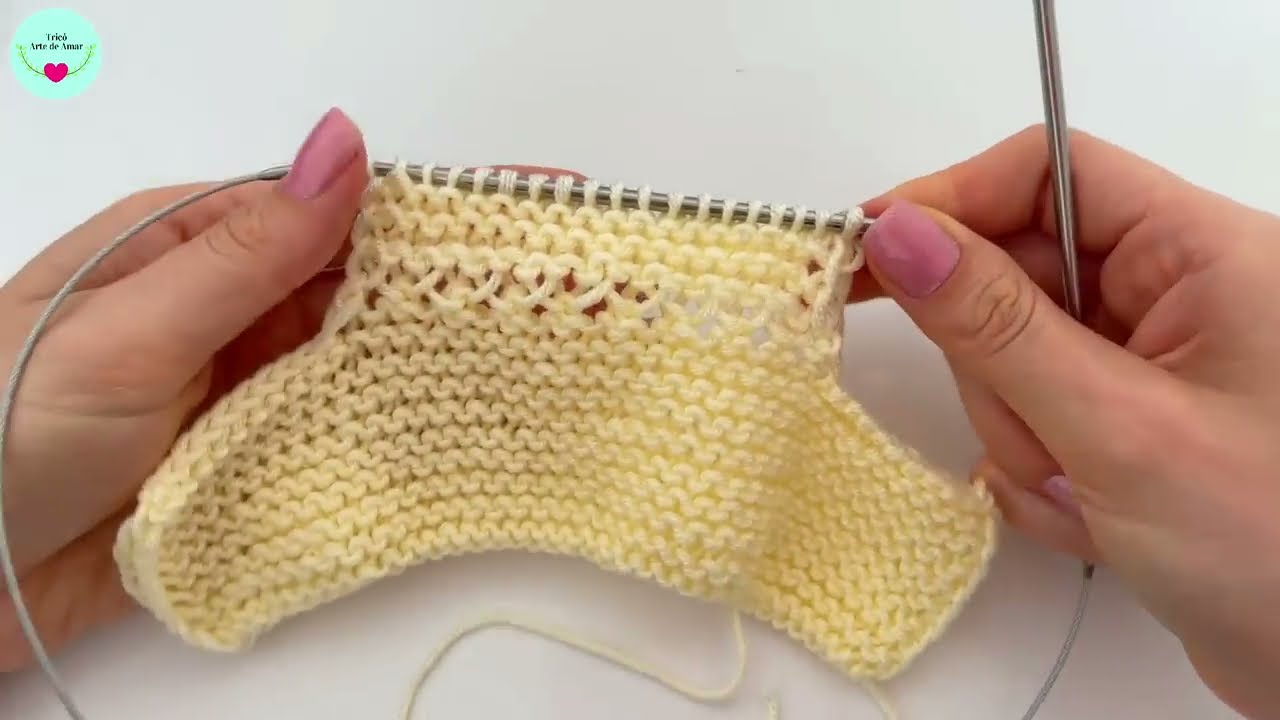
- This bootie is knit flat as one piece and then seamed.
- We will be primarily using the Garter Stitch (knitting every row), which is easy and creates a nice, stretchy fabric.
Pattern Instructions:
Make 2 (for a pair)
The Main Piece (Rectangle)
Step 1: Casting On CO 28 stitches. (Adjust the number of stitches here to change the width/height of the bootie)
Step 2: Knitting the Rectangle Knit every row (Garter Stitch) until the piece measures approximately 4.5 – 5 inches from the cast-on edge, or until you have knitted about 38 – 42 rows (adjust the number of rows here to change the length of the bootie). The piece should be slightly longer than your desired finished sole length.
Step 3: Binding Off BO all stitches loosely.
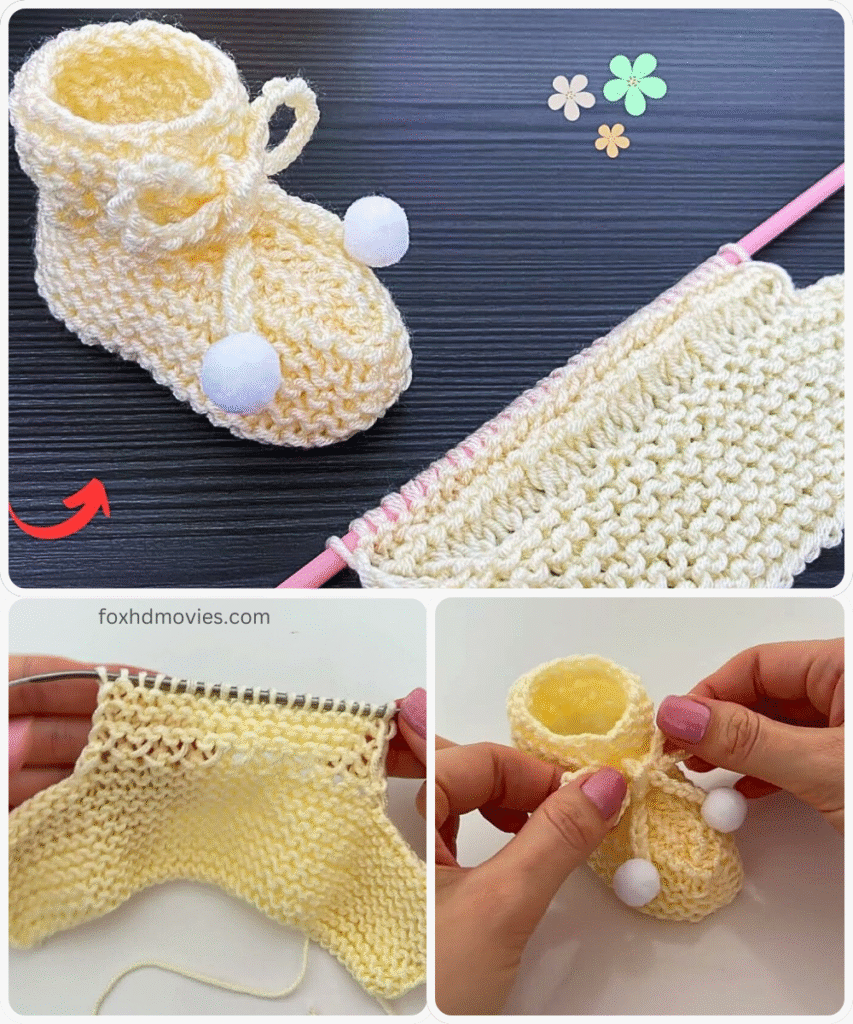
You should now have a knitted rectangle.
Assembly:
- Lay your knitted rectangle flat.
- Fold the rectangle in half lengthwise. The cast-on edge should align with the bound-off edge.
- Using your tapestry needle and a length of the same yarn, seam one of the short sides closed. This will form the back of the heel. Use a mattress stitch or whip stitch for a neat seam.
- Now, you have a tube shape. The seam you just made is the heel. The folded edge is the top of the foot/ankle opening. The other short ends will form the toe.
- Thread your tapestry needle with a new length of yarn. Starting from one corner of the open short end (the toe end), weave the needle in and out through the stitches along the raw edge of the fabric, going all the way across to the other corner.
- Once you’ve woven through the entire raw edge of the toe, pull the yarn tail tightly to gather the stitches and close the toe. Cinch it as tightly as possible.
- Secure the gathering by stitching back and forth a few times across the gathered opening.
- Weave in any remaining yarn ends securely on the inside of the bootie.
- Turn the bootie right side out.
Repeat for the second bootie.
Video tutorial
Finishing:
- Weave in all loose ends securely.
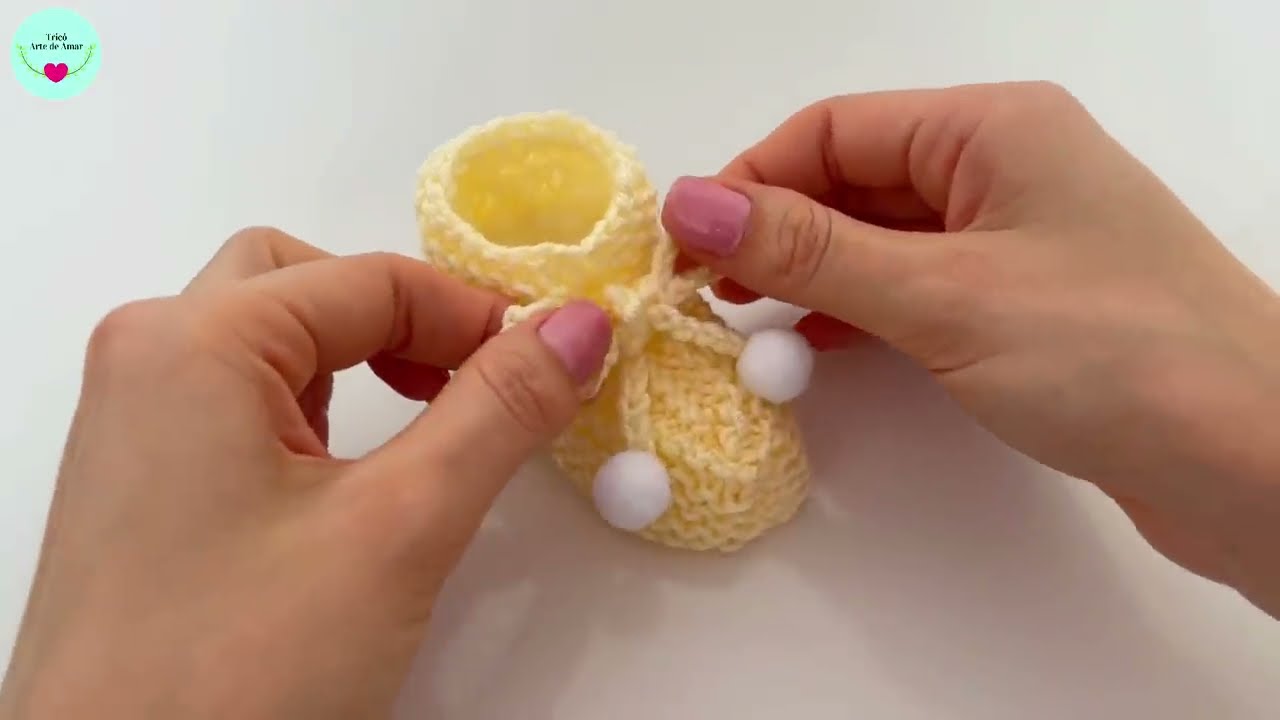
- (Optional) You can add a ribbon or knitted tie through the stitches around the ankle for decoration and a slightly snugger fit.
Your easiest knitted baby shoes are complete!