by
by 
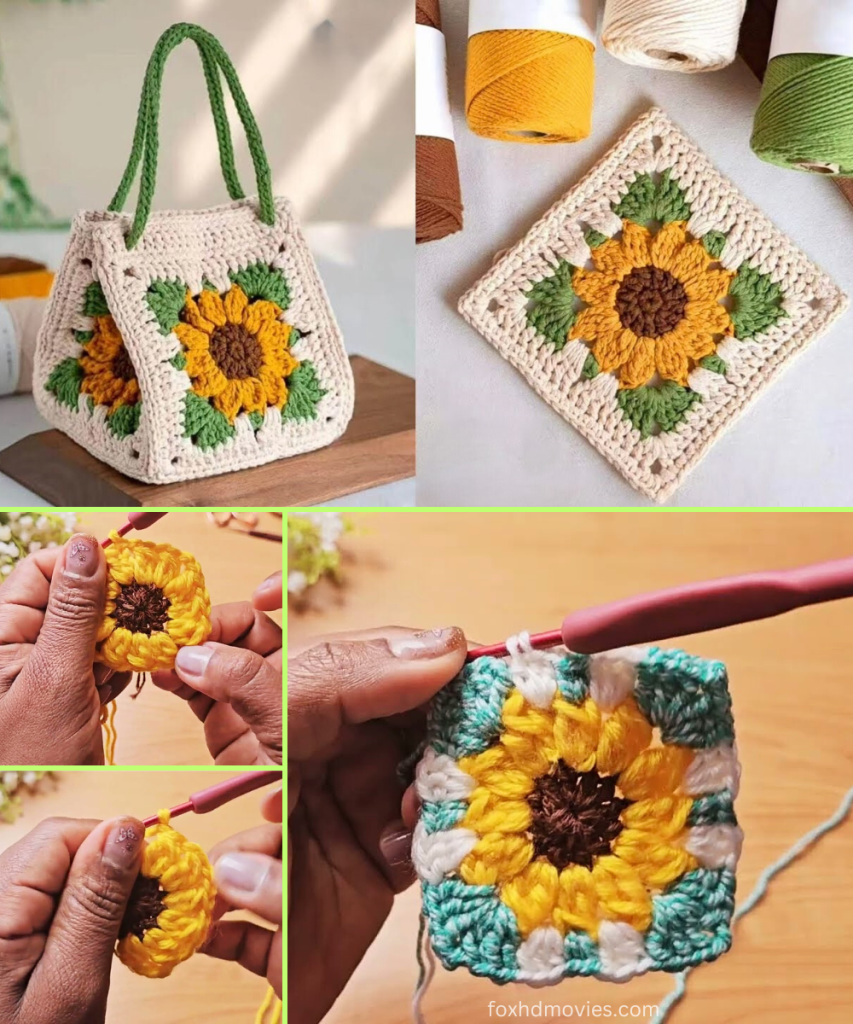
Bring the warmth of a sunflower into your crochet projects with this beautiful “Square Floral” motif! Inspired by a detailed and easy-to-follow tutorial, this pattern guides you through creating a vibrant sunflower design within a classic square shape. It’s a fantastic project for adding a touch of nature and color to blankets, bags, and countless other creations.
Skill Level: Easy to Intermediate
Finished Size (Approximate):
- Approximately 6 – 6.5 inches (15 – 16.5 cm) square
- Size can vary based on yarn, hook, and tension.
Materials You’ll Need:
- Yarn: Small amounts of DK weight (Light Worsted / 8 ply) yarn in three to four colors:
- Color A (Center): Brown (or a dark, earthy tone)
- Color B (Petals): Bright Yellow (or orange, for a fiery sunflower)
- Color C (Leaves/Squaring): Green (or a contrasting color for the square base)
- Color D (Optional Outer Border): White (or a neutral color for the final border)
- Any smooth acrylic or cotton yarn will work beautifully.
- Crochet Hook: E/4 (3.5 mm) or size needed to obtain a firm but flexible fabric.
- A slightly smaller hook than recommended for your yarn weight will help the motif hold its shape better.
- Tapestry Needle: For weaving in ends.
- Scissors
Gauge (Not Critical, but Aim for Consistency!):
Since this is a decorative motif, exact gauge isn’t crucial. However, consistency in your stitches will ensure your motif is square and the colors blend nicely. If your fabric seems too loose, try a smaller hook.
Abbreviations (US Crochet Terms):
- ch: chain
- sl st: slip stitch
- sc: single crochet
- hdc: half double crochet
- dc: double crochet
- tr: treble crochet (yarn over twice, insert hook, yo, pull through 2 loops, yo, pull through 2 loops, yo, pull through last 2 loops)
- st(s): stitch(es)
- MR: Magic Ring
- FO: Fasten off
- ch-sp: chain space
Let’s Crochet Your Sunny Sunflower Square!
This motif is worked in rounds, building the sunflower center first, then adding the petals, and finally squaring it off with green and white borders.
Part 1: The Brown Center (Color A)
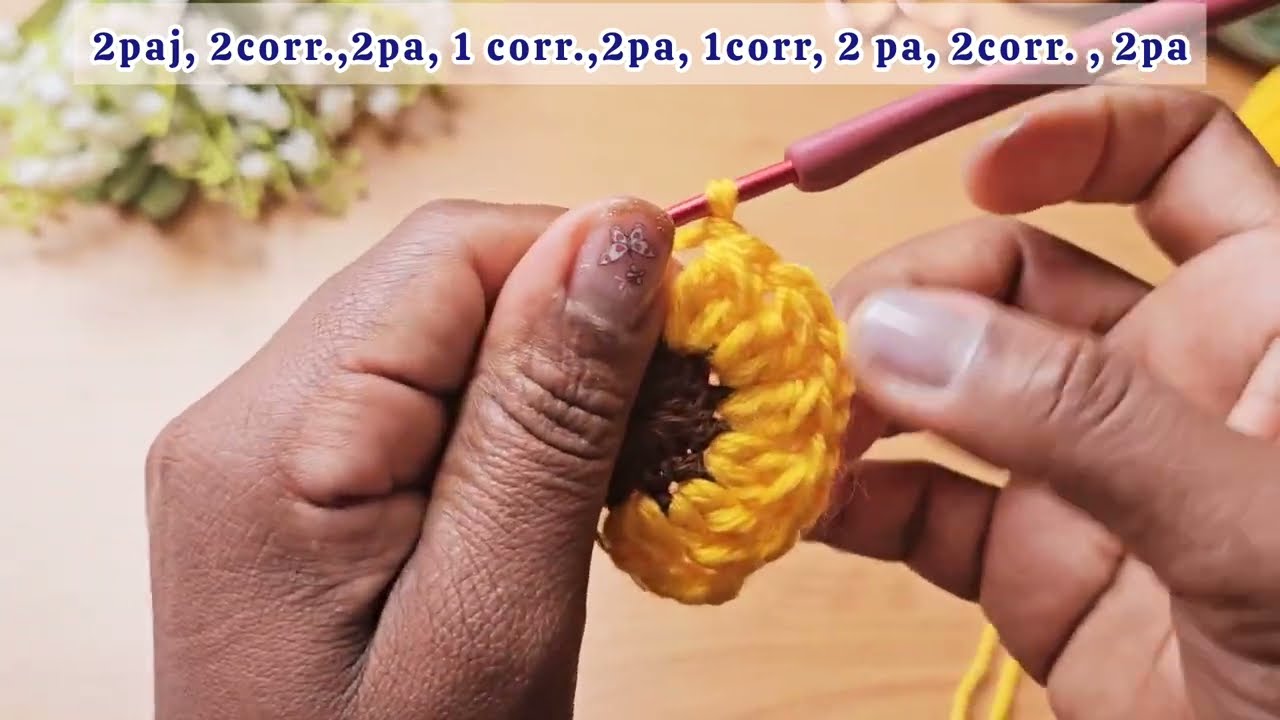
Start with Color A (Brown).
Rnd 1: Create a Magic Ring (MR). Ch 2 (does not count as a stitch). Work 12 dc into the MR. Join with a sl st to the first dc. (12 dc)
- Pull the MR tight to close. This forms the very center of your sunflower.
FO Color A. Weave in ends.
Part 2: The Yellow Petals (Color B)
Now, switch to Color B (Bright Yellow).
Rnd 2: Attach Color B with a sl st into the space between any two dc stitches from Rnd 1. Ch 3 (counts as 1st dc). Work 2 dc into the same space. Ch 2. Work 3 dc into the next space between dc stitches from Rnd 1. Ch 2. Repeat from * to * around. Join with a sl st to the top of the beginning ch 3. (12 groups of 3 dc, 12 ch-2 spaces)
- This round creates the base for your petals. The ch-2 spaces will be where the petals “pop” out.
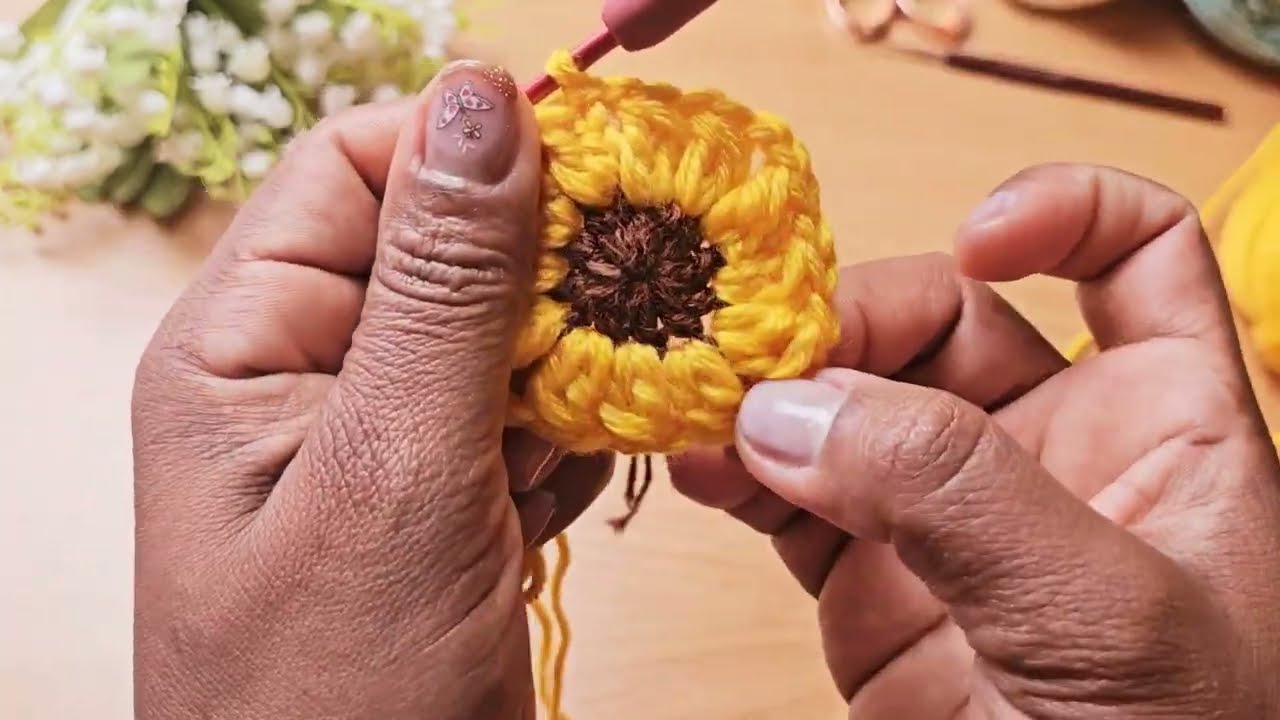
FO Color B. Weave in ends.
Part 3: Squaring with Green (Color C)
Now, switch to Color C (Green) to begin squaring off the motif and forming the “leaves.”
Rnd 3: Attach Color C with a sl st into any ch-2 space from Rnd 2. Ch 2 (does not count as a stitch). Work (2 hdc, 2 dc, 2 tr, ch 2, 2 tr, 2 dc, 2 hdc) into the current ch-2 space – this forms a corner. Sl st into the next ch-2 space. Repeat from * to * 3 more times. You will have 4 corners formed. Join with a sl st to the first ch 2.
- This round creates the distinct square shape with the large, leafy corners.
FO Color C. Weave in ends.
Part 4: First White Border (Color D – Optional, or continue with Color C)
Now, switch to Color D (White) or continue with Color C if you prefer a two-color square.
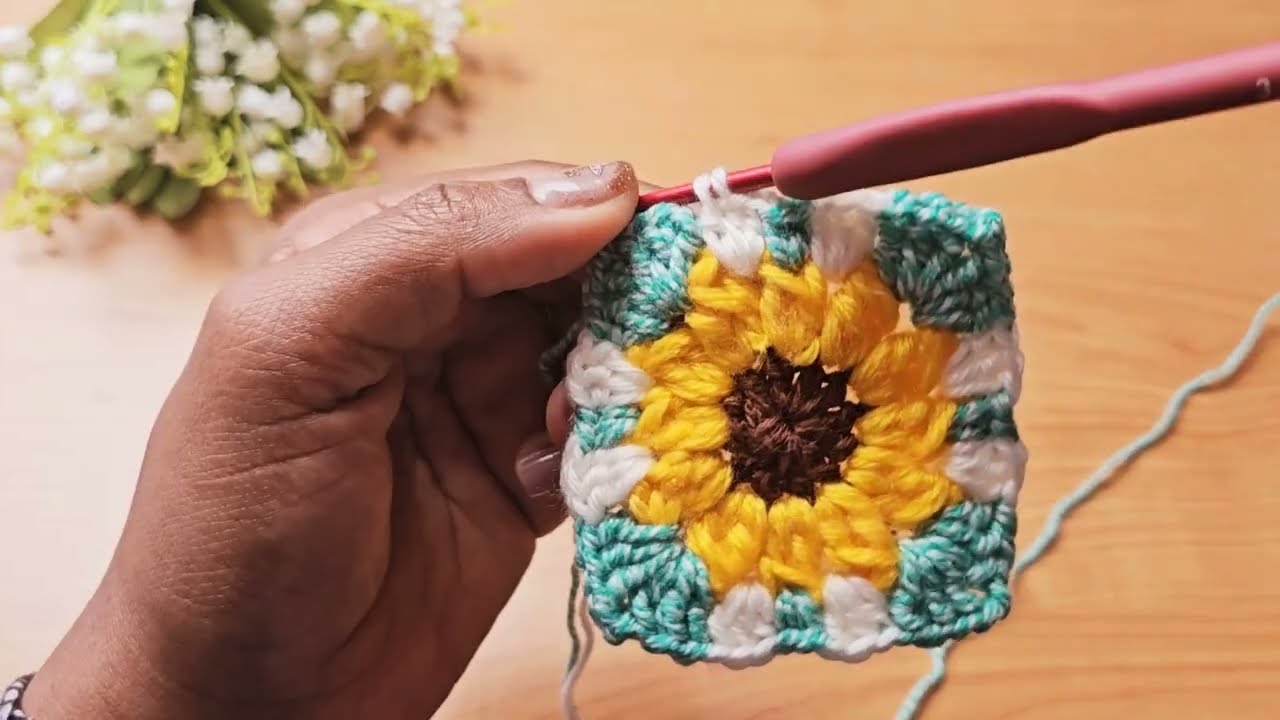
Rnd 4: Attach Color D with a sl st into any ch-2 corner space from Rnd 3. Ch 3 (counts as 1st dc). Work (1 dc, ch 2, 2 dc) into the same ch-2 corner space. (This forms your first corner). Dc in each stitch along the side until you reach the next corner space. (You will be working into the hdc, dc, and tr stitches of the green corner). In the ch-2 corner space, work (2 dc, ch 2, 2 dc). Repeat from * to * around. Join with a sl st to the top of the beginning ch 3.
- This round builds up the sides of your square.
Part 5: Final White Border (Color D – Optional, or continue with Color C)
Rnd 5: Ch 3 (counts as 1st dc). Work (1 dc, ch 2, 2 dc) into the current ch-2 corner space. Dc in each dc along the side until you reach the next corner space. In the ch-2 corner space, work (2 dc, ch 2, 2 dc). Repeat from * to * around. Join with a sl st to the top of the beginning ch 3.
FO Color D. Weave in ends.
Part 6: Finishing Touches
- Weave in all ends: Use your tapestry needle to neatly weave in any remaining loose yarn tails. This is crucial for a tidy and professional finish.
- Block (Optional but Recommended): Gently wet your motif and pin it to a foam board or blocking mat, shaping it into a perfect square. Let it dry completely. Blocking helps open up the stitches and gives your motif a crisp, finished look, making it easier to join with other squares.
Video tutorial
Versatile Uses for Your Crocheted Sunflower Square:
- Granny Square Blankets: Join multiple motifs together to create stunning blankets, throws, or baby blankets.
- Pillow Covers: Combine several squares for a unique and cheerful pillow cover.
- Tote Bags: Use as panels for a vibrant and eye-catching tote bag.
- Table Runners/Placemats: Create a series of squares for charming table decor.
- Wall Hangings: Frame a single square or join a few for a lovely piece of wall art.
Customization & Tips:
- Color Combinations: Experiment with different color palettes! You could use a deep red for the petals for a dramatic look, or pastels for a softer feel.
- Size Adjustment:
- Larger Square: Use a thicker yarn (e.g., worsted weight) and a larger hook (e.g., H/5.0 mm). You can also add more rounds to the center (Part 1) or more border rounds (Parts 4 & 5), always maintaining the increase pattern for squaring.
- Smaller Square: Use a finer yarn (e.g., fingering or lace weight) and a smaller hook (e.g., 1.5 mm or 2.0 mm). Reduce the initial stitch count in Rnd 1 or skip a border round.
- Stitch Variations: Once you’re comfortable with the pattern, you can experiment with different stitches in the border rounds (e.g., hdc instead of dc) for varied textures, always ensuring you maintain the corner increases.
Enjoy creating these bright and beautiful crocheted sunflower square motifs! They’re a fantastic way to add a personal touch and a burst of sunshine to your handmade projects.