 by
by 
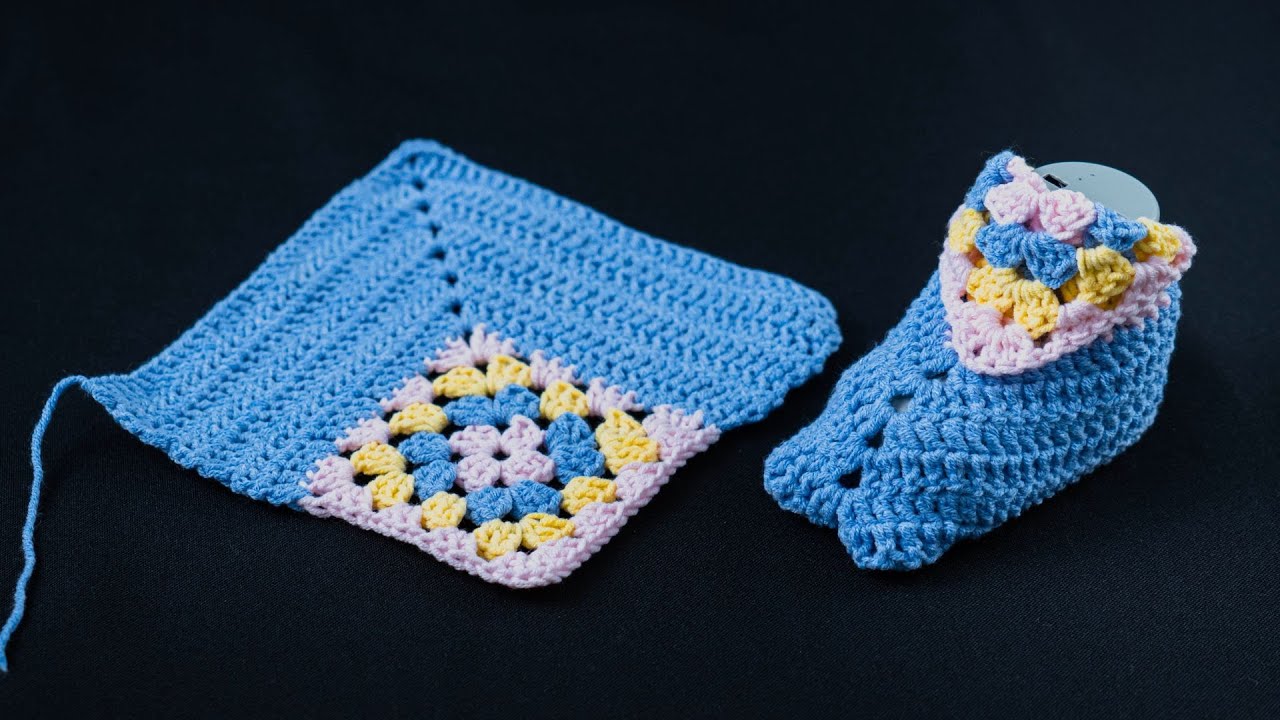
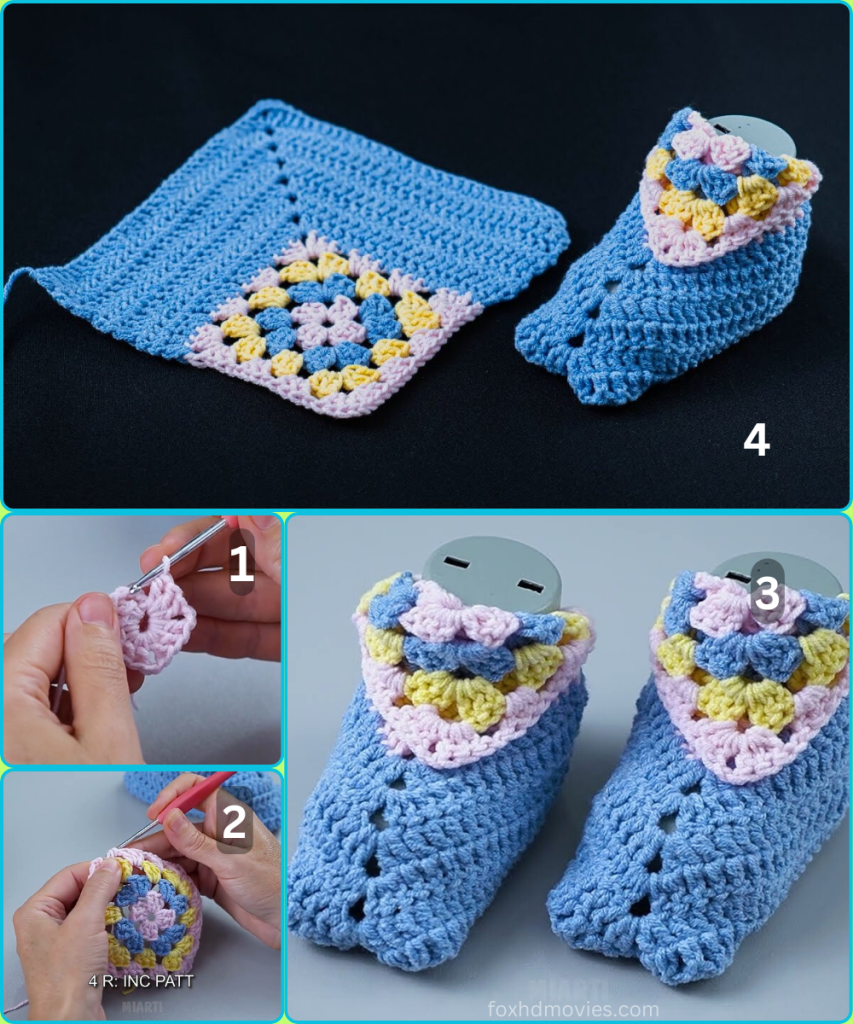
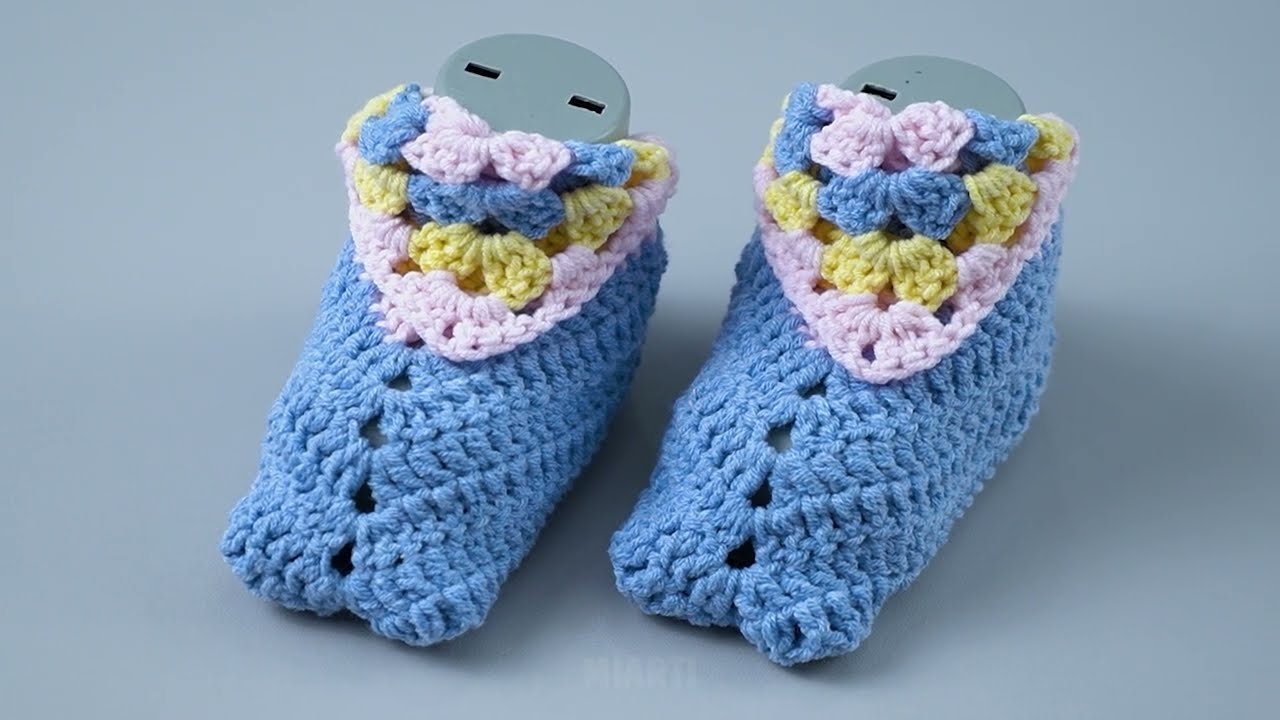
Hello, crocheters! Ready to create something absolutely adorable for a new baby in your life? These Sweet Granny Baby Booties are a delightful project that combines the classic charm of a granny square with a simple, cozy bootie pattern. This pattern is designed to be long and detailed, making it perfect for an intermediate beginner looking to create a unique and heartfelt gift. The booties are made from a single granny square folded and seamed in a clever way to form the toe and ankle, with a final cuff for a perfect fit.
Materials Needed
- Approximately 50g of DK weight (or light worsted weight) yarn in a main color (MC). The image shows a light blue.
- Approximately 10g each of two contrasting colors (CC1 and CC2) for the granny square. The image shows light pink (CC1) and light yellow (CC2).
- A 4.0mm (G-6) crochet hook.
- Scissors.
- Tapestry needle for weaving in ends and seaming.
Gauge
Gauge isn’t critical for this project, but a consistent tension is important for the size of your square.
- A finished square should measure approximately 4 inches by 4 inches (10 cm x 10 cm).
Adjust your hook size as needed to achieve a square of this size.
Stitches and Abbreviations
- ch: chain
- sl st: slip stitch
- sc: single crochet
- dc: double crochet
- granny cluster: 3 dc in the same stitch or space
- ch-1 sp: chain-1 space
- […]: repeat instructions within brackets
- (…): number of stitches at the end of the round or row
- MC: Main Color
- CC1: Contrasting Color 1
- CC2: Contrasting Color 2
Construction Overview
The booties are created from a single, seamless piece that is folded and seamed. First, you’ll crochet a classic granny square in your contrasting colors. Then, you’ll add a few rows to one side of the square to form the bottom and top of the bootie. Finally, you will fold and seam the piece to create the final shape and add a cuff.
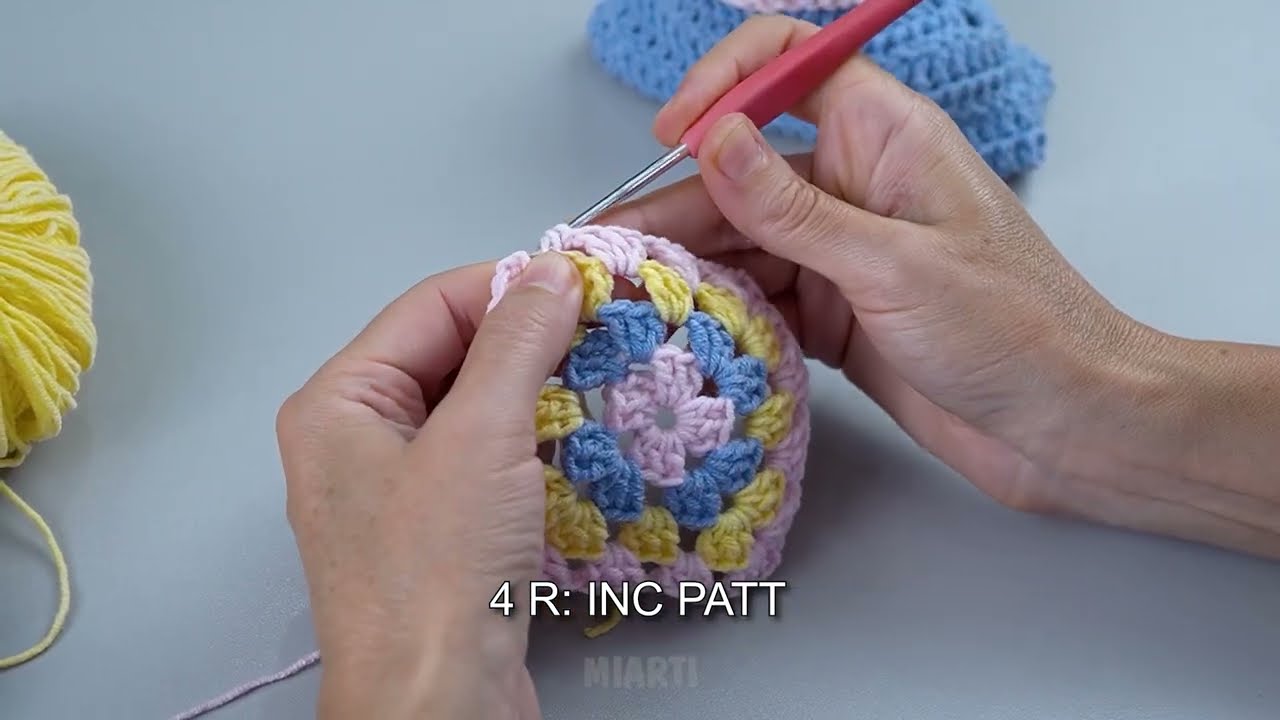
Part 1: The Granny Square
This granny square is worked in the round, using three colors to create the layered effect seen in the image.
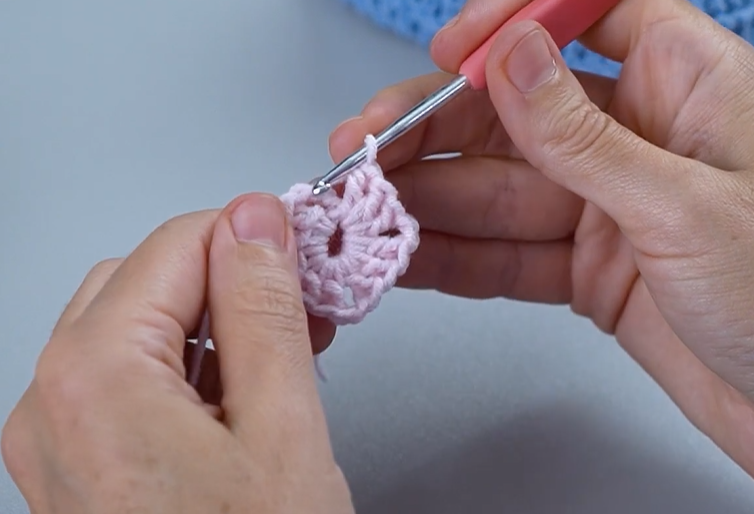
Round 1 (Center): With CC2, ch 4. Sl st into the first ch to form a ring. Ch 3 (counts as a dc). Work 2 dc into the ring. [Ch 2, 3 dc into the ring] three times. Ch 2, sl st into the top of the beginning ch-3 to join. Fasten off CC2. (4 granny clusters, 4 ch-2 spaces)
Round 2 (Middle): Join CC1 into any ch-2 space. Ch 3. Work (2 dc, ch 2, 3 dc) into the same ch-2 space. This forms your first corner. [Ch 1, (3 dc, ch 2, 3 dc) in the next ch-2 space] three times. Ch 1, sl st into the top of the beginning ch-3 to join. Fasten off CC1. (4 corners, 4 ch-1 spaces)
Round 3 (Outer): Join MC into any ch-2 corner space. Ch 3. Work (2 dc, ch 2, 3 dc) into the same space. [Ch 1, 3 dc into the next ch-1 space. Ch 1, (3 dc, ch 2, 3 dc) in the next ch-2 space] two times. Ch 1, 3 dc into the next ch-1 space. Ch 1, sl st into the top of the beginning ch-3 to join. Fasten off MC. Weave in all loose ends on the square.
Part 2: The Bootie Base
Now, we will work in rows, adding a flap to one side of the granny square. This forms the sole and top of the bootie.
Row 1: Join MC into the ch-1 space on one side of your granny square (the side you choose will be the back of the bootie). Ch 3 (counts as a dc). Work 3 dc into the same ch-1 space. Dc in each of the next 3 dc. Dc in the ch-1 space. Dc in each of the next 3 dc. Work 4 dc in the ch-2 corner space. (14 dc)
Row 2: Ch 3. Turn. Dc in each of the 14 dc across.
Row 3: Ch 3. Turn. Dc in each of the 14 dc across.
Fasten off and leave a very long tail for seaming.
Part 3: Assembly and Cuff
Now, we’ll fold the piece and create the final bootie shape.
- Lay the piece flat. You should have the granny square at the top and the long, rectangular flap you just created on the bottom.
- Fold the granny square in half, with the right sides facing each other.
- Using your long yarn tail and a tapestry needle, seam the sides of the granny square together. This forms the toe section of the bootie.
- Next, fold the long rectangular flap up and seam the sides of the flap to the sides of the granny square. This forms the ankle and bottom of the foot.
- Your piece should now look like a bootie. Turn it right-side out.
Cuff:
- Join MC to the top-back center of the bootie opening.
- Round 1: Ch 1. Sc evenly around the entire top opening of the bootie. Sc in each dc stitch and ch-1 space. Join with a sl st to the first sc.
- Round 2: Ch 1. Sc in each sc around. Join with a sl st. Fasten off and weave in all loose ends.
Video tutorial
Repeat all steps to create a second, matching bootie.
Your Sweet Granny Baby Booties are now complete! This is a quick and satisfying project that looks much more complicated than it is. The customizable colors and design make it a perfect go-to gift for any baby shower. Enjoy!