by
by 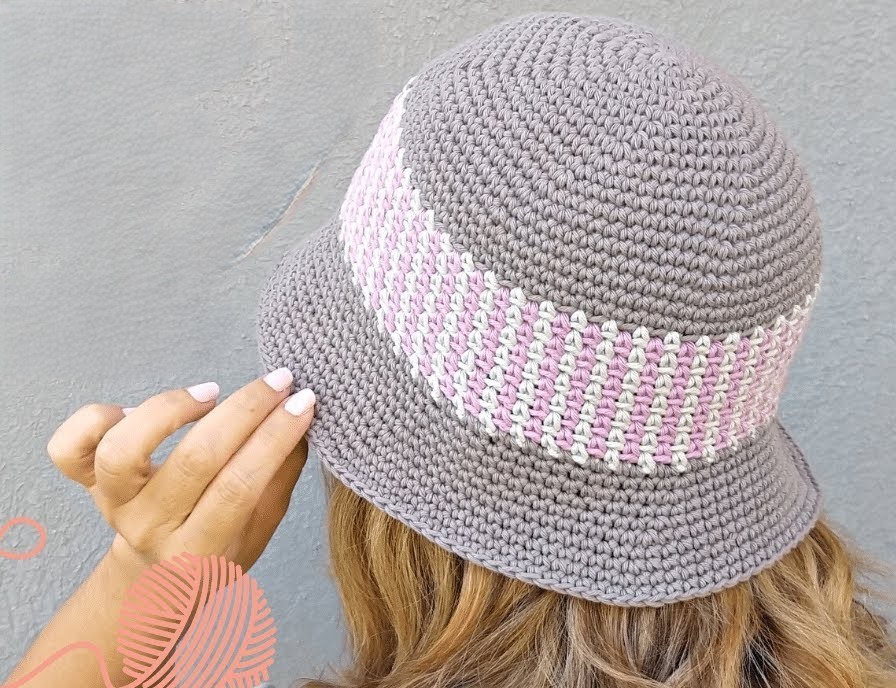
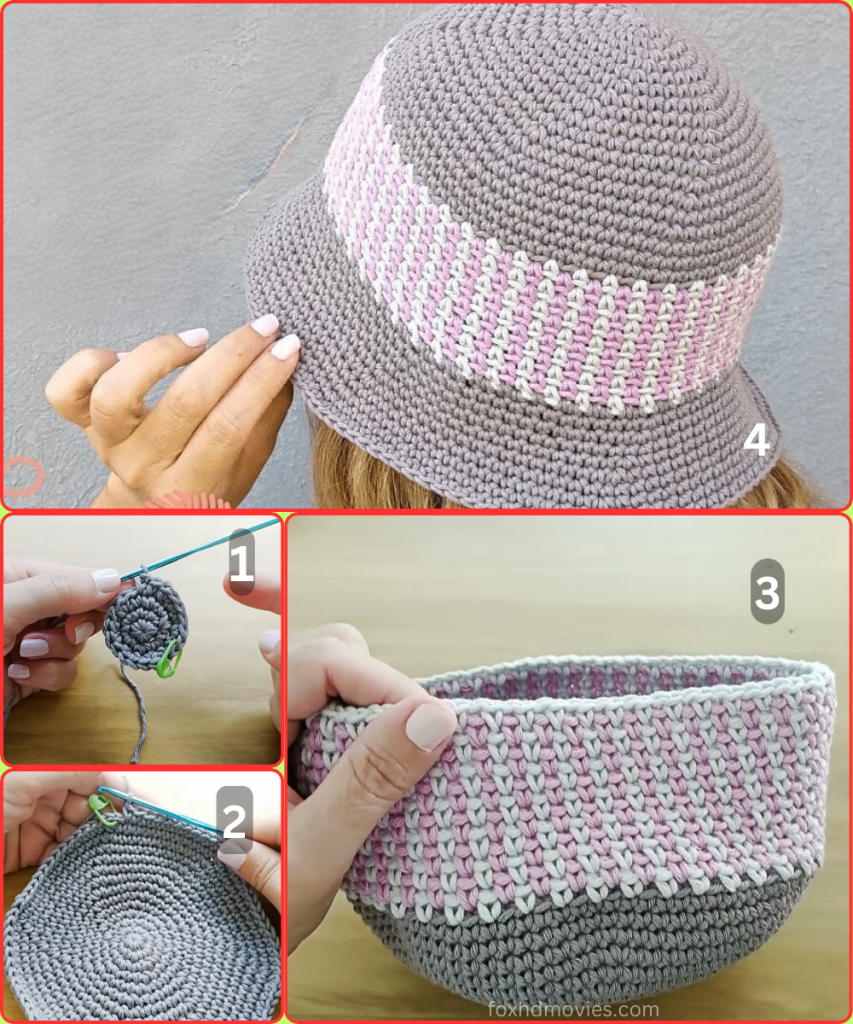
Welcome, crocheters! Ready to make a stylish accessory that’s both practical and chic? This Serenity Bucket Hat is the perfect project. It’s designed with a classic, sturdy structure and features a beautiful, eye-catching colorwork band. This pattern is written in detail to ensure you can follow along easily, no matter your skill level. The hat is worked from the top down and is the perfect way to practice your single crochet skills and some simple color changes.
Materials Needed
- Approximately 100g of worsted weight (or aran weight) cotton yarn in a main color (MC). The image shows a light gray.
- Approximately 30g of worsted weight cotton yarn in a contrasting color 1 (CC1), which is white in the image.
- Approximately 30g of worsted weight cotton yarn in a contrasting color 2 (CC2), which is pink in the image.
- A 4.0mm (G-6) crochet hook.
- Scissors.
- Tapestry needle for weaving in ends.
- Stitch marker (essential for working in continuous rounds).
Stitches and Abbreviations
- ch: chain
- sl st: slip stitch
- sc: single crochet
- sc inc: single crochet increase (work 2 sc in the same stitch)
- sc dec: single crochet decrease (sc two stitches together)
- […]: repeat instructions within brackets
- (…): number of stitches at the end of the round
- MC: Main Color
- CC1: Contrasting Color 1
- CC2: Contrasting Color 2
Gauge
A consistent gauge is important for the fit of this hat. The gauge is measured after the first few increase rounds.
- After Round 5, the diameter of your circle should be approximately 2.5 inches (6.5 cm).
- 18 sc and 20 rows = 4 inches (10 cm).
Adjust your hook size as needed to meet this gauge.
Construction Overview
The bucket hat is worked in continuous spiral rounds, starting with the top and increasing until the base of the hat is wide enough to fit your head. Then you’ll work even for the sides and brim. Working in a spiral means you don’t join rounds with a slip stitch, which helps to hide the seam. Use a stitch marker to keep track of the start of each round.
The Crown (Top of the Hat)
Use MC for all crown rounds.
Round 1: Ch 2. Work 6 sc in the second ch from the hook. (6) Alternatively, start with a magic ring and work 6 sc into the ring.
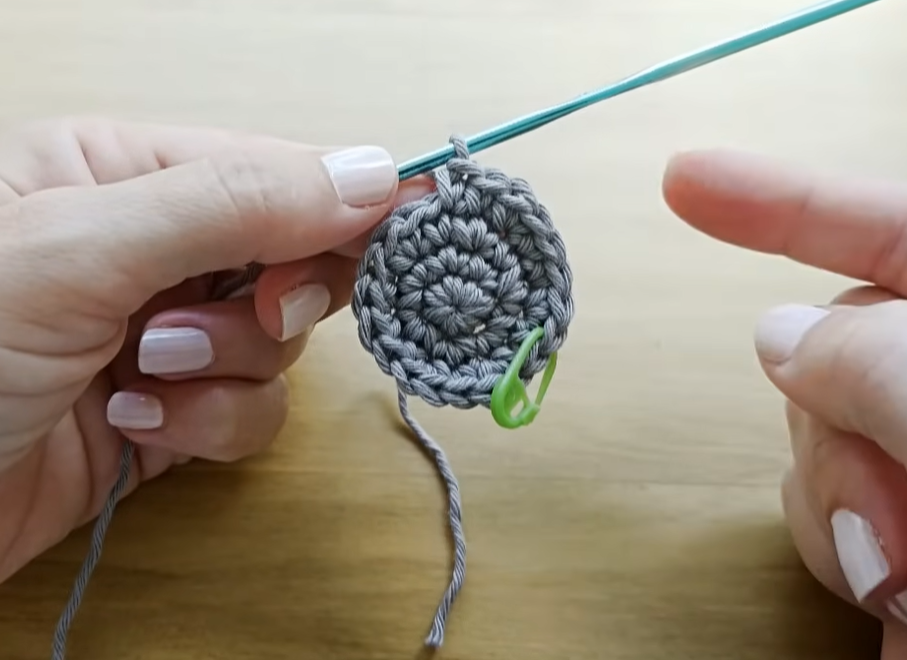
Round 2: 2 sc in each sc around. (12)
Round 3: [Sc in the next sc, sc inc] around. (18)
Round 4: [Sc in the next 2 sc, sc inc] around. (24)
Round 5: [Sc in the next 3 sc, sc inc] around. (30)
Round 6: [Sc in the next 4 sc, sc inc] around. (36)
Round 7: [Sc in the next 5 sc, sc inc] around. (42)
Round 8: [Sc in the next 6 sc, sc inc] around. (48)
Round 9: [Sc in the next 7 sc, sc inc] around. (54)
Round 10: [Sc in the next 8 sc, sc inc] around. (60)
Round 11: [Sc in the next 9 sc, sc inc] around. (66)
Round 12: [Sc in the next 10 sc, sc inc] around. (72)
Round 13: [Sc in the next 11 sc, sc inc] around. (78)
Round 14: [Sc in the next 12 sc, sc inc] around. (84)
The Sides (Straight Section)
Now, we’ll work straight, without increases, to form the sides of the hat. This is the perfect place to do your colorwork.

Round 15: Sc in each sc around. (84)
Round 16: Sc in each sc around. (84)
Round 17 (Colorwork): Sc in each sc around, changing to CC1 at the last sc of the round. (84)
Round 18 (Colorwork): With CC1, sc in the next 2 sc. With CC2, sc in the next sc. With CC1, sc in the next 3 sc. Repeat from * to * around. Change to MC at the last sc of the round. (84)
Round 19 (Colorwork): With MC, sc in the next sc. With CC2, sc in the next sc. With CC1, sc in the next sc. With CC2, sc in the next sc. With MC, sc in the next sc. Repeat from * to * around. Change to MC at the last sc of the round. (84)
Round 20 (Colorwork): With MC, sc in the next 2 sc. With CC2, sc in the next sc. With MC, sc in the next 3 sc. Repeat from * to * around. Change to MC at the last sc of the round. (84)
Round 21 (Colorwork): With MC, sc in each sc around. (84)
Round 22: With MC, sc in each sc around. (84)
Rounds 23-26: Sc in each sc around. (84)

The Brim
Now we’ll work increases to create the flared brim.
Round 27: [Sc in the next 13 sc, sc inc] around. (90)

Round 28: Sc in each sc around. (90)
Round 29: [Sc in the next 14 sc, sc inc] around. (96)
Round 30: Sc in each sc around. (96)
Round 31: [Sc in the next 15 sc, sc inc] around. (102)
Round 32: Sc in each sc around. (102)
Round 33: [Sc in the next 16 sc, sc inc] around. (108)
Round 34: Sc in each sc around. (108)
Round 35: [Sc in the next 17 sc, sc inc] around. (114)
Round 36: Sc in each sc around. (114)
Video tutorial
Finishing
When you reach the end of the last round, sl st into the next stitch. Fasten off and weave in all loose ends with your tapestry needle.
You can also add a final, clean edge to the brim by working a reverse single crochet (crab stitch) around the edge for a decorative, coiled look.
This detailed pattern creates a durable and stylish bucket hat that’s perfect for sunny days. The sturdy cotton yarn and tight single crochet stitches ensure it will hold its shape. Feel free to customize the colors and patterns to make it uniquely yours!