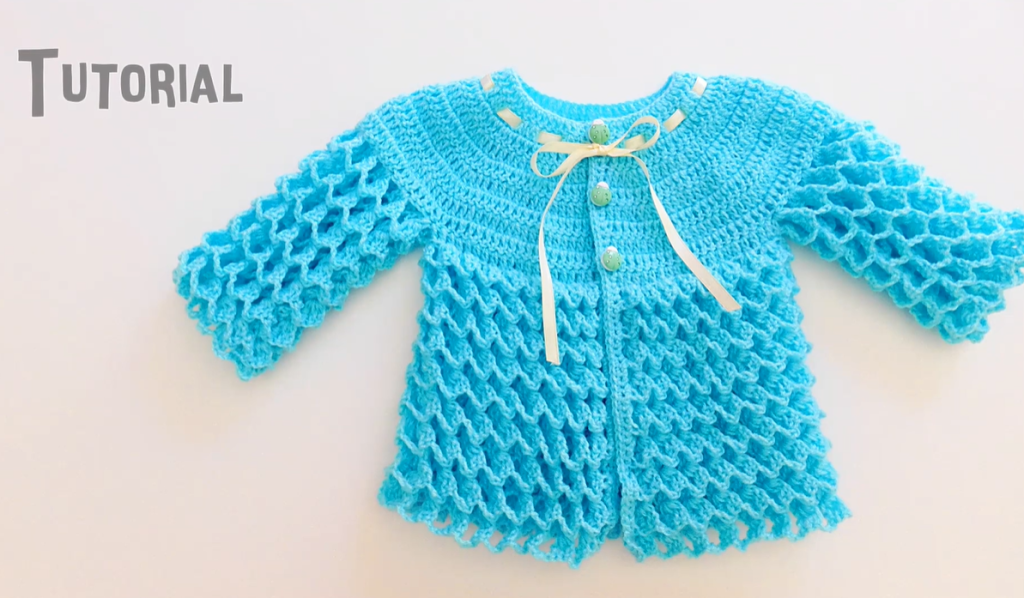
Welcome, fellow makers, to a truly magical crochet project! There’s something so enchanting about a piece that looks complex but is surprisingly manageable. This “Ocean Scales” Baby Cardigan is one of those projects. It features a classic solid yoke and sleeves that flow into a unique, mesmerizing scale-like pattern, giving the cardigan a fairytale-like quality. The stitch used for the body looks like a series of beautiful little shells or scales, making it a perfect piece for a special occasion or everyday wear.
This pattern is designed to be very thorough, breaking down each section from the solid top to the lacy bottom. Get ready to dive into this detailed tutorial and create a stunning and cherished piece for a little one!
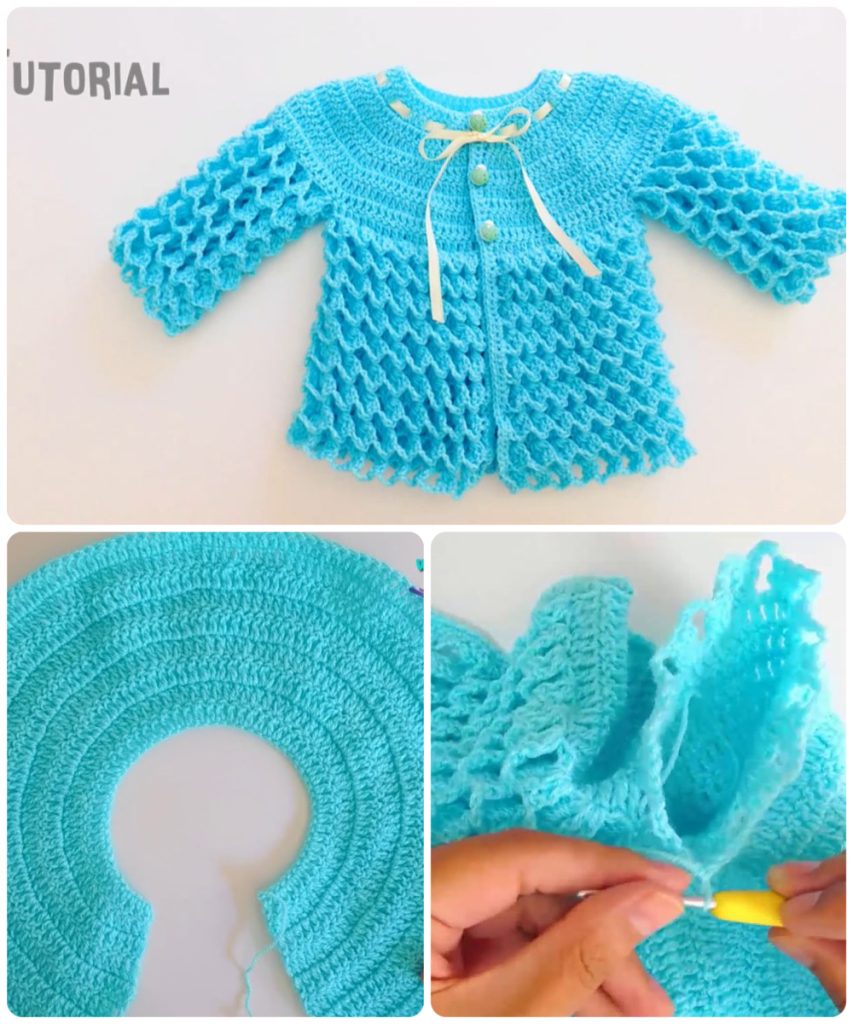
Materials You’ll Need:
- Yarn: Approximately 300-350 yards of DK or light worsted weight (Category 3 or 4) yarn. A soft, vibrant yarn in a color like turquoise or teal works wonderfully with this pattern.
- Crochet Hook: A size G/6 (4.00 mm) hook.
- Buttons: 3 small buttons (about 1/2 inch / 1.5 cm diameter).
- Ribbon: About 1/4 inch wide and 20 inches long.
- Scissors
- Yarn Needle: For weaving in ends, sewing on buttons, and threading the ribbon.
Abbreviations (US Terms):
- ch: chain
- sl st: slip stitch
- sc: single crochet
- hdc: half double crochet
- dc: double crochet
- st(s): stitch(es)
- sk: skip
- sp: space
- rep: repeat
- Rnd: round
- V-st: V-stitch (dc, ch 1, dc) in the same stitch/space
- Sh st: Shell Stitch (2 dc, ch 1, 2 dc) in the same stitch/space
Gauge:
- For the Yoke: 4 rows of hdc and 18 sts = 4 inches (10 cm).
- Finished Yoke Width: Approximately 10 inches (25 cm). This size fits a standard newborn (0-3 months).
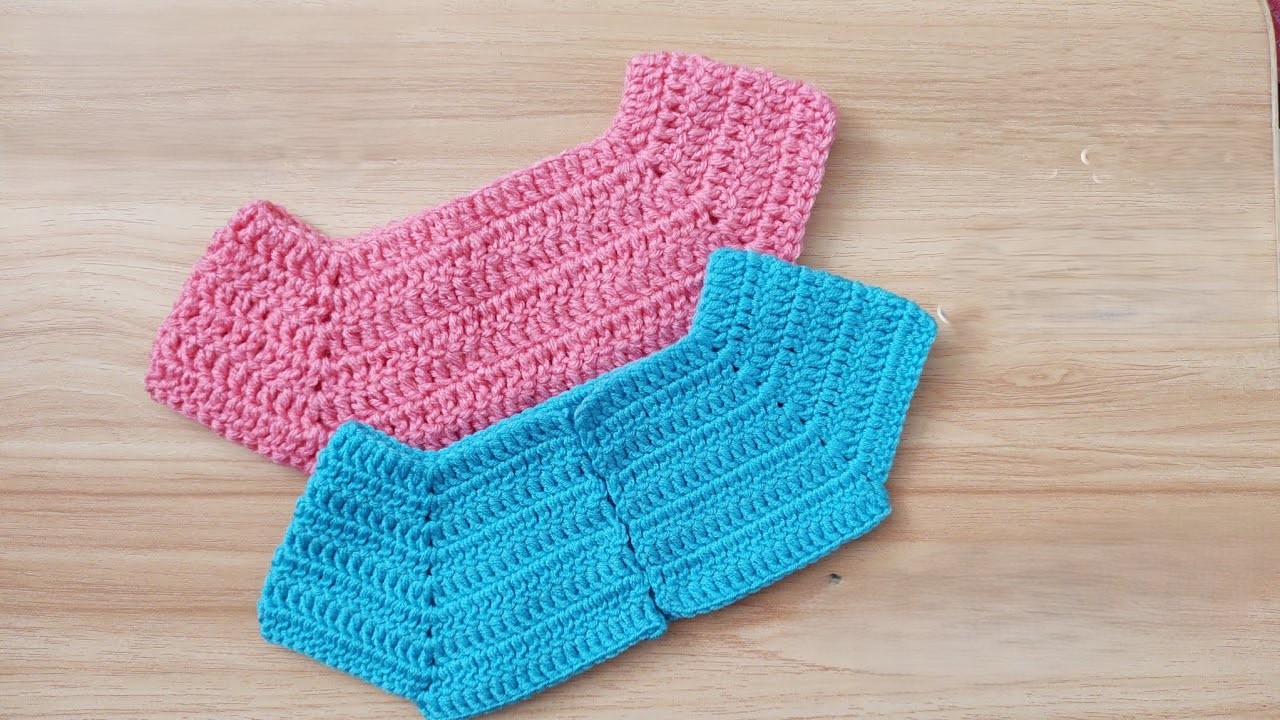
Part 1: The Yoke
We’ll start by working the yoke in rows from the neckline down.

Starting with your yarn and G/6 hook:
- Foundation: Ch 51.
- Row 1 (RS): Hdc in the 2nd ch from the hook and in each ch across. Ch 2 (counts as 1st dc), turn. (50 hdc)
- Row 2 (WS): Dc in the next 7 sts (front panel). * (Dc, ch 2, dc) in the next st (corner increase). * Dc in the next 8 sts (sleeve). Rep from * to *. Dc in the next 14 sts (back). Rep from * to *. Dc in the next 8 sts (sleeve). Rep from * to *. Dc in the remaining 8 sts (front panel). Ch 2 (counts as 1st dc), turn. (58 dc and 4 ch-2 spaces)
- Row 3 (RS): Dc in the next 8 sts. (Dc, ch 2, dc) in the next ch-2 sp. Dc in the next 10 sts. *Rep from * to *. Dc in the next 16 sts. *Rep from * to *. Dc in the next 10 sts. *Rep from * to *. Dc in the remaining 9 sts. Ch 2 (counts as 1st dc), turn. (66 dc and 4 ch-2 spaces)
- Row 4 (WS): Dc in the next 9 sts. (Dc, ch 2, dc) in the next ch-2 sp. Dc in the next 12 sts. *Rep from * to *. Dc in the next 18 sts. *Rep from * to *. Dc in the next 12 sts. *Rep from * to *. Dc in the remaining 10 sts. Ch 2 (counts as 1st dc), turn. (74 dc and 4 ch-2 spaces)
- Row 5 (RS): Dc in the next 10 sts. (Dc, ch 2, dc) in the next ch-2 sp. Dc in the next 14 sts. *Rep from * to *. Dc in the next 20 sts. *Rep from * to *. Dc in the next 14 sts. *Rep from * to *. Dc in the remaining 11 sts. Ch 2 (counts as 1st dc), turn. (82 dc and 4 ch-2 spaces)
- Row 6 (WS): Dc in the next 11 sts. (Dc, ch 2, dc) in the next ch-2 sp. Dc in the next 16 sts. *Rep from * to *. Dc in the next 22 sts. *Rep from * to *. Dc in the next 16 sts. *Rep from * to *. Dc in the remaining 12 sts.
- Row 7 (Joining): Do not turn. Join the two front panels together. Ch 2. Sk the next 18 sts (sleeve), dc in the next 24 sts (back). Ch 2. Sk the next 18 sts (sleeve), dc in the remaining 13 sts (front panel). Fasten off.
Part 2: The Body (Scale Stitch)
Now we’ll work the main body in rows, using the special shell stitch pattern.

Starting with your yarn and G/6 hook:
- Row 1 (RS): Attach yarn to the first dc of the body section. Ch 3 (counts as 1st dc). Dc in the same st. Ch 1, dc in the next 2 sts. Sk 2 sts, (2 dc, ch 1, 2 dc) in the next st (your first shell stitch). Rep from * to * across the body. Your final stitch should be worked into the last dc of the body. Ch 3 (counts as 1st dc), turn.
- Row 2 (WS): Dc in the next dc. Sk the 2 dc from the previous row. (2 dc, ch 1, 2 dc) in the ch-1 sp of the previous shell stitch. Rep from * to * across the row. The final shell stitch should be in the ch-1 sp of the last shell. Dc in the top of the ch 3 from the previous row. Ch 3 (counts as 1st dc), turn.
Repeat Row 2 for a total of 10-12 rows, or until your cardigan is the desired length.
Fasten off and weave in all ends.
Part 3: The Sleeves (Make 2)
The sleeves are worked in the round, using the same scale stitch pattern.

- Round 1: Attach yarn to the center of the armpit. Ch 3 (counts as 1st dc). Dc in the same st. Work (2 dc, ch 1, 2 dc) in the ch-2 sp you created when joining the yoke. Sk 2 dc, (2 dc, ch 1, 2 dc) in the next st. Rep from * to * around the armhole, working stitches evenly. Sl st to the top of the beginning ch 3 to join. Ch 3 (counts as 1st dc), turn.
- Round 2: Dc in the first dc. (2 dc, ch 1, 2 dc) in the ch-1 sp of the previous shell stitch. Rep from * to * around. Sl st to the top of the beginning ch 3 to join. Ch 3 (counts as 1st dc), turn.
Repeat Round 2 for the length of the sleeve. The sleeves in the image are long, but you can adjust to your preference.
Fasten off and weave in your ends. Repeat for the second sleeve.
Part 4: Finishing Touches
Now it’s time to add the final details that make this cardigan so special.

The Button Placket and Neckline:
- Attach yarn to the bottom of the right front panel (when looking at the RS).
- Row 1: Sc evenly up the front panel, around the neckline, and down the other front panel. Sc in each st and a few sc in each ch-2 sp to create a smooth line.
- Row 2 (Buttonholes): Ch 1, turn. Sc in the first few sts. Ch 2, sk 2 sts (this creates a buttonhole), sc in the next several sts. Repeat from * to * for 3 buttonholes, spaced evenly up the front panel. Sc to the end of the row.
- Row 3: Ch 1, turn. Sc in each sc and work 2 sc in each ch-2 sp (to close the buttonholes). Sc around the neckline and down the other front panel.
- Weave the Ribbon: Using your yarn needle, weave the ribbon in and out of the stitches around the neckline, starting at the center back and working your way to the front. Tie a neat bow at the front.
Adding the Buttons:
- Lay the cardigan flat and line up the buttonholes on the right front panel with the corresponding stitches on the left front panel.
- Using your yarn needle, securely sew the buttons in place opposite each buttonhole.
Video tutorial
And there you have it! A beautiful, unique, and handmade baby cardigan, perfect for a little one to wear and cherish. The “Ocean Scales” stitch adds a wonderful touch of texture and whimsy. Enjoy your finished piece!

