 by
by 
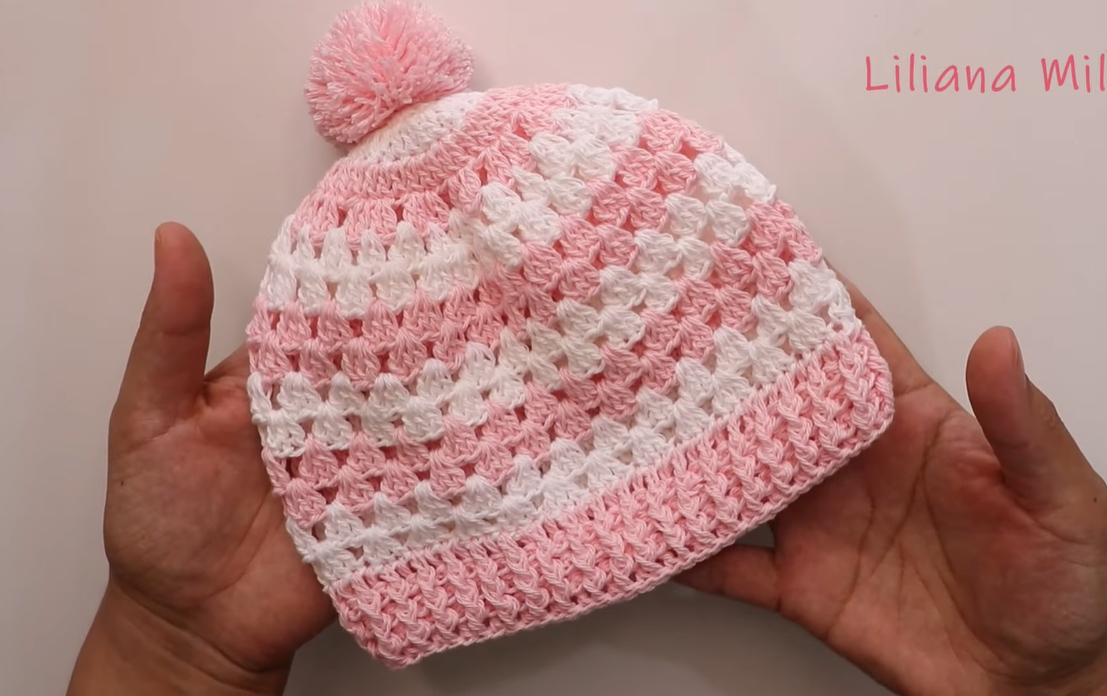
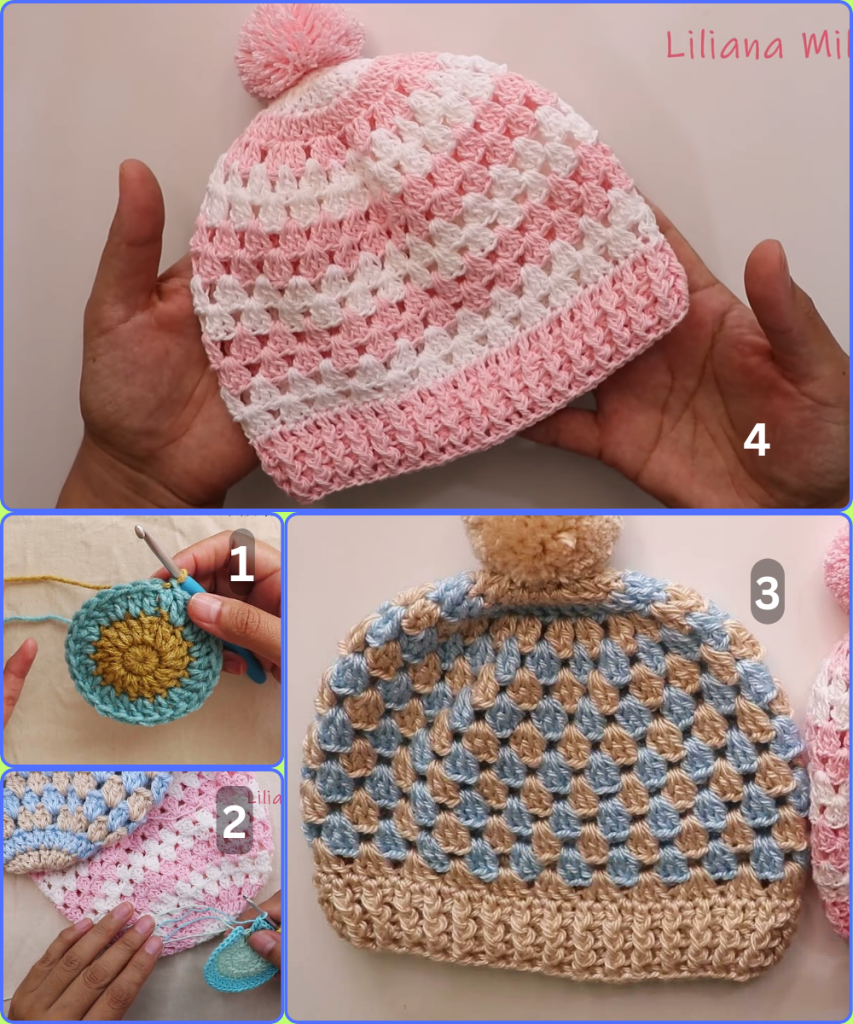
Welcome to a new crochet adventure! Today, we’re going to create the most adorable baby hat, perfect for keeping a little one cozy and stylish. This pattern is designed to be detailed and easy to follow, even if you are a beginner. We’ll be using a simple and classic stitch to create a beautiful, textured fabric. The finished hat will feature sweet stripes and a fluffy pom-pom on top.
Materials You’ll Need:
- Yarn: Worsted weight yarn (Category 4). You will need two colors, one main color (Color A, e.g., pink) and a contrasting color (Color B, e.g., white).
- Crochet Hook: A size H/8 (5.00 mm) hook is recommended. Adjust the size as needed to achieve the correct gauge.
- Scissors
- Yarn Needle: For weaving in ends.
- Pom-Pom Maker (optional): A small to medium size for the pom-pom on top. Alternatively, you can make one by hand.
- Stitch Marker (optional): To help keep track of the beginning of your rounds.
Abbreviations (US Terms):
- ch: chain
- sl st: slip stitch
- sc: single crochet
- dc: double crochet
- st(s): stitch(es)
- sp: space
- rep: repeat
Gauge:
- 14 dc and 8 rows = 4 inches (10 cm) in pattern.
- Checking your gauge is highly recommended to ensure your hat fits correctly. Make a small swatch before you begin.
The Pattern
This pattern is for a baby hat, approximately 6-12 months. The finished hat should have a circumference of about 16-18 inches and a height of about 6-7 inches.
Starting with Color A (Pink)
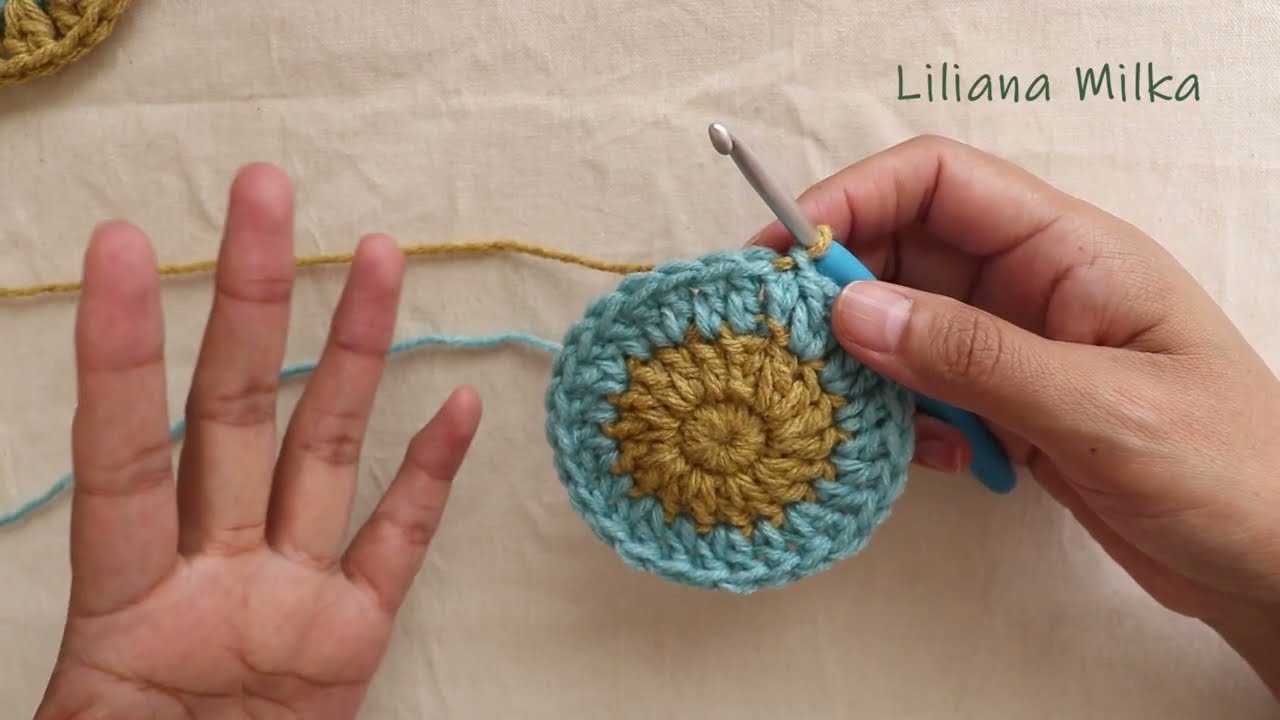
Magic Ring:
- Round 1: Create a magic ring. Ch 3 (counts as first dc). Work 11 more dc into the ring. Sl st to the top of the beginning ch 3 to join. (12 dc)
Increasing for the Crown:
- Round 2: Ch 3 (counts as first dc). Work 1 dc in the same st. Work 2 dc in each st around. Sl st to the top of the beginning ch 3 to join. (24 dc)
- Round 3: Ch 3 (counts as first dc). Work 1 dc in the same st. 1 dc in the next st, 2 dc in the next st. Rep from * to * around. Sl st to the top of the beginning ch 3 to join. (36 dc)
- Round 4: Ch 3 (counts as first dc). Work 1 dc in the same st. 1 dc in each of the next 2 sts, 2 dc in the next st. Rep from * to * around. Sl st to the top of the beginning ch 3 to join. (48 dc)
- Round 5: Ch 3 (counts as first dc). Work 1 dc in the same st. 1 dc in each of the next 3 sts, 2 dc in the next st. Rep from * to * around. Sl st to the top of the beginning ch 3 to join. (60 dc)
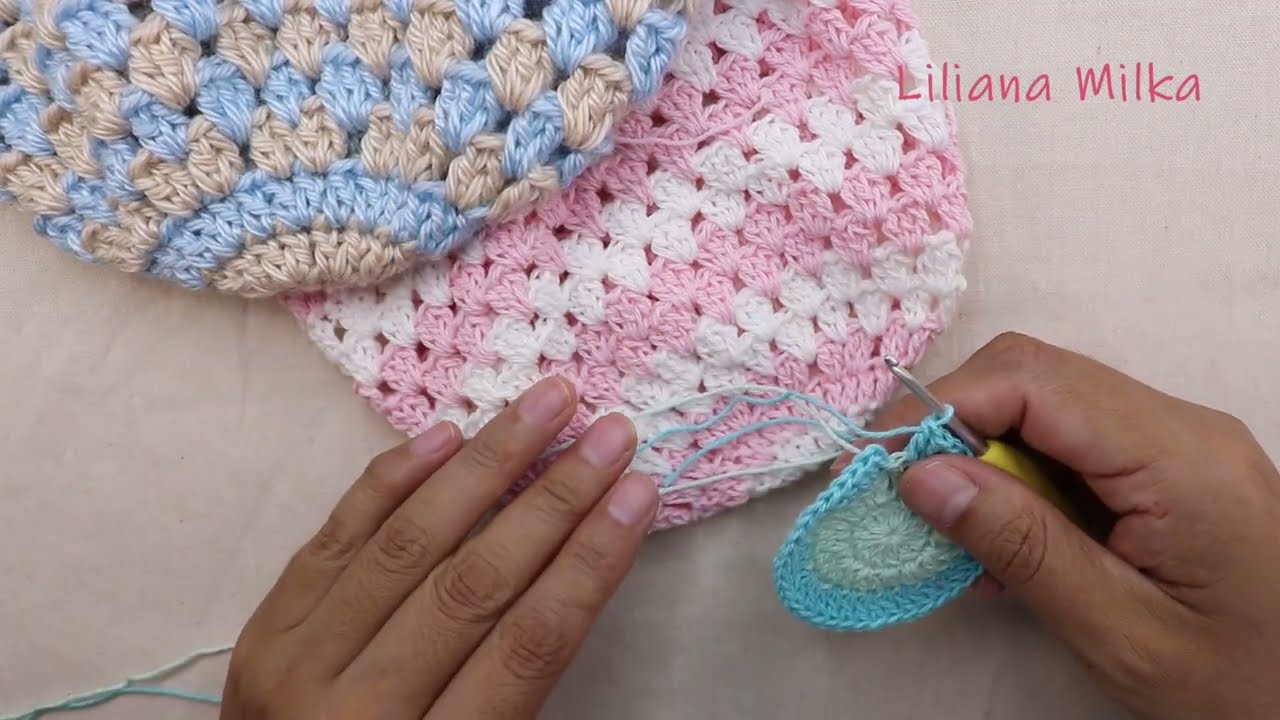
Body of the Hat (Stripes)
Color A (Pink)
- Round 6: Ch 3 (counts as first dc), work 2 dc in the same st. Skip 2 sts. Work 3 dc in the next st, skip 2 sts. Rep from * to * around. Sl st to the top of the beginning ch 3 to join. (20 3-dc clusters)
- Round 7: Ch 3 (counts as first dc), work 2 dc in the first ch-sp. Work 3 dc in the next ch-sp. Rep from * to * around. Sl st to the top of the beginning ch 3 to join. (20 3-dc clusters)
Change to Color B (White)
- Round 8: With new color, sl st into the first ch-sp. Ch 3, work 2 dc in the same ch-sp. Work 3 dc in the next ch-sp. Rep from * to * around. Sl st to the top of the beginning ch 3 to join. (20 3-dc clusters)
- Round 9: Ch 3, work 2 dc in the first ch-sp. Work 3 dc in the next ch-sp. Rep from * to * around. Sl st to the top of the beginning ch 3 to join. (20 3-dc clusters)
Repeat for Stripes:
- Round 10-11: Change back to Color A and repeat Rounds 8-9.
- Round 12-13: Change to Color B and repeat Rounds 8-9.
- Round 14-15: Change back to Color A and repeat Rounds 8-9.
- Round 16-17: Change to Color B and repeat Rounds 8-9.
- Continue repeating these two-round color changes until you reach your desired height, or until you have a total of 17 rounds for the body of the hat.
Ribbing/Brim (using Color A):
- Round 18: Ch 1 (does not count as a stitch). Sc in each st around. Sl st to the first sc to join. (60 sc)
- Round 19: Ch 1 (does not count as a stitch). Sc in each st around. Sl st to the first sc to join. (60 sc)
- Round 20: Ch 1 (does not count as a stitch). Sc in each st around. Sl st to the first sc to join. (60 sc)
Fasten off and weave in all loose ends.
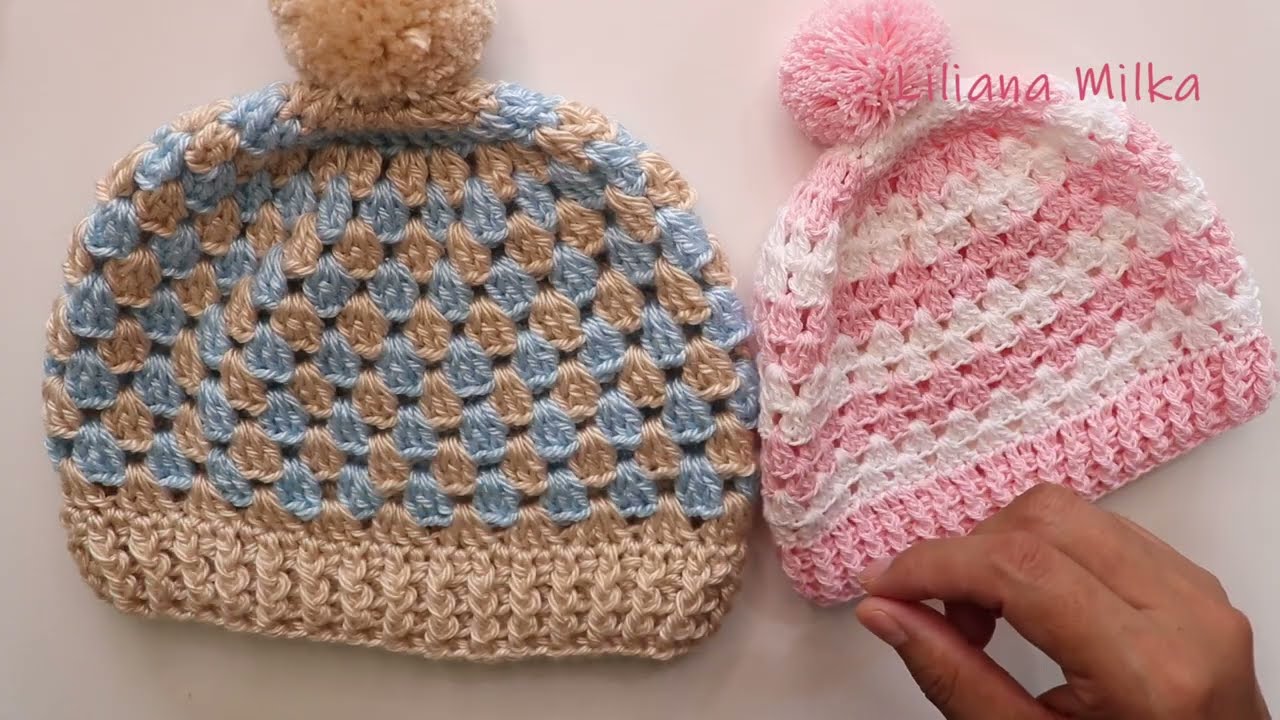
Finishing Touches: The Pom-Pom
- Using Color A, make a pom-pom. A pom-pom maker makes this process easy, but you can also use a small piece of cardboard.
- Once your pom-pom is complete and trimmed to a nice, fluffy sphere, use the two long tails to securely tie it to the top of the hat. Weave the tails to the inside of the hat and tie a double knot to ensure it is secure.
- Weave in any remaining yarn ends from the pom-pom tails.
Video tutorial
Your beautiful, handmade crochet baby hat is now complete! This hat is not only a delightful gift but also a wonderful project to practice color changes and simple stitches. Enjoy your finished piece!