 by
by 
Create a beautiful and stylish yoked garment with this detailed crochet pattern! This guide shows you how to make a charming and versatile yoke for a child’s sweater, blouse, or dress. The unique V-stitch pattern adds a lovely texture and drape to the finished piece. This project is a joy to make and is the perfect starting point for a handmade outfit.
Skill Level: Intermediate
This pattern uses a combination of simple stitches to create a more intricate design. You should be familiar with basic stitches and shaping techniques. The most important part of this project is using your measurements to ensure a proper fit.
Finished Size (Approximate):
- Size: This pattern is designed for a newborn, but it can be adapted for any size.
- Important: This pattern relies on measurements, not stitch counts. The final size will be determined by your yarn thickness and the measurements you follow.
Materials You’ll Need:
- Yarn: A yarn of your choice. The video uses a 2mm thick yarn for a newborn size.
- Crochet Hook: A 3.0 mm crochet hook.
- Scissors
- Yarn Needle: For weaving in ends.
- Tape Measure: To check your measurements and ensure the correct fit.
- Stitch Markers (Optional): To mark key stitches or pattern repeats.
Gauge:
This project is less about gauge and more about measurements. However, achieving a consistent tension is still important for a neat and professional look. The finished fabric should be firm enough to hold its shape but not so tight that it feels stiff. Always crochet a small swatch to check your tension and adjust your hook size if needed.
Measurements You’ll Need:
- Head Circumference: For a newborn, this is approximately 12.6 inches (32 cm).
- Chest Circumference: For a newborn, this is approximately 15 inches (38 cm).
- Armhole Depth: For a newborn, this is approximately 3.1 – 3.3 inches (8 – 8.5 cm).
Abbreviations (US Crochet Terms):
- ch: chain
- sl st: slip stitch
- dc: double crochet
- V-st: V-stitch (dc, ch 1, dc) in the same stitch.
- st(s): stitch(es)
- FO: Fasten off
Let’s Crochet Your Yoke!
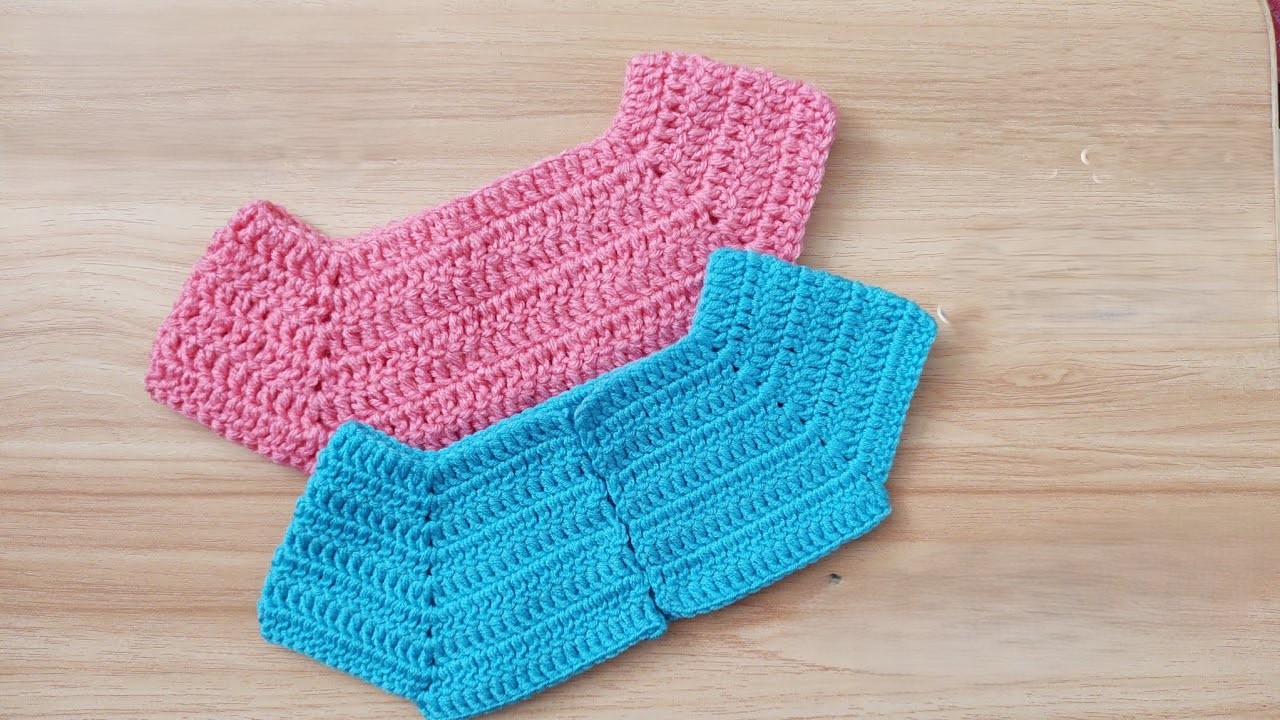
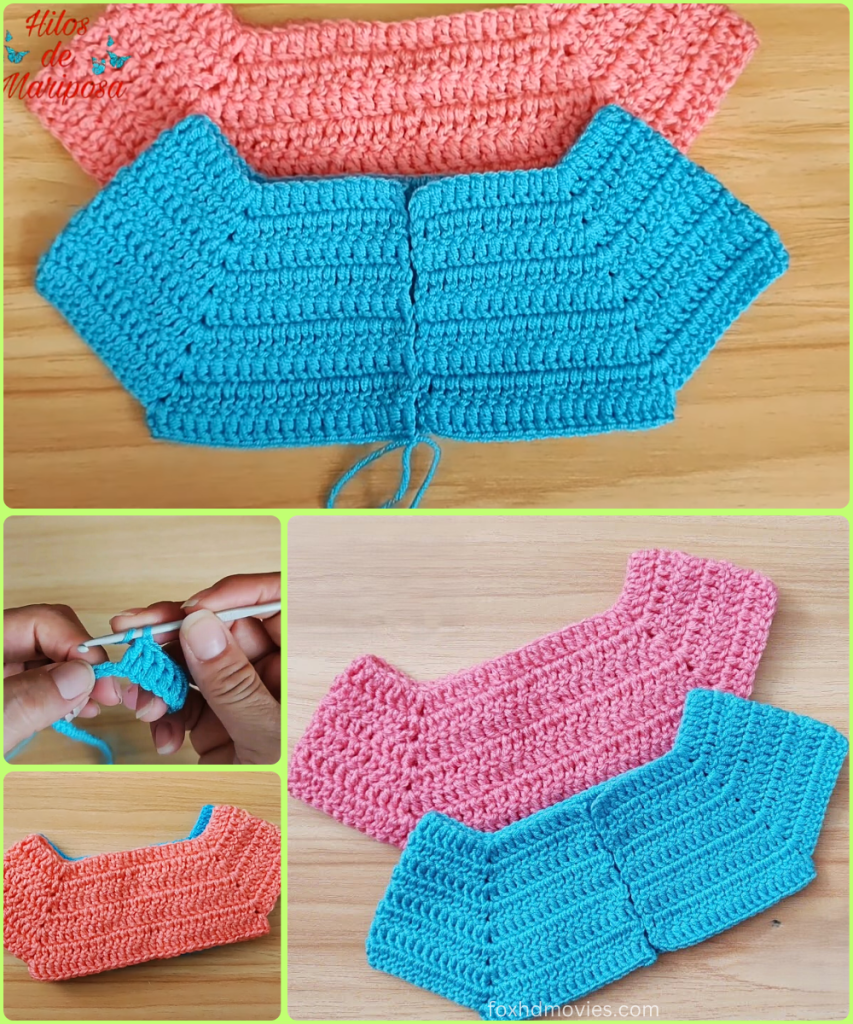
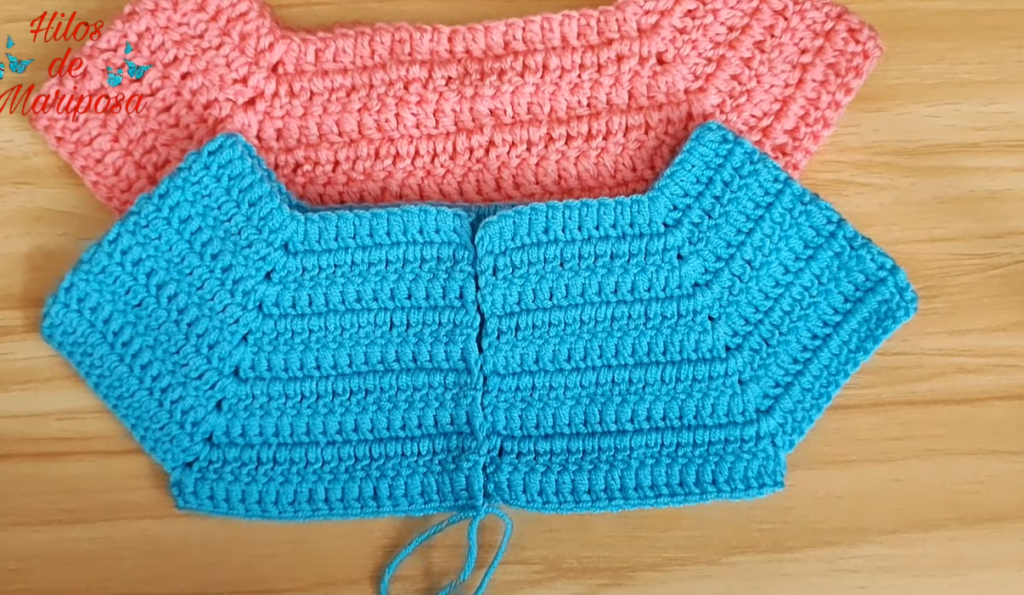
This yoke is worked in rows, creating a flat piece that is later joined to form the round shape of the top of the garment.
Part 1: The Foundation Chain & First Round
- Start: Ch a number of stitches to equal your head circumference measurement. For a newborn, this is approximately 67 stitches.
- Row 1: The pattern begins with a series of V-stitches. You will divide your stitches to form the front, back, and sleeves. For a newborn, the division is as follows:
- 10 stitches for the first front side.
- 13 stitches for the first sleeve.
- 20 stitches for the back.
- 13 stitches for the second sleeve.
- 10 stitches for the second front side.
- You will also add four additional stitches at the corners where increases will be made.

Part 2: The Yoke Pattern & Shaping
- Continue the Pattern: For the following rounds, you will work a V-stitch in the ch-1 space of each V-stitch from the previous round. This creates the open, lacy pattern.
- Make Increases: To ensure the yoke expands correctly, you will continue to make increases at the corners. For each corner, you will work an increase (two V-stitches in the same chain space).
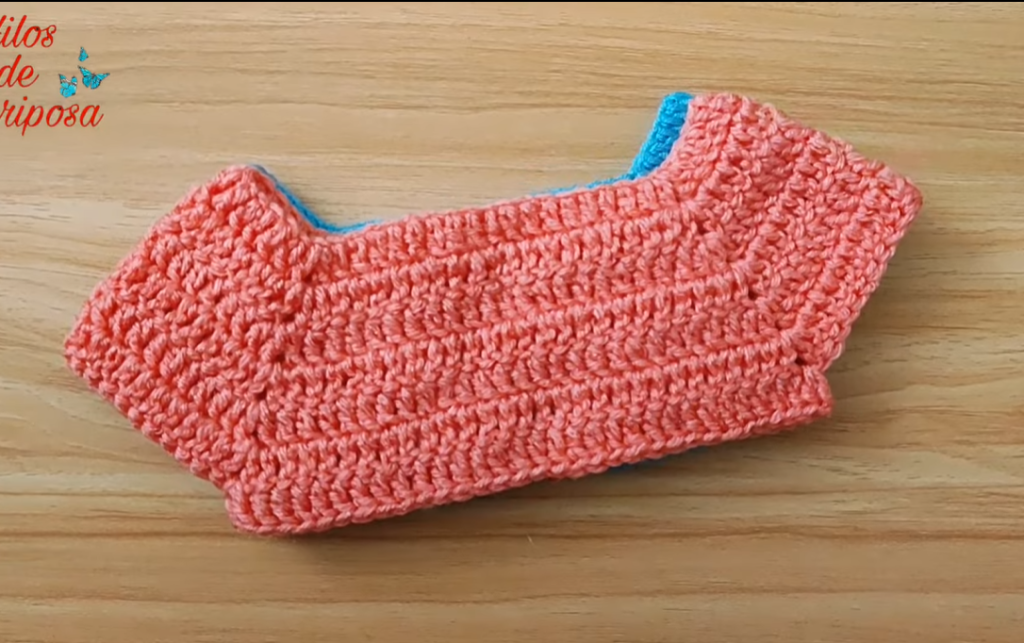
Part 3: Forming the Armholes
After crocheting until your armhole depth measurement is reached, you will join the front and back sections to create the armholes.
- Divide and Join: You will fold the yoke in half. Using a chain stitch, you will join the two sides of the yoke.
- Continue Working: After joining, you will continue working in rounds, creating the base for the body of the garment.
Video tutorial
Versatile Uses for Your Yoke:
- Dress: The yoke can be used as the top part of a dress.
- Sweater: You can continue crocheting the body to create a comfortable sweater.
- Tunic: A longer body can be added to create a tunic.
Customization & Tips:
- Size Adjustment: To create a larger or smaller yoke, simply follow the measurements for the desired size. You can also adjust your yarn thickness and hook size, as long as your finished dimensions match the required measurements.
- Yarn Choice: Experiment with different yarn types and colors. A solid color would look classic, while a variegated yarn would create a fun, striped effect.
- Decoration: You can add a small crocheted flower, a ribbon, or a different kind of embellishment for a personalized touch.
Enjoy crocheting your own beautiful, practical, and unique yoke! It’s a fantastic way to create a personalized accessory that’s sure to become a favorite.