 by
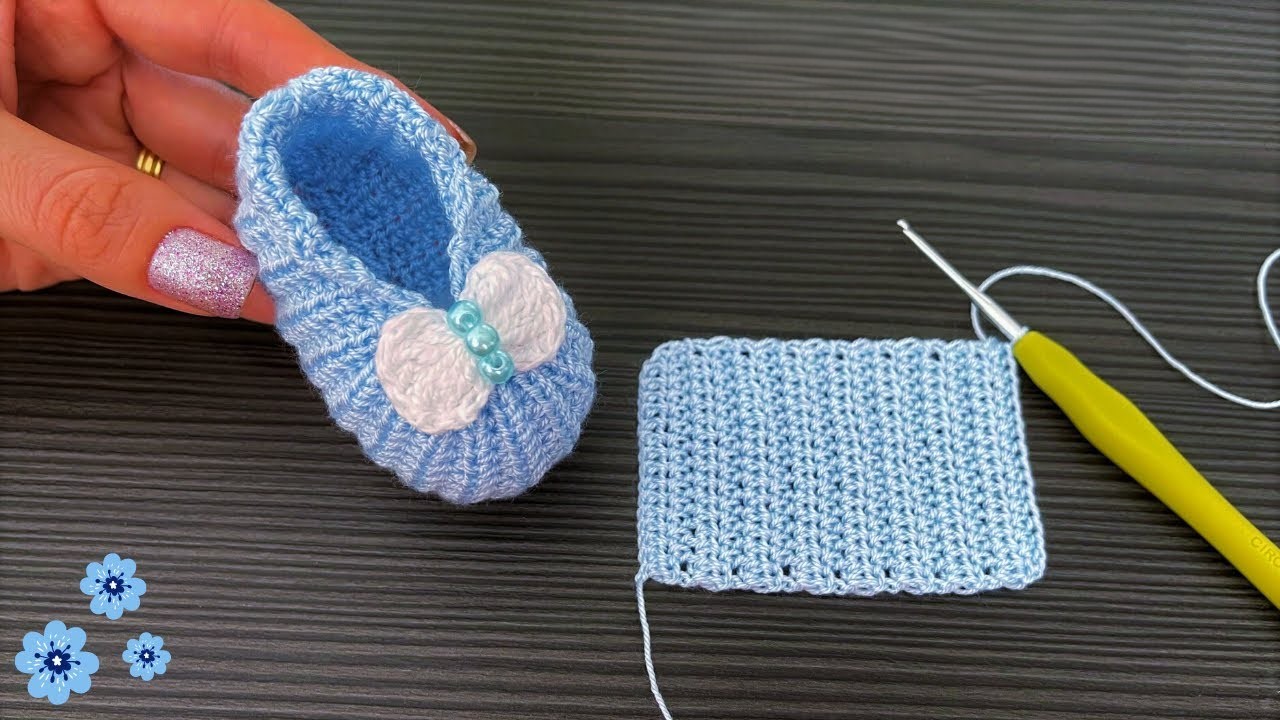
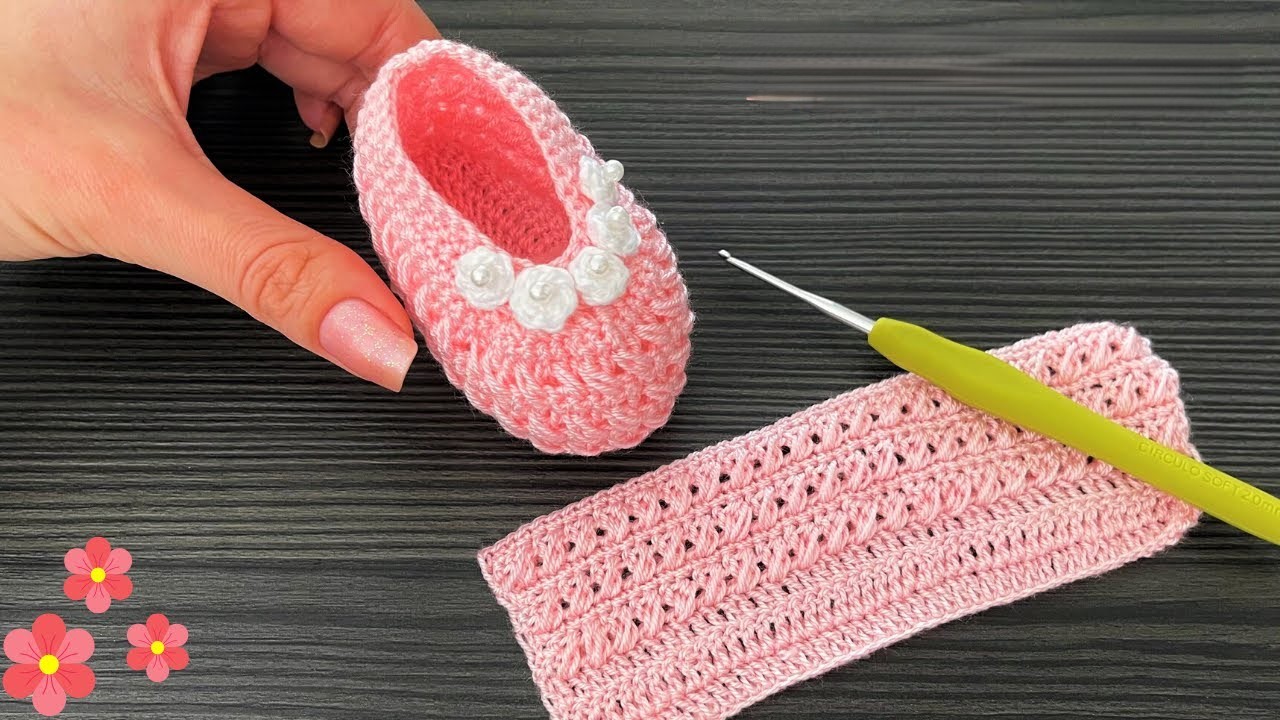
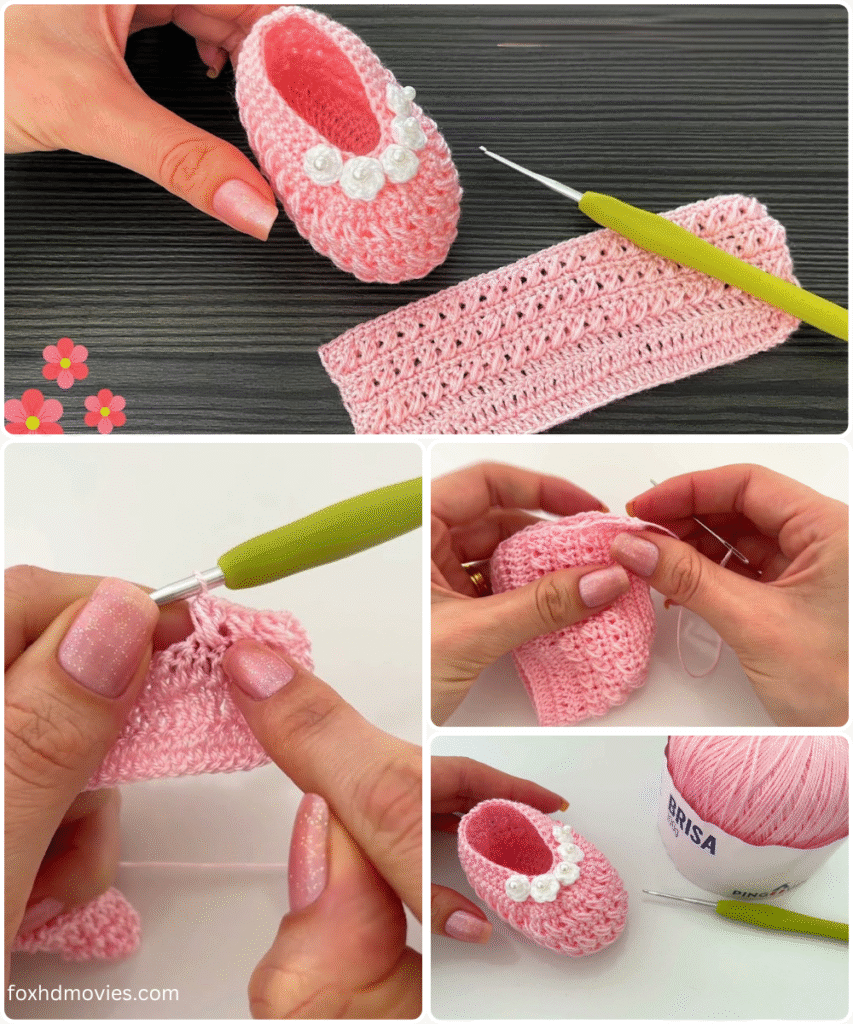
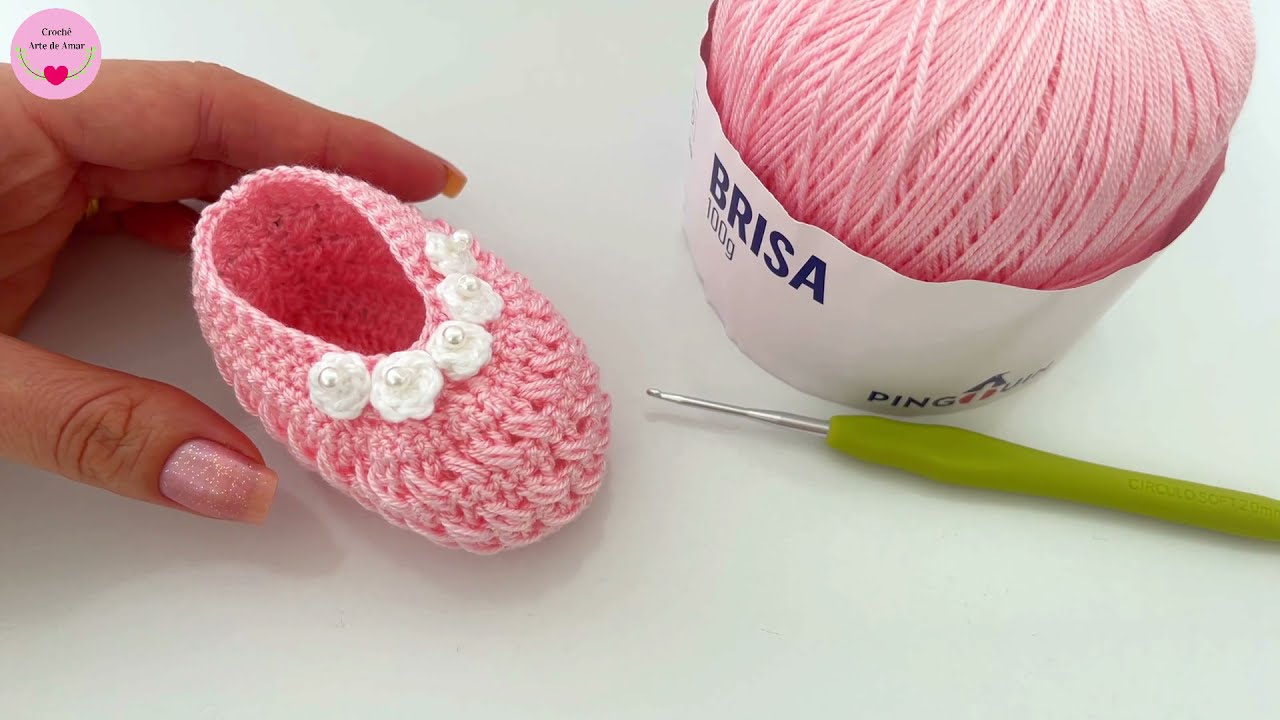
by These charming handmade baby slippers are simply too cute to resist! Featuring a delightful texture created by rows of subtle puff stitches, and adorned with three dainty white flowers, these slippers are perfect for keeping tiny toes cozy and stylish. The construction is straightforward, making it a rewarding project for crocheters of various skill levels.

This pattern is suitable for intermediate crocheters, or confident beginners comfortable with basic stitches, learning a new textured stitch, and simple seaming.
Yarn:
- DK (Double Knit) or Light Worsted Weight yarn in Pink (Main Color), as pictured. Choose a soft, machine-washable baby-friendly yarn like acrylic or a cotton blend.
- Small amount of DK or Light Worsted Weight yarn in White (Contrast Color) for the flowers.
Hook:
- 3.5 mm (US E/4) crochet hook (adjust hook size if necessary to achieve desired fabric and tension).
Notions:
- Tapestry needle for seaming and weaving in ends
- Scissors
- 3 small decorative pearls or beads (for the center of each flower, as pictured).
Gauge (Important for Sizing!):
- For the textured pattern: A 2-stitch repeat (SC, Puff St) should measure approximately 0.75 inches (2 cm) wide, and 2 rows of the pattern should measure about 0.75 inches (2 cm) tall.
- Always make a small swatch to check your gauge, as it’s crucial for the finished size of the slippers!
Size:
- Newborn to 3 months (approximately 3.75 – 4 inches / 9.5-10 cm sole length when finished).
- To adjust for larger sizes, you will need to increase the starting chain for the sole and add more rows for both the sole and the upper sections, ensuring the stitch pattern repeats are maintained.
Abbreviations (US Crochet Terms):
- Ch: Chain
- Sl St: Slip Stitch
- SC: Single Crochet
- HDC: Half Double Crochet
- DC: Double Crochet
- St(s): Stitch(es)
- Sk: Skip
- FO: Fasten Off
- PS (Puff Stitch): [Yo, insert hook into st, Yo, pull up a loop] 3 times in same st (7 loops on hook). Yo, pull through all 7 loops on hook. (This creates a soft puff. Do NOT chain 1 to close the puff unless otherwise specified, as the next stitch will secure it).
Pattern Instructions:
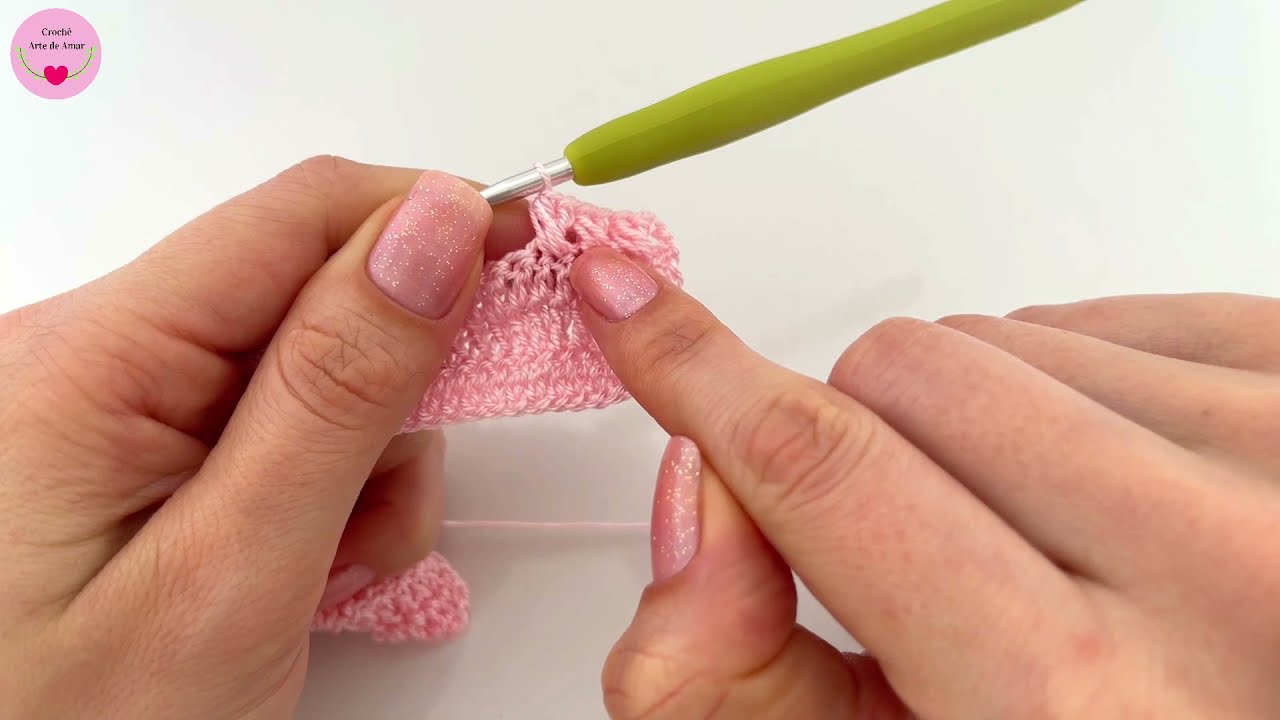
These slippers are made in two main parts: the sole and the main body/upper, which is then shaped and seamed. The image shows the body as a long, flat piece with the lovely textured pattern.
Part 1: The Sole (Main Color – Pink)
The sole is worked in continuous rounds to create an oval shape.
- Ch 14.
- Round 1: SC in 2nd Ch from hook. SC in next 11 Ch. 3 SC in last Ch. (Work around the end of the chain). Working along the other side of the starting chain: SC in next 11 Ch. 2 SC in the very last Ch (this is the same ch as your very first SC). Sl St to first SC to join. (28 SC)
- Round 2: Ch 1 (does not count as a stitch). 2 SC in first SC. SC in next 11 SC. 2 SC in next 3 SC. SC in next 11 SC. 2 SC in last 2 SC. Sl St to first SC to join. (34 SC)
- Round 3: Ch 1. 2 SC in first SC. SC in next 13 SC. 2 SC in next 3 SC. SC in next 13 SC. 2 SC in last 2 SC. Sl St to first SC to join. (40 SC)
- This completes the flat sole. FO, leaving a long tail for sewing the sole to the upper later.
Part 2: The Slipper Body/Upper (Main Color – Pink)
This section is worked flat in rows, creating the textured pattern. The flat piece in the image is quite rectangular, with slight tapering towards one end.
- Ch 28. (This chain will form the main length of the slipper’s body, including the toe and top of the foot).
- Row 1 (RS): SC in 2nd Ch from hook. SC in each Ch across. (27 SC). Ch 1, turn.
- Row 2 (WS – Puff Stitch Row): SC in first SC. PS in next SC, SC in next SC. Repeat from * to * across the row. Your last stitch should be an SC. (13 PS, 14 SC). Ch 1, turn.
- Row 3 (RS): SC in each SC and on top of each PS across. (27 SC). Ch 1, turn.
- Row 4 (WS – Puff Stitch Row – Offset): PS in first SC. SC in next SC (on top of previous PS), PS in next SC. Repeat from * to * across the row. Your last stitch should be a PS. (14 PS, 13 SC). Ch 1, turn.
- Row 5 (RS): SC in each PS and SC across. (27 SC). Ch 1, turn.
- Repeat Rows 2-5 two more times. You will have 3 full repeats of the puff stitch pattern (Rows 2-13).

Shaping the Toe End: The flat piece in the image shows a slight tapering at one end. We’ll incorporate a few decreases here.
- Row 14 (WS – Puff Stitch Row with Decreases): SC in first SC. PS in next SC, SC in next SC. Repeat from * to * until 3 stitches remain. PS in next SC. SC2tog over last 2 SC. (13 PS, 13 SC, 1 SC2tog = 27 sts total for the row). Ch 1, turn.
- Row 15 (RS): SC in each SC/PS/SC2tog across. (26 SC). Ch 1, turn.
- Row 16 (WS – Puff Stitch Row with Decreases): PS in first SC. SC in next SC, PS in next SC. Repeat from * to * until 3 stitches remain. SC in next SC. PS in next SC. SC2tog over last 2 SC. (13 PS, 12 SC, 1 SC2tog = 26 sts total for the row). Ch 1, turn.
- Row 17 (RS): SC in each PS/SC/SC2tog across. (25 SC). Ch 1, turn.
- Row 18 (WS – Final Puff Stitch Row): SC in first SC. PS in next SC, SC in next SC. Repeat from * to * until 2 stitches remain. PS in next SC. SC in last SC. (12 PS, 13 SC). Ch 1, turn.
- Row 19 (RS – Final Row): SC in each SC and PS across. (25 SC). FO, leaving a long tail for seaming.
Part 3: The Flowers (Contrast Color – White)
Make 3 flowers as pictured.
- Ch 2.
- Petals: Work (Sl St, Ch 2, 2 DC, Ch 2, Sl St) all into the 2nd Ch from hook. Repeat 4 more times into the same 2nd Ch from hook. (5 petals total).
- FO, leaving a short tail for weaving in.
- Each flower should look like a small, flat rosette.
Video tutorial
Finishing Your Slipper:
- Weave in all initial loose ends on the sole and the body piece.
- Seaming the Slipper Body:
- Take the long textured piece. Fold it in half lengthwise, bringing the two long edges together.
- Using your tapestry needle, whip stitch or mattress stitch the long side seam closed. This forms the tube shape of the upper. This will be the center back of the slipper.
- Attaching Upper to Sole:
- With the RS of your sole facing you, align the long seamed edge of the textured upper to the perimeter of the sole.
- The starting chain edge of the textured piece will be the top front of the bootie. The tapered end will be the toe.
- Using your tapestry needle and the long tail from the sole, securely whip stitch or mattress stitch the upper to the sole, working all the way around the oval. Ensure the upper is centered evenly on the sole.
- Closing the Toe:
- With your tapestry needle, gather the remaining stitches at the tapered end of the upper (which is now the front tip of the slipper). Pull tight to close the toe opening. Stitch securely to reinforce.
- Attach Flowers:
- Sew one small pearl or bead to the center of each white flower.
- Position the three completed flowers decoratively on the top front of the slipper, as shown in the image. Securely stitch each flower to the slipper.
- Make a Second Slipper: Repeat all steps to create a matching pair!
And there you have it! Beautiful, textured, and handmade baby slippers, perfect for a precious little one.
Happy crocheting!