 by
by 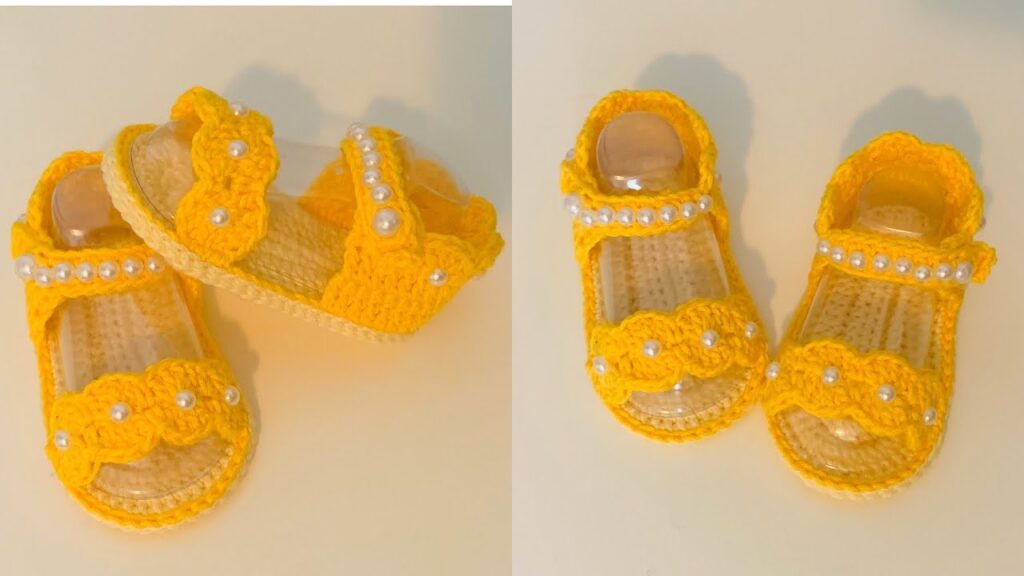
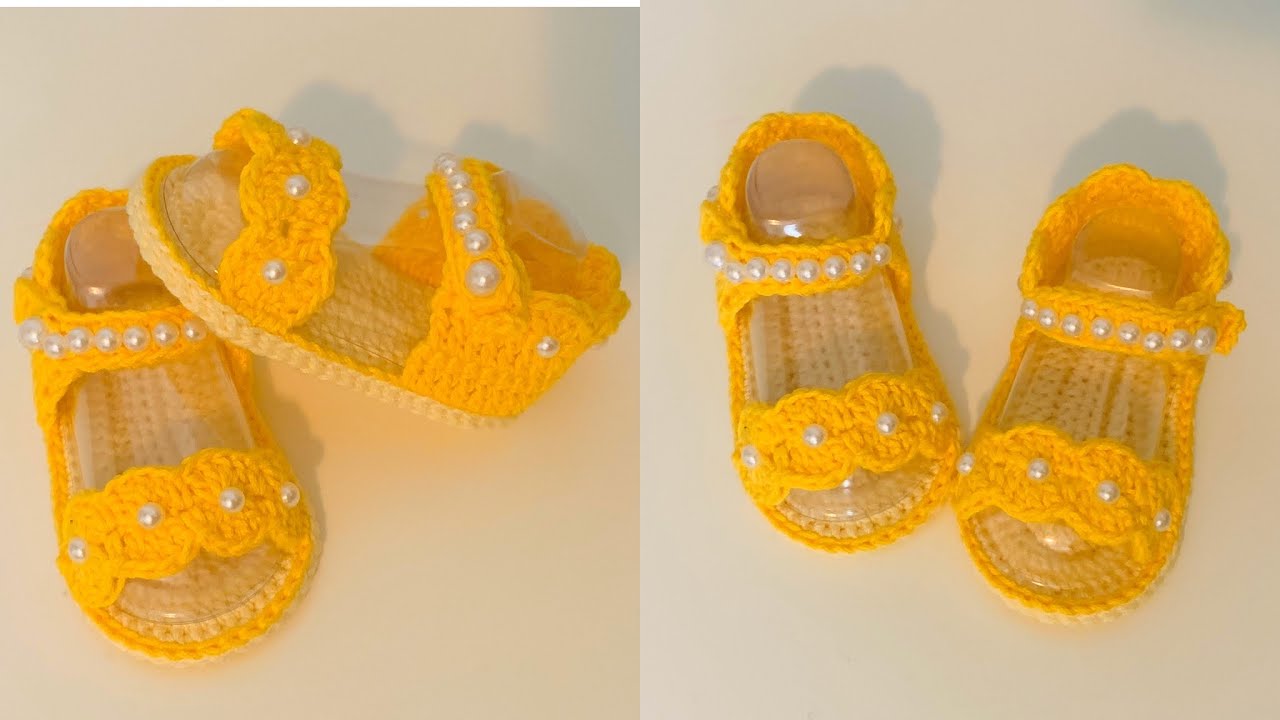
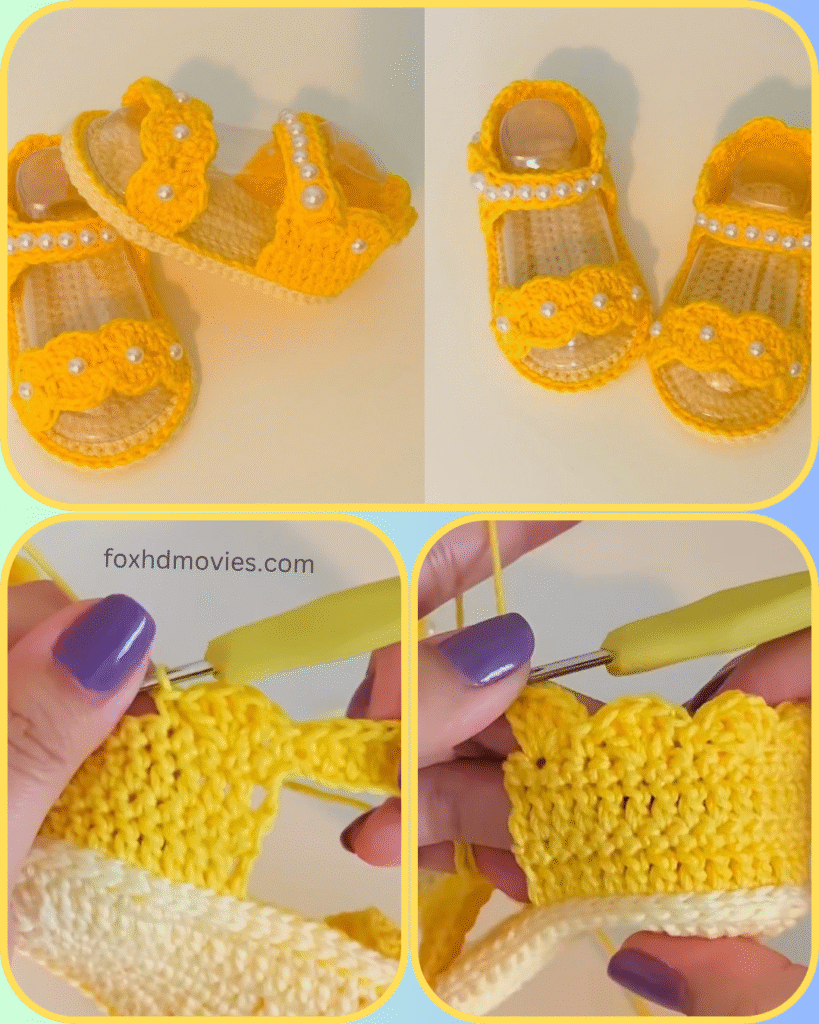
Get ready to melt hearts with these absolutely adorable crochet baby sandals! Perfect for summer, these little sandals feature a charming braided detail and are embellished with delicate pearls, making them a truly special accessory for any little one.
This pattern is designed for beginners comfortable with basic crochet stitches. Let’s make some sunshine for tiny feet!
Skill Level: Easy
Sizes: 0-3 months (approx. 3.5 inches / 9 cm sole length) (Note: You can adjust the starting chain for the sole to make them bigger or smaller. See “Sizing Up/Down” notes below)
Materials:
- DK weight yarn (approximately 50-70 yards) in yellow or your preferred color
- Crochet hook: 3.0mm (or size needed to obtain gauge for a firm fabric)
- Small pearl beads (approximately 6mm-8mm) – you’ll need about 10-12 per sandal
- Tapestry needle for weaving in ends and attaching pearls
- Scissors
- Stitch markers (optional, but helpful for sole rounds)
Gauge: Not critical for this project, but aim for a firm fabric so the sandals hold their shape.
Abbreviations (US Crochet Terms):
- ch: chain
- sl st: slip stitch
- sc: single crochet
- hdc: half double crochet
- dc: double crochet
- st(s): stitch(es)
- BLO: back loop only
- sc2tog: single crochet 2 together (decrease)
- dc2tog: double crochet 2 together (decrease)
Pattern Notes:
- The sandal is worked from the sole up.
- The sole is worked in continuous rounds. Use a stitch marker for the beginning of each round if needed.
- Ch 1 at the beginning of a row/round does NOT count as a stitch.
- Ch 2 at the beginning of a row/round does NOT count as a stitch.
Instructions:
Sandal Sole (Make 2)
- Ch 13.
- Round 1: 2 hdc in 2nd ch from hook, hdc in next 10 ch, 5 hdc in last ch. Working down the other side of the chain: hdc in next 10 ch, 2 hdc in last ch. Join with sl st to first hdc. (30 hdc)
- Round 2: Ch 1. 2 hdc in first 2 sts, hdc in next 10 sts, 2 hdc in next 5 sts, hdc in next 10 sts, 2 hdc in last 2 sts. Join with sl st to first hdc. (44 hdc)
- Round 3: Ch 1. Sc in BLO in each st around. Join with sl st to first sc. (44 sc) This creates a defined edge for the sole.

Upper Part of Sandal
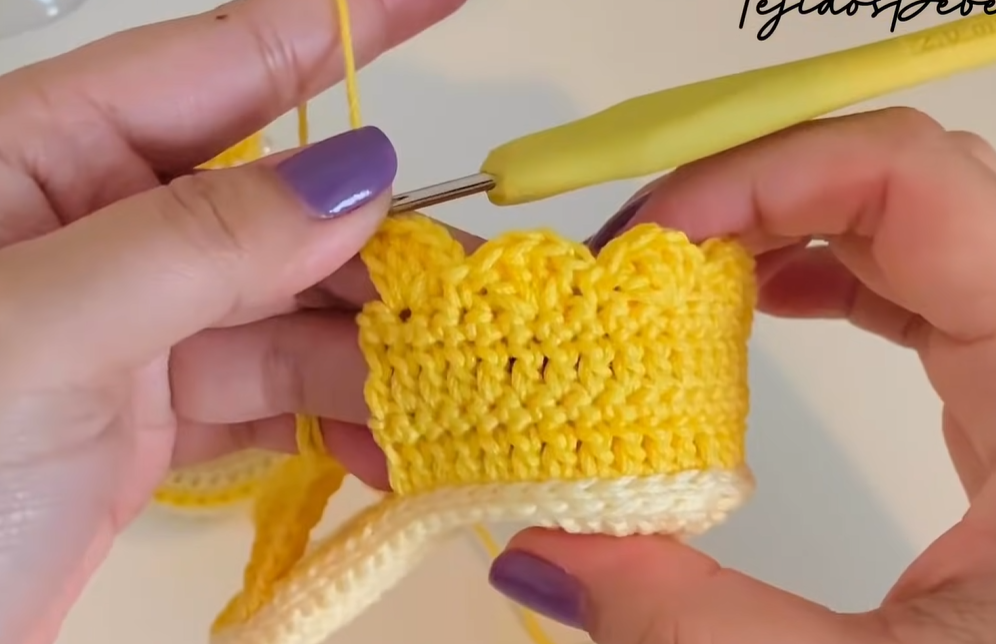
Toe Strap:
- Row 1: Ch 1, turn. Sc in first 5 sts. (5 sc)
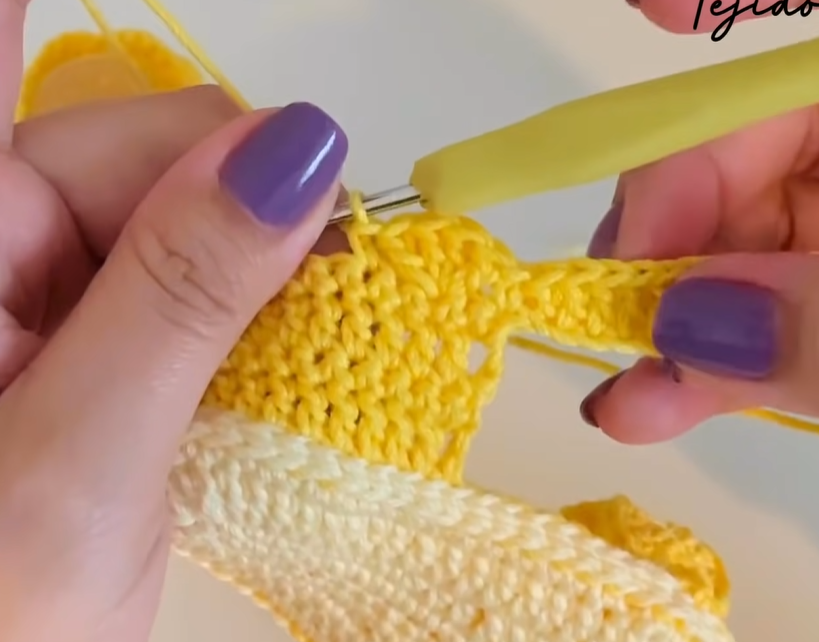
- Row 2 (Braided Detail – 3-strand technique): Ch 1, turn. Sc in first st.
- Work a treble crochet (tr) into the 3rd sc of the previous row (Row 1). This is the first “strand”.
- Sc in next st (this is the 2nd sc of the current row).
- Work a tr into the 2nd sc of the previous row (Row 1). This is the second “strand”.
- Sc in next st (this is the 4th sc of the current row).
- Work a tr into the 1st sc of the previous row (Row 1). This is the third “strand”.
- Sc in last st. (5 sc and 3 tr interwoven – this creates the braid effect).
- Row 3: Ch 1, turn. Sc in each st across. (5 sc)
- Attach to Sole: Fold the sole in half to find the center front. Place the toe strap over the front of the sole. With the tapestry needle and matching yarn, or with your hook and sl sts, securely sew/sl st the toe strap to the sole, centering it.

Ankle Straps:
- First Ankle Strap (Right side of right sandal / Left side of left sandal):
- From the sole, count back approximately 4-5 stitches from where the toe strap is attached on one side. Join yarn.
- Row 1: Ch 1. Sc in the same st and next 3 sts. (4 sc)
- Row 2: Ch 1, turn. Sc in each st across. (4 sc)
- Repeat Row 2 until the strap measures long enough to reach across the foot to the other side, approximately 2.5 – 3 inches (6-7.5 cm).
- Fasten off, leaving a long tail for sewing.
- Second Ankle Strap (Left side of right sandal / Right side of left sandal):
- Join yarn on the opposite side of the sole, mirroring the placement of the first strap.
- Row 1: Ch 1. Sc in the same st and next 3 sts. (4 sc)
- Row 2: Ch 1, turn. Sc in each st across. (4 sc)
- Repeat Row 2 for 2-3 rows less than the first strap (this side will be sewn into the heel).
- Fasten off, leaving a long tail.
Heel Strap:
- Find Center Back: Fold the sole in half to find the center back.
- Row 1: Ch 1, join yarn in the center back. Sc in same st and next 7 sts. (8 sc)
- Row 2: Ch 1, turn. Sc in each st across. (8 sc)
- Row 3: Ch 1, turn. Sc in first 2 sts, sc2tog, sc2tog, sc in last 2 sts. (6 sc)
- Row 4: Ch 1, turn. Sc in each st across. (6 sc)
- Attach Ankle Straps: Position the heel strap and the two ankle straps around the baby’s foot or a small baby shoe form to ensure proper fit.
- Sew the longer ankle strap to the outside of the heel strap.
- Sew the shorter ankle strap to the inside of the heel strap.
- Securely sew the heel strap ends to the sole, aligning them with where the ankle straps join.
Finishing:
- Edging (Optional but recommended for a polished look): Ch 1, sc evenly around the entire top edge of the sandal (around the straps and sole opening). Sl st to join. Fasten off.
- Attach Pearls: Using your tapestry needle and matching yarn (or clear fishing line for a more invisible look), sew the pearl beads onto the toe strap and the front ankle strap. Distribute them evenly and securely.
- Weave in all remaining loose ends.
Sizing Up/Down:
- For 0-3 Months (as written): Ch 13 for the sole.
- For 3-6 Months (approx. 4 inches / 10 cm): Ch 15 for the sole, then follow the increase pattern for the sole. You might also need to add a row or two to the length of the toe strap and ankle straps.
- For 6-9 Months (approx. 4.5 inches / 11.5 cm): Ch 17 for the sole, then follow the increase pattern. Adjust strap lengths as needed.
To adjust sole increases: For a larger sole, continue the increase pattern from Round 2. For example, in Round 3, you’d increase by making 2 hdc in the first 2 sts, hdc across the side, 2 hdc in the toe section, hdc across, and 2 hdc in the heel. Always end with an “in BLO” sc round to create the ridge.
Video tutorial
There you have it! Your adorable crochet baby sandals are ready for tiny feet. These make wonderful gifts and are sure to be cherished.
Happy Crocheting! Share your finished sandals in the comments below!