 by
by 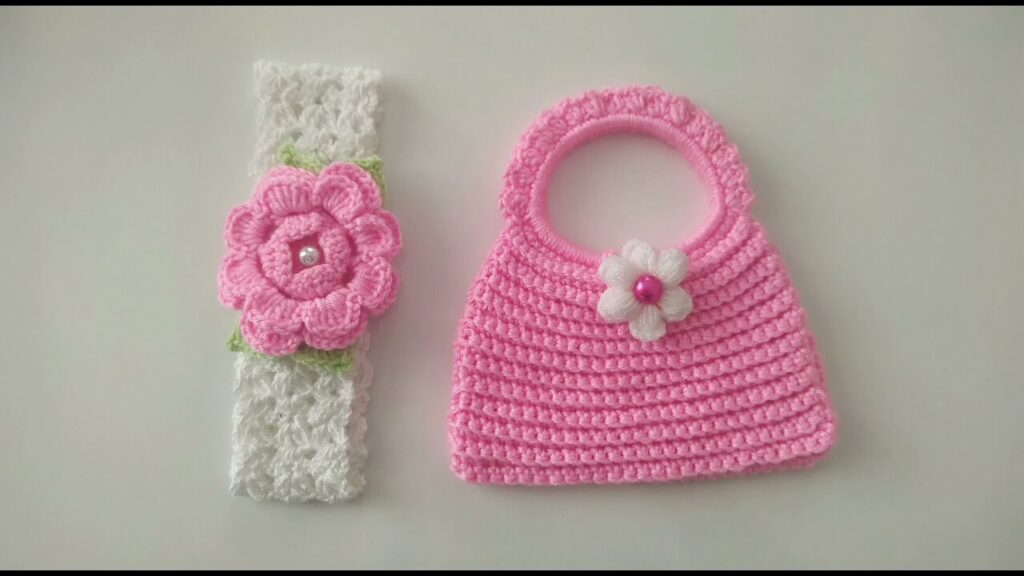
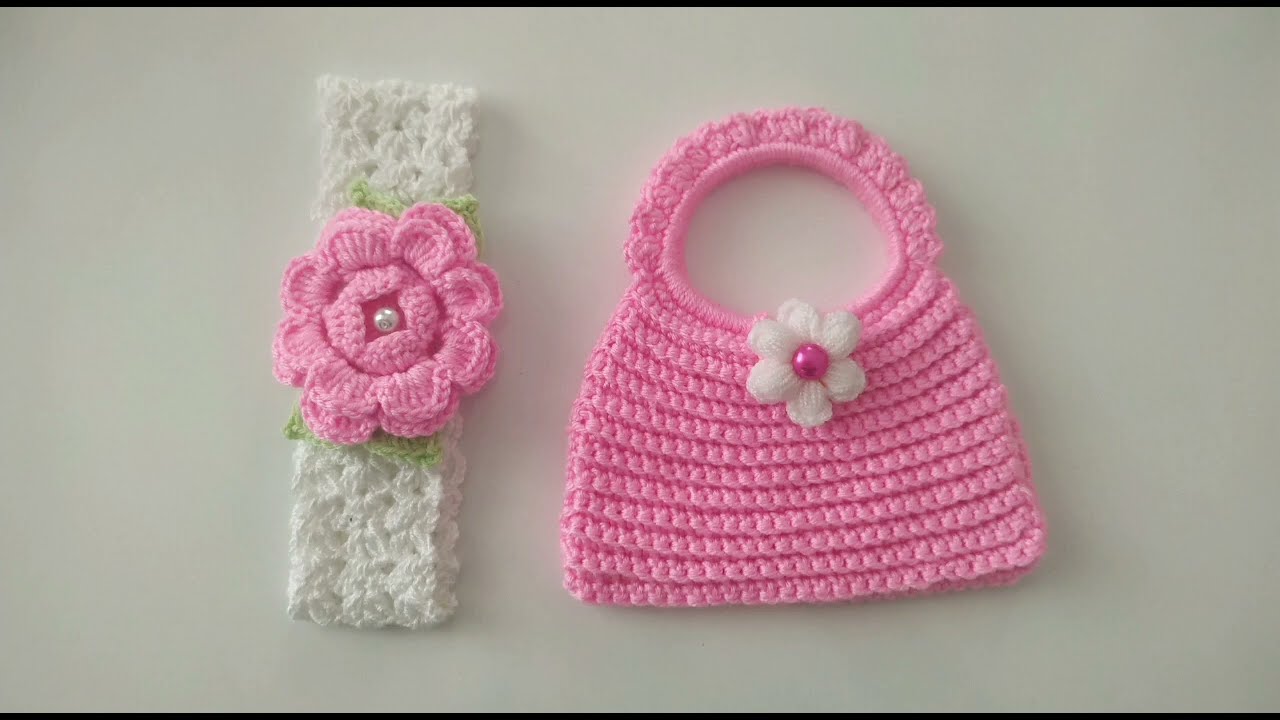
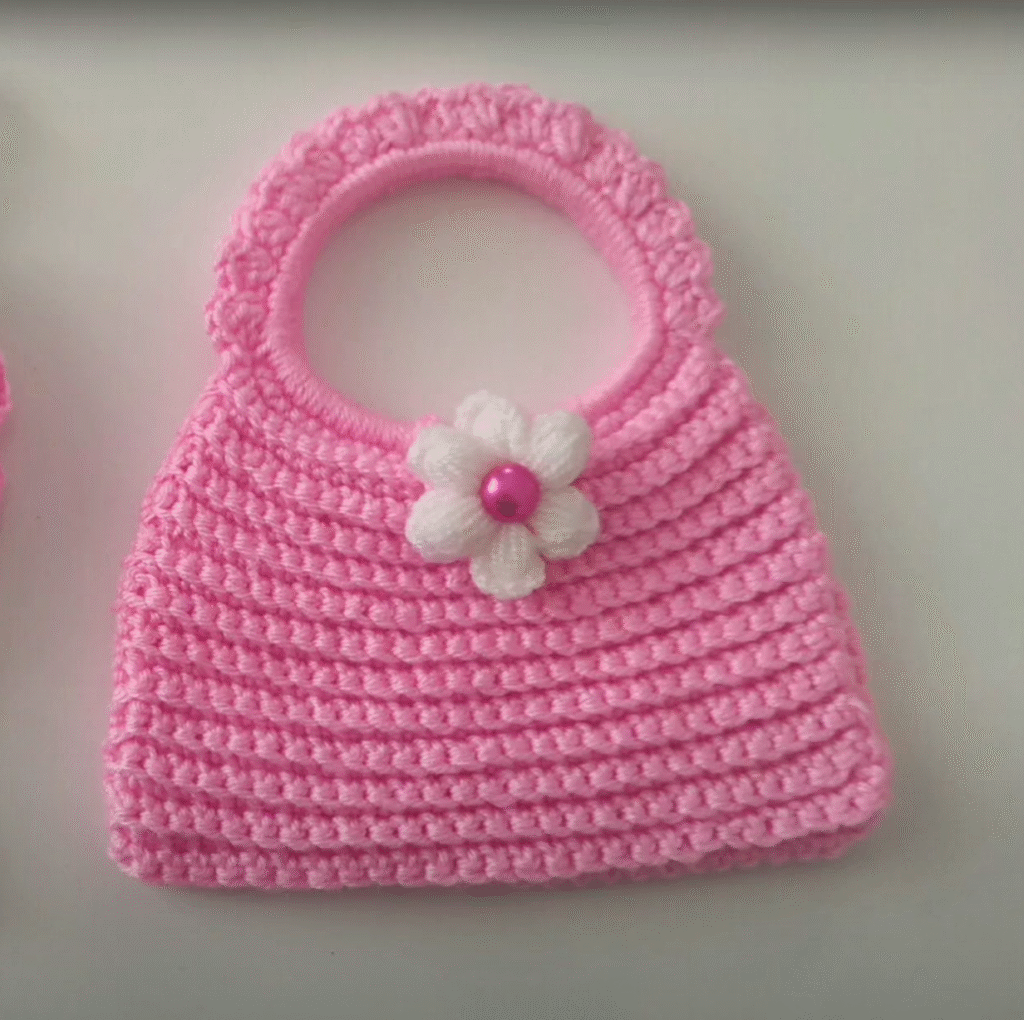
Isn’t this little pink handbag just the sweetest accessory? Perfect for a little girl to carry her treasures, this “Little Sweetheart Handbag” features a lovely textured body, a sturdy ribbed handle, and is adorned with a charming little flower and pearl bead. It’s an ideal gift or a lovely addition to a dress-up collection!
This pattern is designed to be relatively easy, making it suitable for confident beginners or intermediate crocheters. If you’re comfortable with basic stitches and working in the round, you can definitely create this adorable bag!
Let’s get started on crocheting some cuteness!
Skill Level: Easy-Intermediate Yarn Weight: DK (light worsted) yarn in main color (Pink) and a small amount of contrasting color (White). Hook Size: 4.0mm (G/6) crochet hook (or size needed to obtain gauge) Other Materials:
- Yarn needle for weaving in ends and attaching embellishments
- 1 small pearl bead (optional, for flower center)
- Sewing needle and thread (if attaching pearl bead)
Gauge: 5 hdc and 3 rows = 1 inch (2.5 cm) in half double crochet (for the bag body, though gauge isn’t critical for a bag). It’s important to be consistent with your tension.
Finished Size (approximate): 4.5 inches wide x 4.5 inches tall (excluding handle) – with notes for adjustments. You can adjust the starting chain and number of rows to make a larger or smaller bag.
Stitches Used:
- ch: chain
- sl st: slip stitch
- sc: single crochet
- hdc: half double crochet
- dc: double crochet
- Puff Stitch (Puff St): Yarn over, insert hook into stitch, yarn over, pull up a loop (3 loops on hook). Repeat from * to * 3 more times in the same stitch (9 loops on hook). Yarn over, pull through all 9 loops on hook. Ch 1 to secure. (The ch 1 does not count as a stitch unless specified).
- Back Loop Only (BLO): Working into the back loop of the stitch only.
- Front Post Double Crochet (fpdc): Yarn over, insert hook from front to back around the post of the specified stitch, yarn over, pull up a loop, yarn over, pull through 2 loops (twice).
- Back Post Double Crochet (bpdc): Yarn over, insert hook from back to front around the post of the specified stitch, yarn over, pull up a loop, yarn over, pull through 2 loops (twice).
Pattern Notes:
- The bag is worked in rows to create an oval base, then worked in the round for the body.
- The body features a lovely textured stitch that looks like a series of puff stitches or a similar textured pattern.
- The handle is worked separately and sewn on, or can be worked directly onto the bag.
Let’s Begin! The Bag Base (Main Color: Pink)
We’ll start by creating an oval base for the bag.
Starting Chain: Ch 21 (Adjust for desired width of bag).
Round 1: Sc in the 2nd ch from hook. Sc in the next 18 ch. 3 sc in the last ch. (Now working down the other side of the chain) Sc in the next 18 ch. 2 sc in the last ch. Join with a sl st to the first sc. (42 sc)
Round 2: Ch 1. 2 sc in the first sc. Sc in the next 18 sc. 2 sc in each of the next 3 sc. Sc in the next 18 sc. 2 sc in each of the next 2 sc. Join with a sl st to the first sc. (50 sc)
Round 3: Ch 1. Sc in each sc around. Join with a sl st. You have now created a sturdy oval base.
The Bag Body (Main Color: Pink)
Now we’ll work the main body of the bag with the textured stitch.

Round 1 (Texture Set Up): Ch 2 (counts as dc). Dc in the same stitch. Skip 2 sts, (Puff St, ch 1, Puff St) in the next st. Repeat from * to * around. You will likely end the round with a “skip 2 sts” before joining to the top of the beginning ch-2. Join with a sl st. This round will likely need careful adjustment to fit your stitch count from the base. Aim for a multiple of 6 or 7 for the puff pattern. For 50 stitches, you might do 7 repeats of “skip 2, (Puff, ch1, Puff) in next st, skip 2 sts” which uses 35 stitches + the beginning dc. You’ll need to adapt for your specific stitch count.
Alternative Textured Pattern (Easier, closer to image): Round 1: Ch 1, sc in BLO of each sc around. Join with a sl st. (50 sc) Working in BLO creates a ridge for the next row.
Round 2 (Textured Pattern): Ch 1, sc in the first sc. Hdc in the next 2 sts, dc in the next 2 sts, hdc in the next 2 sts, sc in the next st. Repeat from * to * around. Join with a sl st to the first sc. This stitch needs a multiple of 7. If you have 50 stitches, this won’t work perfectly. Let’s simplify to a repeating ridge.
Simpler Textured Pattern (Visible in Image, Looks like Alternating Rows): The image appears to be mostly hdc or dc stitches, with a raised ridge every few rows. This can be achieved by alternating a standard stitch row with a row worked in the back loop only, or with post stitches. Let’s use hdc for the main body and occasional BLO rows for ridges.
Attach Main Color (Pink): Join Pink yarn to the last stitch of the base.
Round 1: Ch 1, hdc in each sc around. Join with a sl st to the first hdc. (50 hdc)
Round 2: Ch 1, hdc in BLO of each hdc around. Join with a sl st. This creates the horizontal ridge.
Round 3: Ch 1, hdc in both loops of each hdc around. Join with a sl st.
Repeat Rounds 2 and 3 until the bag reaches your desired height (approx. 4.5 inches), ending on a Round 2 (BLO row) to create a top ridge.

The Handle (Main Color: Pink)
The handle looks like a ribbed band. You can either work this directly onto the bag or make it separately and sew it on. Making it separately allows for more flexibility.
Handle (Worked separately): Starting Chain: Ch 30 (Adjust for desired handle length).
Row 1: Sc in the 2nd ch from hook and in each ch across. Turn. (29 sc)
Row 2 (Ribbing): Ch 1, sc in the back loop only of each sc across. Turn.
Repeat Row 2 for a total of 4-5 rows, or until the handle is your desired width (approx. 0.75 – 1 inch). Fasten off, leaving long tails for sewing.
The Rose Flower (White Yarn)
This charming little flower is very simple!
Starting Chain: Ch 2. Round 1: 5 sc in the 2nd ch from hook. Join with a sl st to the first sc. (5 sc) Round 2 (Petals): (Ch 2, 2 dc in the same st, ch 2, sl st in the same st). Repeat from * to * 5 times around the circle, working into each sc from Round 1. Fasten off, leaving a long tail for sewing.
Video tutorial
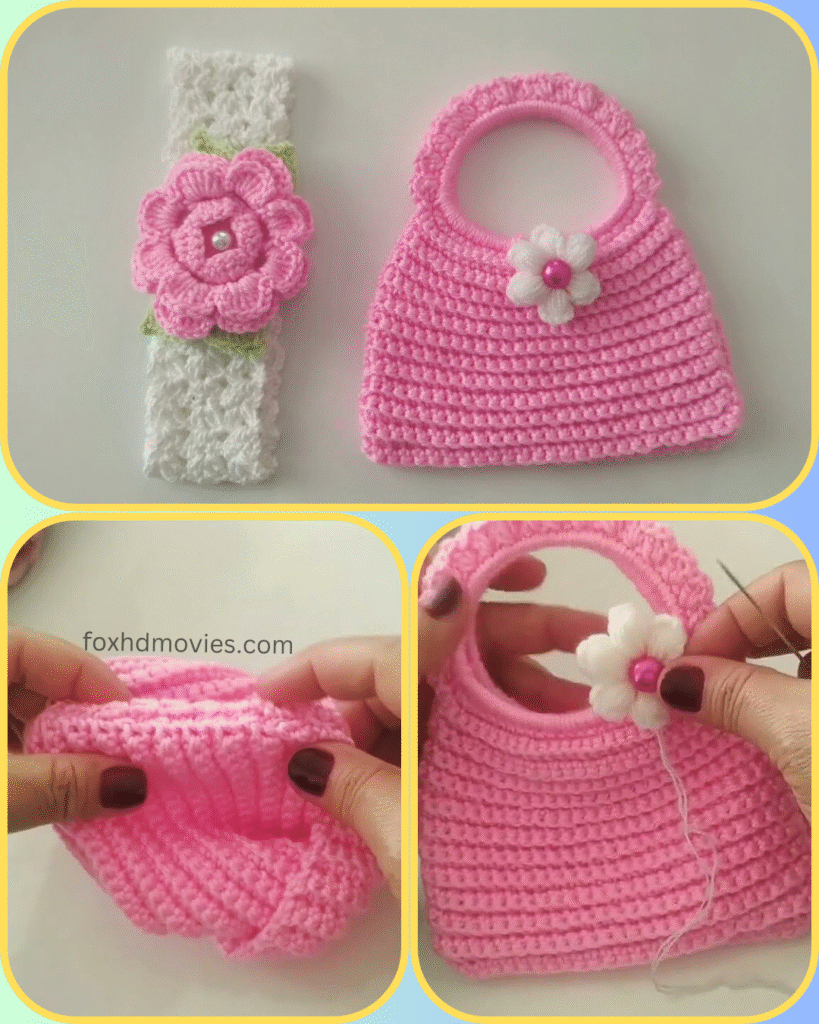
Finishing and Assembly
- Attach Handle: Position the handle evenly on the top opening of the bag. Using your yarn needle, sew each end of the handle securely to the bag.
- Attach Flower: Position the white flower on the front of the bag, near the top. Using the tail from the flower, sew it securely to the bag.
- Optional Pearl Bead: If desired, use a sewing needle and thread to attach a small pearl bead to the very center of the white flower.
- Weave in all ends: Neatly weave in any remaining loose yarn tails.
Enjoy your beautiful handmade Little Sweetheart Handbag! It’s the perfect size for little hands and adds a lovely touch to any outfit. Don’t forget to share your creations with me on social media – I love to see them!
Happy crocheting!