 by
by 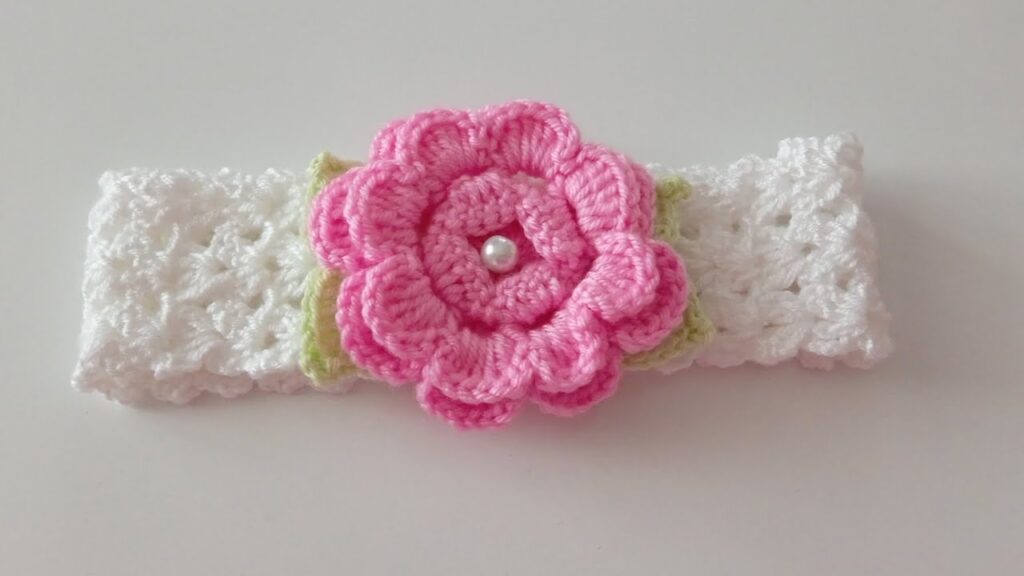
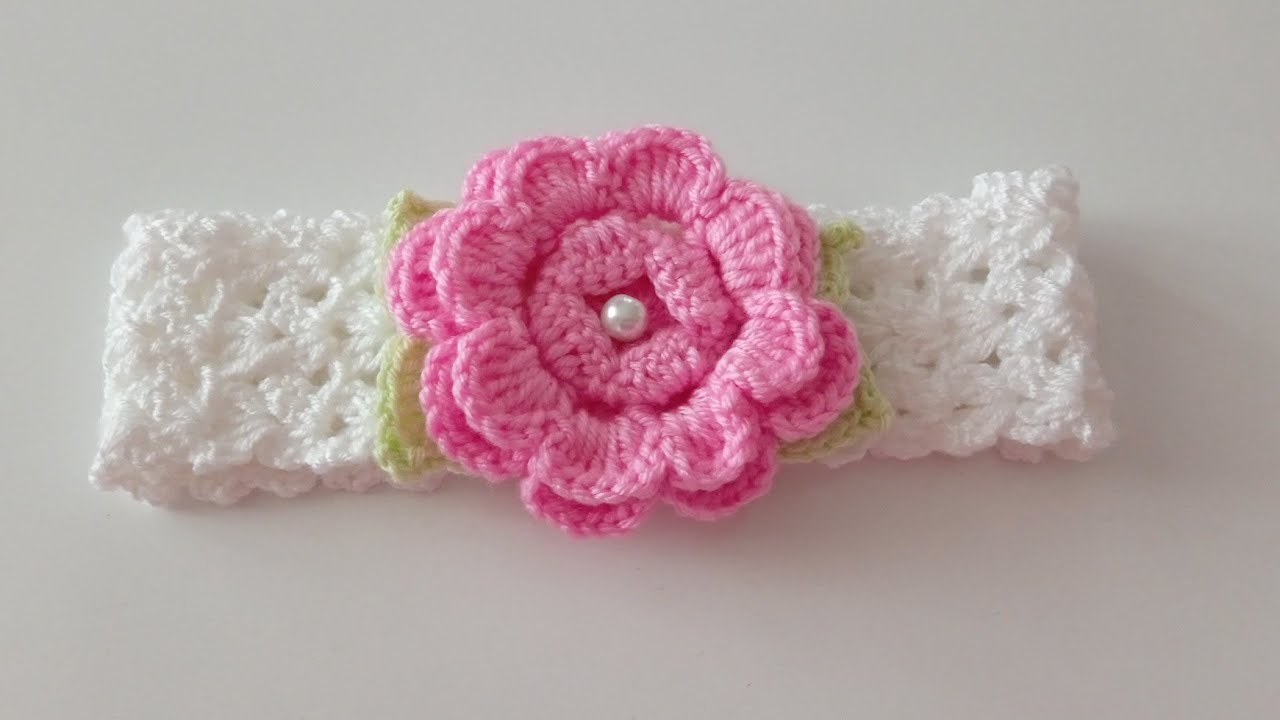
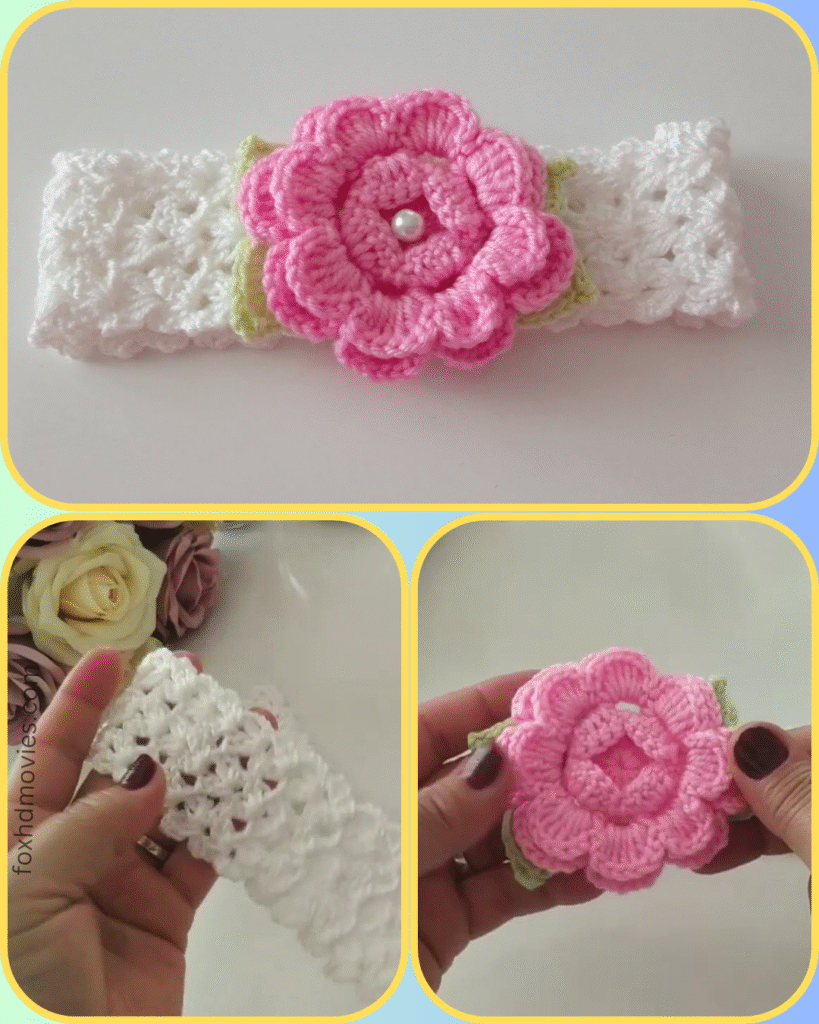
How utterly charming is this “Little Rosy Bloom Headband”?! With its textured white band and a vibrant pink rose nestled amongst delicate green leaves, it’s the perfect accessory for any little girl. It adds a touch of sweetness to any outfit and makes a wonderful gift for baby showers or new arrivals!
This pattern is designed to be relatively easy, making it suitable for beginners or confident beginners. If you’re comfortable with basic stitches, you can absolutely create this beautiful piece!
Let’s get started on crocheting some floral cuteness!
Skill Level: Easy Yarn Weight: DK (light worsted) yarn in three colors: White (for headband), Pink (for flower), and Light Green (for leaves). Hook Size: 4.0mm (G/6) crochet hook (or size needed to obtain gauge) Other Materials:
- Yarn needle for weaving in ends and attaching embellishments
- 1 small pearl bead (optional, for flower center)
- Sewing needle and thread (if attaching pearl bead)
Gauge: 5 hdc and 3 rows = 1 inch (2.5 cm) in half double crochet (for the headband). It’s important to check your gauge to ensure the headband will be the correct size. Adjust your hook size if necessary.
Finished Size (approximate): 0-6 months (with notes for adjustments) For larger or smaller sizes, you’ll need to adjust the starting chain for the headband to fit the head circumference.
Stitches Used:
- ch: chain
- sl st: slip stitch
- sc: single crochet
- hdc: half double crochet
- dc: double crochet
- tr: treble crochet (triple crochet)
Pattern Notes:
- The headband is worked in rows, then seamed to form a band.
- Ch 1 at the beginning of an hdc row does NOT count as a stitch unless specified.
- The flower is worked in the round.
- The texture of the headband is created by a simple stitch pattern, likely a half double crochet variant or V-stitch variant. We’ll use a V-stitch variation for a lovely open texture.
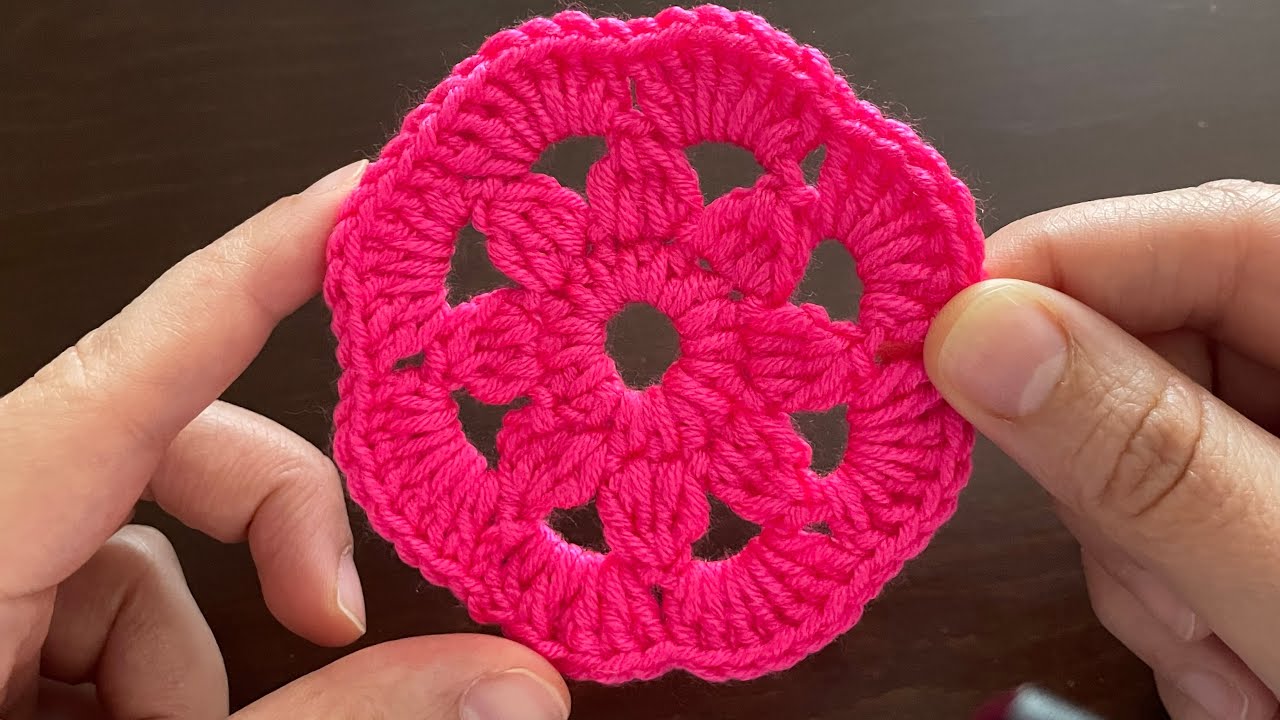
Let’s Begin! The Headband (White Yarn)
We’ll start by crocheting the band.

Starting Chain: Ch 46 (Adjust as needed for desired head circumference. This should stretch comfortably around the head. For 0-6 months, around 16-18 inches unstretched is common).
Row 1: Dc in the 3rd ch from hook (counts as 2 dc). Skip 1 ch, V-stitch (dc, ch 1, dc) in the next ch. Repeat from * to * across to the last 2 ch. Skip 1 ch, dc in the last ch. Turn. You are creating a series of open V-stitches. Your last stitch is a single dc to balance the beginning.
Row 2: Ch 2 (counts as dc). Dc in the next dc. V-stitch (dc, ch 1, dc) in the ch-1 space of the next V-stitch from the previous row. Repeat from * to * across. Dc in the top of the turning chain. Turn.
Repeat Row 2 for a total of 4-5 rows, or until the headband reaches your desired width (approx. 2-2.5 inches). Fasten off, leaving a long tail for seaming.
Seaming the Headband: Fold the headband in half, bringing the first and last rows together. Using your yarn needle and the long tail, sl st or whip stitch along the seam to join, forming a seamless band.
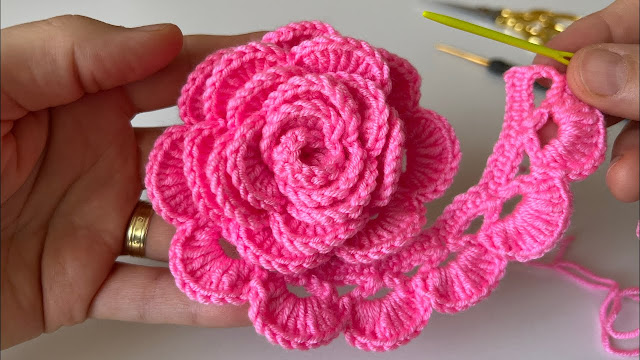
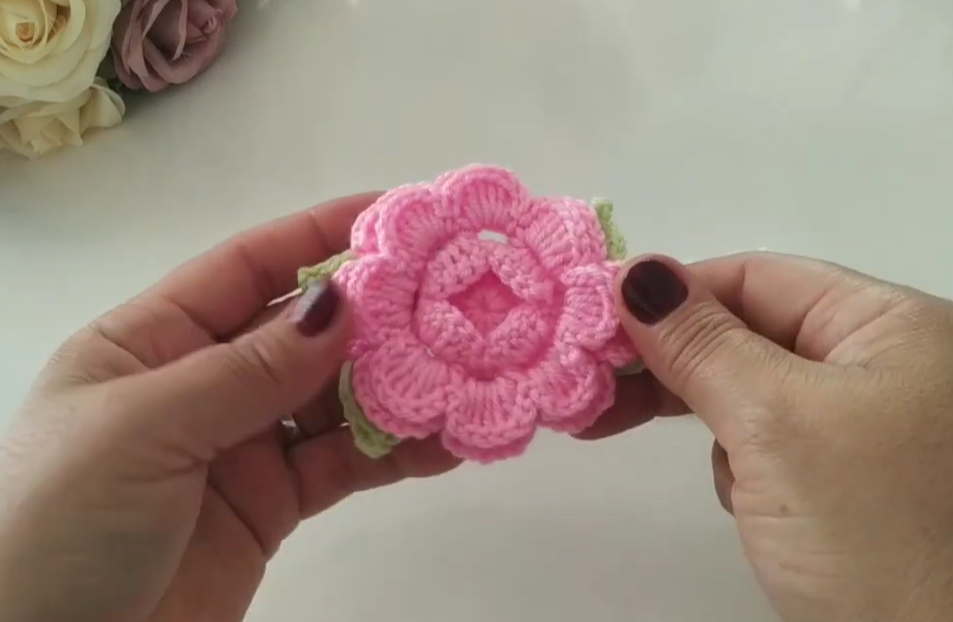
The Rose Flower (Pink Yarn)
This beautiful rose is worked by spiraling stitches.

Starting Chain: Ch 36 (Adjust for a larger or smaller flower).
Row 1: Dc in the 3rd ch from hook. (Dc, ch 1, dc) in the same ch. Skip 2 ch, (dc, ch 1, dc) in the next ch. Repeat from * to * across the chain. Turn. You are creating a series of small V-stitches along the chain.
Row 2: Ch 2 (does not count as st). In the first ch-1 space from the previous row, work (2 dc, 1 tr, 2 dc). In the next ch-1 space, work (2 dc, 1 tr, 2 dc). Repeat from * to * in each ch-1 space across. Fasten off, leaving a long tail for sewing. You’ve created a series of “petals.”
Assembling the Rose: Starting from one end of your strip of petals, begin rolling the strip tightly, forming the center of the rose. Continue rolling, slightly overlapping the petals as you go, until the entire strip is rolled into a flower shape. Use the long tail and your yarn needle to sew through all layers at the base of the flower to secure its shape.
The Leaves (Light Green Yarn – Make 2)
Starting Chain: Ch 6.
Row 1: Sc in the 2nd ch from hook. Hdc in next ch. Dc in next ch. Hdc in next ch. Sc in last ch. Ch 1. Now, work down the other side of the starting chain: Sc in the first st on the opposite side. Hdc in next st. Dc in next st. Hdc in next st. Sc in last st. Sl st to first sc. Fasten off, leaving a tail for sewing.
Finishing and Assembly
- Attach Leaves: Position the two green leaves slightly behind and to the sides of where you want the rose to sit on the headband. Using your yarn needle, sew them securely to the headband.
- Attach Rose: Place the pink rose over the leaves, centered on the headband. Using the tail from the rose, sew it securely to the headband, making sure to catch the leaves underneath as you sew.
- Optional Pearl Bead: If desired, use a sewing needle and thread to attach a small pearl bead to the very center of the rose.
- Weave in all ends: Neatly weave in any remaining loose yarn tails.
Video tutorial
Enjoy your beautiful handmade Little Rosy Bloom Headband! It’s the perfect accessory for photos, special occasions, or just to add a touch of sweetness to your little one’s everyday look. Don’t forget to share your creations with me on social media – I love to see them!
Happy crocheting!