by
by 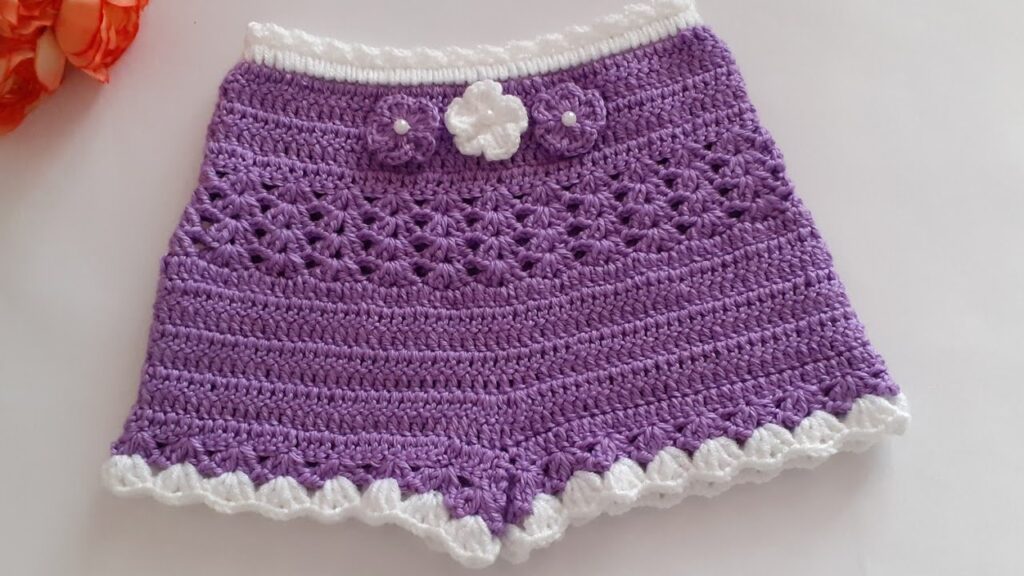
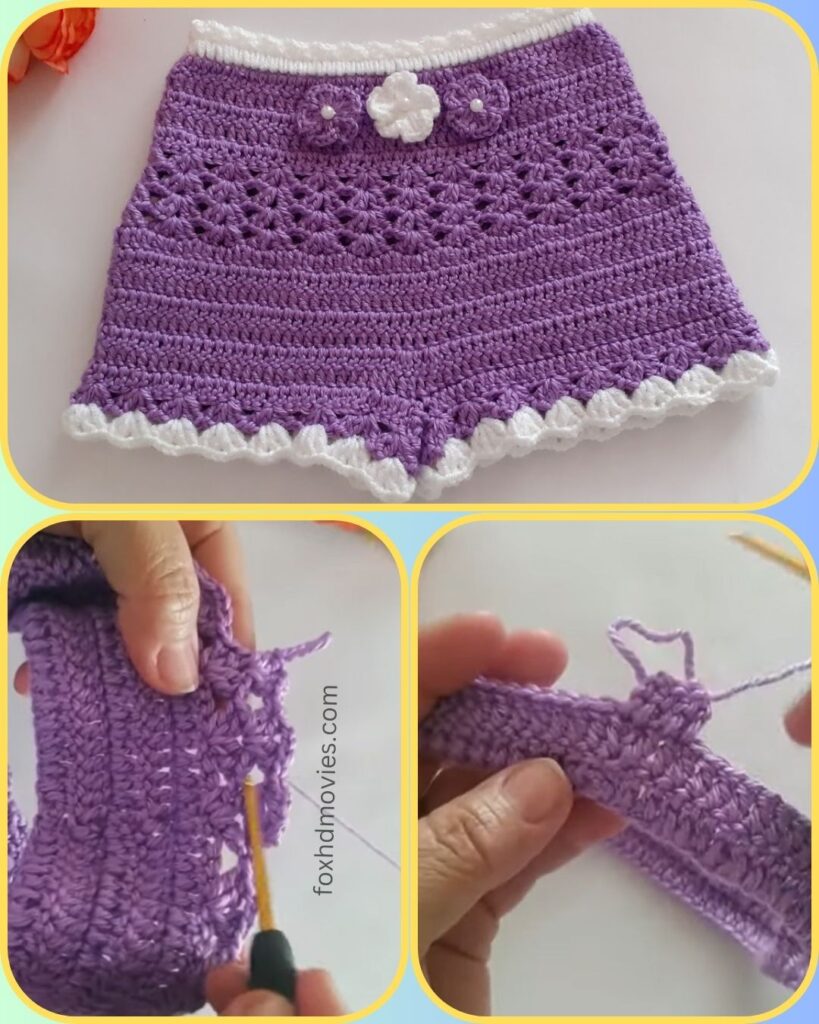
How cute are these little shorts?! Perfect for warm weather, playdates, or just lounging around, these “Little Lavender Lace Shorts” feature a lovely textured stitch, a comfy elastic-free waistband, and sweet floral details. They’re sure to be a hit with your little one!
This pattern is designed for intermediate beginners or intermediate crocheters. If you’re comfortable with basic stitches and working in the round, you’ll find this a fun and rewarding project!
Let’s get started on creating these charming shorts!
Skill Level: Easy-Intermediate Yarn Weight: DK (light worsted) yarn in main color (Lavender/Purple) and a small amount of contrasting color (White). Hook Size: 4.0mm (G/6) crochet hook (or size needed to obtain gauge) Other Materials:
- Yarn needle for weaving in ends
- Stitch markers (helpful for marking the start of rounds and leg splits)
Gauge: 5 dc and 3 rows = 1 inch (2.5 cm) in double crochet (for the upper part). It’s important to check your gauge to ensure the shorts will be the correct size. Adjust your hook size if necessary.
Finished Size (approximate): Toddler (12-24 months) – with notes for adjustments. For larger or smaller sizes, you’ll need to adjust your starting chain and the number of rows/rounds for both the body and legs.
Stitches Used:
- ch: chain
- sl st: slip stitch
- sc: single crochet
- hdc: half double crochet
- dc: double crochet
- V-stitch (V-st): (dc, ch 1, dc) in the same stitch/space
- Shell Stitch (Shell): (2 dc, ch 1, 2 dc) in the same stitch/space (for the border)
Pattern Notes:
- The shorts are worked from the top down, in the round, until the crotch, then split for the legs.
- Ch 2 at the beginning of a dc round counts as a dc. Ch 1 does NOT count as a stitch unless specified.
- Always join rounds with a sl st to the top of the beginning ch-2 (or first stitch if ch 1).
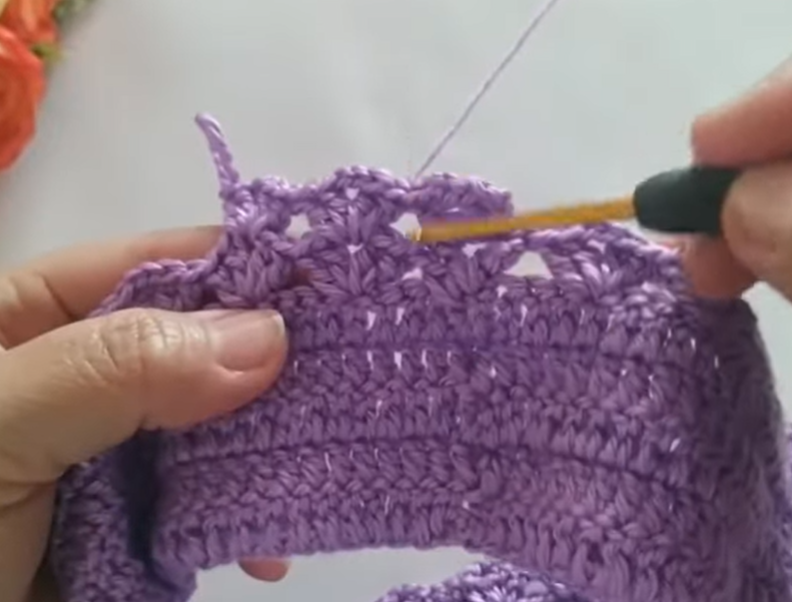
- For the main body, the pattern appears to alternate between rows of V-stitches and rows of solid double crochet, creating a unique texture. The image shows a block of solid dc below the V-stitch pattern before the leg splits.
Let’s Begin! The Waistband (Color A: White)
We’ll start by creating the clean, contrasting waistband.
Starting Chain: Ch 70 (Adjust as needed for desired waist circumference. This measurement should be snug but comfortable around the waist, as there is no elastic). Join with a sl st to the first ch, being careful not to twist.
Round 1: Ch 1, sc in each ch around. Join with a sl st to the first sc. (70 sc)
Round 2: Ch 1, sc in each sc around. Join with a sl st. Repeat Round 2 for a total of 3-4 rounds, or until your waistband is approximately 0.75 – 1 inch wide.
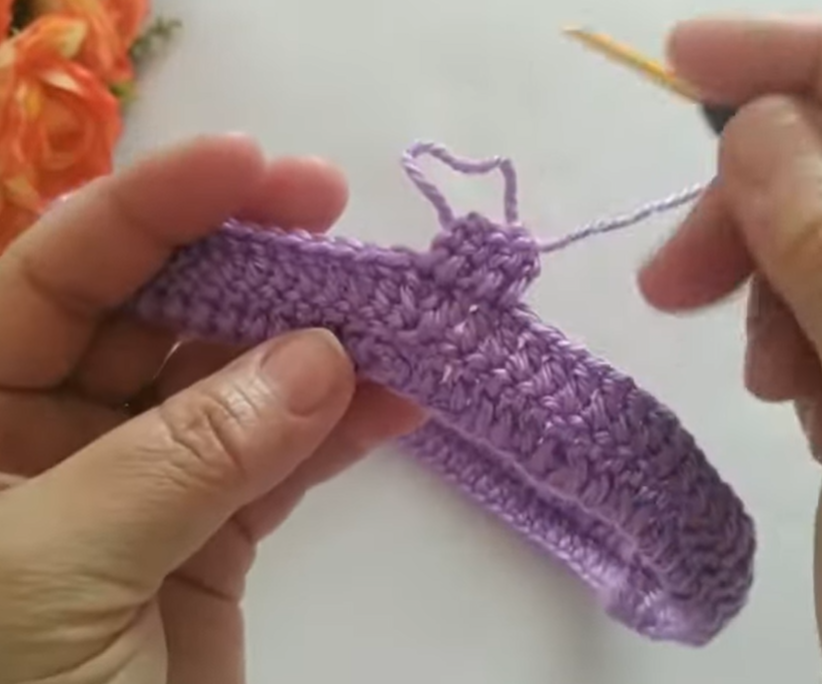
The Body – Upper Section (Color B: Lavender)
Now we’ll switch to the main color and start shaping the body of the shorts.
Attach Color B (Lavender): Join Color B yarn to the last stitch of the previous round.
Round 1: Ch 2 (counts as dc), dc in each sc around. Join with a sl st to the top of the beginning ch-2. (70 dc)
Round 2 (V-Stitch Pattern): Ch 2, dc in the first st. Skip 1 st, V-st in next st. Repeat from * to * around. Skip 1 st, dc in the last st. Join with a sl st to the top of the beginning ch-2. Adjust your stitch count slightly on this first V-stitch round if necessary to get an even repeat. If your initial dc count was 70, you should have 35 V-stitches and 2 dc.
Round 3 (V-Stitch Pattern): Ch 2, dc in the first st. V-st in each ch-1 space of the V-stitches from the previous round across. Dc in the top of the turning chain. Join with a sl st to the top of the beginning ch-2.
Repeat Round 3 for approximately 3-4 more rounds, or until the textured section is about 2.5-3 inches tall.
Transition to Solid Section: Next Round (Solid Dc): Ch 2, dc in each dc and into each ch-1 space around. Join with a sl st to the top of the beginning ch-2. Make sure to maintain your stitch count from the last dc round (e.g., 70 dc).
Repeat the Solid Dc Round for approximately 2-3 more rounds, or until the shorts are close to the desired length before splitting for the legs.
Dividing for the Legs
Now we’ll create the leg openings.
Measure: Lay your shorts flat. Place a stitch marker at the center of the front and center of the back. This will help you count. Count your total stitches. Divide by 2 to get the stitch count for each leg. (e.g., 70 stitches total, so 35 stitches per leg).
First Leg: Next Round: Ch 2, dc in the first stitch. Dc in each dc until you reach the stitch marker for the back center. Ch 4 (for crotch space): Ch 4 (this creates the crotch seam. Adjust number of chains for a looser or tighter fit in the crotch). Join: Join with a sl st to the first dc of this round, skipping the stitches for the second leg.
You have now formed one leg opening. You will work in the round for this leg.
Continue working in the round for the first leg: Round 1: Ch 2, dc in each dc around, working into the chains of the crotch space as well. Join with a sl st to the top of the beginning ch-2. Repeat Round 1 for approximately 1-2 more rounds, or until the leg is the desired length before the border.
Leg Border (Color A: White)
Attach Color A (White): Join Color A yarn to the last stitch of the leg.
Round 1 (White Shells): Ch 1, sc in the first st. Skip 2 sts, Shell Stitch (2 dc, ch 1, 2 dc) in the next st, skip 2 sts, sc in the next st. Repeat from * to * around. Join with a sl st to the first sc.
Round 2 (White Shell Edging): Sl st into the first dc of the first shell. Ch 1, sc in the ch-1 space of the first shell. Ch 3, sc in the ch-1 space of the next shell. Repeat from * to * around. Join with a sl st to the first sc. Fasten off.

Second Leg
Re-attach Color B (Lavender) yarn to the unworked stitches at the crotch. Work the second leg exactly as you did the first.
Optional Flower Embellishments (Make 3)
- With white yarn and a smaller hook (e.g., 3.0mm):
- Ch 2. 5 sc in the 2nd ch from hook. Join with a sl st to first sc.
- (Ch 2, 2 dc in same st, ch 2, sl st in same st) Repeat 5 times around the circle, working into each sc. You’ll form 5 small petals.
- Fasten off, leaving a tail for sewing.
- Sew the three flowers onto the front of the waistband, evenly spaced.
Video tutorial
Finishing
- Weave in all remaining loose ends securely.
And there you have it – a pair of adorable and comfy Little Lavender Lace Shorts, ready for your little one to wear! Don’t forget to share your finished shorts with me on social media – I love to see your beautiful creations!
Happy crocheting!