 by
by 
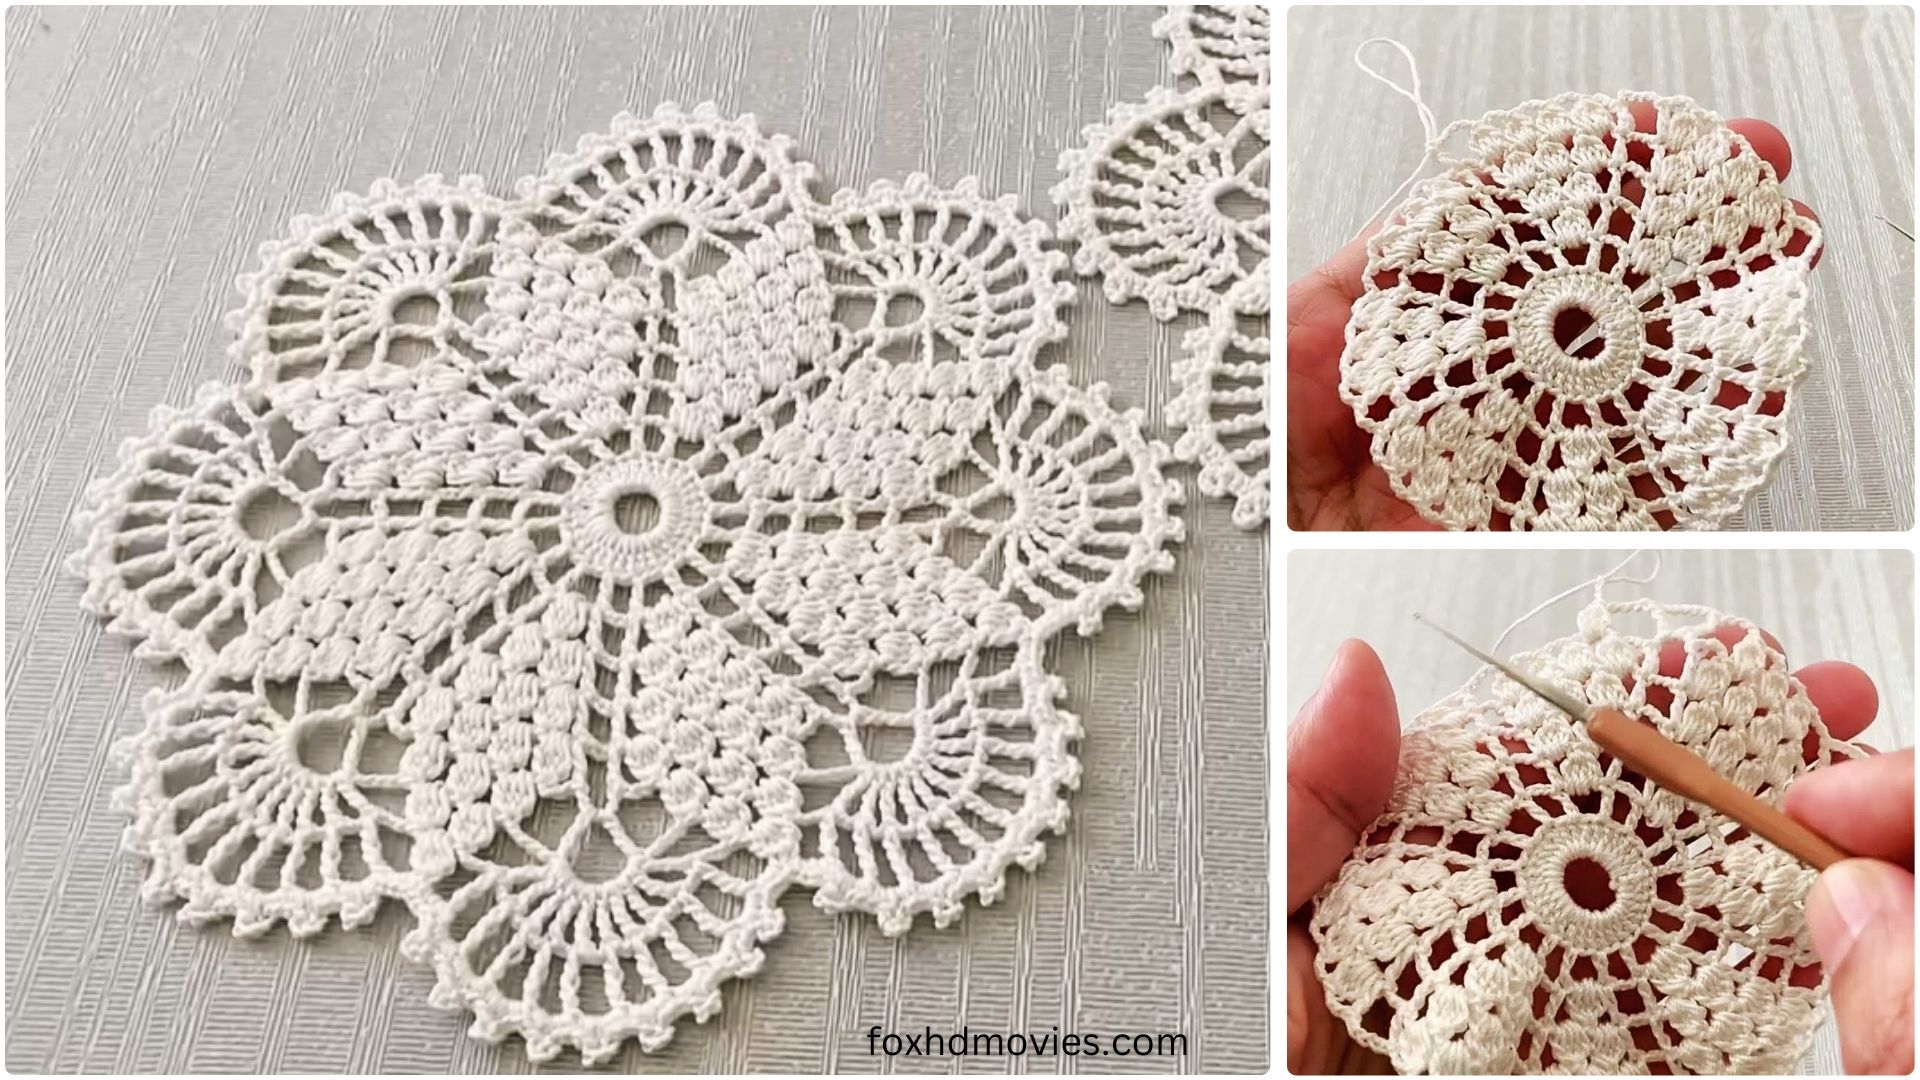
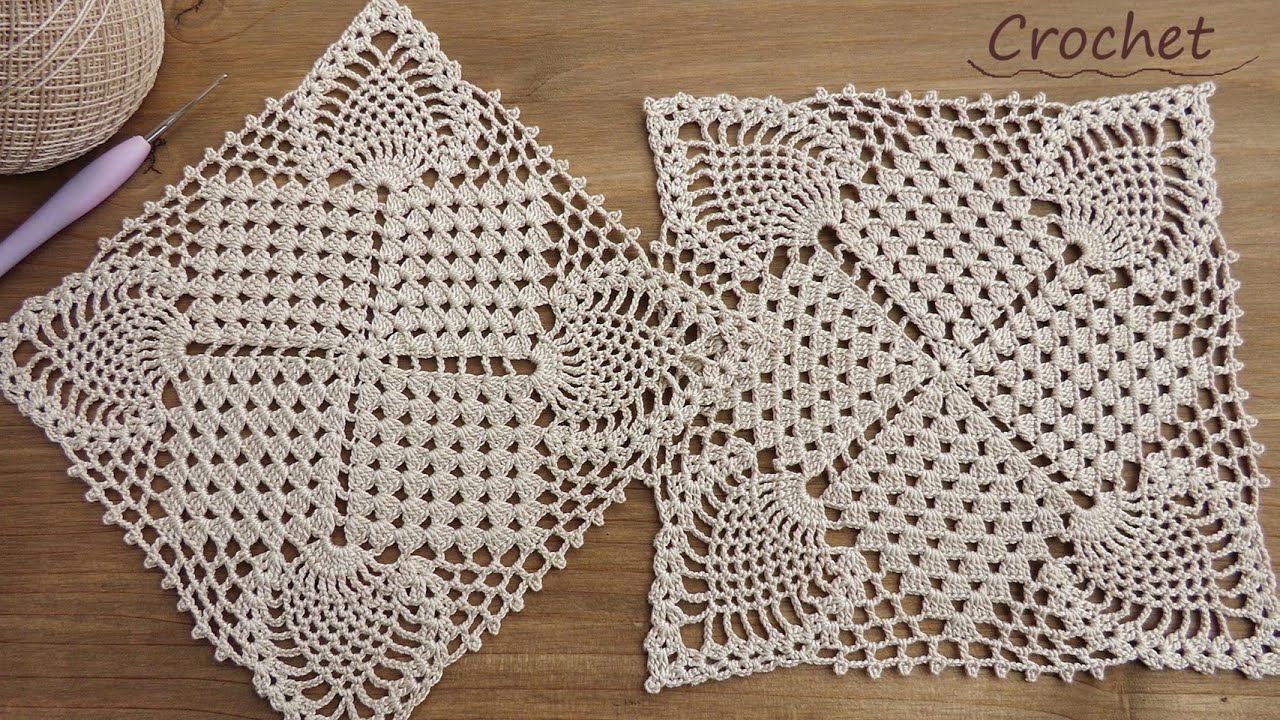
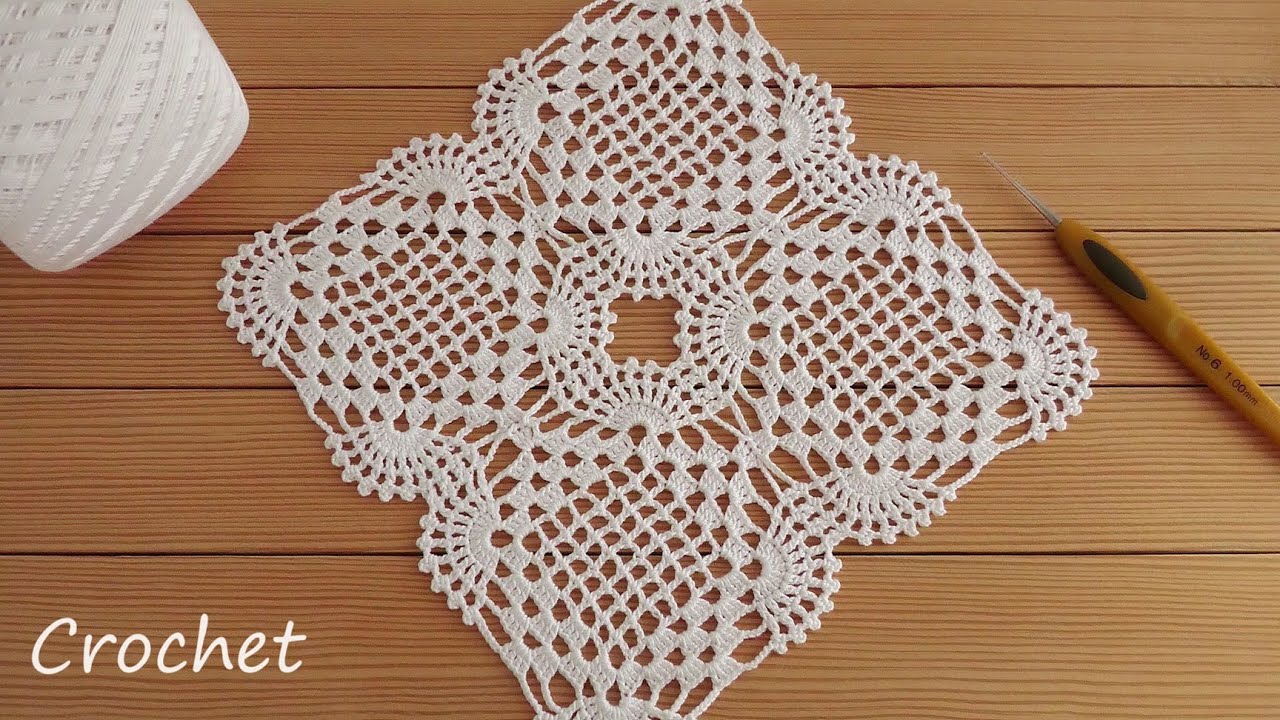
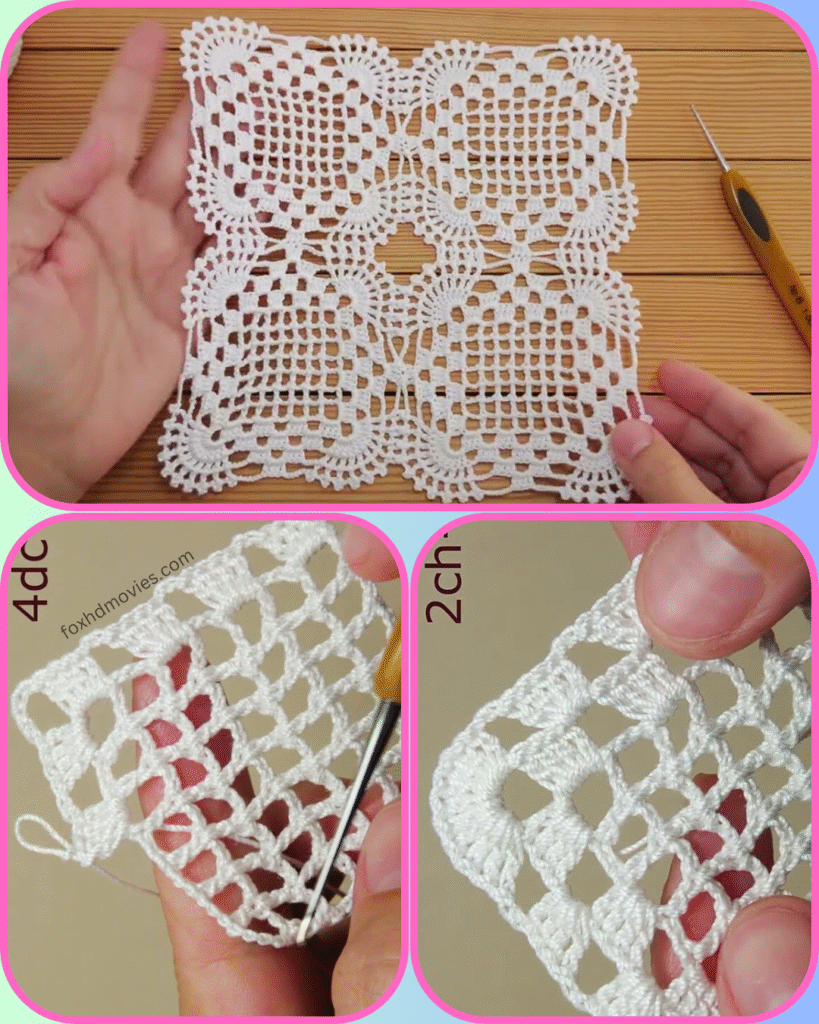
Bring a touch of timeless beauty to your home with these exquisite crocheted lace square motifs! Perfect for creating stunning doilies, table runners, throws, or even joining into larger, intricate garments, these squares feature a captivating blend of openwork and solid sections. The crisp white yarn in the example highlights every delicate detail, making it a truly eye-catching piece!
This pattern is designed for intermediate crocheters who are comfortable with various stitches, working in rounds, and reading detailed patterns. Adventurous beginners who enjoy a challenge might also find this a rewarding project!
What You’ll Need:
- Yarn: A fine crochet thread or lace weight yarn. The example uses classic white, which is perfect for showcasing intricate lace. (e.g., mercerized cotton crochet thread, size 10 or similar)
- Crochet Hook: A hook appropriate for your chosen yarn. For fine thread, this might be a 1.5mm – 2.25mm (US steel hook size 7-1). A smaller hook will create a more delicate, intricate result.
- Scissors
- Tapestry Needle (for weaving in ends)
Understanding the Motif:
This gorgeous motif is a square, starting from a central point and expanding outwards. It features a fascinating interplay of dense stitches and open, lacy sections, creating a dynamic visual texture. The corners are beautifully rounded with shell or fan-like elements, which transition into a square outer border.
Key features we’ll be aiming for:
- A central core that branches out into the four quadrants of the square.
- Areas of solid crochet contrasting with open, chain-space driven lace.
- Distinctive rounded or scalloped corners.
- A defined square shape with a clear outer edge.
Getting Started: The Central Starburst
The foundation of this motif appears to be a central core that radiates outwards, setting the stage for the four distinct sections of the square.

Instructions for the Central Section:
- Magic Ring (or Chain 4, join with sl st to form a ring): This creates a neat, tight center for your motif.
- Round 1 (Initial Spokes/Base): This round will likely establish the first set of “spokes” or divisions that will lead to the four sides of the square. You might be working groups of stitches (like double crochets) separated by chain spaces.
- Example Idea: Ch 3 (counts as 1 dc), then work [number] dc into ring, [ch X, dc Y times] a certain number of times, ending with a join to the initial Ch 3. The image suggests a pattern of 8 radiating points initially.
- Round 2 & Beyond (Building the Quadrants and Lace): This is where the motif starts to take its distinct shape. You’ll likely alternate between solid sections (using stitches like dc) and open lace sections (using chains and taller stitches like trc or dc). The image suggests a combination of dense areas that form the “arms” of the square and open chain-space grids in between.
- Consider: How are the four sections of the square being formed from the central point? It looks like there are four main “solid” sections branching out, with lacy windows in between.
Shaping the Square and Adding the Decorative Edges:
Once your inner pattern is established, you’ll focus on fully shaping the square and adding the beautiful outer border.
- Next Round (Defining Corners): This round will be crucial for creating the clear square corners. You’ll typically use specific stitch combinations (e.g., (dc, ch 2, dc) or (trc, ch 3, trc)) in the corner points, while continuing the pattern along the sides.
- Example Idea: [Work X stitches along side (can be a mix of solid and chain spaces), (Y stitches, Ch Z, Y stitches) in corner space/stitch], repeat 4 times. The corners in the image appear to have a fan or shell element.
- Final Round(s) of the Motif: Complete the outer border, adding any final picots, small shells, or chain loops to create the delicate, scalloped edge seen in the example. Ensure your stitch count allows for easy joining to other motifs if you plan to create a larger piece.

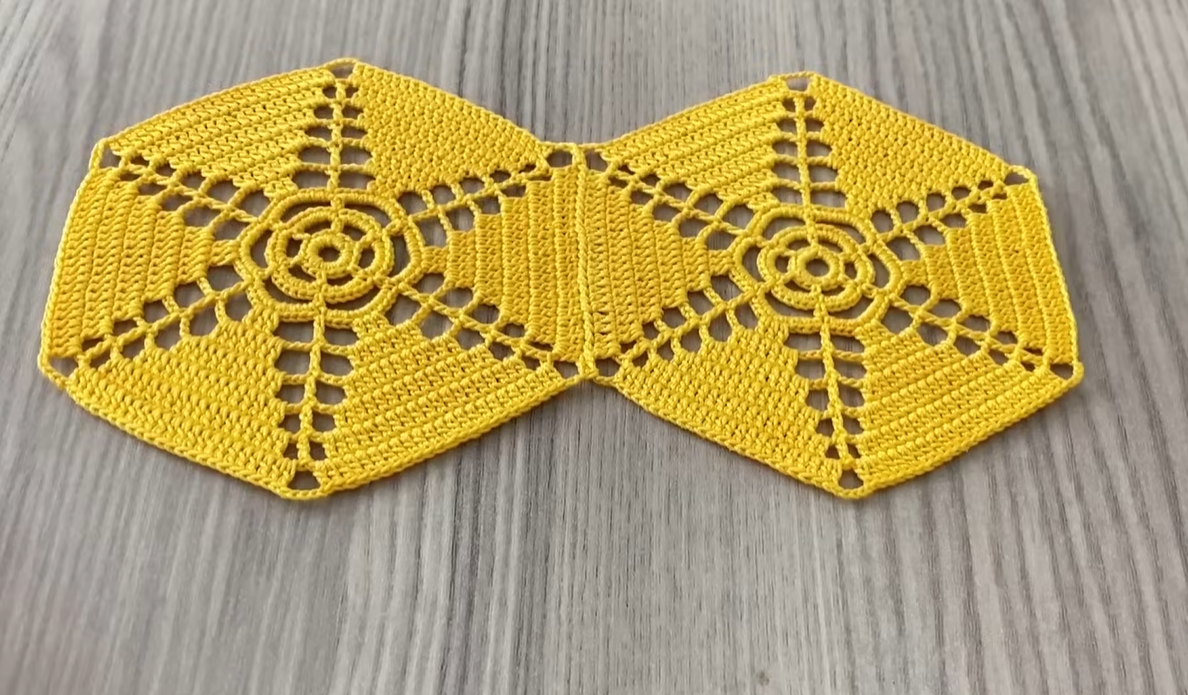
Joining Your Motifs (Optional for larger projects):
If you’re creating a larger piece like a tablecloth or a blanket, you’ll need to join your individual motifs. The image shows a single finished square, but these designs are often part of a larger project.
The most common and clean methods for joining these types of motifs are:
- Join-as-you-go (JAYG): This is often preferred for lace motifs as it creates a seamless look and avoids a lot of seaming at the end. As you work the final round of your second (and subsequent) motif, you’ll slip stitch or single crochet into the corresponding chains or stitches of the previously completed motif, creating a continuous fabric.
- Whip Stitch or Slip Stitch Joining: You can complete all your motifs first, and then use a tapestry needle and a length of yarn to whip stitch them together, or use your crochet hook to slip stitch them together.
Video tutorial
Finishing Touches:
- Weave in all ends: This is crucial for a clean and professional finish, especially with intricate lace.
- Blocking: For lace crochet, blocking is absolutely essential. It opens up the stitches, evens out your work, and truly showcases the delicate design of the openwork and the crisp edges. Wet your motif, gently squeeze out excess water, pin it to shape on a blocking mat or towel, and let it dry completely.
Share Your Creations!
I can’t wait to see your own beautiful crocheted lace square motifs! Once you’ve made them, share them on social media and tag me! What will you create with yours – a stunning doily, a unique placemat, or perhaps a beautiful throw?
Happy Crocheting!