by
by Hey there, yarn enthusiasts!
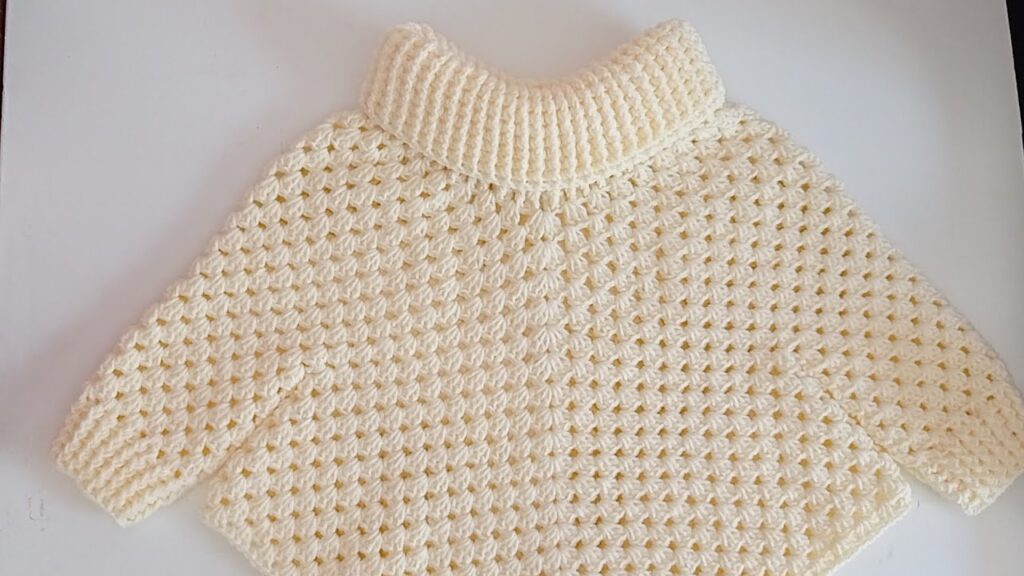
Get ready to create the ultimate cozy accessory for your little one – this absolutely charming cream-colored baby poncho! With its snuggly turtleneck and beautiful textured stitch, it’s perfect for keeping babies warm and stylish during cooler weather. It’s an ideal layering piece that’s easy to pop on and off, making it a favorite for parents and babies alike!
Before we begin, here are a few important notes:
- Skill Level: Intermediate. Working ribbed stitches and the main body stitch in the round, along with increasing for the poncho’s drape, requires some focus.
- Yarn Choice: For warmth and comfort, choose a soft, cozy yarn. Baby acrylic, a wool blend, or even a soft chenille in DK (#3) or Worsted (#4) weight would be perfect.
- Hook Size: This will depend on your chosen yarn. Aim for a hook size that creates a firm but comfortable fabric for the ribbing and a nicely defined stitch for the body. (e.g., 4.0mm – 5.5mm).
- Gauge is Crucial! Especially for a garment, getting the correct gauge ensures the poncho fits as intended. Make a swatch of both the ribbing and the body stitch!
Let’s Gather Our Supplies!
Materials You’ll Need:
- Approx. 200-350 grams of soft baby yarn (DK or Worsted weight) in your chosen color (cream or other).
- Crochet hook (e.g., 4.5mm or 5.0mm, adjust for gauge)
- Stitch markers (essential for marking increase points!)
- Yarn needle
- Scissors
Crochet Language Decoder (Abbreviations):
- ch: chain
- st(s): stitch(es)
- sl st: slip stitch
- sc: single crochet
- hdc: half double crochet
- dc: double crochet
- sk: skip
- sp: space
- BLO: back loop only
- fpdc: front post double crochet
- bpdc: back post double crochet
- [ ]: repeat instructions within brackets
- ( ): number of stitches at the end of the row/round
Gauge:
- Ribbing Swatch: 12 hdc BLO rows = 4 inches (10 cm)
- Body Stitch Swatch: 5 V-stitches and 6 rows = 4 inches (10 cm)
- Adjust hook size to match gauge.
Key Stitch Patterns:
A. Half Double Crochet Ribbing (for Collar & Cuffs): This creates the lovely stretchy, vertical ribbing.
- Work hdc into the back loop only (BLO) of each stitch.
B. Stacked V-Stitch (for Body): This forms the main textured pattern on the poncho. It creates a dense, slightly diamond-like fabric.
- V-Stitch (V-st): (Dc, ch 1, dc) in indicated stitch or space.
- In subsequent rows/rounds, you will work the next V-st directly into the
ch-1space of the V-st from the previous row/round.
Pattern Instructions (Top-Down Construction):
This poncho is worked from the turtleneck down.
Size: 0-6 Months (Adjustments for 6-12 Months, Toddler in notes) Final approximate bottom width: 18-20 inches per side (total 36-40 inches circumference)
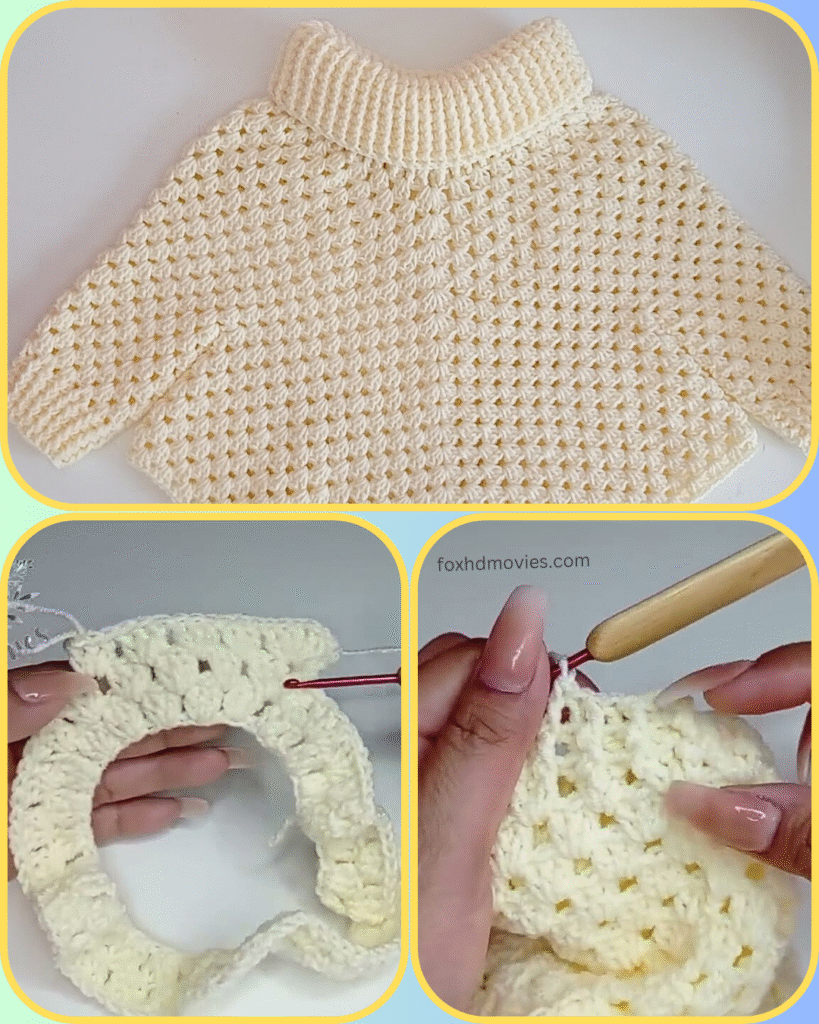
Part 1: The Turtleneck Collar
- Ch 25 (adjust for desired collar height).
- Row 1: Hdc in 2nd ch from hook, hdc in each ch across. Ch 2, turn. (24 hdc)
- Row 2: Hdc in BLO of each hdc across. Ch 2, turn. (24 hdc)
- Rows 3-30 (or until desired neck circumference): Repeat Row 2. The collar should comfortably fit around a baby’s head/neck when stretched slightly.
- For 0-6 months, aim for approx. 10-12 inches circumference when un-stretched.
- Joining Collar: Bring the short ends of the ribbed strip together. Sl st through the BLO of the last row and the corresponding starting chain loop of the first row to form a seamless tube. Do not fasten off.

Part 2: Yoke / Shoulder Formation
Now we transition from the collar to the poncho body, forming the shoulder increases.
- Rnd 1 (Setup for Body Pattern): Ch 3 (counts as dc). Work 2 dc in the same stitch/space where you joined. [Sk 1 st, 3 dc in next st]. Repeat [ ] around the top edge of the collar, distributing evenly to create a flat circle. Join with sl st to top of beg ch 3.
- You should have approximately 48-60 dc groups. The exact number isn’t critical, as long as it’s an even number of stitches for the next pattern.
- Place stitch markers at 4 equidistant points around this round (e.g., quarter points) – these will be your increase points.
- Rnd 2 (First V-Stitch Row & Increases): Ch 3 (counts as dc). Dc in same st. [Ch 1, sk 1 st]. Repeat [ ] around to the first stitch marker.
- At each stitch marker: (Dc, ch 2, dc) in the marked st (this is your increase point for the poncho).
- Continue [Ch 1, sk 1 st, dc in next st] between increase points.
- Ensure your stitch count allows for V-stitches. If you have extra sts, sc or dc them into the previous round as needed.
- Join with sl st to top of beg ch 3.
- Rnd 3 (V-Stitch into V-Stitch & Increases): Ch 3 (counts as dc). Dc in first dc from previous V-st. [Ch 1, V-st in next ch-1 sp of V-st from previous row]. Repeat [ ] around until you reach a ch-2 increase space.
- At each ch-2 increase space: (V-st, ch 1, V-st) in the ch-2 sp.
- Continue the regular V-st pattern between increase points. Join with sl st to top of beg ch 3.
- Rnd 4-X (Continue Yoke/Body): Continue repeating Rnd 3. You will keep increasing at the 4 marked points (or at the center of the
(V-st, ch 1, V-st)increase) to create the poncho’s width.- Keep working until the poncho reaches just past the baby’s shoulders/top of arms. This will be the point where the “sleeves” start to form.
- For 0-6 months, this might be 10-15 rounds after the collar.

Part 3: The Body of the Poncho
Continue the main V-stitch pattern without specific increase points, letting the pattern naturally expand or adding increases more subtly if desired.
- Rnd 1 (Body Continuation): Ch 3. Work V-st into each ch-1 sp of the V-sts from the previous row. (If you still have specific increase points, you can continue
(V-st, ch 1, V-st)in those 4 spaces, or gradually reduce increases as desired for the flare.) Join with sl st. - Rnds 2-X: Continue working V-st into V-st from the previous row, working in continuous rounds.
- Continue until the poncho reaches the desired length, from the shoulder to where you want the hem to fall (e.g., hips or mid-thigh).
- For 0-6 months, this could be 15-25 rounds after the yoke.
- Fasten off.
Part 4: Arm Openings / Cuffs
These create the defined sleeve openings on the poncho.
- Identify Opening: Lay the poncho flat. Mark two sections on the sides where you want the “sleeves” to be. These should be roughly opposite each other, starting about 3-5 rounds down from the yoke’s widest point. Mark 15-20 stitches wide for the opening (adjust for arm size).
- Attach yarn: Attach yarn (main color) to the bottom side of one marked arm opening.
- Rnd 1 (Setup for Ribbing): Ch 2. Hdc evenly around the perimeter of the marked arm opening. Join with sl st. (Approx. 20-25 hdc, or whatever fits best).
- Rnd 2 (Ribbing): Ch 2. Hdc in BLO of each hdc around. Join with sl st.
- Rnd 3-5 (or desired cuff thickness): Repeat Rnd 2.
- Fasten off. Weave in ends.
- Repeat for the second arm opening.

Part 5: Finishing Touches
- Weave in all loose ends neatly using your yarn needle.
- Blocking: For garments, especially those with textured stitches and ribbing, blocking is highly recommended! Gently wet the poncho, carefully shape it to size on a blocking mat, stretching the ribbing slightly if desired, and allow it to dry completely. This will open up the stitches beautifully and give it a professional finish.
Video tutorial
Your Cozy Baby Poncho is Ready!
Congratulations! You’ve just created a wonderfully warm and stylish crochet baby poncho. This classic piece will be a go-to for comfort and charm for any little one.
Feel free to personalize your poncho by adding a small embroidered detail, a decorative button near the neckline, or a fringe border along the bottom hem.
Don’t forget to share your finished poncho! I’d love to see your unique color choices and how you’ve made it your own. Tag me on social media or send me a picture!
Happy crocheting!