 by
by 
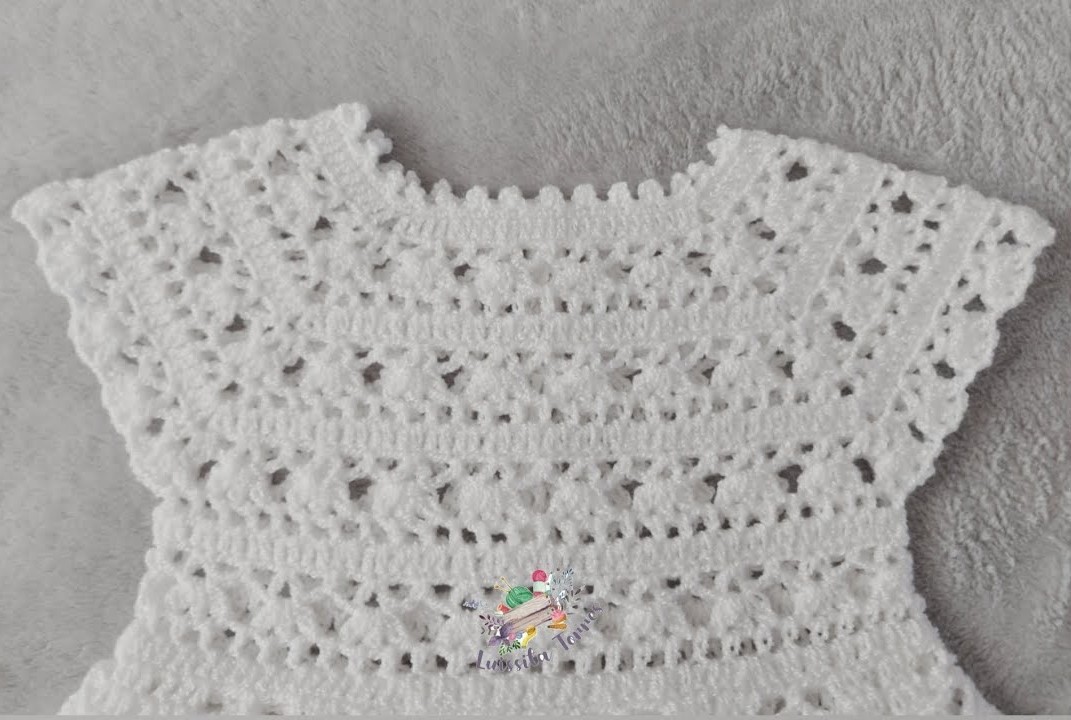
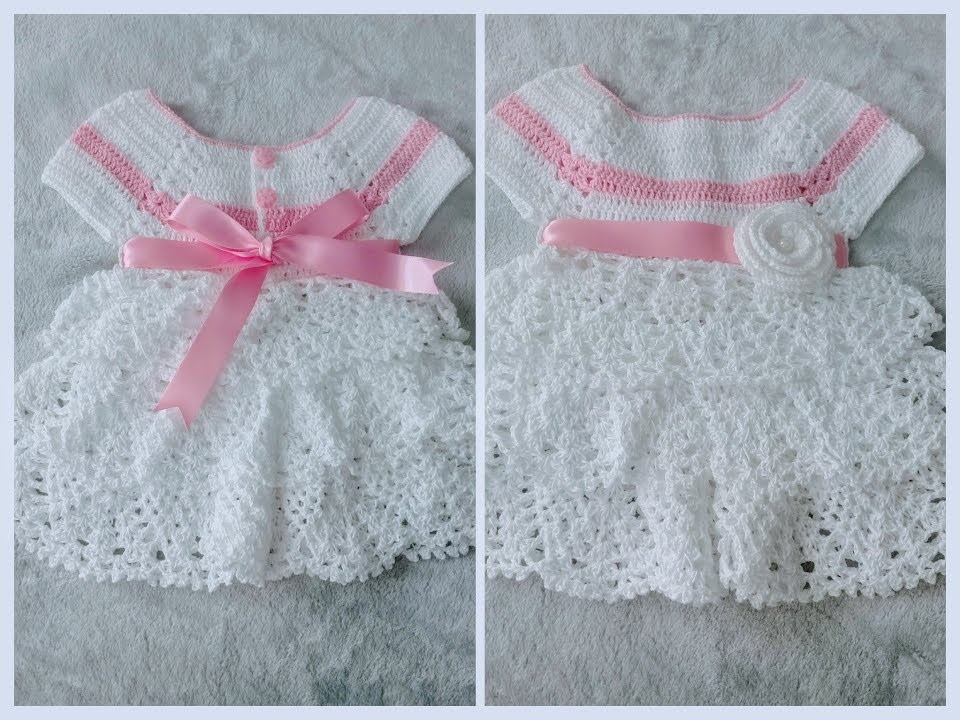
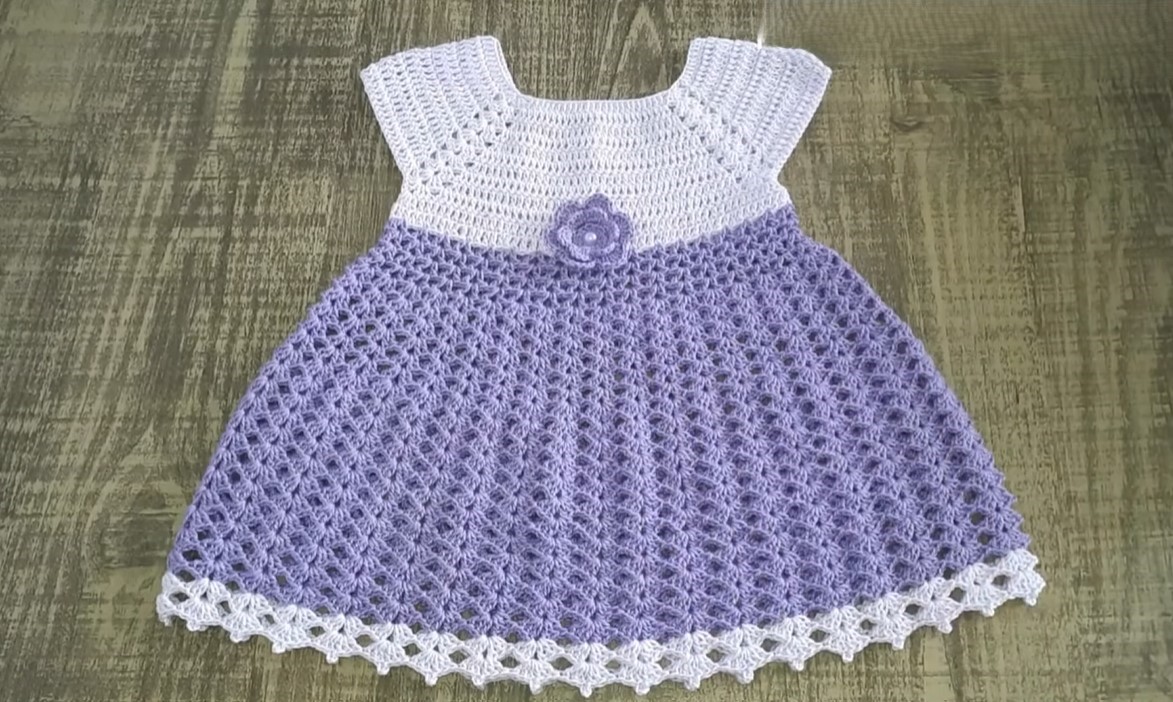
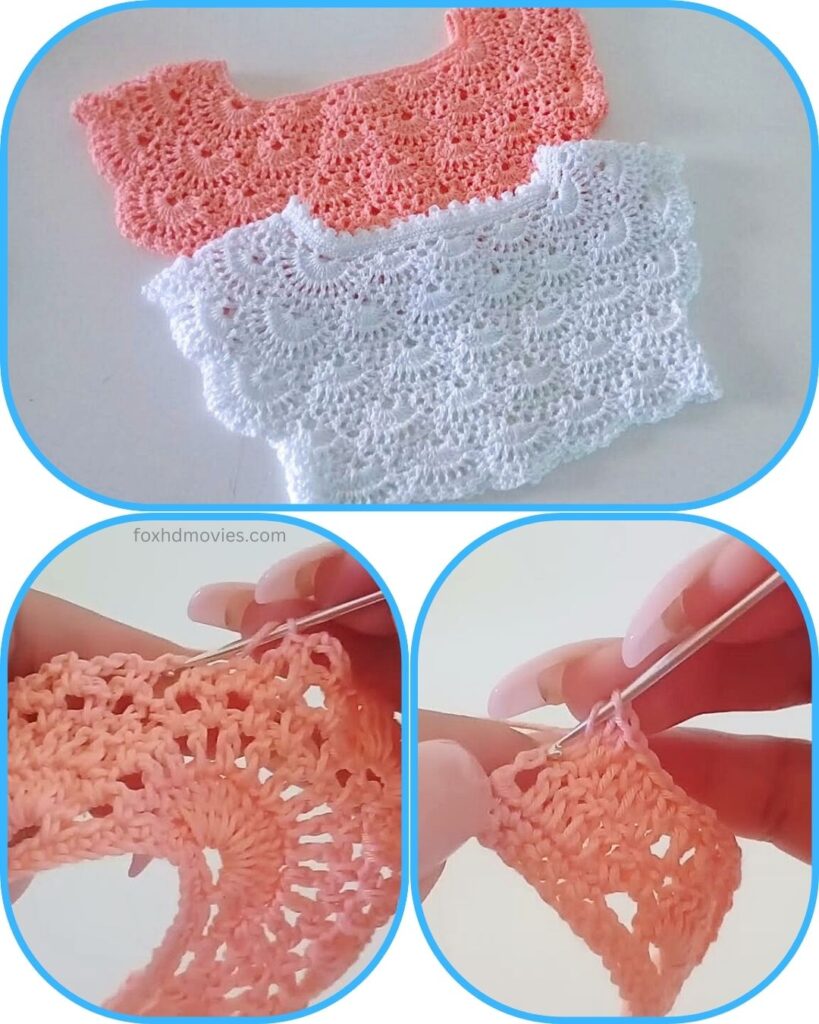
Create a beautiful foundation for a baby dress, top, or cardigan with this exquisite lacy fan stitch yoke! Inspired by the elegant design in the picture, this pattern works from the neckline down, expanding with delicate increases to form the shoulders and chest. It’s a truly lovely piece that will make any baby garment shine.
Skill Level: Intermediate (familiarity with basic stitches, working top-down, and understanding fan/shell stitch patterns is helpful).
Materials:
- Yarn: DK (Light Worsted) weight yarn. A soft baby acrylic, cotton, or a blend is highly recommended for comfort and drape.
- Main Color (MC): Your chosen color (e.g., Pink, White) – approx. 50-100 yards, depending on size.
- Crochet Hook: Size G/6 (4.0 mm) or size needed to obtain gauge.
- Yarn Needle: For weaving in ends.
- Scissors
- Stitch Markers: Essential for marking the start of rows and the increase points on the yoke.
Gauge (Crucial!):
Achieving the correct gauge is essential for the yoke to fit properly.
- Initial Chain: 4 stitches per inch for the foundation chain.
- Fan Stitch: 1 fan and the stitch between it should measure approximately 1.5 inches.
- Adjust your hook size if necessary to meet these gauges.
Finished Size (Approximate, 6-12 Months):
- Neckline Circumference: 12-13 inches
- Yoke Depth (from neckline to underarm): 4-5 inches
- Adjustments for other sizes: Guidance will be provided.
Abbreviations (US Crochet Terms):
- ch: chain
- sl st: slip stitch
- sc: single crochet
- hdc: half double crochet
- dc: double crochet
- tr: treble crochet
- sk: skip
- sp: space
- st(s): stitch(es)
- beg: beginning
- rep: repeat
- MC: Main Color
- Fan: (dc 2, ch 1, dc 2) in same st/sp (adjust for denser or lacier fan if desired)
- ( ): repeat instructions in parentheses a specified number of times
- [ ]: total stitches in a row/round
Pattern for Lacy Fan Stitch Baby Yoke
This yoke is worked from the top down, in rows, creating a flat opening at the back, as seen in the picture.
Part 1: The Neckline & Foundation Rows
Initial Chain: Ch 76 (for 6-12 months). This chain count should be a multiple of 4 + 4 for the initial hdc setup, and divisible evenly by your fan pattern repeat later.
Row 1 (Foundation): Hdc in 3rd ch from hook and in each ch across. [74 hdc] Do NOT join. You’ll work in rows for the back opening. Ch 2 (counts as hdc), turn.

Row 2 (First Yoke Increase Row): Hdc in first st. Hdc in next 10 sts (Right Back Panel). (Hdc 2 in next st, ch 1, Hdc 2 in next st) in next st (Corner 1). Place stitch marker in ch-1 sp. Hdc in next 15 sts (Right Sleeve). (Hdc 2 in next st, ch 1, Hdc 2 in next st) in next st (Corner 2). Place stitch marker in ch-1 sp. Hdc in next 20 sts (Front Panel). (Hdc 2 in next st, ch 1, Hdc 2 in next st) in next st (Corner 3). Place stitch marker in ch-1 sp. Hdc in next 15 sts (Left Sleeve). (Hdc 2 in next st, ch 1, Hdc 2 in next st) in next st (Corner 4). Place stitch marker in ch-1 sp. Hdc in next 10 sts. Hdc 2 in last st (Left Back Panel). [86 hdc, 4 ch-1 sps] Ch 2, turn.
Row 3 (Yoke Increase Row): Hdc in first st. Hdc in each hdc until you reach the first ch-1 sp. (Hdc 2 in ch-1 sp, ch 1, Hdc 2 in ch-1 sp) in ch-1 sp (Corner 1). Hdc in each hdc until you reach the next ch-1 sp. (Hdc 2 in ch-1 sp, ch 1, Hdc 2 in ch-1 sp) in ch-1 sp (Corner 2). Hdc in each hdc until you reach the next ch-1 sp. (Hdc 2 in ch-1 sp, ch 1, Hdc 2 in ch-1 sp) in ch-1 sp (Corner 3). Hdc in each hdc until you reach the next ch-1 sp. (Hdc 2 in ch-1 sp, ch 1, Hdc 2 in ch-1 sp) in ch-1 sp (Corner 4). Hdc in each hdc until last st. Hdc 2 in last st. Ch 2, turn.
Repeat Row 3 for a total of 5-7 yoke rows (including Row 2). The picture shows a yoke with about 6-7 rows before the fan stitch begins. Measure the yoke depth to ensure it’s about 4-5 inches from the neckline to the corner point. You should end on a row where the next step can be the fan stitch.
Part 2: Transition to Fan Stitch
After your last hdc yoke row, you will begin the fan stitch pattern. The pattern requires a specific stitch count or a multiple of a certain number of stitches (e.g., a multiple of 6 or 8) per panel between increases for the fans to lay out nicely.
Next Row (Transition Row): Ch 1. Sc in each hdc across the entire yoke, working 1 sc into each hdc, and 1 sc into each ch-1 corner space. This will provide a solid base for the fan stitch. Count your stitches at the end of this row. It should be a large number (e.g., 100-120+ sts). If working a dress/top, you would now join with a sl st to the first sc to work in the round. If continuing as a cardigan, you would continue in rows. For this yoke, assuming it’s the top of a dress/top, you will now join for circular work. Sl st to the first sc to join the round.

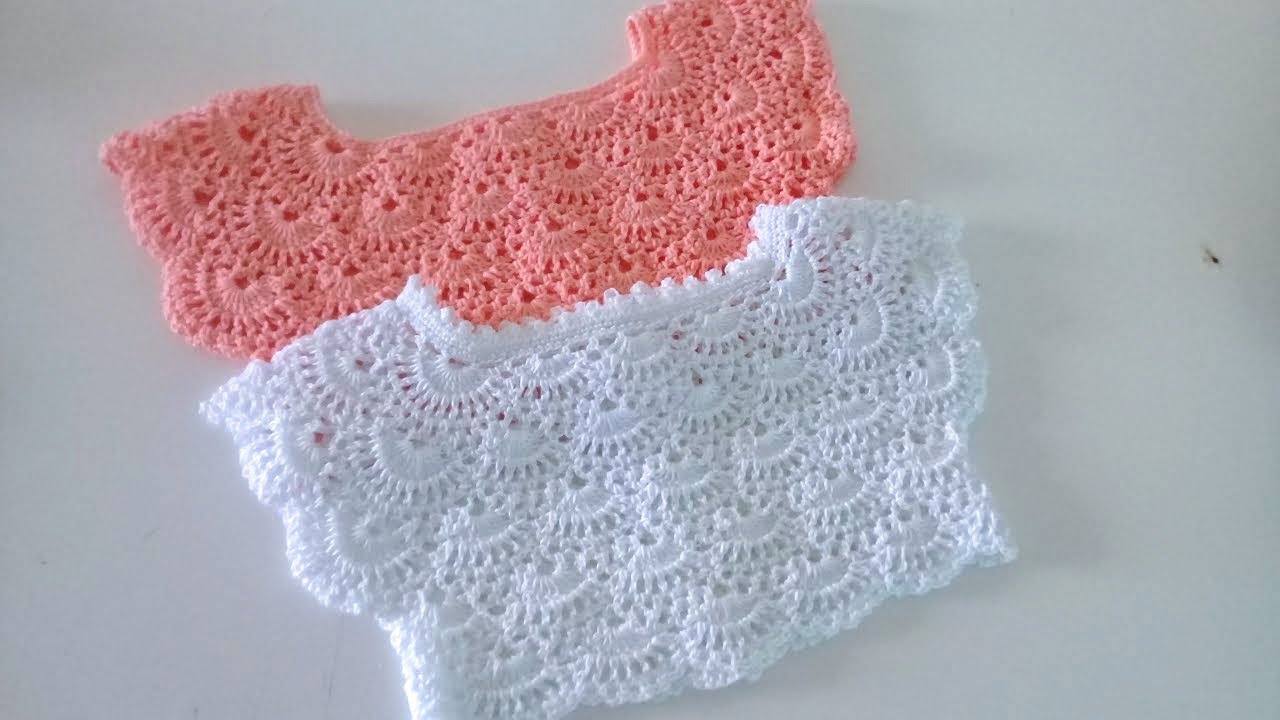
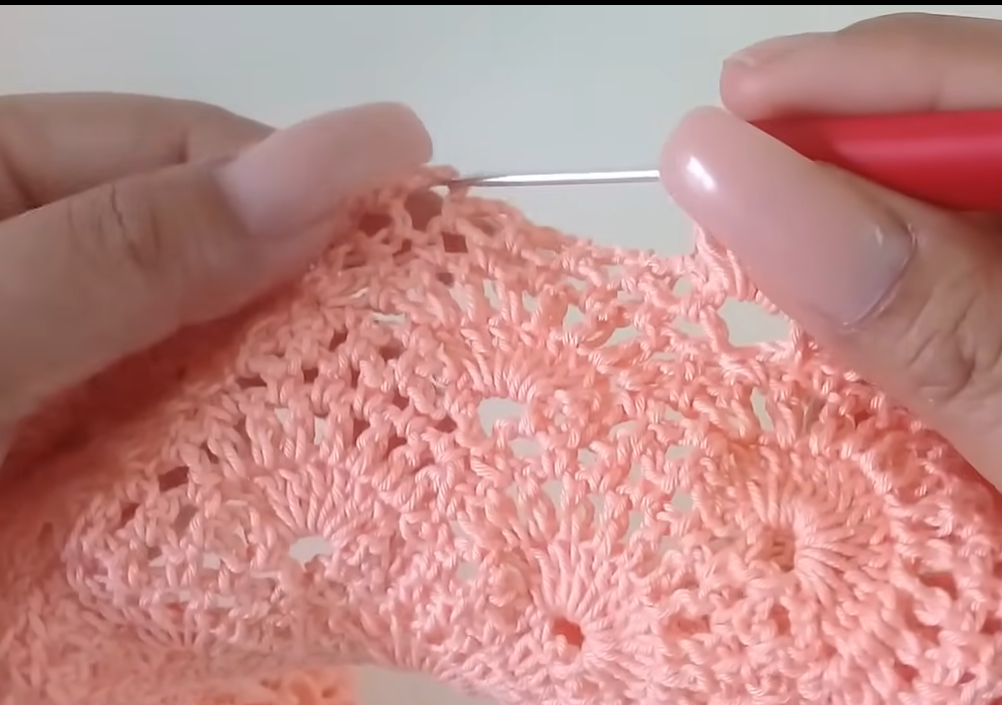
Part 3: The Lacy Fan Stitch Pattern
The pattern in the picture resembles a fan or shell stitch where the fans are offset in alternating rows.
Round 1 (First Fan Row): Ch 3 (counts as dc). Dc in same st. *Sk 2 sts, (dc 2, ch 1, dc 2) in next st (Fan made).* Repeat from * to * around. You may need to adjust the last few stitches to fit the pattern evenly. If you have stitches left over, try to evenly distribute them by occasionally skipping 1 st instead of 2, or working a dc at the end of the round. Sl st to 3rd ch of beg ch-3 to join.
Round 2 (Fan Row, Offset): Ch 3 (counts as dc). Dc in same st (this starts a half fan). *Shell (dc 2, ch 1, dc 2) in the ch-1 sp of the next Fan.* Repeat from * to * around. End with dc 2 in the same stitch as the beginning ch-3 (completing the first fan). Sl st to 3rd ch of beg ch-3 to join.
Round 3 (Fan Row, Regular): Sl st into the ch-1 sp of the first Fan. Ch 3 (counts as dc). (Dc 1, ch 1, dc 2) in same ch-1 sp (first Fan made). *Shell (dc 2, ch 1, dc 2) in the ch-1 sp of the next Fan.* Repeat from * to * around. Sl st to 3rd ch of beg ch-3 to join.
Repeat Rounds 2 and 3 alternately until the yoke reaches your desired depth (typically 2-3 more fan rows after the initial transition). The picture shows about 3-4 rows of the fan stitch pattern.
Final Round (Optional – for a neat edge): Ch 1. Sc in each dc and in each ch-1 sp around. Sl st to join. Fasten off MC.
Part 4: Finishing Touches
Neckline Edging: Join MC yarn to the top right corner of the back opening. Round 1: Ch 1. Sc evenly around the entire neckline opening. Join with sl st to first sc. You can repeat this row for a thicker edge, or work a picot edge as seen in some similar patterns. Fasten off and weave in ends.
Armhole Edging (if making a sleeveless top/dress): Join MC yarn to the bottom of one armhole. Round 1: Ch 1. Sc evenly around the armhole opening. Join with sl st to first sc. Fasten off and weave in ends. Repeat for the second armhole.
Back Closure (for a dress/cardigan):
- Button Loops: On one side of the back opening (e.g., the right side when looking at the back), join MC yarn at the top. Ch 3-4 (to form a loop), sl st into a nearby stitch to create a small button loop. Make 2-3 loops evenly spaced down the back opening.
- Buttons: Sew 2-3 small buttons onto the opposite side of the back opening, aligning them with the button loops.
Final Touches:
- Weave in all remaining yarn ends securely.
- Block the yoke gently to open up the lace pattern and ensure evenness.
Video Tutorial
Adjusting for Different Sizes:
- Initial Chain: Adjust the initial chain to fit the head circumference, ensuring it works with your yoke increase formula (e.g., a multiple of 4 + 4 for the hdc rows).
- Yoke Rows: Add or subtract yoke increase rows (Row 3 repeats) to achieve the desired chest circumference and armhole depth. Measure regularly!
- Fan Stitch Count: When you transition to the fan stitch, ensure your total stitch count is a multiple that works with your chosen fan size (e.g., multiple of 6 for a (dc2, ch1, dc2) fan with 2 skipped stitches in between). Adjust with small increases/decreases in the transition row if needed.
- Gauge Swatch: ALWAYS make a gauge swatch for garments to ensure the correct fit!
Enjoy crocheting this beautiful and delicate baby yoke! It’s a lovely starting point for a truly charming handmade garment.